How to make pot roast with potatoes and carrots – can’t get easier than this!

Smells heavenly doesn't it?
B E A U T Y !

Most everyone loves a good pot roast. The taste is so wonderful, like you’ve been slaving away for hours and hours, when in reality, it basically does most everything itself. Some people prefer to make mashed potatoes, if you’re on of those people, you can certainly pull the veggies and pot roast out when done, and maybe stir in a little corn starch/water mixture and and to pan, heat to thicken the gravy. I don’t bother, the juice is just that good. I usually throw my carrots and potatoes in the pot instead of making mashed potatoes, it’s just too easy this way!

I follow this recipe from Cooking Light magazine – not exactly, but its a starting point. Add more of what you like, less of what you don’t!

My notes on the recipe below… I rarely use wine, I just like the taste of pot roast best without it, same with Thyme… garlic I use occasionally, but rarely… I buy a large container of Kitchen Basics Beef Broth (unsalted), and use about 3/4 of it. I don’t measure I just make sure it covers most of the veggies… I use a lot of carrots and a few potatoes. For a 1.5# roast, I usually bake it for about 45 minutes, then add the potatoes and carrots (I put the roast on top) and bake another hour. It’s perfect when the meat falls apart easily.

Recipe from Cooking Light Magazine!

Classic Beef Pot Roast (with Potatoes and Carrots)

Ingredients

1 teaspoon olive oil 
1 (3-pound) boneless chuck roast, trimmed 
1 teaspoon kosher salt 
1/4 teaspoon freshly ground black pepper 
2 cups coarsely chopped onion 
1 cup dry red wine
4 thyme sprigs
3 garlic cloves, chopped
1 (14-ounce) can fat-free, less-sodium beef broth $
1 bay leaf
4 large carrots, peeled and cut diagonally into 1-inch pieces $
2 pounds Yukon gold potatoes, peeled and cut into 2-inch pieces
Fresh thyme leaves (optional)

Preparation

Preheat oven to 350º.

Heat olive oil in a large Dutch oven over medium-high heat. Sprinkle chuck roast with salt and pepper. Add roast to pan; cook 5 minutes, turning to brown on all sides. Remove roast from pan. Add onion to pan; sauté 8 minutes or until tender.

Return browned roast to pan. Add the red wine, thyme sprigs, chopped garlic, beef broth, and bay leaf to pan; bring to a simmer. Cover pan and bake at 350° for 1 1/2 hours or until the roast is almost tender.

Add carrots and potatoes to pan. Cover and bake an additional 1 hour or until vegetables are tender. Remove thyme sprigs and bay leaf from pan; discard. Shred meat with 2 forks. Serve roast with vegetable mixture and cooking liquid. Garnish with thyme leaves, if desired.

Note:

MyRecipes is working with Let’s Move!, the Partnership for a Healthier America, and USDA’s MyPlate to give anyone looking for healthier options access to a trove of recipes that will help them create healthy, tasty plates. For more information about creating a healthy plate, visit www.choosemyplate.gov.

Jeanne Thiel Kelley,

OCTOBER 2006

Ok, now for my step by step shots!

Sear the meat first!

Sear to lock in juices on all sides

Since there are only two of us, I usually go to Whole Foods or EarthFare and buy a pot roast (chuck roast) and if it’s really thick i have them slice it in half lengthwise, I usually end up with about a 1.5 pound roast, but if you have more than two people in your family (this is several meals for us), then you may opt for the larger cut, just keep it in the oven longer.

Start by adding a little olive oil to the pan so it won’t stick, get the pan nice and hot so you hear SIZZLE when you put the roast in the pan… you aren’t cooking it through just browning on all sides, at medium high, I even sear the sides… keeps all those juices where you want them to be! Once it’s seared, move it to a plate…

Sautee onions...
Sautee onions…

Now sautee the onions… smells wonderful doesn’t it?

Add seared roast and beef broth to pan

Now add the seared roast and the beef broth to the pan – cover and bake OR… go ahead and add potatoes and carrots (If roast is small) and bake all together for around 1.5 hours or until it starts to fall apart! I tuck the potatoes and carrots all around the roast… you can check on it a time or two, splash a little more broth on top… a few hours later (and a WONDERFUL smelling house)… you have…

This is what BEAUTY Looks like when you pull it out of the oven… oh. my. word.

Smells heavenly doesn't it?
Smells heavenly doesn’t it?

Too good for words!!

Catch you back here tomorrow!

Recipe Flashback: Thanksgiving and a special treat – homemade hot chocolate!

Homemade Hot Chocolate!

Wishing you and yours a safe and happy Thanksgiving day! Now, if for some reason you aren’t full after a Thanksgiving Day feast, and you would like a little treat, that really feels like a treat… Try this… it’ll warm you up too!

Hot chocolate, made from scratch. YUM! Yet one more thing to be thankful for on a chilly day, right? There are only a few ingredients, you can heat the milk however you like (stove or microwave) and instantly you have wonderful hot chocolate that warms you from the inside out! Click on that link to be taken to the original recipe complete with photos!

Enjoy this Thanksgiving Day. Whew, I have so much to be thankful for… all of you, my family, friends, health, Charlie (woof) and Fred just to name a few.

If you’re feeling blessed (as I am), do something to make someone smile. This time of year can be hard on so many people for a variety of reasons. Do you have a neighbor who may be eating alone today? Invite them over, or maybe take them a hot chocolate and have a visit. We all get busy in life, but we have to keep those in mind who don’t have family and may be struggling with something going on in their lives.

Make. Someone. Smile.

Happy Thanksgiving! I’ll catch you back here tomorrow!

Recipe flashback: Homemade Cranberry Sauce – it doesn’t get better than this!

Image via Martha Stewart!

Can you believe that tomorrow is Thanksgiving? Are you looking for something to make as a side to go with the turkey? Would you like to make something that is quick, easy, beautiful and tastes out of this world? Ahhhh, then this is the recipe for you! This is from Martha Stewart! I posted this several years ago (and would never buy canned since I saw how easy this was to make).

Yes, there is sugar in this recipe, but unlike canned sauce there is no high fructose corn syrup or corn syrup (2nd and 3rd ingredient listed, eek!)

Thank you to Martha Stewart for the photo and the recipe (Everyday Food, November 2008).

Basic Cranberry Sauce

Yield Makes 2 cups

Ingredients

  • 1 bag (12 ounces) cranberries
  • 3/4 cup sugar
  • 1 teaspoon grated lemon zest
  • 1 cup water

Directions

  1. In a medium saucepan, combine cranberries, sugar, lemon zest, and water; bring to a boil. Reduce to a simmer; cook until cranberries are soft, about 10 minutes. Transfer to a bowl, and let cool to room temperature.

Catch you back here tomorrow!

Thanksgiving Recipe: Rustic Apple Tart (beautiful and so easy!)

Rustic Apple Tart
Rustic Apple Tart

This week I’m bringing back recipe favorites that I think may be a great match for Thanksgiving! This Rustic Apple Tart (click on link to see original post complete with photos as well as a video!) is easy, and so beautiful. The secret is the glaze and it couldn’t be easier!

This is a Martha Stewart – Everyday Food recipe.

Click HERE to print the recipe only.

RUSTIC APPLE TART

Puff Pastry (1 sheet)
3 Granny Smith Apples
1/3 cup sugar (or a little less)
1 large egg yolk
1 tsp water
Defrost puff pastry in refrigerator.
Once defrosted, leave folded and roll out to 8×14 on a lightly floured surface.
TRIM EDGES – need a clean edge, otherwise it won’t puff up, she used a pizza cutter
Place on baking sheet and PUT IN FREEZER 10-15 minutes (this is very important)!
Filling:
Peel and core 3 Granny Smith Apples, cut into 1/4″ slices
Add 1/3 cup sugar (or less) and mix.
In separate bowl, mix 1 large egg YOLK (discard white) and 1 tsp water, set aside.
Dough out of freezer.
Brush on egg wash (don’t let drip down the sides, it could inhibit it from rising)
Create border 3/4″ from edge, cut halfway through dough with a knife.
Arrange apples within border.
Dot the top of the tart with 2 Tablespoons of butter.
Bake at 375 for 30-35 minutes.
While tart is still warm mix up this glaze…

GLAZE

2 Tablespoons of apricot jam or apple jelly
1 Tablespoon water
Mix and heat until warm.
Brush this mixture on the tart while it’s still warm.
Cut and serve!

This is perfect for a smaller gathering! Enjoy!

Catch you back here tomorrow!

Thanksgiving Recipe… Couscous with Cranberries and Pecans!

fullsizeoutput_3e85

Thanksgiving is this coming Thursday. Can you believe it? Seems like it was just summer a few days ago? Crazy how fast time flies!

This week I’m bringing back a few recipes that I’ve shared with you throughout the years, maybe one of them will sound good for your Thanksgiving!

Cranberry & Nut Israeli Couscous Salad is a fabulous recipe (click on that link to see the original post, complete with step by step photos). This is a fabulous cold salad with dried cranberries, fresh oranges, tasty pecans… oooh, I think this is one you will enjoy, and I’m thrilled that I ran across the recipe again, as I had forgotten about it, sigh…

Here’s the recipe – Click to print this recipe from Epicurious – NOTE: I added 2 1/2 oranges, cut into wedges (the other half is juiced in the steps below) – this made the recipe over the top good! You may want to jot that on your printed copy ;)

 israeli couscous with cranberries and pecans

…ingredients

Salad:
2 cups Israeli couscous, uncooked
1 cup dried cranberries
1 cup toasted pecans, quartered
2 scallions, minced
Dressing:
3 tbsp canola oil (I used olive oil)
1.5 tbsp champagne vinegar (I used white wine vinegar)
1 orange, zest
1/2 orange, juiced
1/2 tsp turmeric
1/2 tsp dried thyme
1/2 tsp dried tarragon
Salt and pepper to taste

…preparation

Bring a pot of salted water to a boil, and add the couscous. When it’s done (roughly 8-10 mins, or when it’s al dente), drain it but do not rinse. Set aside and let cool while you mince the scallions, toast and chop the pecans, and make the dressing.

In a small bowl, whisk together the canola oil, vinegar, orange zest and juice, spices and salt and pepper.

In a large bowl, combine the couscous, cranberries, pecans and scallions. Pour the well-whisked dressing over it and toss to combine.

Serve immediately, or chill in the fridge for a few hours to blend the flavors.


[As I look back through these photos with recipes… I cannot believe that I posted such horrible photos. Many times it’s starting to get dark outside and lighting + food photos don’t look great to me, of course, neither does the image above, which will be replaced SOON!]

Catch you back here tomorrow!

How to make homemade Chicken Salad!

Chicken Salad - Too Easy!
Chicken Salad – Too Easy!

Owie… chicken salad. Yum! It’s so quick and easy to make, and you can put in it what YOU like! You have options (I love options!), you can use mayo, or Greek yogurt, or a mixture of the two… you control your own destiny… woohoo!

How to make it… there really isn’t a recipe exactly, you put in it what you like…

How to poach chicken: Place a few boneless, skinless chicken breasts in a wide pan. Be careful to not put too many in the pan. Depending upon the size of your pan, 2-4 chicken breasts should fit. Next… add water, covering the chicken by a few inches (note: some people use chicken broth and spices, veggies, etc. I didn’t). Add a little salt.

Bring the water to a boil and then turn the burner down so that it is slowly simmering (where you see a few small bubbles, but not a big rolling boil)! I’ve done the rolling boil thing before and it’s basically… chicken jerky ;) Not good!

Simmer for 10 minutes, then turn off the heat. COVER the pot and let the chicken sit in the water for another 15-20 minutes (depending upon the size of the chicken breasts). After 20 minutes poaching in the pan, take them out and shred with two forks (is how I do it). Cubed chicken wigs me out. It’s not right. But it is easier and quicker, so if you can eat chicken cubes, go for it!

Making the chicken salad… Decide what you want in it… I used a little mayo the first time, but I’ll try Greek yogurt next time (if I’m going to eat it all the same day). I used chopped walnuts, chopped celery and grapes (I cut some in half but left some whole), use any spices that you like (I used a dash of curry powder, which turns it a little yellow which is nice). It’s great to eat alone, or as a sandwich, with crackers, etc. Great protein, and only as much fat as you add to it!

Catch you back here tomorrow!

Recipe: Healthy Breakfast Sandwich!

The Power Breakfast Sandwich

Quick. Easy. Healthy. Fills you up for hours. How can you beat this?

The Power Breakfast Sandwich 

1 Whole Wheat English Muffin

1 Egg

1 Handful of Arugula (or Spinach)

1 Slice of Extra Sharp Cheddar (or whatever you like).

Toast English Muffin. While it’s toasting heat a small frying pan, crack the egg and give it a quick beat with a fork, sprinkle a little pepper. I try to make it roughly the shape of the English Muffin.  Flip it and cook the other side. When the English Muffin comes out of the toaster, top with Cheese, and then Egg… now it’s time for the handful of Arugula, which adds a nice flavor. Wait a few minutes while the cheese starts to melt.

Ta da! Easy, right?

Catch you back here tomorrow!

Tasty side dish: Brown rice, tomatoes, green onion, feta and olives!

Brown rice, feta, tomatoes and green onion

Grilled chicken… again… WHAT to have as a side? Something different. Something QUICK. What’s on hand? Trader Joe’s rice. Yay! Grape tomatoes, feta, olives, all staples… there ya go… add more or less it’s good any way you make it!

Brown Rice with Feta, Grape Tomatoes, Green Onion, Feta, Olives…

INGREDIENTS

Brown Rice (see note*)

Container of Grape Tomatoes, cut in half

Green onion (to your taste)

Feta

Red or green onion

Olive Oil

You can also add Olives, Banana Pepper or anything else that you have on hand that sounds good!

DIRECTIONS

I cook the rice, prep and cut the veggies.

In a bowl I add just enough olive oil to coat/moisten the rice and I add pepper (1-2 tablespoons would be my guess). If I’m using Feta I do not use Salt.

Mix the oil and spices, then add the sliced tomatoes. Top with hot rice and let sit a few minutes to soften the tomatoes a bit. Then give it a good stir, add the veggies and the feta, olives, banana pepper and anything else that sounds good. This literally takes a few minutes to make when using frozen rice (microwave). It’s a great side dish and believe it or not is good hot or cold!

*You can use refrigerated leftover brown rice, make a fresh pot of rice, or use the frozen packets (Trader Joe’s Organic Brown Rice, each pouch makes about 3 servings) – super quick, you zap for 3 minutes in the microwave!

Catch you back here tomorrow!

NOTE to my subscribers: This recipe originally said olive oil amount was 5 swirls around the bowlthat is for the pasta salad… eek, my apologies, this uses far less! (Always check the blog (via the email) by clicking on the title of the post (it will take you to my blog). If there are any errors I usually catch them in the morning, and have them corrected!

Recipe: A Little Less Guilt Tomato Pie – have a slice of heaven!

Tomato Pie

A friend passed me this recipe (thank you Shirley!) and it is OUTSTANDING! Substitutions were made it and it was a hit! Instead of using the full 3/4 cup of mayo, she made it with 1/2 plain yogurt and 1/2 mayo. I didn’t have any plain yogurt so I used about 1/2 cup plain Greek yogurt (non fat) and 1/4 cup Canola Oil Mayo. It still worked perfectly. For the cheese I used a little less than 1 cup of fresh mozzarella and the same amount of extra sharp cheddar. But you could mix any combination you like. Shirley used less cheese and it was unbelievably good!

I think it’s pretty important to squeeze the tomatoes out and pat dry with many, many paper towels. The only thing I didn’t use is Hot Sauce, and it’s only because I didn’t have any, I don’t think it needs it, but you be the judge!

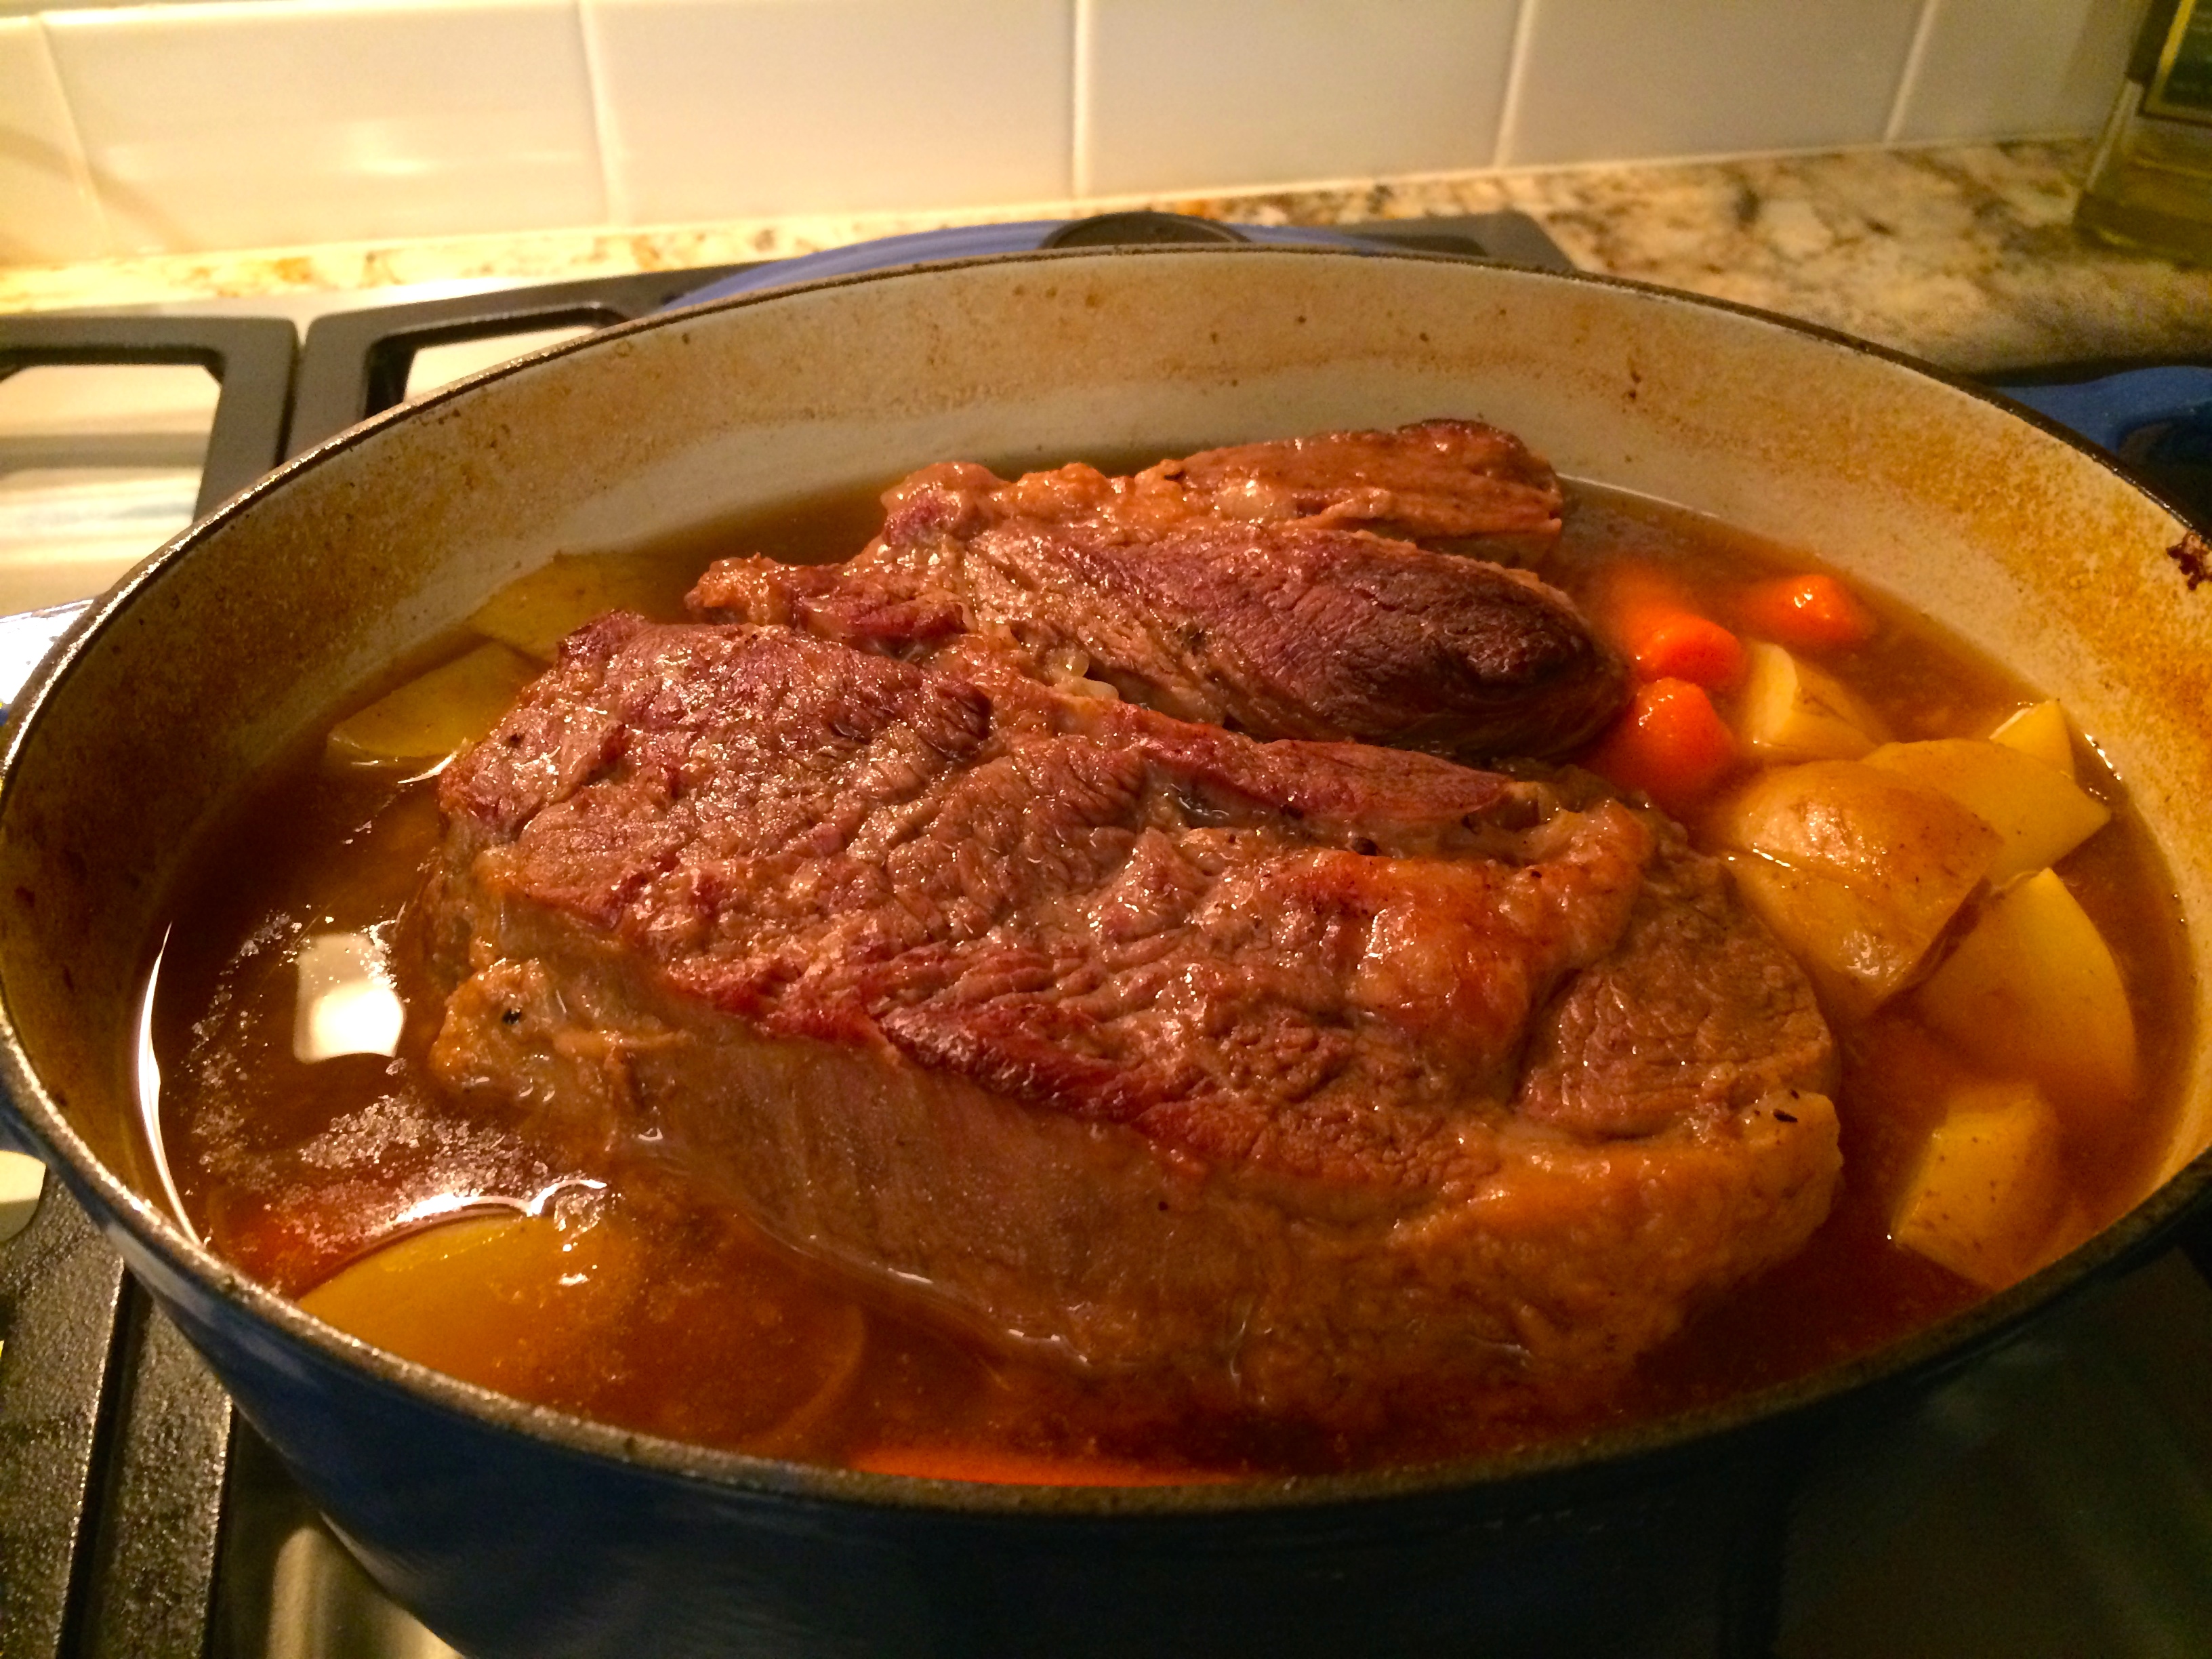
The biggest thing is to use fresh tasty tomatoes, they make all the difference in the world! This is a beautiful dinner. Not light and healthy like you can eat every night, but great to have on occasion!

Notes: I used Pillsbury pie crust in the refrigerated section at the grocery store, that one never lets me down… I used 4 tomatoes (I originally had 4 cups chopped, it cooks down, so it was fine, but I have a deep dish pie plate, so that may be why?). For the mayo, you can substitute half Greek yogurt (or plain yogurt), experiment and try a little more each time. Next time I will use less cheese, don’t get me wrong, it was awesome like this, but…

RECIPE IS BELOW, but here is a recap:

Tomato Pie

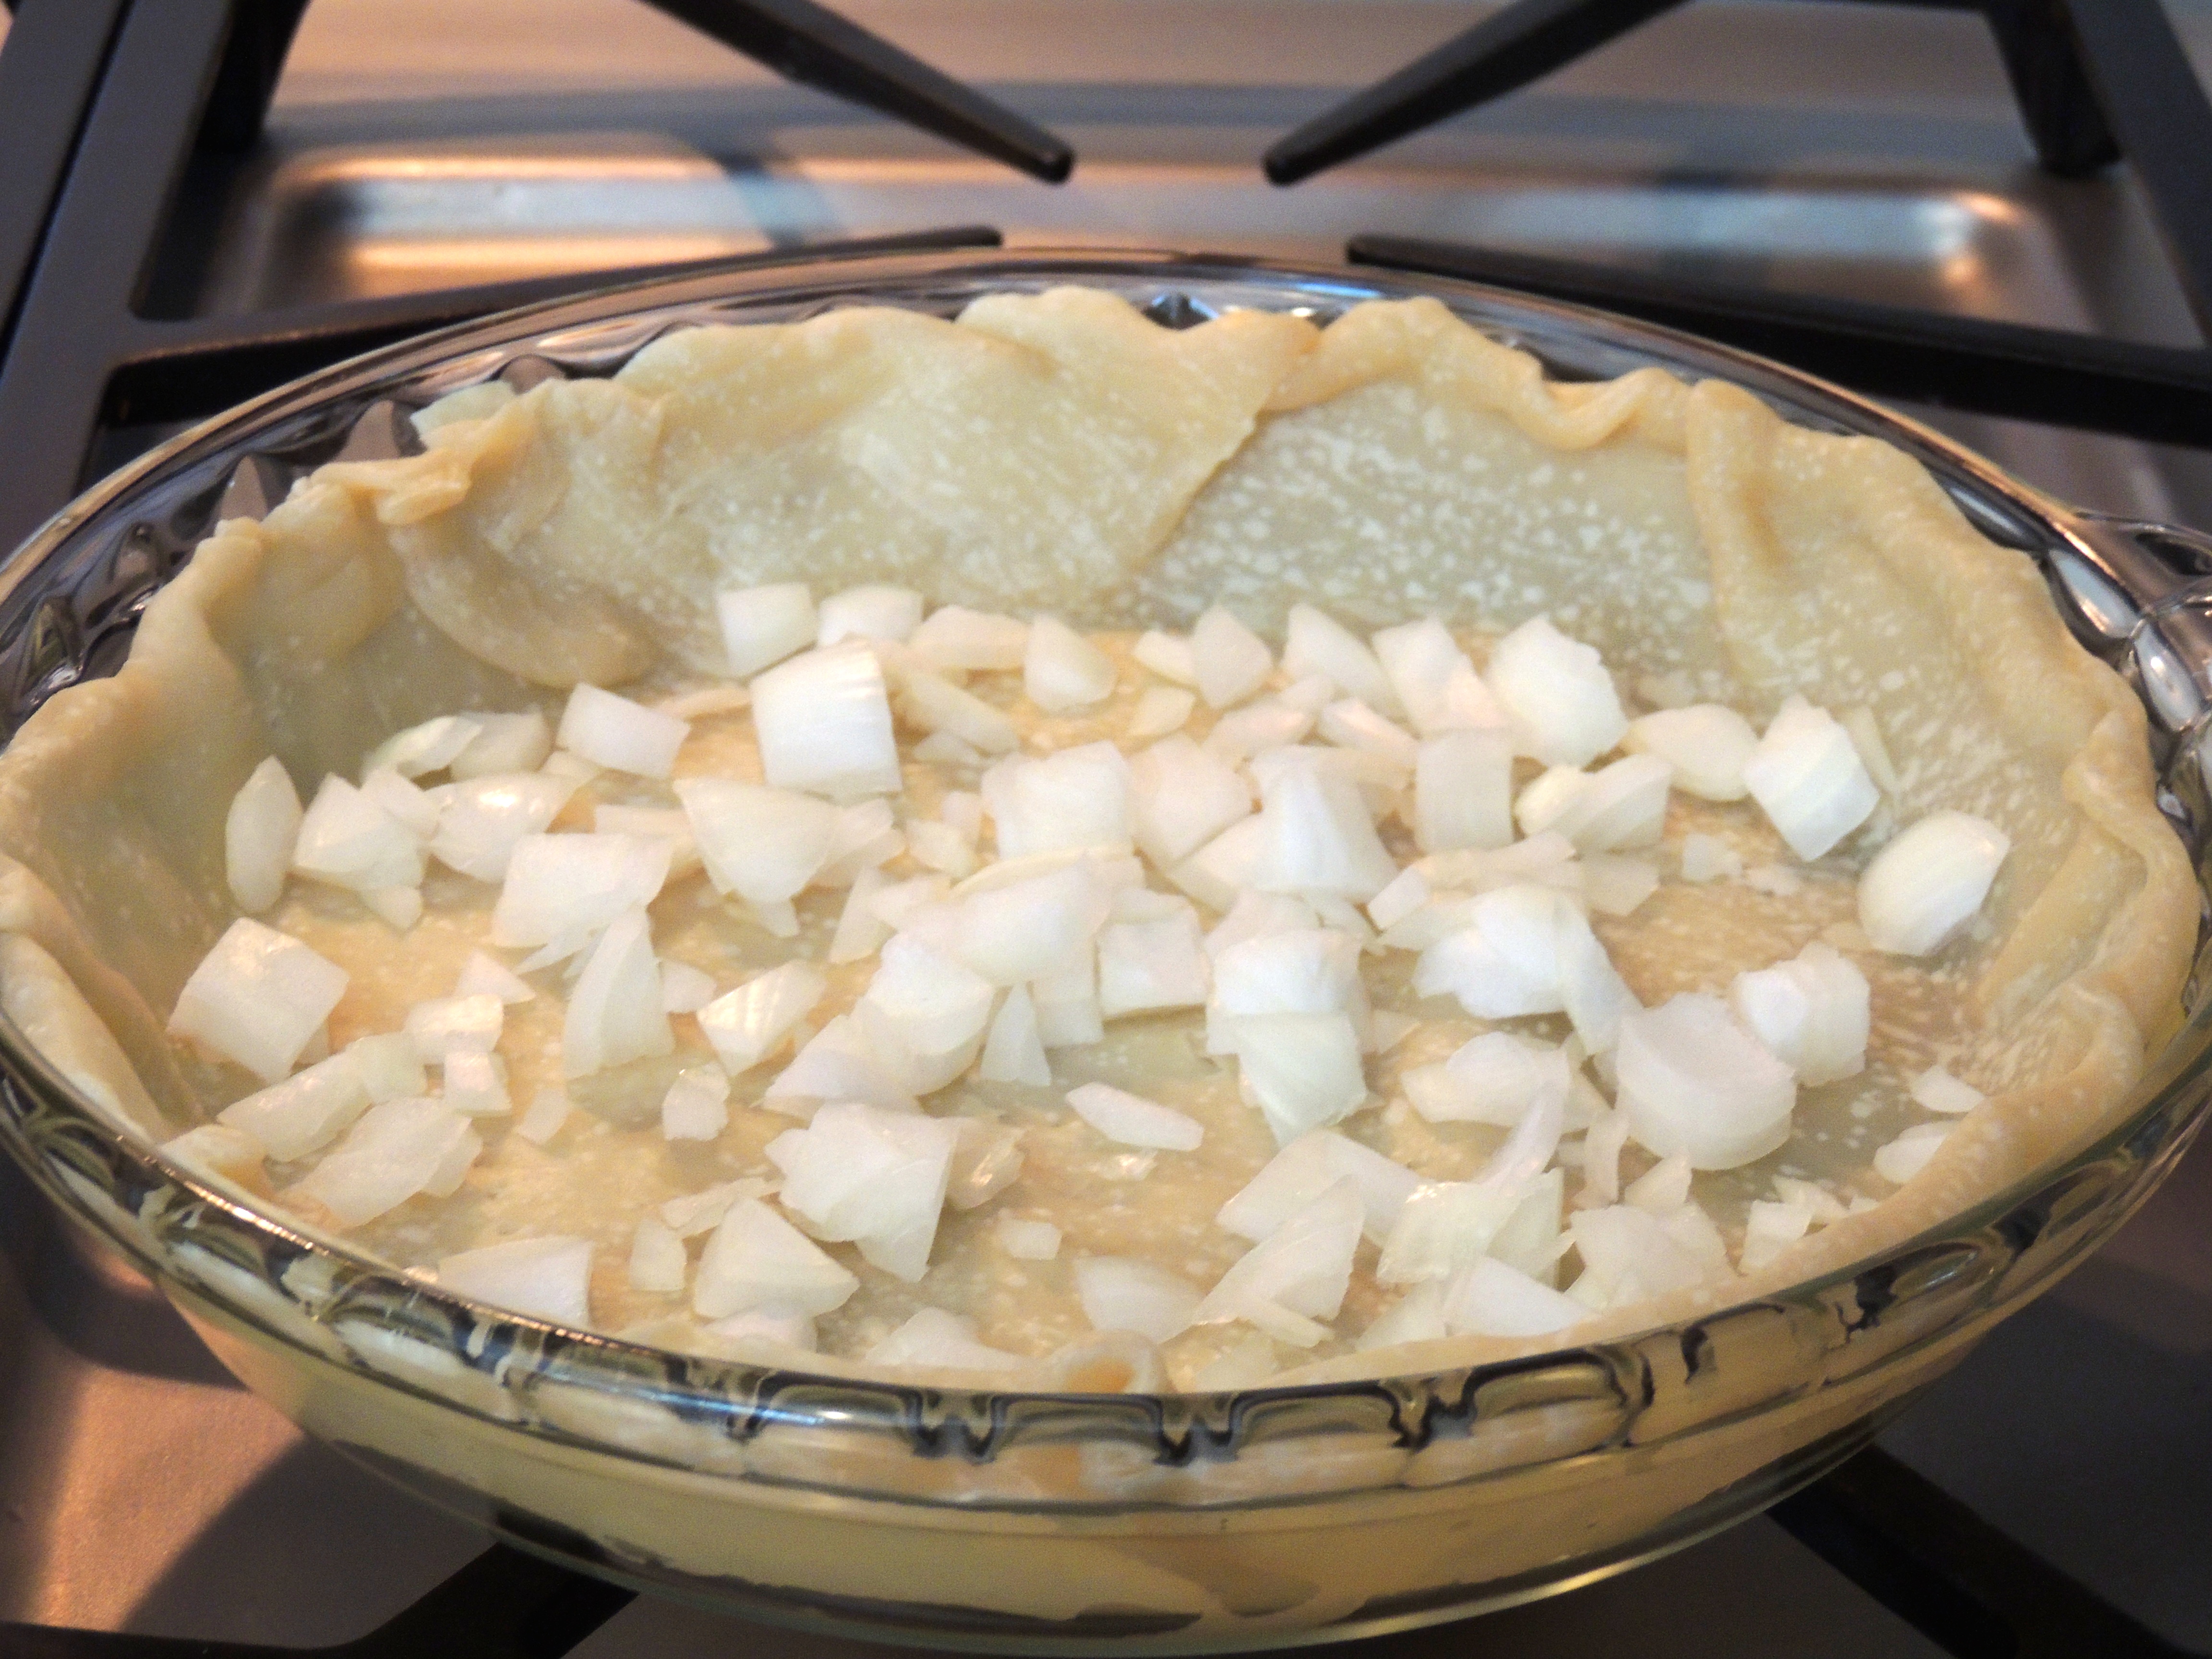
First bake the pie crust. I poked it with a fork a few times to prevent it from bubbling up, some people put beans or other pie weights to hold it down… Once it’s out of the oven, sprinkle the chopped onion in the bottom.

Tomato Pie

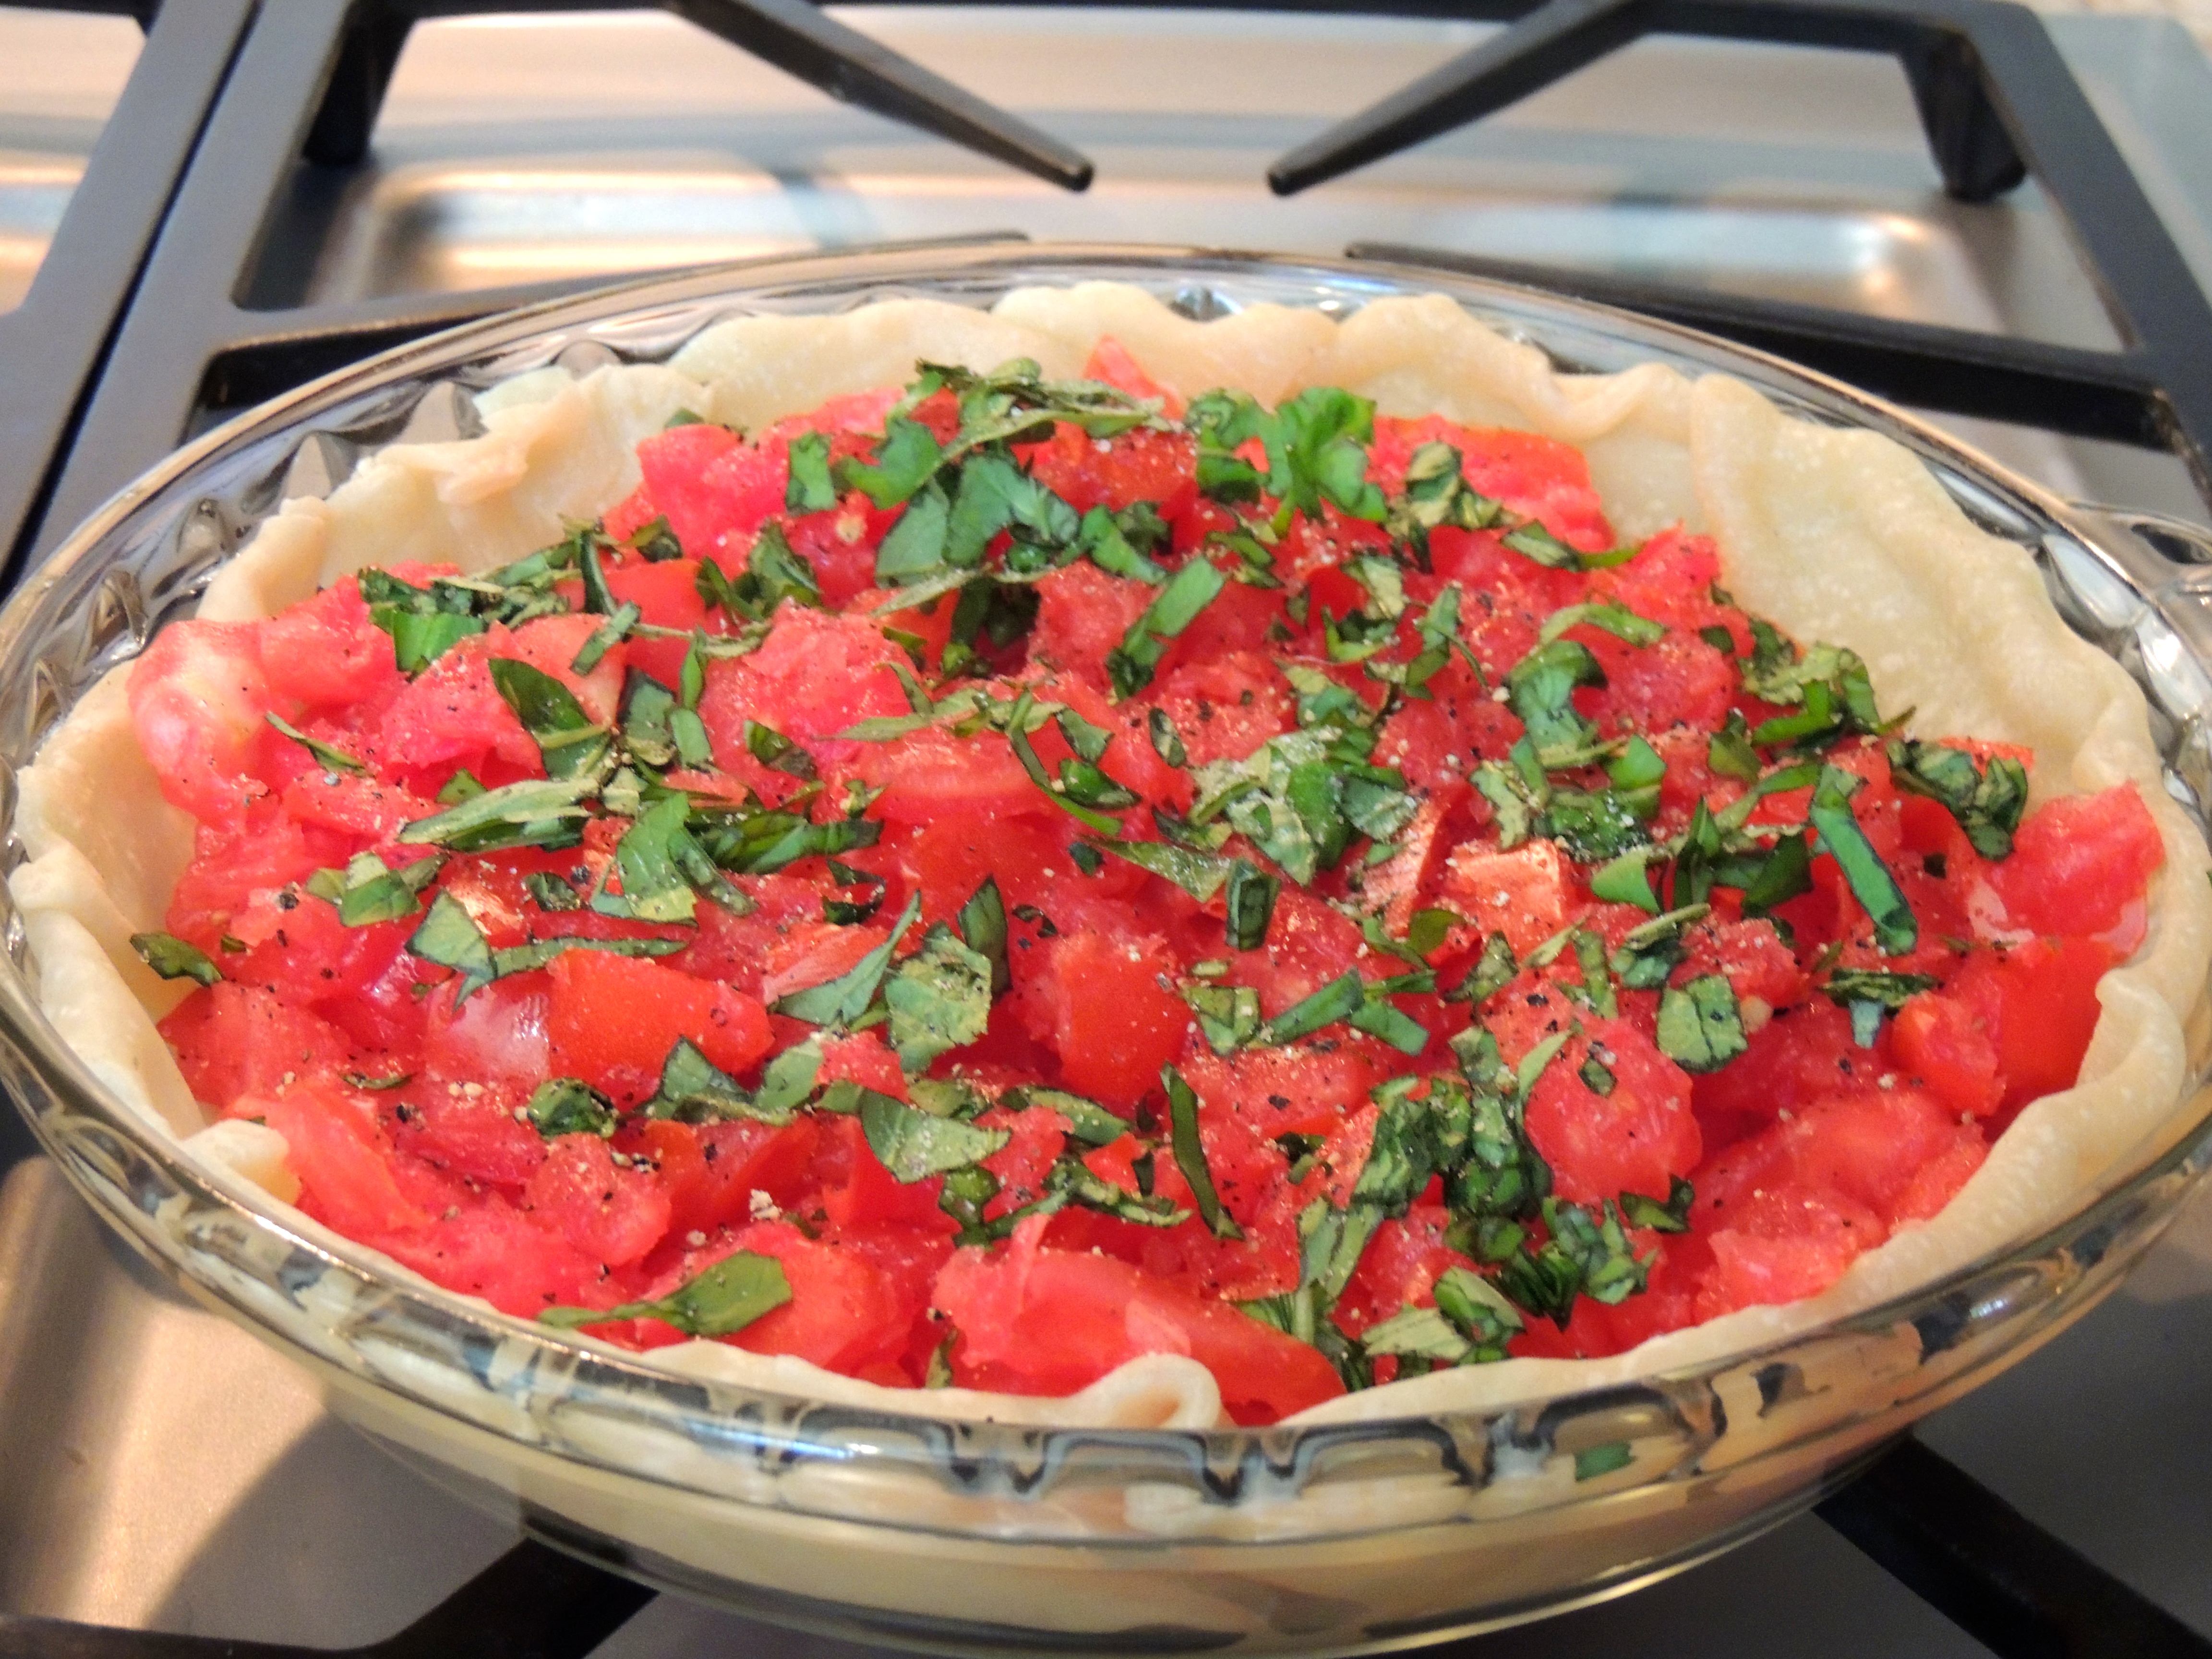
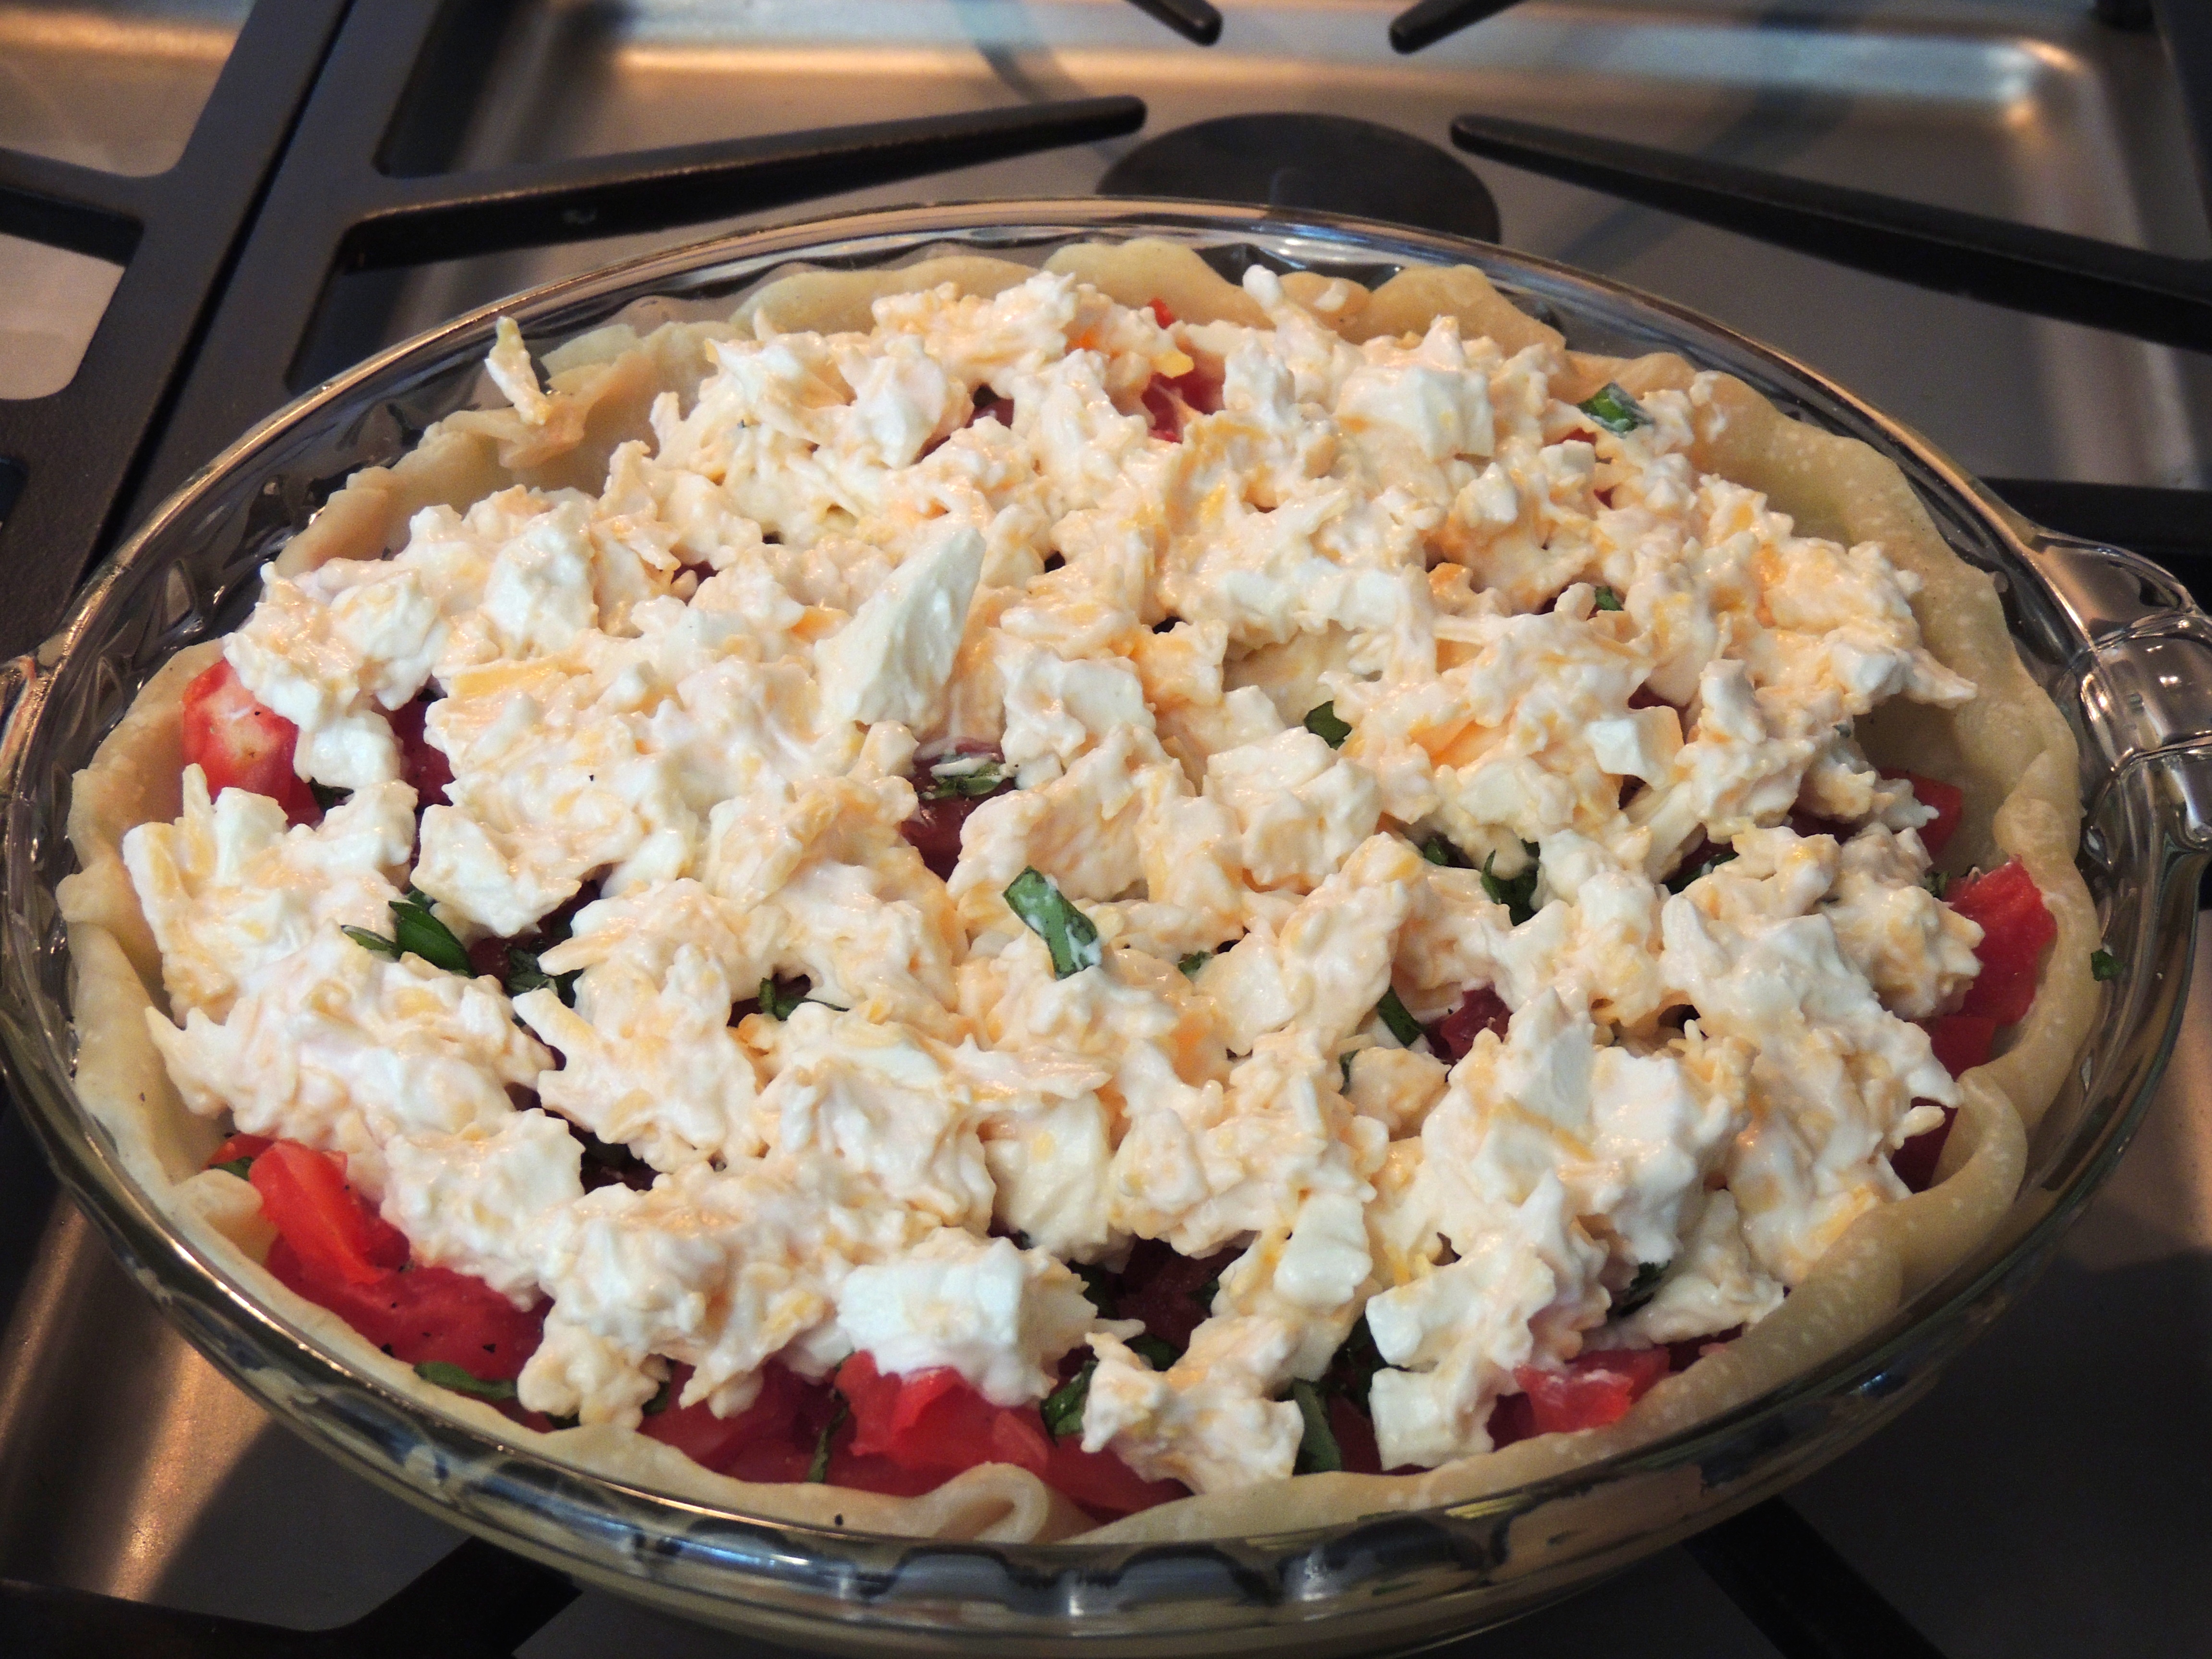
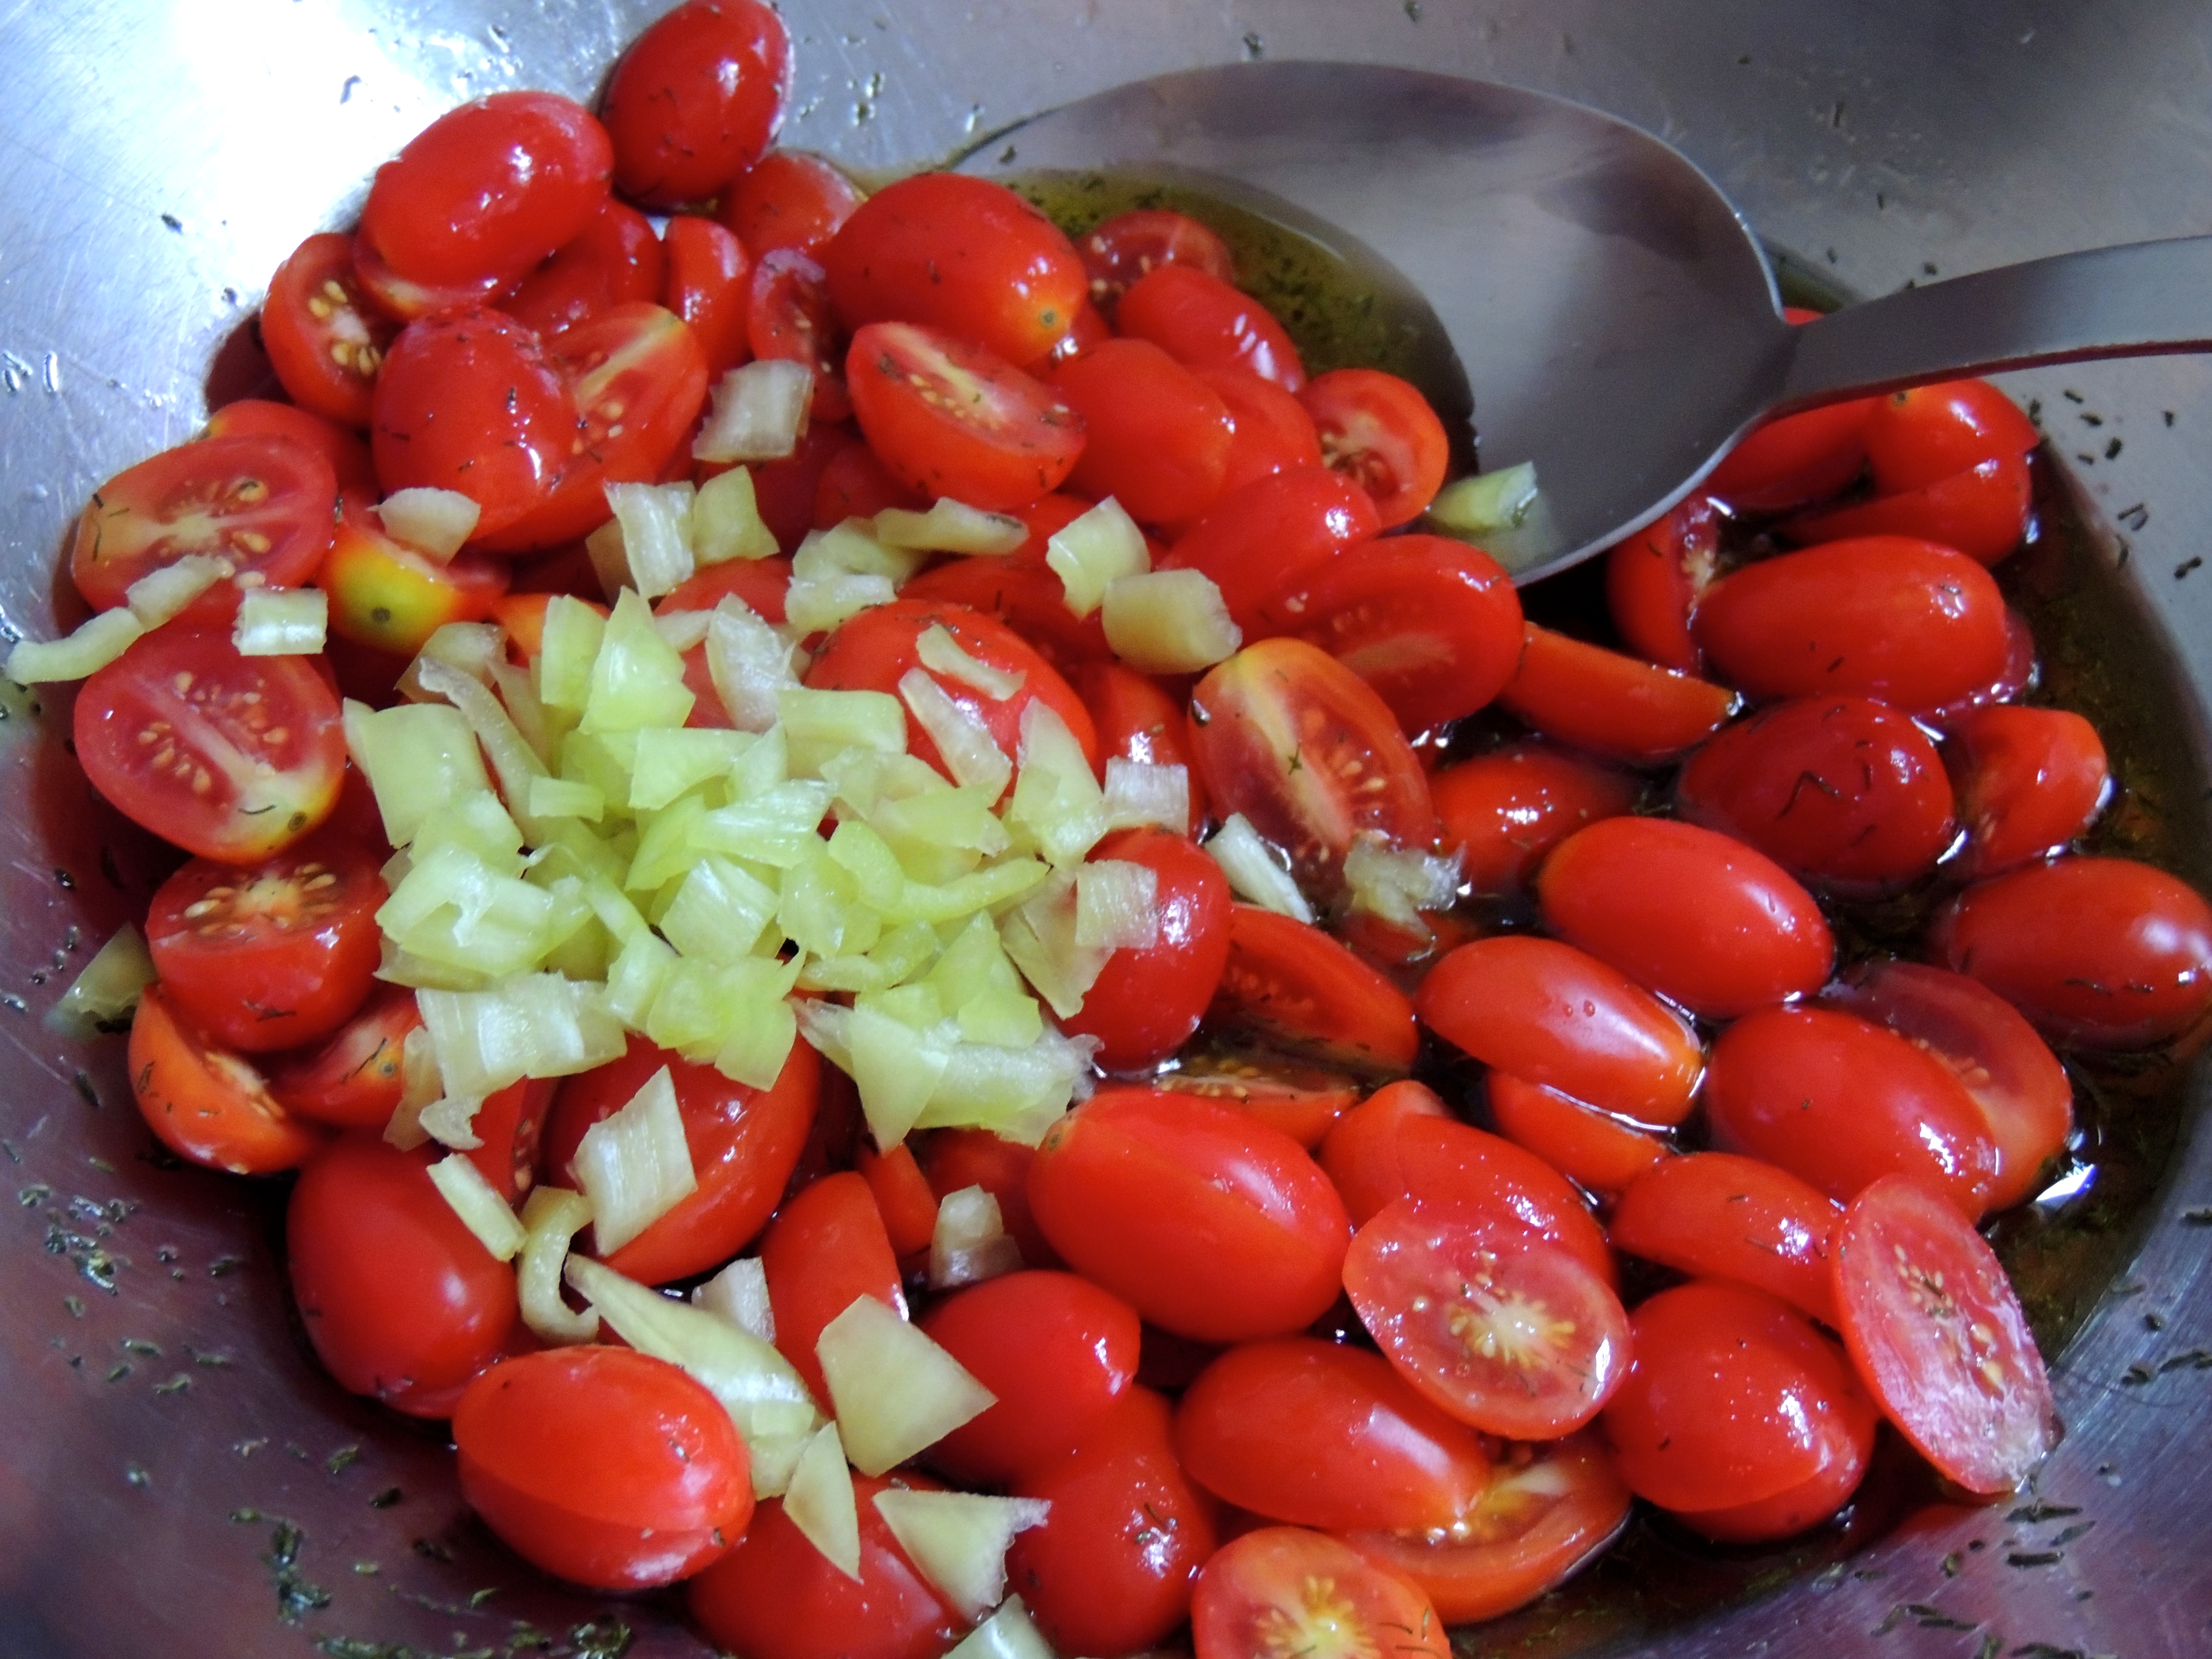
Then add the chopped, squeezed, drained tomatoes, top with chopped basil, salt and pepper…

Tomato Pie

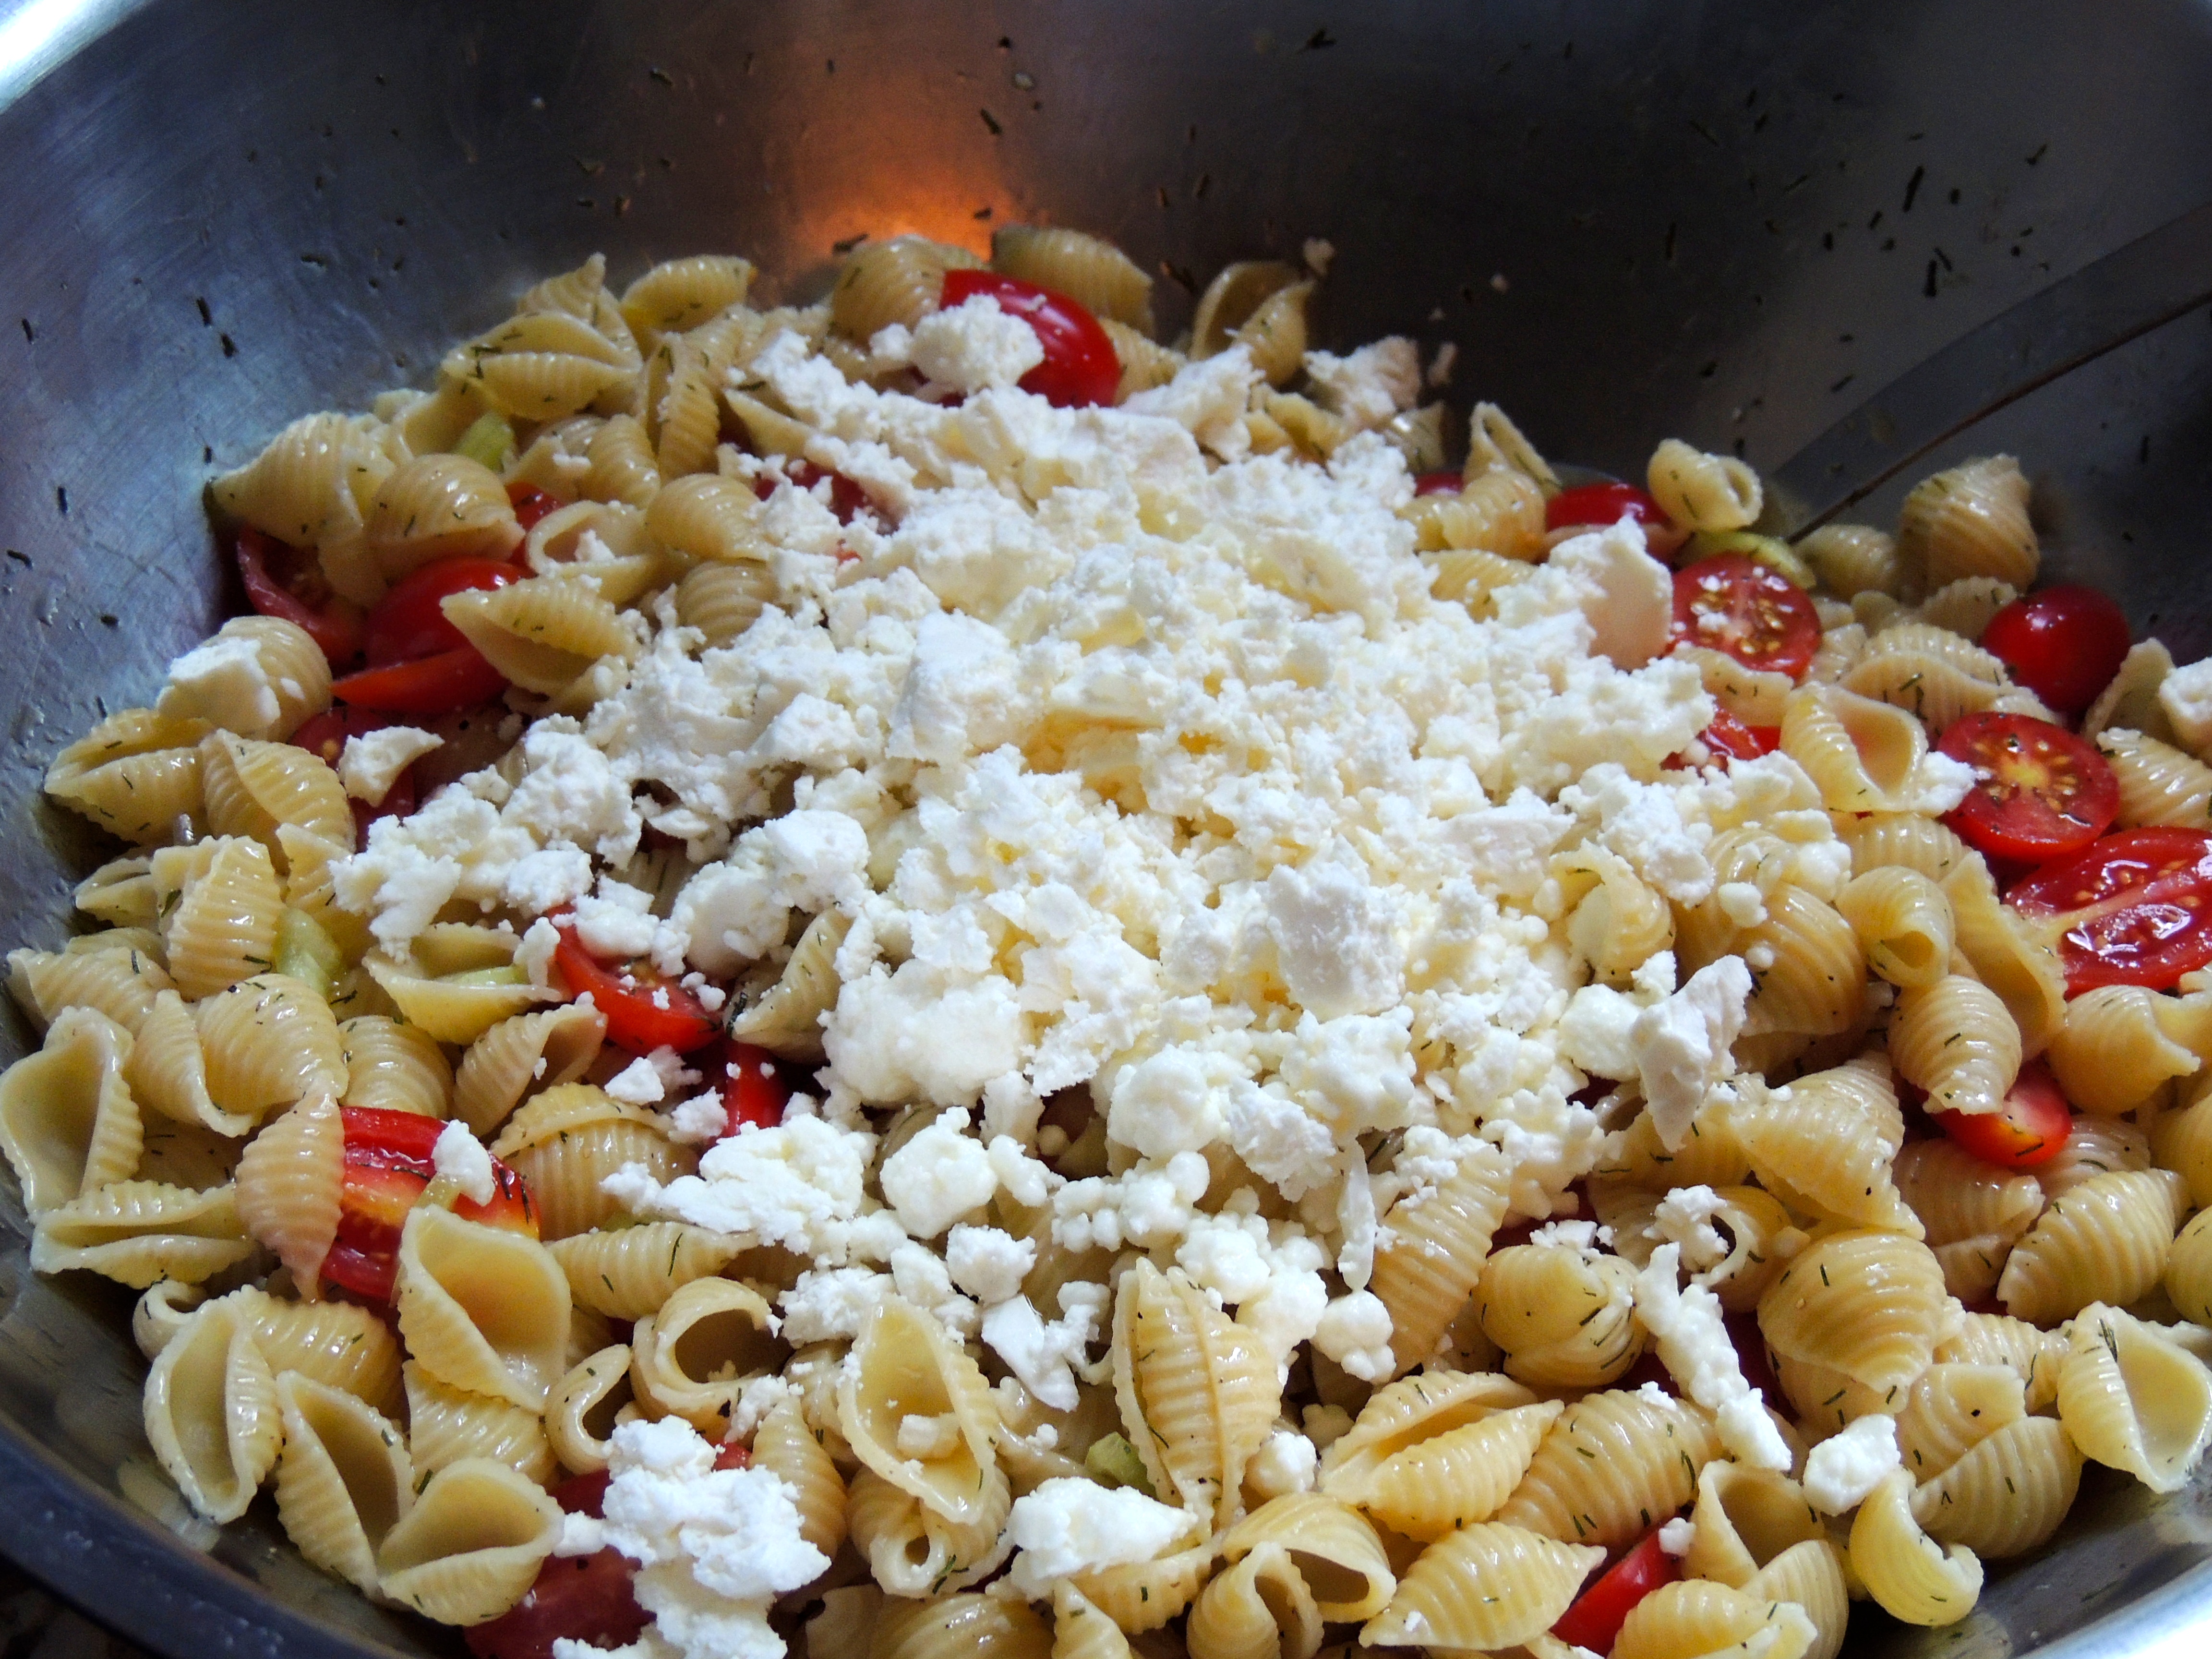
After you mix up the Mayo (or mayo/Greek yogurt) and cheese(s) together drop on top of the tomatoes…

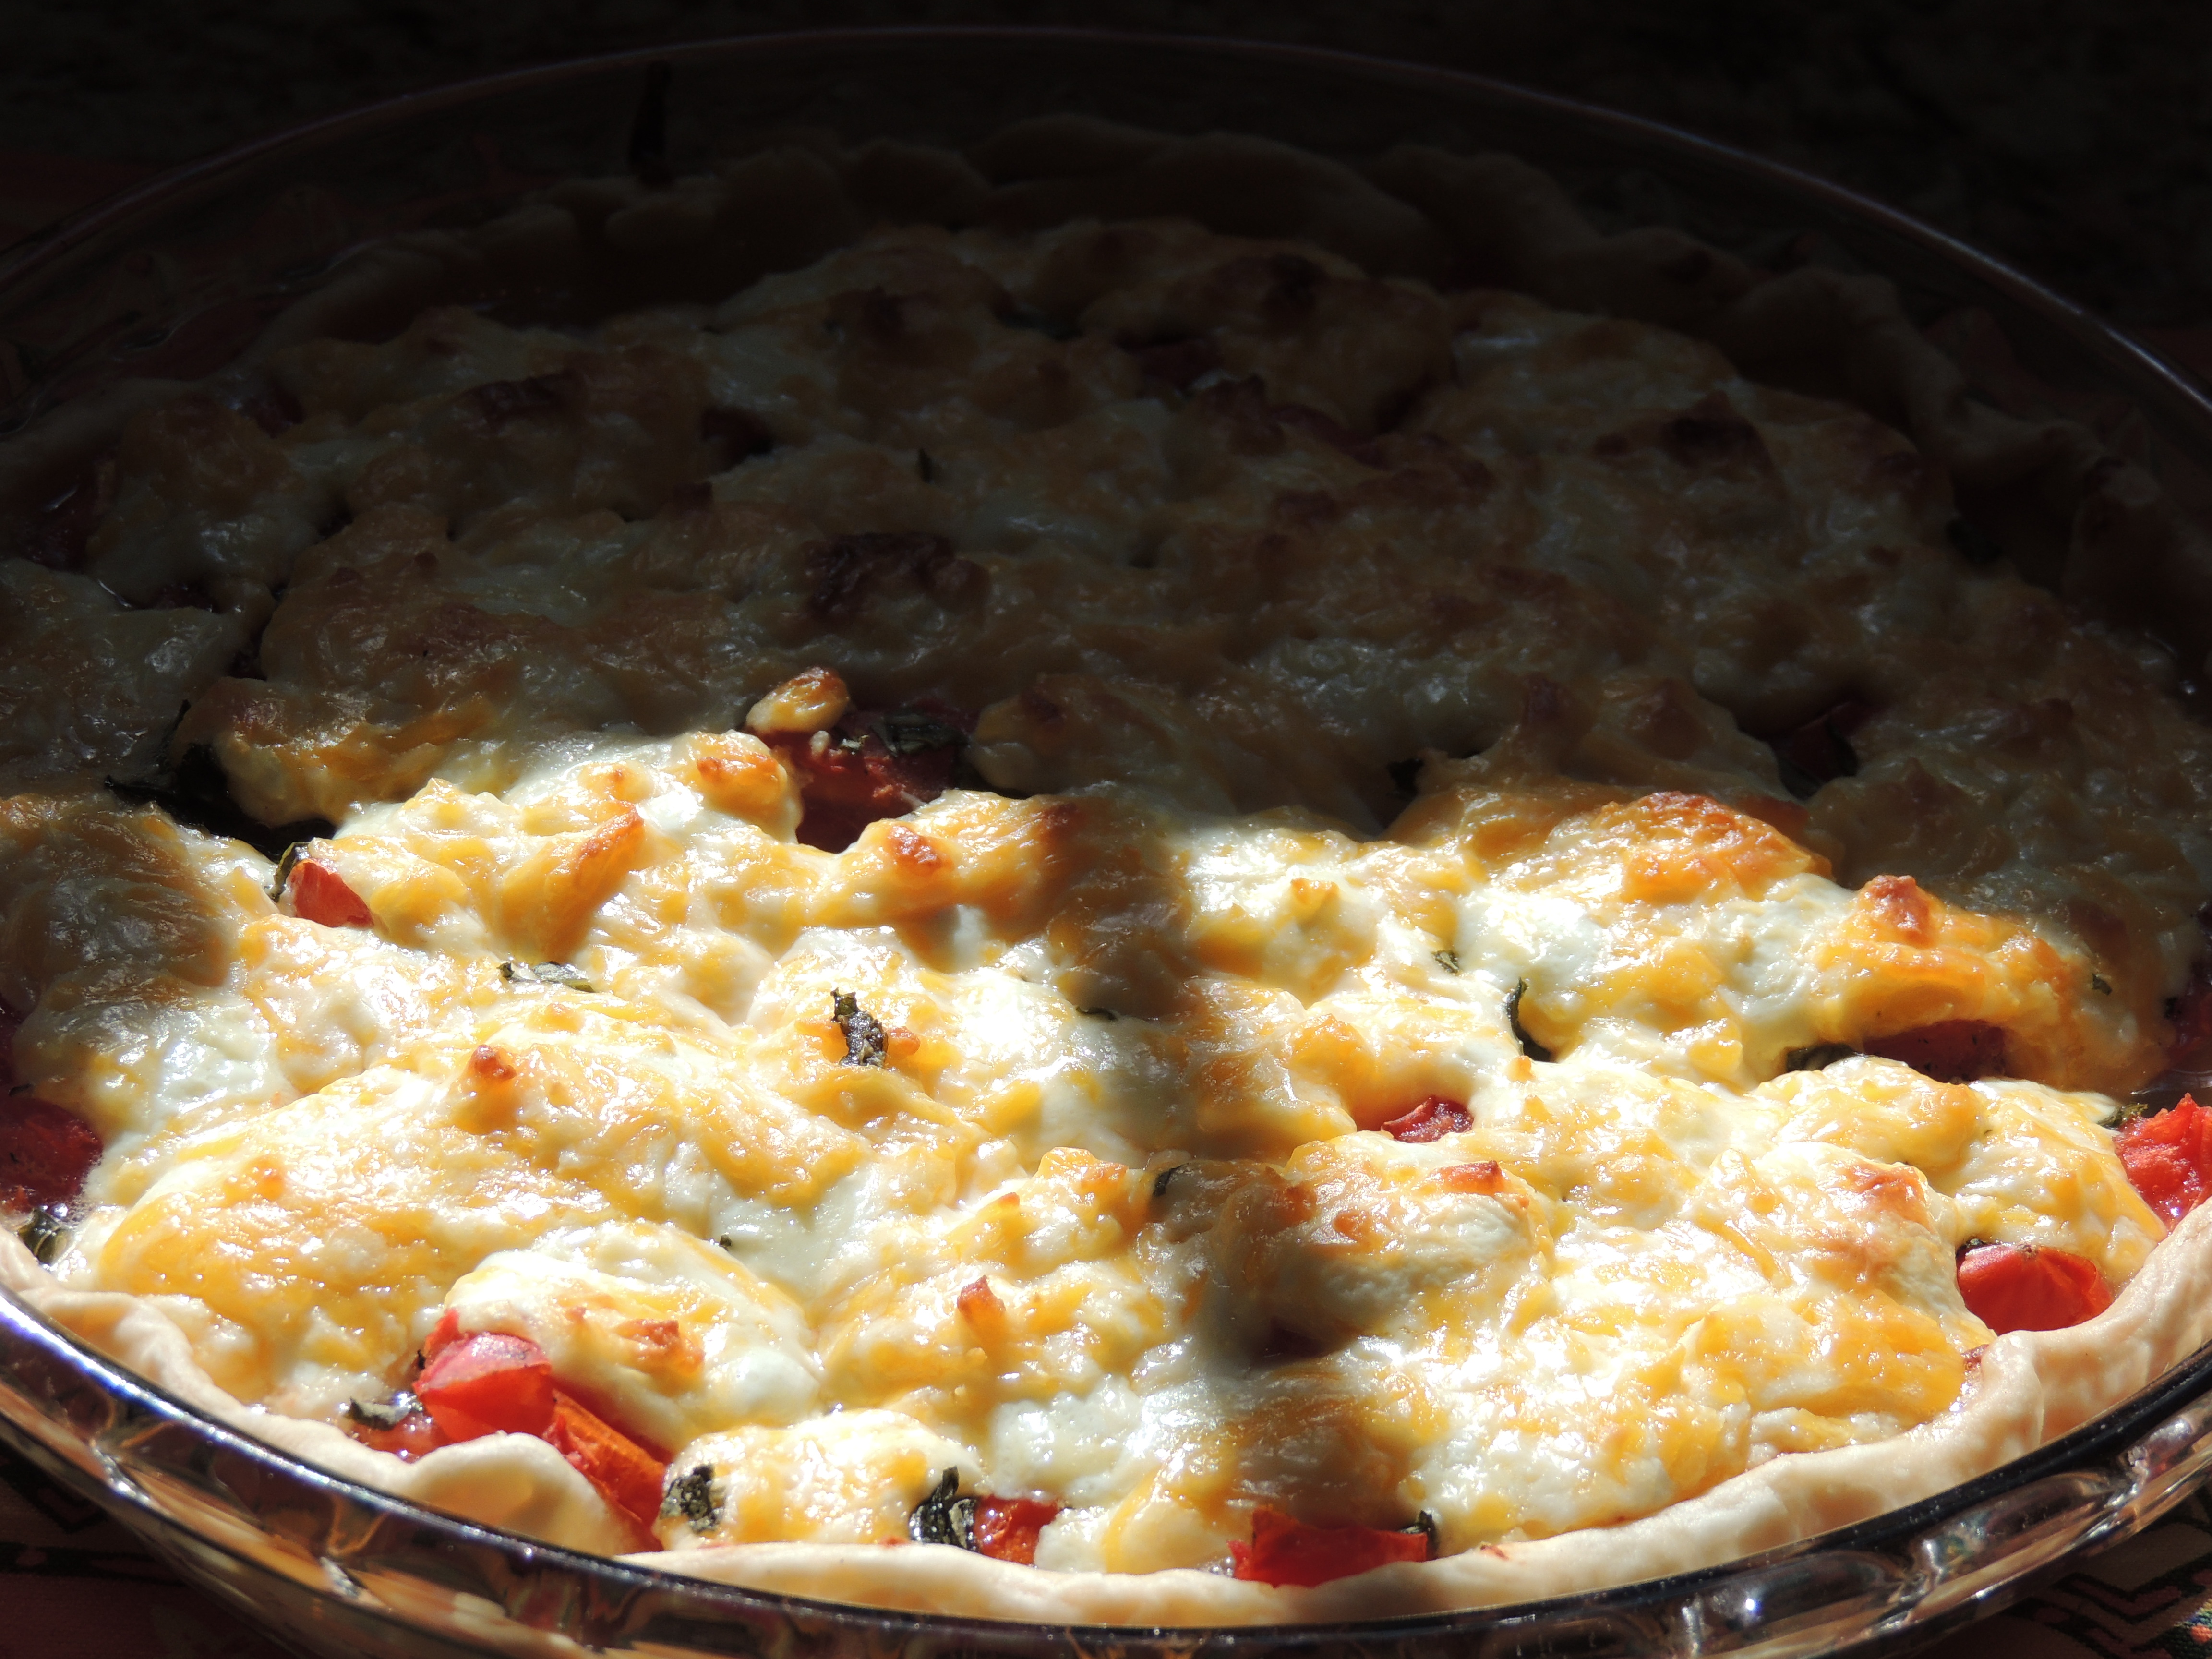
Put it in the oven and wait (this is the hardest part of the entire recipe!)… ooooh, you won’t believe your tastebuds!

This recipe is from SimplyRecipes.com, you can click the link to go straight to their site to see the recipe, or scroll to bottom and click PRINT to print the recipe only.

Tomato Pie Recipe

  • Prep time: 10 minutes  /  Cook time: 55 minutes  /  Yield: Serves 6.

INGREDIENTS

  • 1 9-inch pie shell (see pie crust recipe for homemade version)
  • 1/2 yellow or red onion, chopped
  • 3-4 tomatoes, cut in half horizontally, squeezed to remove excess juice, roughly chopped, to yield approximately 3 cups chopped tomatoes
  • 1/4 cup sliced basil (about 8 leaves)*
  • 2 cups grated cheese (combination of sharp cheddar and Monterey Jack, or Gruyere or Mozarella)
  • 3/4 cup mayonnaise
  • 1 teaspoon (or more to taste) of Frank’s Hot Sauce (or Tabasco)
  • Salt and freshly ground black pepper

*To slice basil, chiffonade them by stacking the leaves on top of each other, roll them up like a cigar, starting at one end slice the “cigar” crosswise in thin slices.

METHOD

1 Preheat oven to 350°F. Place pie shell in oven and cook for 8-10 minutes or longer until lightly golden. If you are starting with a frozen crust, you’ll need to cook it a little longer. If you are using a homemade crust, freeze the crust first, then line the crust with aluminum foil and pre-bake it for 20 minutes, then remove the foil and bake an additional 10 minutes.

2 Squeeze as much moisture as you can out of the chopped tomatoes, using either paper towels, a clean dish towel, or a potato ricer.

3 Sprinkle the bottom of the pre-cooked pie shell with chopped onion. Spread the chopped tomatoes over the onions. Sprinkle the sliced basil over the tomatoes.

4 In a medium bowl, mix together the grated cheese, mayonnaise, Tabasco, a sprinkling of salt and freshly ground black pepper. The mixture should be the consistency of a gooey snow ball. Spread the cheese mixture over the tomatoes.

5 Place in oven and bake until browned and bubbly, anywhere from 25 to 45 minutes.

Catch you back here tomorrow!

Recipe: Summer Med Pasta Salad with Arugula!

DSCN3061

This, my friends, is an amazing summer cold salad, that can be a meal! It makes a perfect lunch or light dinner. It’s ready quick, and the only thing you turn the stove on for is to cook the pasta!

Click HERE to print this recipe minus images and blah, blah, blah…

ArtFoodHome.com | barbara stroud

Ingredients

The ingredients… baby arugula to put on top (I try to put the same amount of arugula as I do pasta salad on my plate)… I used white wheat pasta, you can use any you like… Olive oil, Feta, and Dill are the stars of this show!

Olive Oil, Pepper & Dill

This isn’t really a salad where things can be measured, add lots of what you like, less of what you don’t, add anything you wish! I do maybe five times around the bowl with olive oil. It seems like a lot but you’re coating the pasta, and anything you add to it… it also becomes the “dressing” on your arugula… I would estimate between 1/4 – 1/3 cup? I sprinkle a good amount of dried dill (because I like it and it really makes this salad taste “fresh” not “dilly”!

Add tomatoes and banana pepper

Wash and dry a container of grape tomatoes, I lucked out, these were local, woohoo! Use the HOT TIP FOR CUTTING GRAPE TOMATOES QUICKLY! I also chopped up some banana pepper, it tastes super fresh in this salad… Let the tomatoes and peppers soak up the olive oil… it’s like spa day for them!

Pick whatever pasta you like, cook it according to package directions and drain. Once drained put in bowl on top of tomatoes! Let them sit there a few minutes and soften the tomatoes!

Add feta

Then stir the pasta around and get it coated in that nice dilly oil… add 6oz. of Feta… YUM! Stir it around good!

Not sure why I used this as a serving dish for myself, ha ha… I guess so I could show the ratio of pasta to arugula… but this is me, you eat it however you like! I put a few spoonfuls of pasta…

Top with Arugula - I use a lot!

Then top with at least as much arugula… baby arugula… ohhhh it’s so good!

Top with Arugula, I use a lot!

As you eat it, stir it around and the leaves will get coated in a little olive oil from the pasta. Oh boy, this sounds good… think I’m going to have to make it again!

ALSO!! ADD OLIVES! I forgot this time! I usually put olives and maybe a few tablespoons of olive juice!

Catch you back here tomorrow!

Omelet with feta, arugula and tomatoes!

IMG_1071

Owieee, I’m hooked on arugula right now. Ever since I heard on the Dr. Oz show how healthy arugula is for you, I tried it… I put it on sandwiches, on top of pasta, in omelets… baby arugula is the best (I buy Earthbound Farms brand). This omelet (or scrambled eggs if that’s easier) is quick and easy:

Omelet with Feta, Arugula and Tomatoes

2 eggs beaten

Baby Arugula

Tomato, chopped

Feta, crumbled

Can add anything your heart desires, onion, leftover chicken Italian sausage, more veggies…

Heat a 1/2 teaspoon of olive oil in a non-stick pan (or more if using a regular pan). Add the eggs, then add the toppings, pepper… (feta has enough sodium, don’t need salt)

Can either make an omelet with it or scrambled eggs.

Oooooh, and this will keep you going for a while! You might want to have 1/2 banana for dessert… read on…

From the Dr. Oz website:

Everyone knows that leafy greens are good for you. And arugula is one of the better choices for health. It contains two cancer fighters called kaempferol and quercetin. Researchers have shown that diets containing arugula can reduce the risk of lung cancer. Arugula is great to use in a salad, or even mixed into hot pasta coming off the boil. You can also arrange it as a bed of tasty greens on which to put other cooked or raw foods. t’s beautiful and healthy.

Tip: Look for baby arugula.  The young leaves are sweet and nutty tasting. When the plant gets bigger, the leaves can have a slightly bitter taste.

Fresh fruits are an obvious healthy choice, but did you know that bananas contain cancer fighters? They are called catechins and delphinidin, and studies have shown diets rich in bananas and other fruits can reduce the risk of breast cancer. 

Tip:  Have half a banana a day with breakfast. It’s an easy way to sneak a cancer fighter into your diet, right at the start of each day.

Catch you back here tomorrow!

F L A S H B A C K !

O n e  Y e a r  A g o:            Artist: Sam Robinson!

T w o  Y e a r s  A g o:        Charleston, SC Photo – A unique perspective…

T h r e e  Y e a r s  A g o:    Artist: Julia Nichols!

My new sandwich “recipe”!

IMG_1092

I’ve come up with a few new sandwich ideas that are over the top good… I needed something different. Something healthy, but super duper tasty… My new thing here… BROCCOLI SPROUTS, I heard on Doctor Oz how they’re so good for you, throw them on all your sandwiches (well, PB&J? I think not) they’re scrumptious little buggers… Above… I have an open face sandwich.

1 slice 7 sprouted grains bread (freezer section) – toasted

Veggie Cream Cheese (Philadelphia Brand) – spread on the toast… YUM!

Hefty dose of broccoli sprouts on top of cream cheese

Cucumbers, thinly sliced on top… we LOVED this! Also tried it with 1/2 slice of Havarti cheese… GET OUTTA HERE!

This will become the new love of your life!

IMG_1127

When you feel an open faced sandwich just won’t cut it, here’s another version… sprouted 7 grain bread, veggie cream cheese, 4 thin slices of cucumber, slice of Havarti cheese, 4 more thin slices of cucumber, and a big handful of that oh so healthy arugula (or broccoli sprouts!), top with another slice of sprouted 7 grain bread toasted. Yipeeee!

DE-LISH!! Catch you back here tomorrow!

F L A S H B A C K !

O n e  Y e a r  A g o:           Artist: Jason Sacran!

T w o  Y e a r s  A g o:        Happy thoughts to all!

T h r e e  Y e a r s  A g o:   Artist: Alexsander Titovits!

The Easiest Coleslaw You Will Ever Make! Healthy Too!

Vinegar Coleslaw, too good for words! Vinegar Coleslaw, too good for words!

Healthy cole slaw? Usually it’s loaded with mayonnaise and sugar… which is what makes it so good right? Wrong! I bought some shredded cole slaw mix at our local healthy grocery store, Earth Fare (love that place), and I wanted to try something different. I know we both like the mayo based cole slaw recipes, but would we like a vinegar based recipe? Hmmmm, it was time to give it a whirl. I found this recipe on the Food Network (Rachel Ray!) and it couldn’t be easier!

I had originally posted this with a rather sad image… because I kept forgetting to take a photo, ha ha… FINALLY have a photo that looks like the coleslaw before its three days old, sigh…

I was skeptical, but this recipe is delicious!

The only thing I changed below is that I reduced the sugar (original recipe calls for 2 T sugar), I used olive oil (instead of peanut or vegetable oil), I used only 1/2 tsp celery salt. More or less to taste… you can’t go wrong with this recipe!

Click HERE to print the original recipe from FoodNetwork.com!

OIL AND VINEGAR SLAW RECIPE – inspired by Rachel Ray – My version…

Ingredients

1/4 cup red wine vinegar

1-2 tablespoon sugar

2 tablespoons olive oil

1 sack, 16 ounces, shredded cabbage mix for slaw salads

1/2 teaspoon salt (or celery salt) (or 1/2 teaspoon salt and 1/2 teaspoon celery seed)

Pepper

Directions

Mix vinegar and sugar. Add oil. Add cabbage to dressing and season with salt and pepper. Toss with fingers to combine. Adjust seasoning. Let stand 20 minutes. Re-toss and serve.

Lasts a few days… Day 3 pictured above, looks tired, but tasted great!

Find the original recipe at: http://www.foodnetwork.com/recipes/rachael-ray/oil-and-vinegar-slaw-recipe.html#comments?oc=linkback

Catch you back here tomorrow!

F L A S H B A C K !

O n e  Y e a r  A g o:            Artist: Margaret Lawrence!

T w o  Y e a r s  A g o:         Charlie’s Other Momma…

T h r e e  Y e a r s  A g o:    Artist: Carol Marine!

Greek Yogurt Marinated Grilled Chicken… will transform your thoughts on grilled chicken!

Greek Yogurt Marinated Grilled Chicken - Recipe inspired by Bon Appetit Photo by Mark Peterson
Greek Yogurt Marinated Grilled Chicken – Recipe inspired by Bon Appetit

Ahhh, I ran across a fantastic recipe in Bon Appetit. It turned typically dry boneless skinless grilled chicken breasts into something absolutely heavenly! The secret? Yogurt! I made very few variations. Instead of regular yogurt I used Greek Yogurt and I did not use Cilantro. Pretty much everything else was the same.

This is what I did… click HERE for the link to Bon Appetit to see the original recipe! This will change the way you think about boneless/skinless chicken… I PROMISE!

Greek Yogurt Marinated Chicken on the Grill…

4 boneless skinless chicken breasts (pound between wax paper to make an even thickness, so you don’t end up with shoe leather on one end and not quite done in the thicker areas).

In a bowl, mix together:

1 cup Greek Yogurt (plain, not flavored!)

1/2 cup chopped Onion

1/4 cup Olive Oil(or a wee bit less, use some to coat the grill good)

2-3 Garlic cloves, minced (or use the microplane, that’s even better)

1/2 Tablespoon Lime juice

1/2 Tablespoon Garam Masala (spice) – if you aren’t a fan of Indian cuisine, you may want to go lightly on this spice.

1 teaspoon Kosher Salt and 1/2 teaspoon fresh black pepper

1″ ginger, peeled and microplaned (or minced)

Stir ingredients together and put in a zip top storage bag.

Add the chicken and squish it around until its coated. Place it in a dish and let it soak in all the heavenly flavors for at least 3 hours (or overnight).

Heat the grill (coat the grill with oil).

The recipe says to wipe off the marinade, before putting on the grill which is good, and looks prettiest. The first time we did it, we didn’t see this step, and put it on the grill with the marinade. It was far tastier BUT it was white with grill marks… the flavor was overwhelming! It will transform what you think about grilled chicken. Cook until chicken is done!

I serve with cucumbers sliced, in a mixture of Greek yogurt and a splash of vinegar with some dill… It’s a nice combination!

Photo by Mark Peterson via BonAppetit.com

F L A S H B A C K !

O n e  Y e a r  A g o:           Artist Hollis Dunlap!

T w o  Y e a r s  A g o:        Charleston Photo of Light & Shadow…

T h r e e  Y e a r s  A g o:   Tivo!

Skillet Tortilla Casserole Recipe – Cooking Light

IMG_0292

Skillet Tortilla Casserole. All made in the same pan. Too good!!

Let me start off by saying this is a horrible photo… almost didn’t post it because it’s not appetizing at all by the looks of this. But this is so tasty you won’t believe it! A great meatless meal. Fills you up, easy to make, tastes great! And… all made it one pan!

IMG_0250

Here are the ingredients… the only thing missing is the sour cream (we used Greek yogurt, tasted fabulous)… Olive oil, onion, frozen whole kernel corn, oregano, cumin, garlic, flour, can of tomatoes, black beans, chopped green chiles, corn tortillas, green onions, cilantro (WHICH I FORGOT!), sharp cheddar cheese, paprika (optional: radishes).

This is a recipe by Cooking Light magazine. It’s one that I’ve been making since 1997 – Here is a link to the recipe from the MYRECIPES.COM website (Cooking Light and several other magazines).

Here is the recipe from that website:

To recap:

It’s easiest if you prep your ingredients first. Chop, measure and get it all ready to go!

IMG_0255

Heat oil in a 10-inch cast iron skillet over medium heat. Add the onion and saute 5 minutes.

IMG_0257

Add the corn (to the onions), and saute another 5 minutes or until corn begins to get lightly browned.

IMG_0259

Add oregano, cumin and garlic… saute 30 seconds.

IMG_0260

Add flour, and cook one minute, stirring constantly!

IMG_0263

Next… add the tomatoes, beans, chiles, and cook 2 minutes or until thick.

IMG_0266

Once you’ve cooked this and it starts to thicken, remove from heat…

IMG_0267

Spoon mixture into a bowl…

IMG_0269

Spread 1/2 cup of the bean mixture over the bottom of the skillet.

IMG_0271

Then arrange half of those tortilla’s that you cut in quarters to cover the bean mixture, overlapping slightly…

IMG_0274

Spread half of the remaining bean mixture on top…

IMG_0277

Sprinkle your green onions (all of them)… this seems like a lot of green onions, but its not!

IMG_0278

The final layer of tortilla’s…

IMG_0280

The rest of the bean mixture…

IMG_0282

Sprinkle the cheese… whoa? Is this 1/2 cup? Oops ;) Sprinkle with paprika.

Bake at 375 for 30 minutes or until throughly heated. Remove from oven and LET STAND 10 MINUTES.

Notice what photo is missing?? Sigh… when will I learn? I’m so excited when it comes out of the oven. I dish it up, make it look beautiful… and then… EAT IT!

Next time… ;)

Catch you back here tomorrow!

F L A S H B A C K !

O n e  Y e a r  A g o:                Featured Artist… Tom Hughes!

T w o  Y e a r s  A g o:           Meggett Sunset

T h r e e  Y e a r s  A g o:      Taco Boy – Charleston, SC