Katharine Hepburn’s Brownie recipe… yep, the real deal! (Updated 10.07.21)

 My mom sent me this recipe years ago… she had gotten it from the February 1992 issue of Gourmet magazine (still can’t believe that magazine isn’t still around). I didn’t eat fat, so I never made them. I filed it away in case I ever fell off the wagon. Then one day we were visiting Michigan, we arrived to a pan of piping hot brownies. Whoa… the best I ever tasted, with deep chocolate flavor, more fudgy than cakelike, I was in heaven! Then to read how simple these puppies were to make made my head spin (dramatic once again). Trust me, you won’t make these only once. You’ll NEED them, ha ha, and you’ll make them more often than you should (or perhaps I’m talking about my own problems here, hmmm).  They couldn’t be easier, using only 1 pot and 1 8″ pan!

Melt together 1 stick of butter (I know… ugh, but…) and 2 squares unsweetened chocolate*, then take the saucepan off the heat.  *See note regarding type of chocolate to use…

Stir in 1 cup sugar, add 2 eggs and 1/2 teaspoon vanilla, and beat the mixture well.

Stir in 1/4 cup flour and 1/4 teaspoon salt. (As Gourmet magazine Feb 1992 states, the original recipe added 1 cup chopped walnuts here… I prefer mine without, but that’s up to you)…

Butter an 8″ square pan (recipe says to flour as well, this time I forgot and they came out of the pan easier, so I leave that up to you… to flour or not to flour). Happy Hint: when I use a stick of butter, I put the wrapper in the freezer. When I need to butter a pan I pull the wrapper out and let it sit a minute to thaw, then use it to spread. It works perfectly every time!

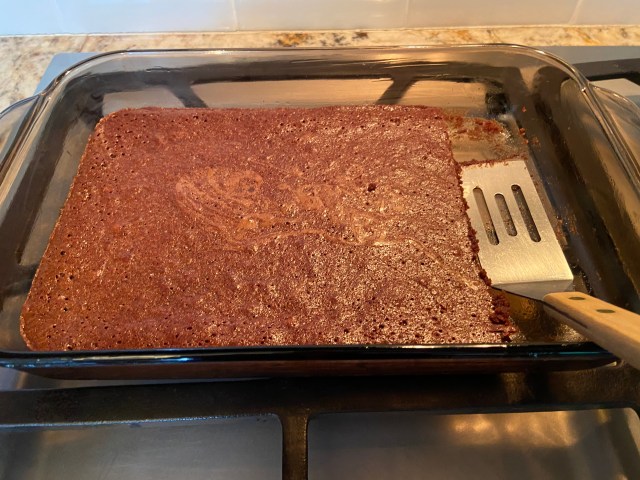
NOTE: Update 10.07.21, this works great with an 11×7″ pan as shown below. It’s not pretty but I found it (thankfully) in the cupboard after the disappearance of my 8″ square pan.

Now bake these at 325 for about 40 minutes – When they smell done, they likely are (my oven doesn’t take the full 40 minutes)!

Someone got a little excited about the brownies coming out of the oven, so this is the best photo I can do at this moment, ha ha…

IMG_8117

Note 10.07.21: I deleted a blip about substituting cocoa and butter for the unsweet baking chocolate. After trying it, I truly wasn’t happy with the substitution, too greasy. These brownies are good just like they are. Use the best chocolate for best results. I made it with Guittard Unsweet Chocolate Baking Bar, and it was a night and day difference. It was truly amazing!

Another way to take it over the top when serving, sprinkle (VERY LIGHTLY) with a good flaky sea salt like SALTVERK! Oooooo, Mmmmmm, Geeeeee! You just need a teeny bit!

IMG_8116

Catch you back here tomorrow… I have to go walk, for about 14 hours as I calculate it! Worth every bite!

Happy St. Patty’s to ya… Hot Corned Beef-Potato Hash…

Image

This is a recipe I found in Cooking Light magazine years ago… it’s a keeper! Quick and easy too… if you get a chance, give it a try! It’s a nice alternative the otherwise heavy St. Patrick’s Day meal.

This recipe is fabulous! UPDATE: Cooking Light removed the link to this recipe… am going to write a new post about this because it’s truly that good. Will add a link here to access once it’s written!

You can make Beef Bourguignonne even if your name isn’t Julia!

Image via MyRecipes.com

While the air still has a tad of a chill left to it, this is one HOT recipe to make… great when you have a group, or great to eat for a few nights. This is a Cooking Light recipe, therefore it’s not as fatty as the original recipe. I would never have known that it was lighter. My favorite part… the mushrooms! WOW!

Beef Bourguignonne (click HERE if you want to know how to pronounce it! Click on the little symbol that looks like a speaker and you will hear someone say it) is basically beef cooked in red wine with bacon, onions and mushrooms. It’s better if it sits a day… Click HERE if you want to be taken to MyRecipes.com to the actual recipe where it’s quick and easy to print, or here it is… You may want to rent Julie and Julia for more details… This was a dish made famous (in my eyes) by Julia Childs.

Yield: 9 servings (serving size: about 1 cup beef mixture, 3/4 cup noodles, and 1 teaspoon parsley)

Beef Bourguignonne with Egg Noodles

Yield: 9 servings (serving size: about 1 cup beef mixture, 3/4 cup noodles, and 1 teaspoon parsley)

Ingredients

  • 1/3  cup  all-purpose flour
  • 2  teaspoons  salt, divided
  • 3/4  teaspoon  freshly ground black pepper, divided
  • 2 1/4  pounds  beef stew meat
  • 3  bacon slices, chopped and divided
  • 1  cup  chopped onion
  • 1  cup  sliced carrot
  • 4  garlic cloves, minced
  • 1 1/2  cups  dry red wine
  • 1  (14-ounce) can less-sodium beef broth
  • 8  cups  halved mushrooms (about 1 1/2 pounds)
  • 2  tablespoons  tomato paste
  • 2  teaspoons  chopped fresh thyme
  • 2  bay leaves
  • 1  (16-ounce) package frozen pearl onions
  • 7  cups  hot cooked medium egg noodles (about 6 cups uncooked noodles)
  • 3  tablespoons  chopped fresh flat-leaf parsley

Preparation

Combine flour, 1 teaspoon salt, and 1/4 teaspoon pepper in a large zip-top plastic bag. Add beef; seal and shake to coat.

Cook half of bacon in a large Dutch oven over medium-high heat until crisp. Remove bacon from pan with a slotted spoon; set aside. Add half of beef mixture to drippings in pan; cook 5 minutes, browning on all sides. Remove beef from pan; cover and keep warm. Repeat procedure with remaining bacon and beef mixture. Remove beef from pan; cover and keep warm.

Add chopped onion, sliced carrot, and minced garlic to pan; sauté 5 minutes. Stir in red wine and broth, scraping pan to loosen browned bits. Add bacon, beef, remaining 1 teaspoon salt, remaining 1/2 teaspoon pepper, mushrooms, tomato paste, chopped thyme, bay leaves, and pearl onions; bring to a boil. Cover, reduce heat, and simmer 45 minutes. Uncover and cook 1 hour or until beef is tender. Discard bay leaves. Serve beef mixture over noodles; sprinkle with parsley.

Nutritional Information

Calories: 447, Fat: 14.6g (sat 5.1g,mono 6.1g,poly 1.5g), Protein: 32.7g, Carbohydrate: 45.7g, Fiber: 3.9g, Cholesterol: 117mg, Iron: 6mg, Sodium: 677mg, Calcium: 47mg

Recipe and Image via MyRecipes.com (Becky Luigart-Stayner; Melanie J. Clarke and Celine Chenoweth)

Bake away the craving – Oatmeal Cookie Recipe!

Vanishing Oatmeal Cookies

 A craving for something sweet. Ugh. You know how it is when something pops into your head, like a nice warm oatmeal cookie fresh out of the oven. The wonderful smell of cinnamon permeating the room… ohhhh and a nice cold glass of milk to go along with it… Ahhh, let me get ahold of myself! That’s what happened to me the other day. OATMEAL. COOKIES. This thought popped into my head and would not escape. Finally I gave in. I’ll take some to a neighbor, saving myself from eating too many! So off I went. Armed with a NEW oatmeal cookie recipe, I started measuring… then all of a sudden something didn’t seem right with the recipe… Hmmm, let me check online and see if there were any comments on this recipe… duh. Something I always do BEFORE I try a recipe, not while I’m almost done measuring all the ingredients! TRAGIC COMMENTS. Eek, how can I save these cookies now that I have most of the ingredients comingled? I popped the lid off the Quaker Oat cannister and TADA staring back at me is the Vanishing Oatmeal Cookie recipe everyone knows and loves. I tried to adjust to get the ingredients measured to the new recipe and without hesitation popped those babies in the oven. Worst case? The baked cookies don’t taste good… Silver lining? Yep, the dough is awesome! Ha… Thankfully they turned out. I ate too many (it was lunch) and now I’m done with them for a while… Next time I may substitute cranberries for the raisins and add walnuts. If these cookies are sounding good to you, you can get them via the Quaker website OR off the lid on your cannister of oatmeal. Otherwise, here it is! Happy day! Catch you back here tomorrow…

Vanishing Oatmeal Raisin Cookies (QuakerOats.com)

Ingredients

  •  1/2  cup (1 stick) plus 6 tablespoons butter, softened
  • 3/4  cup firmly packed brown sugar
  • 1/2  cup granulated sugar
  • 2  eggs
  • 1  teaspoon vanilla
  • 1-1/2  cups all-purpose flour
  • 1  teaspoon baking soda
  • 1  teaspoon ground cinnamon
  • 1/2  teaspoon salt (optional)
  • 3  cups Quaker® Oats (quick or old fashioned, uncooked)
  • 1  cup raisins

Preparation

Preheat oven to 350°F. In large bowl, beat butter and sugars on medium speed of electric mixer until creamy. Add eggs and vanilla; beat well. Add combined flour, baking soda, cinnamon and salt; mix well. Add oats and raisins; mix well.

Drop dough by rounded tablespoonfuls onto ungreased cookie sheets.

Bake 8 to 10 minutes or until light golden brown. Cool 1 minute on cookie sheets; remove to wire rack. Cool completely. Store tightly covered.

Yield:  4 DOZEN

Remember to visit my photo blog at http://almostdailypic.wordpress.com – thanks for stopping by!

Everyday Chocolate Cake…

Happy Friday everyone! I have to tell you about this amazing chocolate cake recipe that I found on the Smitten Kitchen blog. If you’ve never heard of The Smitten Kitchen, ohmygosh, check it out, seriously. Excellent recipes, hilarious writing, AMAZING PHOTOGRAPHY and just a good time overall! You may consume a bit more butter than you should, but hey, it’s a treat! I wish I could make this cake every day!

I have made this cake a few times, Deb Perelman has this recipe down to using only one bowl… easy clean up… YAY! The fresh whipped cream and raspberries that I rolled around in sugar were a nice addition… It’s the weekend, INDULGE!

Check out the Smitten Kitchen blog if you get a chance!

Here is the recipe as shown on the Smitten Kitchen blog, I didn’t change a thing:

Everyday Chocolate Cake from the Smitten Kitchen blog…
Adapted from Magnolia Bakery At Home

1/2 cup (1 stick or 4 ounces) unsalted butter, softened
1 cup (6 7/8 ounces) firmly packed light brown sugar
1/2 cup (4 ounces) granulated sugar
1 large egg, at room temperature
1 cup buttermilk
1 teaspoon vanilla extract
1 1/2 cups (6 3/4 ounces) all-purpose flour
3/4 cup (2 5/8 ounces) Dutch cocoa powder (see Smittenkitchen.com for a natural cocoa adjustment)
1/4 teaspoon baking soda
1/2 teaspoon baking powder
1/4 teaspoon salt

Preheat the oven to 325°F. Butter and lightly flour a 9×5×3-inch loaf pan, or spray it with a butter-flour spray. In a large bowl, on the medium speed of an electric mixer, cream the butter until smooth. Add the sugars and beat until fluffy, about 3 minutes. Add the egg and beat well, then the buttermilk and vanilla. Don’t worry if the batter looks a little uneven. Sift the flour, cocoa, baking soda, baking powder and salt together right into your wet ingredients. Stir together with a spoon until well-blended but do not over mix. Scrape down the batter in the bowl, making sure the ingredients are well blended.

Pour the batter into the prepared loaf pan. Bake for 60 to 70 minutes, or until a cake tester inserted into the center of the loaf comes out clean. Cool in pan on a rack for about 10 to 15 minutes, at which point you can cool it the rest of the way out of the pan. Serve with whipped cream and fresh berries, if you’re feeling fancy

Baked Potato Soup with all the trimmings!

Sometimes when you’re chilly there is nothing like a nice hot bowl of soup to get your innards warmed up. Other than vacuuming, there really isn’t anything that is going to warm you up from the inside out!

This tasty soup is from Cooking Light, and although it uses lower fat ingredients, if no one told you there were lower fat ingredients, I promise you, you would never know. NEVER. KNOW. That’s part of what makes this such a good recipe. It’s a fairly quick soup to make after the potatoes are baked. Mmmm, this is looking too good right now!!

So, if you were sitting there thinking… Ugh, I’m in a rut and need to try something new but want it to be pretty healthy, hey, this is for you!

I use Cracker Barrel 2% Extra Sharp cheese, it’s great, and it’s my “go to” cheese for recipes. It’s in every grocery store in Charleston, but I know other areas don’t carry it (Algonac, MI, darnit!). Serving size is 1 1/2 cups and let me tell ya… you will be full! Especially after adding a sprinkle of shredded extra sharp cheese, some green onions and some crispy bacon… oh la la… I edited the recipe to show less flour, otherwise it was too thick for us.

BAKED POTATO SOUP  

Baked Potato Soup

Ingredients

  • 4 baking potatoes (about 2 1/2 pounds)
  • 1/4 cup all-purpose flour
  • 6 cups 2% reduced-fat milk
  • 1 cup (4 ounces) reduced-fat shredded extrasharp cheddar cheese, divided
  • 1 teaspoon salt
  • 1/2 teaspoon freshly ground black pepper
  • 1 cup reduced-fat sour cream
  • 3/4 cup chopped green onions, divided (or 1 small bunch, whites cut off)
  • 6 bacon slices, cooked and crumbled
  • Cracked black pepper (optional)

Preparation

  • Preheat oven to 400°.
  • Pierce potatoes with a fork; bake at 400° for 1 hour or until tender. Cool. Peel potatoes; coarsely mash.
  • Lightly spoon flour into dry measuring cups; level with a knife. Place flour in a large Dutch oven; gradually add milk, stirring with a whisk until blended. Cook over medium heat until thick and bubbly (about 8 minutes). Add mashed potatoes, 3/4 cup cheese, salt, and 1/2 teaspoon pepper, stirring until cheese melts. Remove from heat.
  • Stir in sour cream and 1/2 cup onions. Cook over low heat 10 minutes or until thoroughly heated (do not boil). Ladle 1 1/2 cups soup into each of 8 bowls. Sprinkle each serving with 1 1/2 teaspoons cheese, 1 1/2 teaspoons onions, and about 1 tablespoon bacon. Garnish with cracked pepper, if desired.

Catch you back here tomorrow!

Cookies for Valentine’s Day, a work of art!

Aren’t these the most beautiful Valentine’s Day cookies you’ve ever seen? I admit, I haven’t seen many cookies for this holiday, well, not if you exclude the mass produced variety at the grocery store…  These take a little bit of time, but ooooh, the result is A WORK OF ART! I last posted this recipe on my PHOTO BLOG (click for link) for Christmas cookies, but here it is again, I hope you give them a try! This time I made the dough on Friday, got busy on Saturday, then set them out on the counter for a little while on Sunday before rolling and cutting into heart shapes and baking. The decorating part looks like the most time consuming, but if you don’t get too uptight about it (me) and can just swirl it on (Fred, my husband) then it looks beautiful and is done in a snap! Wishing you a Happy Valentine’s Day!

VALENTINE’S DAY BUTTER COOKIES

Sift 2 3/4 cups of flour, 1 teaspoon baking powder and 1/2 teaspoon of salt.

In mixer bowl add 3/4 cup soft butter, 1 cup sugar, 2 eggs, 1 teaspoon vanilla.

Beat until fluffy and light. Slowly beat in flour mixture. CHILL ONE HOUR.

Flour your work surface and roll out dough. Use cookie cutters to cut into desired shapes.

Place on ungreased cookie sheet. Bake at 375 degrees for 8-10 minutes.

YIELD: 4 dozen (IF you don’t eat the dough… good luck to ya!)

FROSTING

Mix 1/4 cup butter, 4 cups (1 box) confectioner’s sugar, 1/4 cup scalded cream and 1 teaspoon vanilla. Blend until smooth. Scoop into separate bowls and add food coloring (hint: Valentine cookies are good just red, light pink and white). Scoop colored frosting into Ziplock bag (I use freezer) and snip a little off the corner. Squeeze onto cookie to decorate! If you need the frosting thinned a bit more, I have great luck just using light cream, add a little at a time until it will easily come out of the bag to decorate.

Black Bottom Banana Cream Pie… oh my!

This is a Cooking Light recipe, and it’s TO. DIE. FOR. I’m not kidding you! My husband says “It’s so good it’ll make your tongue beat your brains out!” or something like that. I have to admit, I haven’t heard that saying before, the images that flash before my eyes give me the willies, BUT, it’s a GOOD thing… means it’s soooo gooood!

Oh yeah, the BLACK BOTTOM BANANA CREAM PIE (click on that for direct link to My Recipes where it’s easily printed) is delish! It’s not difficult, bake a pie crust, melt some chocolate, make the banana cream custard filling, slap the sliced bananas on top of the chocolate, smear on the custard, then they top with “whipped topping” EEEEK, which just doesn’t happen to be in my vocabulary. Instead mine isn’t pretty until served, I make whipped cream or if in a time pinch use the canned REAL whipped cream, then using a microplane shred a little chocolate on top and whoooaaaa! Have you got yourself a masterpiece! But don’t take my word for it. Really. Ohhhh, please tell me I didn’t toss those overripe bananas!

Black Bottom Banana Cream Pie

Yield: 8 servings (serving size: 1 wedge)

Ingredients:

  • (9-inch) Pastry Crust
  • 3  tablespoons  cornstarch, divided
  • 2  tablespoons  sugar
  • 2  tablespoons  unsweetened cocoa
  • Dash of salt
  • 1 1/3  cups  1% low-fat milk, divided
  • 1  ounce  semisweet chocolate, chopped
  • 1/2  cup  sugar
  • 1/4  teaspoon  salt
  • 2  large eggs
  • 1  tablespoon  stick margarine or butter
  • 2  teaspoons  vanilla extract
  • 2  ounces  block-style fat-free cream cheese, softened
  • 2  cups  sliced ripe banana (about 2 large bananas)
  • 1 1/2  cups  frozen fat-free whipped topping, thawed
  • Chocolate curls (optional)

Preparation

Prepare and bake Pastry Crust in a 9-inch pie plate. Cool completely on a wire rack.

Combine 1 tablespoon cornstarch, 2 tablespoons sugar, cocoa, and dash of salt in a small, heavy saucepan; gradually add 1/3 cup milk, stirring with a whisk. Cook 2 minutes over medium-low heat. Stir in chocolate; bring to a boil over medium heat. Reduce heat to low; cook 1 minute, stirring constantly. Spread chocolate mixture into bottom of prepared crust.

Combine 2 tablespoons cornstarch, 1/2 cup sugar, 1/4 teaspoon salt, eggs, 1 cup milk, and margarine in a heavy saucepan over medium heat, stirring constantly with a whisk. Bring to a boil. Reduce heat to low, and cook 30 seconds or until thick. Remove from heat. Add vanilla. Beat cream cheese until light (about 30 seconds). Add 1/4 cup hot custard to cream cheese, and beat just until blended. Stir in remaining custard.

Arrange banana slices on top of chocolate layer; spoon custard over bananas. Press plastic wrap onto surface of custard; chill 4 hours. Remove plastic wrap. Spread whipped topping evenly over custard. Garnish with chocolate curls, if desired. Chill until ready to serve.

Nutritional Information

Calories:

315 (29% from fat)
Fat:
10.1g (sat 4.8g,mono 3.4g,poly 2.4g)
Protein:
6.9g
Carbohydrate:
49.6g
Fiber:
1.6g
Cholesterol:
58mg
Iron:
1.4mg
Sodium:
253mg
Calcium:
94mg

Greg Patent, Cooking Light, NOVEMBER 1998

Visit my photo blog at http://almostdailypic.wordpress.com !

Image via www.myrecipes.com – Becky Luigart-Stayner

Always trust your source…

Image: cookinglight.com

Always trust your source! Especially when looking for a recipe online. There are many websites and blogs out in the cyber world, but when it comes to throwing costly ingredients together and having it turn into something fabulous, TRUST YOUR SOURCE. I have been a subscriber to Cooking Light magazine since the mid 90’s. It has changed over the years, but it has always been a great magazine FULL of fabulous recipes.

I read mine, fold down the pages of the recipes I like, then I go online to MYRECIPES.com where I pull up the recipe and save it to my “recipe box”online. That way I can pull up a favorite recipe no matter where I am, a big plus for sure! Then I can pass the magazine on to a neighbor. You can also subscribe to their daily email which sends you a meal suggestion each day as well as a host of other emails targeted specifically to one type of food. This is done through MyRecipes.com, which has the recipes from Cooking Light, Southern Living and a host of other popular magazines.
If you haven’t picked up a copy of Cooking Light, I urge you to do so, or look at it at the library! Trust me, you’ll be copying down recipes like nobody’s business! It pays to subscribe, it’s much cheaper that way.
Remember to check out my photo blog at http://almostdailypic.wordpress.com – Until tomorrow…

Bowtie pasta with sundried tomato and scallion cream!

Food & Wine

I was trying to think of what to make for dinner… ugh, I don’t want to be in a rut and make the same thing time and time again. We were both in the mood for some pasta, but we just weren’t sure HOW we wanted it… I happened to be on Facebook and I saw that Food and Wine magazine had posted a recipe that was quick and easy and sounded DELICIOUS! So off we went to the store, hunted and gathered the ingredients, popped home and threw it together in NO TIME! Seriously. This pasta sauce ISN’T. EVEN. COOKED! I had some reservations… hmmm, seems like you should at least cook it. I usually do try a new recipe pretty much as it’s shown, then the next time I make it I tweak it and change it up a bit. The only thing I did with this recipe is to use basil instead of parsley (LOVE tomatoes and basil together!) which the recipe did have listed as an alternative, and I used sundried tomatoes in oil instead of reconstituting… I also used mini bowties, well, just because I like them and they’re cute!  This. Was. Delicious. Say no more… I will be making this time and time again!

If you get a chance, check out this recipe. It would be nice paired with a small salad or a crusty loaf of good bread (as Ina would say). The recipe also mentions that it would be good with fusilli pasta, as the sauce would hold on to the crevices. See the wine pairing suggestion from Food and Wine below…
Pairing Suggestion – A fruity red wine will be ideal with the rich sauce and the assertive, salty taste of the sun-dried tomatoes. A slightly chilled bottle of Barbera or Dolcetto from the Piedmont region of Italy would be perfect.

Bow Ties with Sun-Dried Tomato and Scallion Cream

SERVINGS: 4   FAST / VEGETARIAN

Ingredients

5 scallions, white and light-green parts only

6 tablespoons chopped reconstituted sun-dried tomato halves (about 12 halves); see Note

1 cup light cream or half-and-half

1 pound bow ties

1 teaspoon salt

1/2 teaspoon fresh-ground black pepper

3 tablespoons chopped fresh parsley

Directions

  1. In a blender or food processor, puree the scallions and sun-dried tomatoes with 1/2 cup of the cream.
  2. In a large pot of boiling, salted water, cook the bow ties until just done, about 15 minutes. Reserve 1/2 cup of the pasta water. Drain the pasta and toss with the puree, the remaining 1/2 cup cream, 1/3 cup of the reserved pasta water, the salt, pepper, and parsley. If the sauce seems too thick, thin it by adding more of the reserved pasta water.

 Notes

Reconstituting Sun-Dried Tomatoes In a small pan bring enough water to a boil to cover the dried tomatoes. Add the tomatoes, then remove from the heat and let steep in the hot water for about 5 minutes. Drain. You can also use drained oil-packed sun-dried tomatoes for this recipe. Since they’re already soft, you don’t have to reconstitute them.

Variation

Bow Ties with Sun-Dried Tomato and Herb Cream An equal quantity of chopped fresh basil or chives or 2 tablespoons of tarragon would be a good alternative or addition to the parsley.

Remember to visit my photo blog at http://almostdailypic.wordpress.com!

Image via Food & Wine – Melanie Acevedo

Death by lemon squares…

Oxmoor House photo – Cooking Light

Everyone loves a good lemon square. Normally when I post a recipe I post it as I’ve made it with some changes, additions or subtractions. But this my friends is PERFECT JUST AS IT IS. It’s a Cooking Light recipe. You can copy and paste the recipe below… (the link to Cooking Light no longer exists).

Beware, this is “16 servings” which is really like “4 servings” in my book, so the calories, etc. do go up… but it’s worth every bite! Really…


EASY LEMON SQUARES – Cooking Light

 For the crust:

¼ cup sugar

3 tablespoons butter

1 cup flour

In a mixing bowl, beat the sugar and butter at medium speed until creamy. Gradually add flour to sugar mixture, mix on low until resembles fine crumbs. Gently press into the bottom of an 8” square baking pan. Bake at 350˚ for 15 minutes; cool pan on wire rack.

 For the topping:

3 large eggs

¾ cup sugar

2 teaspoons grated lemon rind

1/3 cup FRESH lemon juice

3 tablespoons flour

½ teaspoon baking powder

1/8 teaspoon salt

In a mixing bowl, beat eggs at medium speed until foamy. Add sugar, lemon rind, lemon juice, flour, baking powder and salt. Beat until well blended. Pour mixture of partially baked crust. Bake at 350˚ for 20-25 minutes or until topping is set. Cool on wire rack.

 Before serving:

Sift 2 teaspoons of powdered sugar evenly over the top once it has cooled. (I skip this step, but it’s pretty!)

Nutritional Information:

Calories 118, Fat 3.2g (sat 1.7g, mono 1g, poly 0.3g), Protein 2.2g, Carbs 20.5g, Fiber 0.3g, Cholesterol 47mg, Iron 68mg, Sodium 68mg, Calcium 16mg


Post updated 01/23/25

Apple crisp recipe… heat your house and your innards at the same time!

My version of APPLE CRISP

You know how it is when you’re chilly… the house feels chilly… it’s hibernating time and you want something sweet, but semi-healthy (ha ha)… well I’ve got the recipe for you! APPLE CRISP! I used almost a full 3# bag of granny smith apples AND there is oatmeal involved… therefore… HEALTHY’ish… Enjoy, it’s best topped with a little vanilla ice cream! Remember it’s a recipe, which is simply a guide, use more of what you like and less of what you don’t… the apples however are essential!

This recipe does more than make your house smell divine… it helps heat it up, and when you eat it… ahhhhh, finally warm! It’s better than vacuuming to get warm, hee hee…

APPLE CRISP (recipe adapted from Novia Scotia Apple Crisp that appeared in the Post & Courier newspaper years ago!)

Apple portion:

1- 3# bag of granny smith apples – PEELED AND SLICED

cinnamon, nutmeg and a little sugar – if you use sweet apples you may not need sugar!

Topping:

1/3 cup flour

2/3 cup rolled oats (use the regular oats, not the 1-minute kind)

1 cup brown sugar

1/3 cup butter (or whatever you have that resembles it)

Preheat oven to 375 degrees F.

Peel and slice apples. Arrange apples in a buttered baking dish (lasagna size pan or large casserole if you don’t have lasagna pan). Although I used 11×17 and it worked fine!

Sprinkle apples with cinnamon (I use quite a bit, use how much you like) and just a light sprinkle of nutmeg (it’s stronger). Then sprinkle a tablespoon or two of sugar over top of the apples.

In a medium bowl mix the flour, rolled oats, brown sugar together. Cut in the butter (can use two knives and cut it up in small pieces while mixing in with flour, etc.), until mixture resembles coarse bread crumbs (it was cold when i made it last so they were bigger hunks, it’s OK).

Spread this mixture over the apples.

Bake at 375 F until apples are tender (poke with fork) and topping is lightly browned (35-40 minutes).

Serve with ice cream…. ooohhh la la!

Ina’s Mexican Chicken Soup… my version!

img_8705
My version of Ina Garten’s MEXICAN CHICKEN SOUP

We all want to be remembered for something when we’re gone… I would like to be remembered as a great artist. Wait. I need to paint A LOT more before that can happen. OK… I would like to think that people will remember me for being a nice person, caring about others and that I was always willing to help. (People don’t always ask for help, so keep an eye out for a neighbor that looks like they may need assistance. It never hurts to ask. Sometimes people get frustrated because they want to do it themselves, but you never know, so just ask)! However, it wouldn’t be so bad to be remembered as a great cook, hee hee… I’m including a recipe that will KNOCK YOUR SOCKS OFF! This is my version of Ina Garten’s (Barefoot Contessa) Mexican Chicken soup. I’ve added a few things and slightly altered it. A recipe is merely a guide, add more of what you like and less of what you don’t (unless you’re baking, then it’s more of an exact science)…  Enjoy! Until tomorrow…

Mexican Chicken Soup (adapted from Ina Garten)

2-4 chicken breasts (with bone and skin, more or less depending on how much chicken you like, I use 2-3 large)

olive oil

salt and pepper

2 medium onions

2-3 stalks celery

1 bunch carrots with greens (cut off greens)

2 cloves garlic

2 1/2 quarts chicken stock (I like Kitchen Basics if not homemade)

1-28 oz can diced tomatoes

1-2 jalapeno peppers, minced, no seeds (unless you like HOT)

1 teaspoon cumin

6 white corn tortillas

1/2 bag frozen white sweet corn

1 can black beans rinsed and drained

Serve with: grated cheddar cheese, sour cream, tortilla chips crushed

Preheat oven to 350 degrees F. I put foil down on a baking sheet to make clean up easy. Place chicken on baking sheet skin side up. Drizzle with olive oil, rub it in. Sprinkle with salt and pepper. Bake 35-50 minutes or until done. Once cooled, pull off the skin and shred the meat. Set aside.

Heat 2-3 Tablespoons of olive oil in large pot or dutch oven. Add the onions, celery and carrots. Cook over medium low heat for 10 minutes or until onions just begin to brown. Add garlic and cook for 30 seconds. Add the chicken stock (start with 2 qts, then when it cooks down some, add more stock). Add tomatoes, jalapenos, cumin, black beans, salt and pepper. Cut the tortillas in half and then cut then into 1/2 inch strips, add to the soup. They will dissolve in the soup giving it a wonderful taste and aroma!. Bring the soup to a boil, then lower the heat and simmer at least 25 minutes. About 20-25 minutes before you are going to serve this soup add the frozen corn. About 5 – 10 minutes later add the shredded chicken and season to taste. Serve the hot soup with grated cheddar, a dallop of sour cream and a handful of crushed tortilla chips. This makes a big pot of soup and is great frozen and reheated!

Also see http://almostdailypic.wordpress.com for my photo blog… Have a good day!