
Ultra Crispy Baked Potato Wedges from Cookie + Kate!

I found this recipe while searching for a couscous recipe that had cranberries and nuts in it, I had an idea what to use for dressing, but ran across this recipe on Epicurious – it used spices that I definitely would not have used, but am so glad that I did. This recipe is one that was apparently created at Whole Foods. I checked their site for the recipe, but it wasn’t there. I did find it on Epicurious. This is a great side dish/salad that goes well with pretty much everything! It can be served warm or cold. This is a quick and easy recipe that will put a smile on your face! I added fresh orange wedges to it, and that makes all the difference, it takes it from a really good recipe to a blow your mind recipe. Yep, just with a few oranges!
Note: This recipe calls for Israeli couscous. I always thought of couscous as the tiny grain like pasta, which I never cared for, but after reading about it on Cookthink.com I saw that it was entirely diffferent. It’s puffier, this is what it looks like (the other couscous looks a bit like sand)…
![Israeli CousCous [Cookthink.com]](https://artfoodhome.com/wp-content/uploads/2013/08/israelicouscous-cookthink-com.jpg)
Like couscous, so-called Israeli couscous are small, round, pasta-like granules made from semolina and wheat flour.
While the Israeli company Osem claims to have “invented” Israeli couscous in the 1950s, it is simply a marketing term for what was known previously as North African berkukes or Palestinian matfoul and popular in Jordan, Syria and Lebanon.
Unlike familiar small, yellow semolina-based North African couscous, Israeli couscous (which is sometimes called pearl couscous) is twice as big and is toasted rather than dried. This gives it a nutty flavor and a sturdy composition that gives it a chewy bite and makes it stand up to sauce.
Israeli couscous can be used in salads, soups or as a base for chicken or fish. It works well when prepared like a rice pilaf.
Here’s the recipe – Click to print this recipe from Epicurious
Salad:
2 cups Israeli couscous, uncooked
1 cup dried cranberries
1 cup toasted pecans, quartered
2 scallions, minced
Dressing:
3 tbsp canola oil (I used olive oil)
1.5 tbsp champagne vinegar (I used white wine vinegar)
1 orange, zest
1/2 orange, juiced
1/2 tsp turmeric
1/2 tsp dried thyme
1/2 tsp dried tarragon
Salt and pepper to taste
Bring a pot of salted water to a boil, and add the couscous. When it’s done (roughly 8-10 mins, or when it’s al dente), drain it but do not rinse. Set aside and let cool while you mince the scallions, toast and chop the pecans, and make the dressing.
In a small bowl, whisk together the canola oil, vinegar, orange zest and juice, spices and salt and pepper.
In a large bowl, combine the couscous, cranberries, pecans and scallions. Pour the well-whisked dressing over it and toss to combine.
Serve immediately, or chill in the fridge for a few hours to blend the flavors.

Set out ingredients…
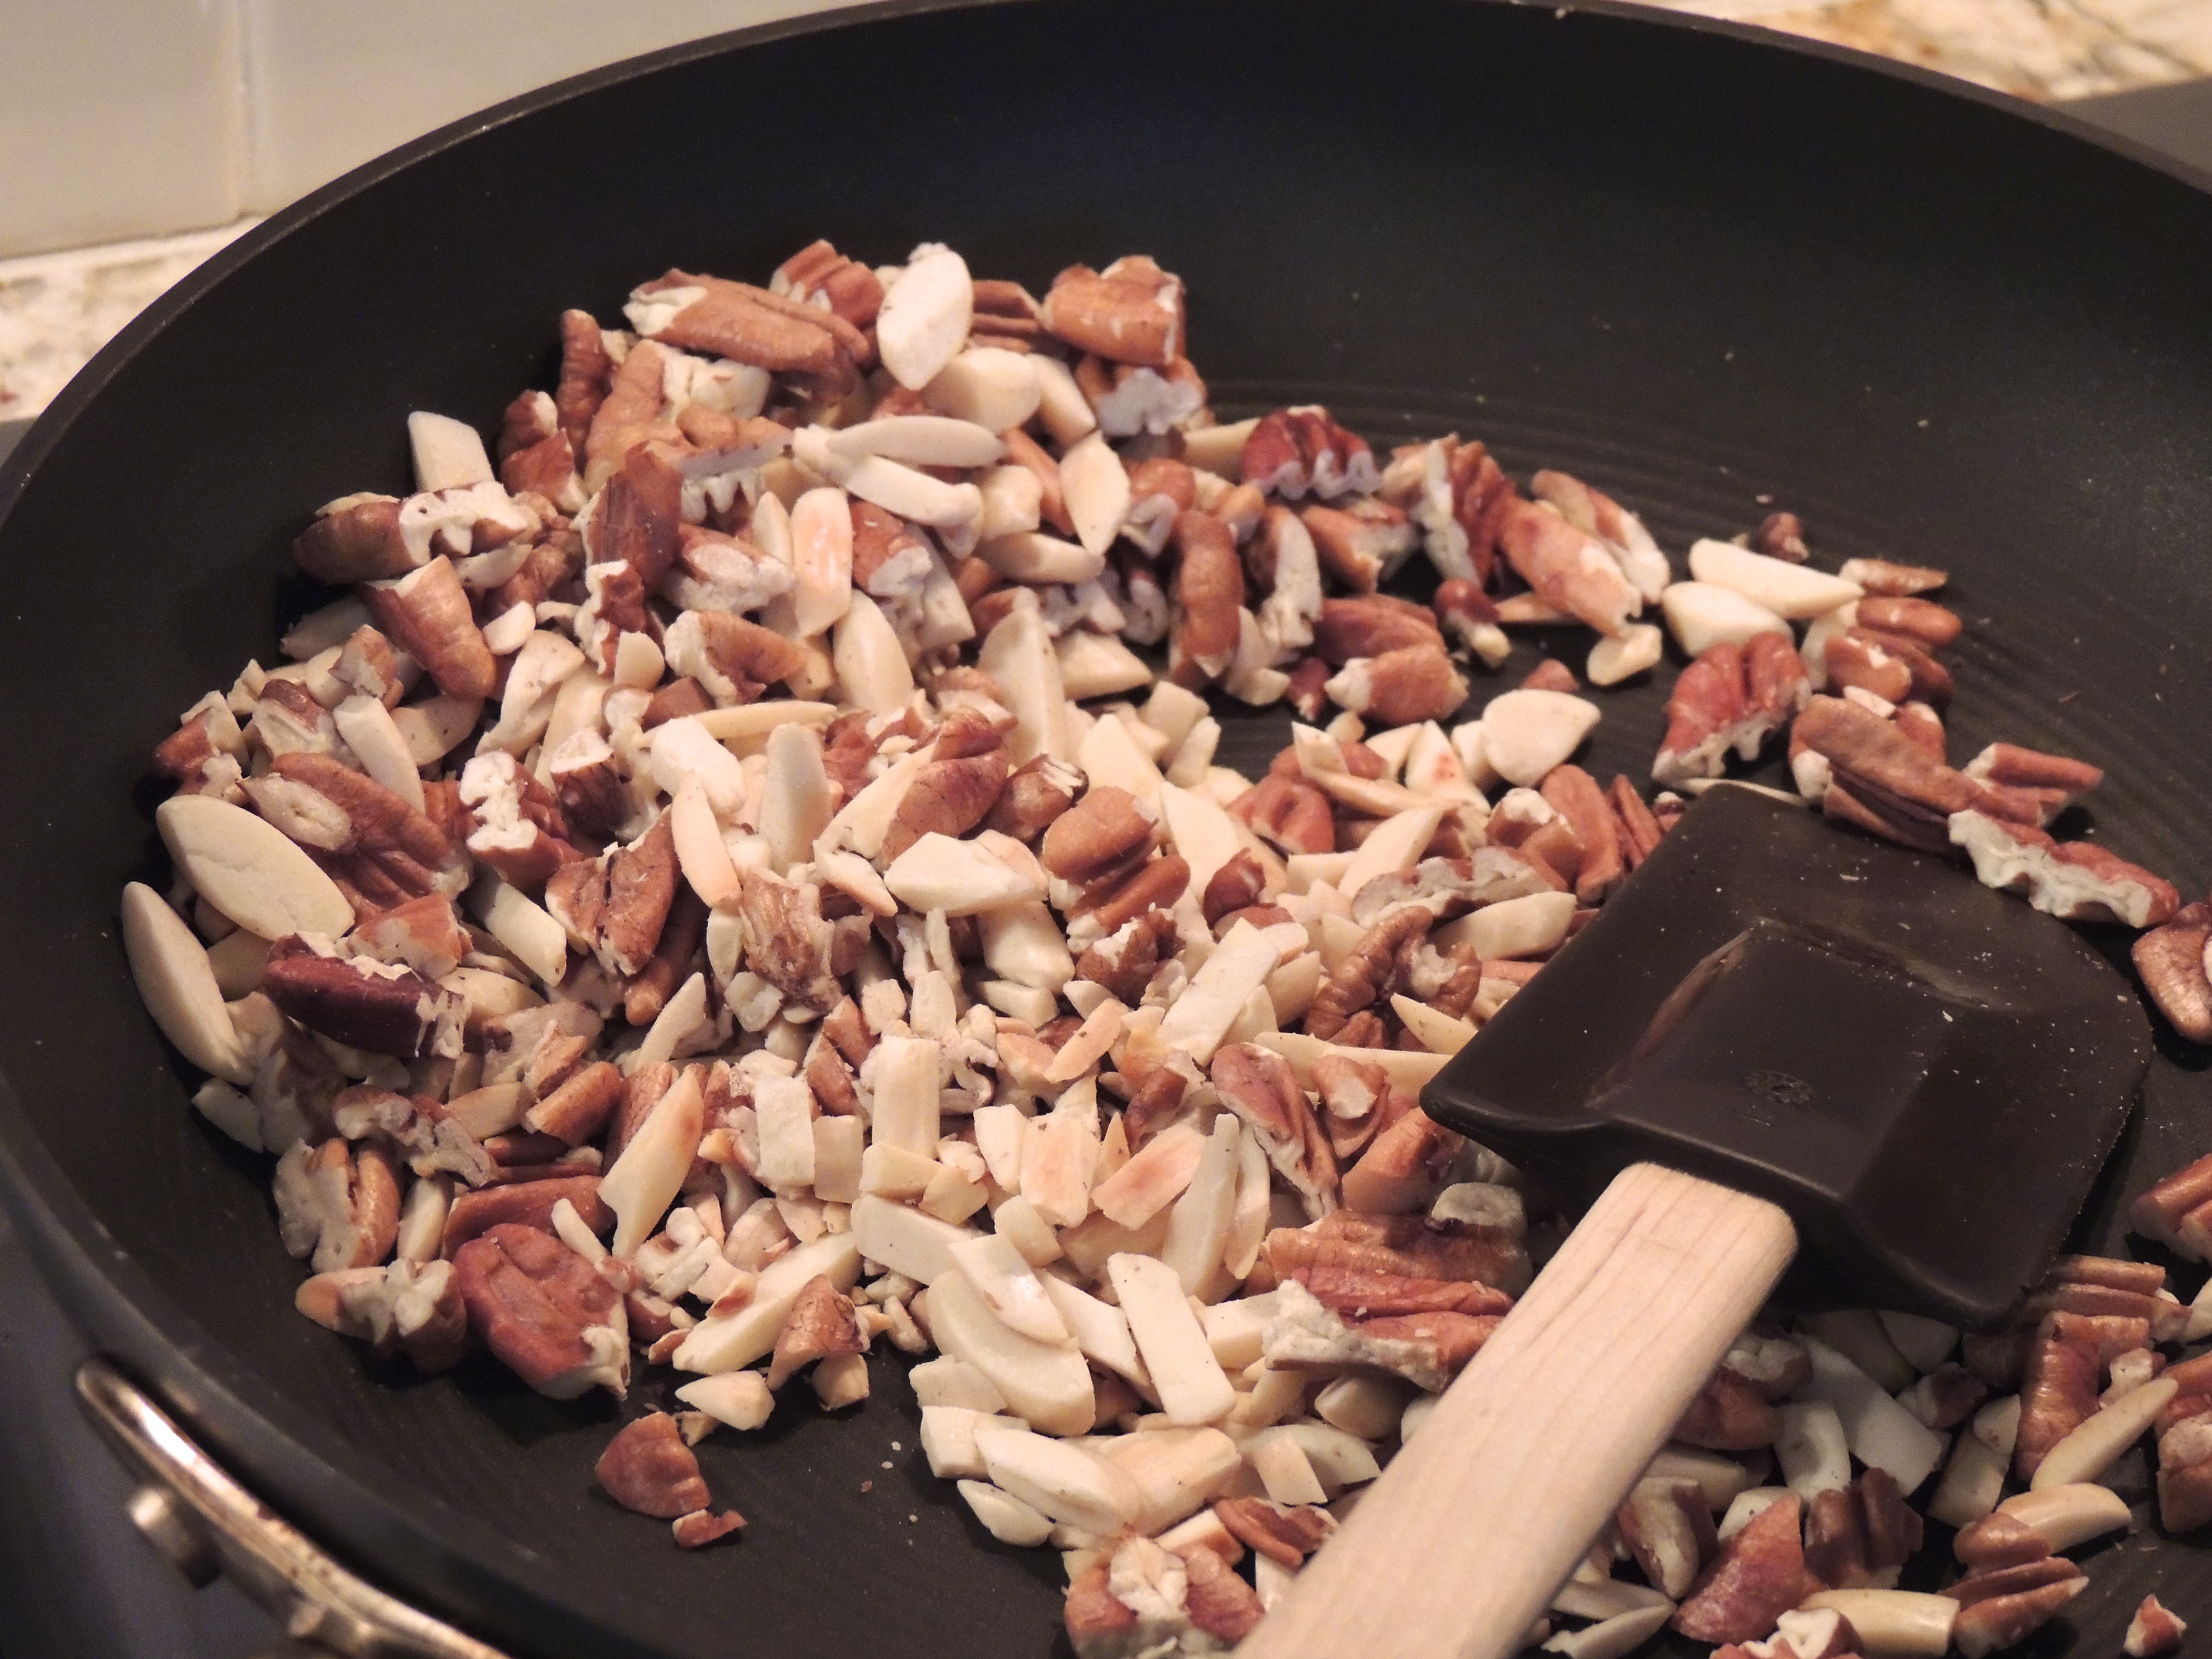
Toast nuts in a dry non stick pan just until they start to turn a light brown and you can begin to smell them; beware, this step can go from good to bad quickly, so get the pan off the stove once you start to smell them roasting.

Zest your orange (not the white part) – In a bowl mix the olive oil, vinegar, fresh squeezed orange juice, zest and spices…

Cut oranges into wedges or smaller pieces, however you like it… this will add a nice sweet burst of flavor- I don’t think you can have too many!

After you cook the couscous in boiling water, as you would pasta (I did mine 6 minutes and it was perfect), drain it and put it into a bowl. Then, chop your green onions…
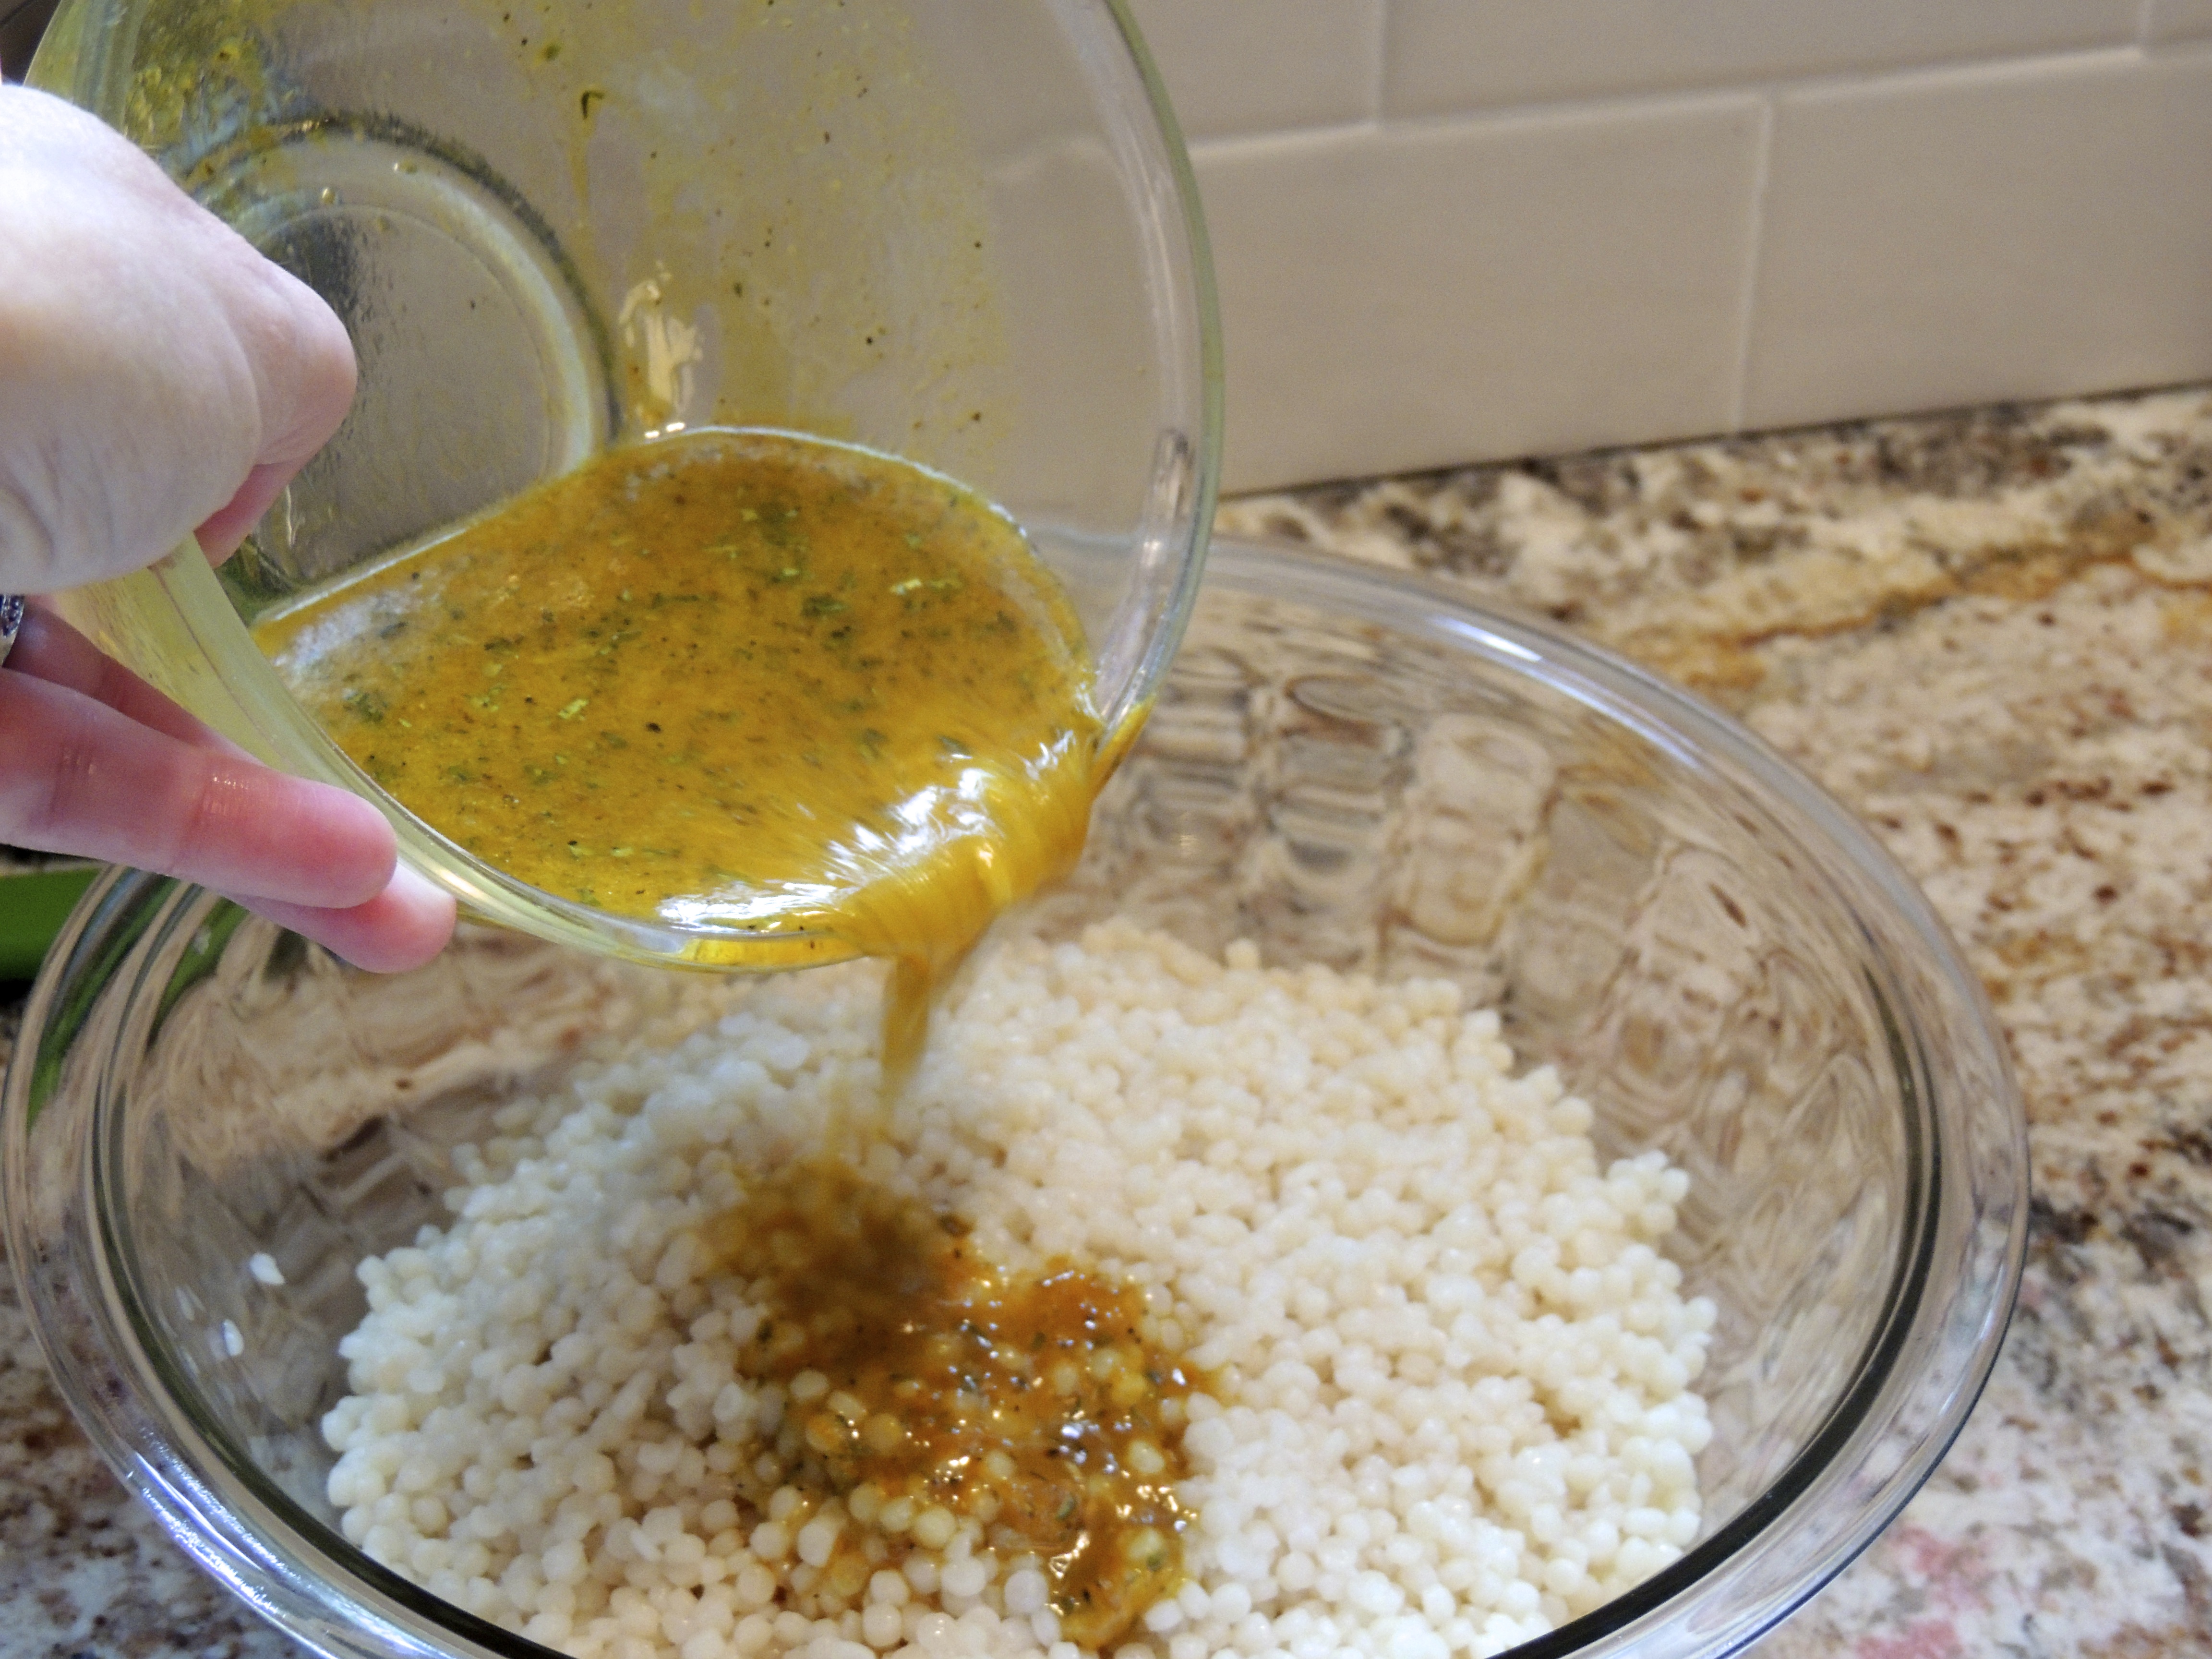
Pour the dressing over the cooked couscous – oooowie, smells good, doesn’t it?

Add the dried cranberries and orange segments…

Add the green onions that you chopped a few minutes ago…

Then add the toasted nuts…

Now you would think that I would put a serving in a pretty little dish and take a photo… but did I? Nope… I was hungry and I totally missed this step! It would have been pretty too! We had grilled chicken, couscous and sautéed spinach – close your eyes a picture it… on a pretty plate… smell the wonderful combination of orange, roasted nuts, mmmmm… you know you want it… now go get busy! ENJOY!
Catch you back here tomorrow!
My post from a year ago… Featured Artist… Camille Przewodek!
My post from two years ago… Hootie and the Blowfish Concert…

Years ago my mother-in-law made this bean salad as one of the side dishes for Thanksgiving… Cold bean salad… hmmm… thank you, but no thank you… I wasn’t a big bean fan, and definitely not cold beans. She urged me to try it… it’s good with turkey she said. Trusting her, I took a tiny taste. Bite of turkey, yummmmm, ok, here goes nothing… bite of bean salad… HOLY COW! This stuff is GOOD! Is that hilarious or what? We’ve had it every single Thanksgiving since, I know we’ve had this recipe at least 17 years. So trust me when I say, THIS IS GOOD… and it’s a great dish to make to take with you. You can make it ahead and it’s even better!
SCANDINAVIAN BEAN SALAD
1 can (16 oz.) small green peas, drained (I buy Le Sueur very young small sweet peas, I buy low sodium, but you don’t have to)
1 can (16 oz.) French style green beans, drained
I use a small bag of frozen shoepeg corn (sometimes I use 1/2 bag, original recipe calls for 1 small can white shoepeg corn, drained)
1 1/2 – 2 cups diced celery
1 onion, chopped (this time I used red onion, which is oh so pretty!)
DRESSING
(2024 update: 1/4 cup sugar, 1/2 cup red wine vinegar, 1/3 cup olive oil)
1/2 – 3/4 cup sugar (depending on how sweet you like things)
1 cup red wine vinegar
1/3 to 1/2 cup olive oil (or canola oil)
DIRECTIONS
Mix together beans, peas, corn, celery and onion. If you haven’t already drained the veggies, drain them now.
Mix up the dressing and pour over the bean/corn/pea mixture. Let stand 2 hours or overnight in refrigerator.
Serve by scooping out with a SLOTTED spoon. This keeps indefinitely (kinda like those toaster pastries, hee hee, but this is better for you!).
You. Won’t. Believe. How. Good. This. Is!
Wow, tomorrow is the big day… take time to think about all the things you have to be Thankful for…
I am thankful for you… reading this…
Happy Thanksgiving Eve!
Catch you back here tomorrow!

Owieeeee, isn’t this beautiful! So much more appetizing than the stuff that comes out of the can, don’t you think? Well, this is going to be one of my small contributions towards Thanksgiving dinner! Thank you to Martha Stewart for the photo and the recipe (Everyday Food, November 2008). I am probably most excited about this recipe! I guess I never thought to MAKE cranberry sauce when you can just open a can. But it’s quick, easy and it’s GOT to taste much better! So I’ll be making it along with you this year! Hope you enjoy. Can you believe Thanksgiving is Thursday??! Wow… time flies!
Yield Makes 2 cups
UPDATE!! (11/21/12): I just made this cranberry sauce and it is the best I have ever tasted in my life! It couldn’t be easier! I will never buy canned again, especially after I looked at the ingredients (cranberries, high fructose corn syrup, corn syrup, water… ugh!). I was surprised at how easy it came together. After it cools completely refrigerate until you serve it! Simply divine!
Catch you back here tomorrow!

Ahhh, Ina’s potato salad. Simply the best. I’m not a potato-salad-kind-of-gal… prefer my macaroni salad any day. But one day I was watching the Food Network show with the Barefoot Contessa herself (AKA Ina Garten) and she made potato salad. It intrigued me. I loved the way she cooked the potatoes for a short time and then covered them with a clean kitchen towel to steam. Brilliant! Nothing like mushy potato salad, and that does the trick, no more mush! Hey, maybe that’s why I never cared for it before? This is tasty, makes a good bit and is EASY. My husband needed to take something into the office, so I tried this recipe and he didn’t come home with any (not that THAT is a true indication, long story short, at an office I had worked at I burned a Pop Tart (yes, you know, those little healthy tarts filled with all things good… ha… I think I heard they last 13 years on the shelf… I buy them in case of a hurricane, hee), I didn’t just burn the edges the entire thing was solid dark black. I was about to toss it when someone said not to throw it away, to put it on a plate on the table in the breakroom and one of the programmers would eat it. I came back an hour later and that puppy was GONE and it wasn’t in the trash!!), but I’m sure they ate this potato salad because it was DELICIOUS! Try it for yourself!
INA GARTEN’S NEW POTATO SALAD
Place the potatoes and 2 tablespoons of salt in a large pot of water. Bring the water to a boil, then lower the heat and simmer for 10 to 15 minutes, until the potatoes are barely tender when pierced with a knife. Drain the potatoes in a colander, then place the colander with the potatoes over the empty pot and cover with a clean, dry kitchen towel. Allow the potatoes to steam for 15 to 20 minutes. Meanwhile, in a small bowl, whisk together the mayonnaise, buttermilk, Dijon mustard, whole-grain mustard, dill, 1 teaspoon of salt, and 1 teaspoon of pepper. Set aside. When the potatoes are cool enough to handle, cut them into quarters or halves, depending on their size. Place the cut potatoes in a large bowl. While the potatoes are still warm, pour enough dressing over them to moisten. (As the salad sits, you may need to add more dressing.) Add the celery and red onion, 2 teaspoons of salt and 1 teaspoon of pepper. Toss well, cover, and refrigerate for a few hours to allow the flavors to blend. Serve cold or at room temperature.
Print Recipe
Catch you back here tomorrow! Check out my photo blog at http://almostdailypic.wordpress.com
Image and recipe via www.foodnetwork.com

I saw some pretty little grape tomatoes in the fridge and a pot of basil that was begging to be used. I whipped my mom up a small super simple tomato salad… It took no time and it was delicious to boot!
Tomatoes are so good for you because they contain lycopene, an antioxidant. To get the most nutrition when you eat a tomato pair it with a little olive oil. The good lycopene found in tomatoes is fat soluble, so if you add a little good fat, like olive oil it helps your body absorb lycopene more easily. Here’s the recipe… no need to even write it down… cut up the tomato into bite sized pieces (whatever kind of tomato you like, the darker the tomato the more antioxidants), drizzle with a little olive oil, sprinkle a little salt and pepper then top with fresh basil. If you happen to have a little fresh mozarella (MUST be FRESH, that’s my opinion) chop up a bit and toss it in, that’s delightful! Quick and easy!Added tip… cooked tomatoes are more concentrated, therefore have more lycopene… Enjoy!

This has been a favorite in our house for many years now, it’s quick to make and takes full advantage of all mother nature has to offer… you can make it your own by tossing in anything else that sounds tasty. The recipe calls for white balsamic vinegar, I used regular and it was fine. This salad side dish goes well with anything, and is best served at room temperature or warm. Often times I’ll make it early in the day so the house stays cool, then just take it out of the fridge for a little while, that works! This is a recipe from Cooking Light magazine… tasty!
Here’s the link to where it’s easy to print, otherwise, below is the recipe… ENJOY! ROASTED CORN SALAD (Cooking Light) YIELD: 4 servings (serving size: 3/4 cup)
Ingredients
Preparation
Cooking Light
JULY 1998
Catch you back here tomorrow!

This recipe is courtesy of Paula Deen’s son’s, (AKA “The Deen brothers”). It was featured on her Food Network show Paula’s Best Dish’s, the All in the Family episode. I didn’t see it, my mom told me she tried this recipe and got rave reviews. Everyone wanted the recipe. THAT’S the kind of thing I like to take somewhere. Once you throw it together, put it in a pretty dish and off you go! (OK, some of you may have noticed, I didn’t put it in a pretty dish, but I was taking this to a neighborhood get together on a very warm evening, so I put it in a stainless bowl and then placed the stainless bowl inside a larger stainless bowl filled with ice, I topped it with plastic wrap and a thick towel to keep the heat out. So much for my pretty dish, ugh. Might want to take printed recipes with you or a link to the online version (click HERE , easy to print), otherwise, here you go…
English Pea Salad
Ingredients
Directions
In a large skillet, cook the bacon over medium heat until crisp. Transfer to a paper towel-lined plate to drain. Let cool.
In a medium serving bowl, combine the bacon, peas, cheese, and eggs. Stir in the mayonnaise, lemon juice, and salt and pepper, to taste. Serve immediately or refrigerate until ready to serve.
Catch you back here tomorrow!

