I’m sharing with you a great recipe from Cooking Light (link now takes you to Eating Well website)… This is a relatively quick and easy meal. Each recipe makes 2 servings and believe me, the servings are generous. I pretty much followed the recipe, except I like to use grape tomatoes instead of regular tomatoes… If you have dinner for four make two packets then slide it into a pretty dish. Gorgeous, tasty and without the guilt… then you can indulge in dessert! I hope you enjoy this as much as we do! Catch you back here tomorrow!
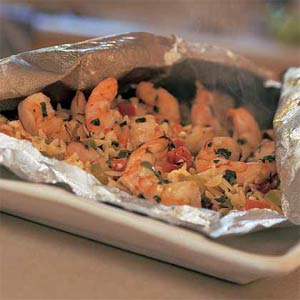
Basil Shrimp with Feta and Orzo
Ingredients
- 1 regular-size foil oven bag
- Cooking spray
- 1/2 cup uncooked orzo (rice-shaped pasta)
- 2 teaspoons olive oil, divided
- 1 cup diced tomato (I used grape tomatoes)
- 3/4 cup sliced green onions
- 1/2 cup (2 ounces) crumbled feta cheese
- 1/2 teaspoon grated lemon rind
- 1 tablespoon fresh lemon juice
- 1/4 teaspoon salt
- 1/4 teaspoon black pepper
- 3/4 pound large shrimp, peeled and deveined
- 1/4 cup chopped fresh basil
Preparation
- Preheat oven to 450°.
- Coat inside of oven bag with cooking spray. Place the bag on a large shallow baking pan.
- Cook the pasta in boiling water 5 minutes, omitting salt and fat; drain. Place the pasta in a large bowl. Stir in 1 teaspoon oil and next 7 ingredients (1 teaspoon oil through pepper). Place the orzo mixture in prepared oven bag. Combine shrimp and basil. Arrange shrimp mixture on orzo mixture. Fold edge of bag over to seal. Bake at 450° for 25 minutes or until the shrimp are done. Cut open bag with a sharp knife, and peel back the foil. Drizzle with 1 teaspoon oil.
Yield: 2 Servings
Recipe via Cooking Light/Eating Well magazines.
Links updated 1/26/25