Are you looking for a quick appetizer? An easy to throw together, yet super special concoction of all things good? Well, I was searching for the same thing a while back, and low and behold, Pioneer Woman (a wonderful blog, I highly recommend it!) posted this recipe… Don’t tell anyone, but once in a while we have this for dinner ;) it’s beans… pure health food I’m telling you! I don’t add any salt because there is salt on the chips (and next time we’re buying the blue chips with no salt)… Here goes… If you haven’t heard of Pioneer Woman (whaaat?) Ree Drummond, she has a cooking show on Food Network, she’s got books, you name it… pure entertainment at its finest!
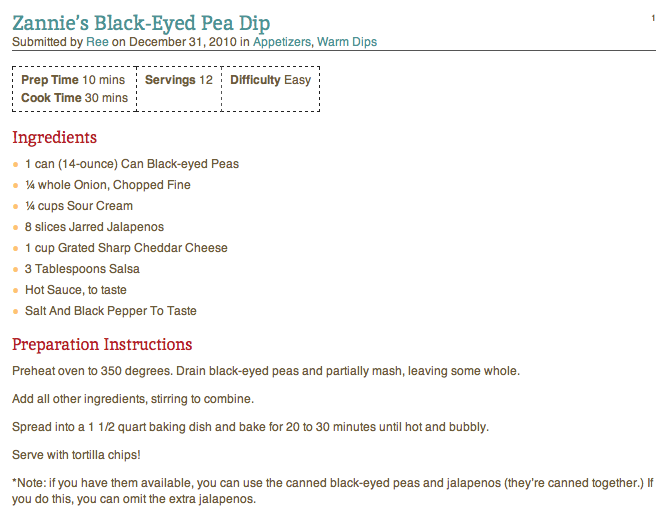
Drain and partially mash the black-eyed peas… You don’t have to mash them to death, some chunks are good. Texture. Is. Good!
Add in everything else… the salsa, sour cream, onion, and jalepeno’s!
Don’t forget the cheese! Add it to everything else and stir it around.
Then spread it into a baking dish (I use a ceramic tart pan), and bake at 350 degrees F for 20-30 minutes or until its nice and hot and bubbly.
Serve with tortilla chips!
AND… if you’re in the mood for a good book that will make you laugh, her book “Black Heels to Tractor Wheels: A Love Story” is wildly entertaining… her real life story about how she met her husband, Marlborough Man… hee hee…
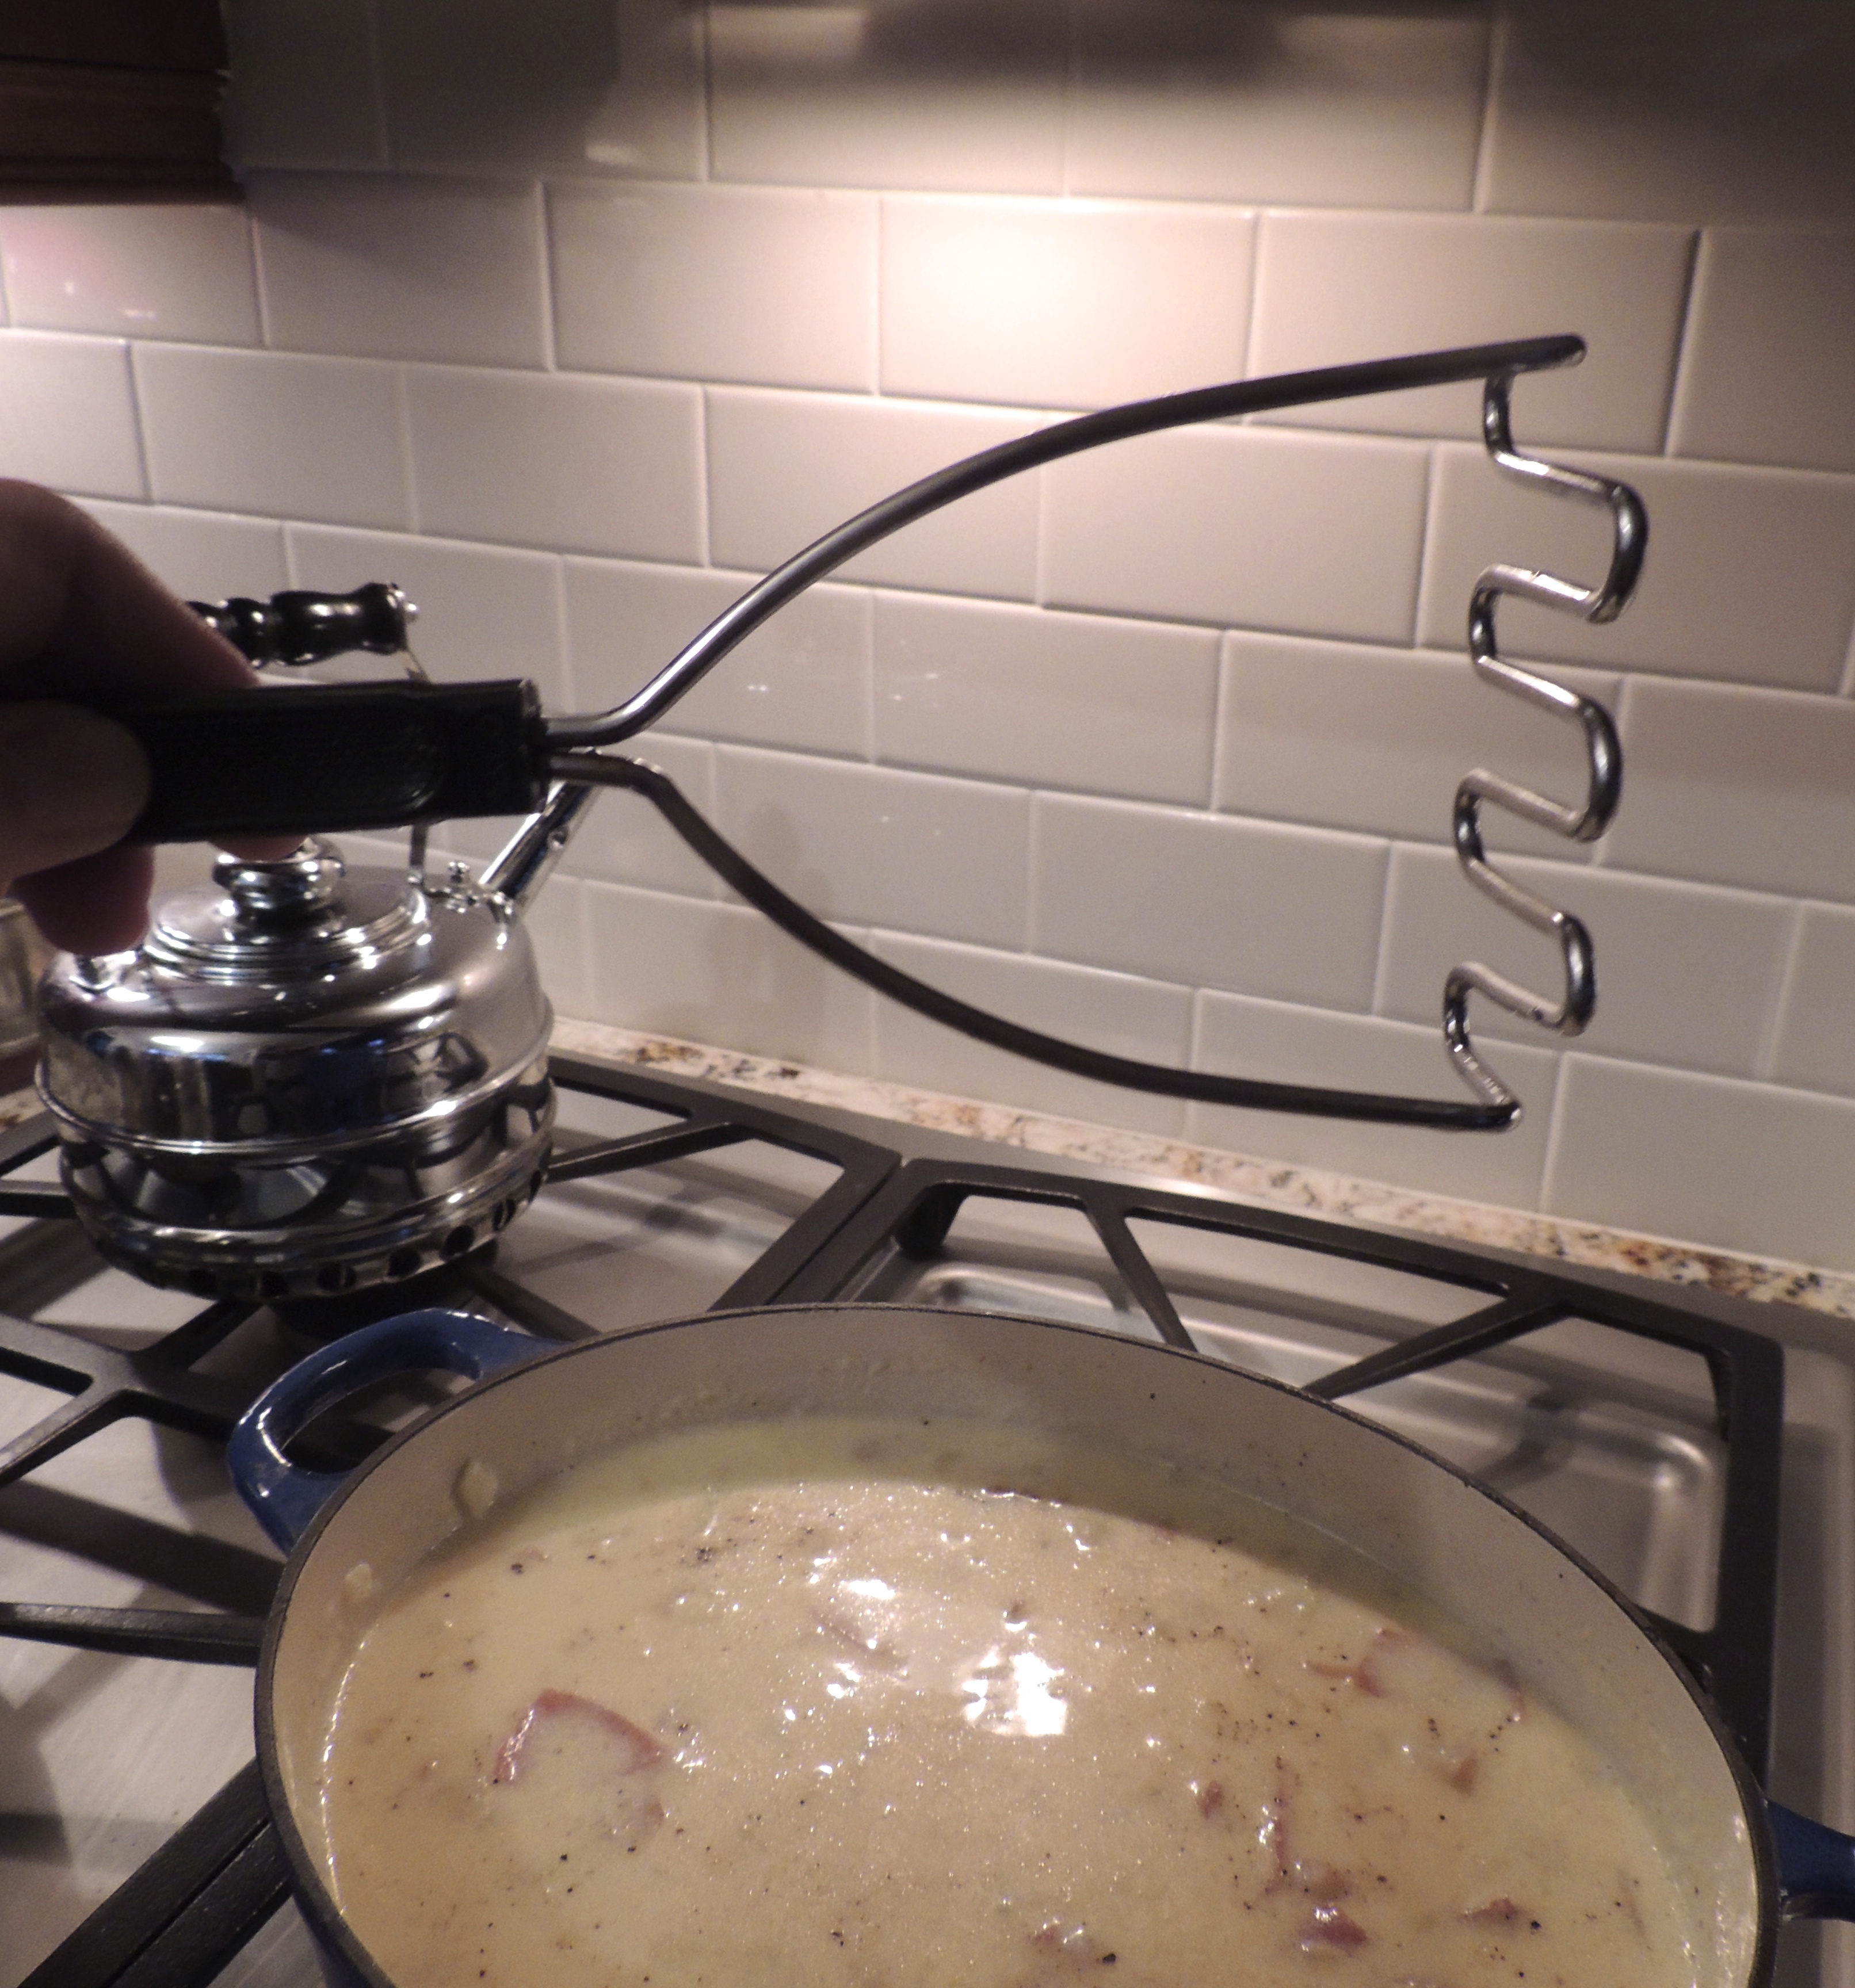
Nothing can heat your innards like a good bowl of soup. This is an easy one, and oh so delicious. I double the recipe so we have leftovers. This soup will warm your soul (I’m not being dramatic, really)!
Cheesy Potato Soup – recipe by Cooking Light magazine (myrecipes.com) – Click HERE to print.
1 tablespoon butter
1 cup chopped onion
2 1/2 tablespoons all-purpose flour
3 cups chopped red potato (about 1 pound)
1 1/4 cups 1% low-fat milk
3/4 cup fat-free, lower-sodium chicken broth
1/2 cup water
1/2 cup (2 ounces) shredded reduced-fat sharp cheddar cheese
1/8 teaspoon ground red pepper
2 tablespoons chopped green onions
Preparation
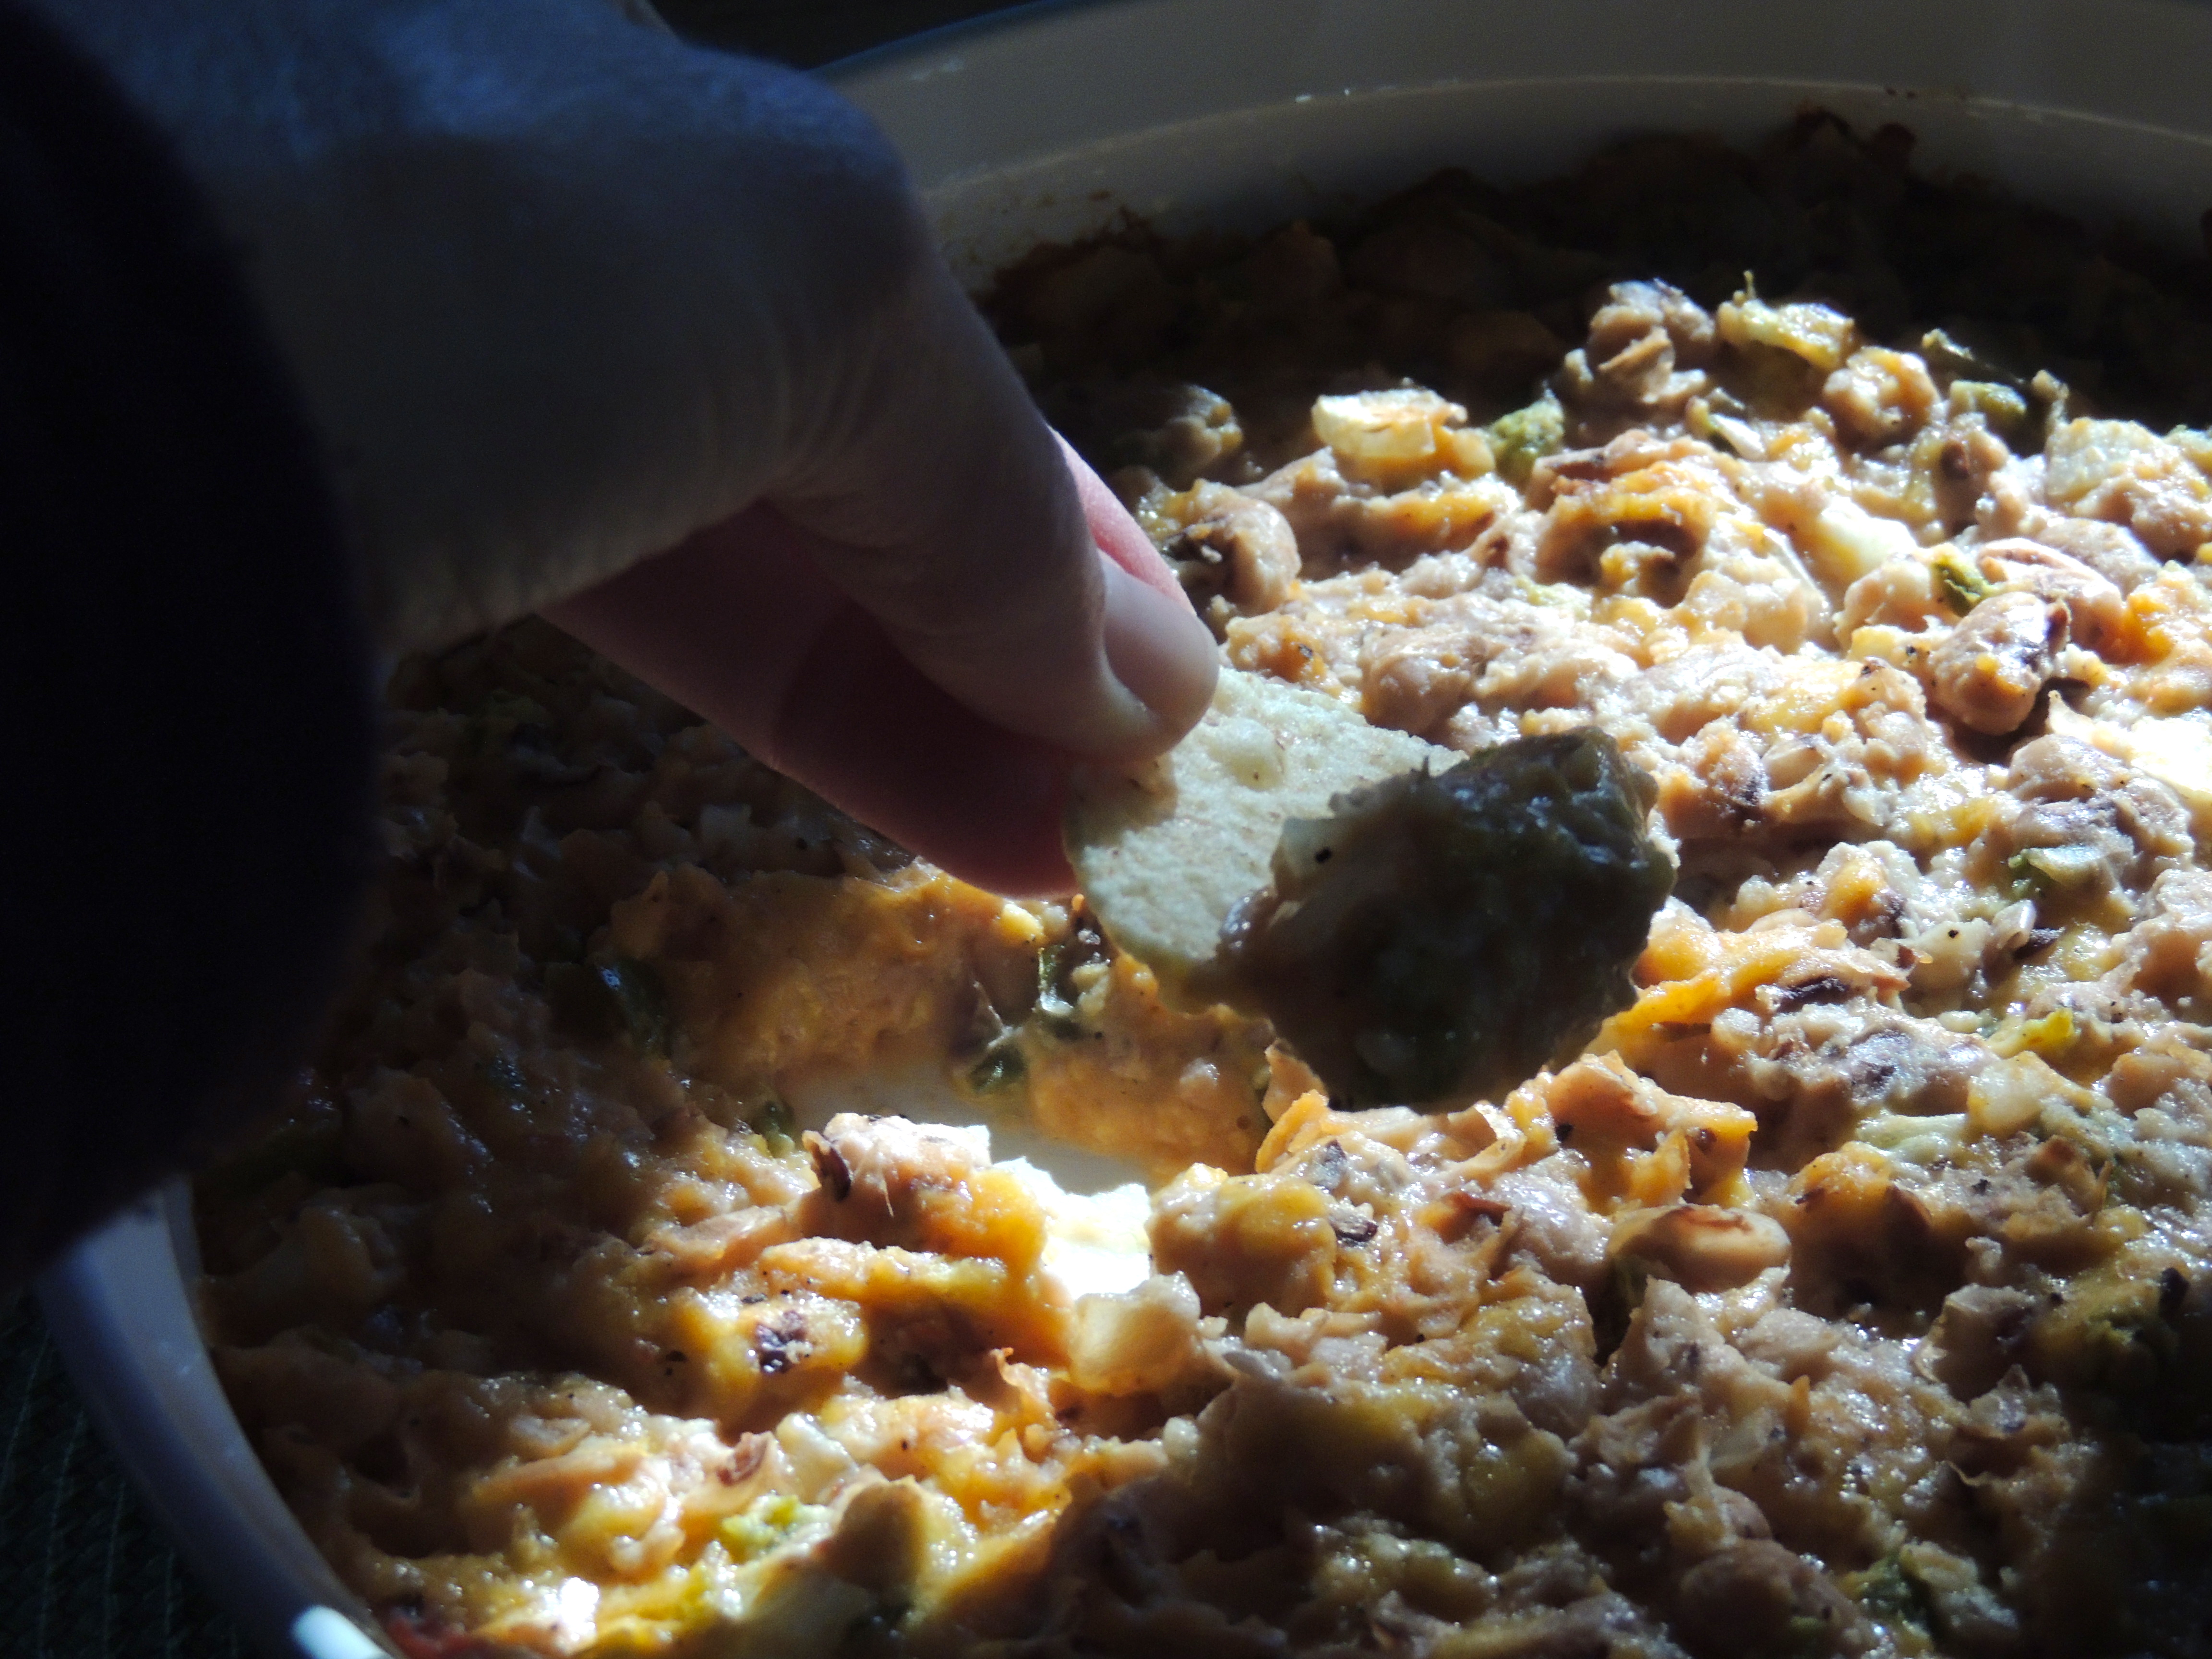
Melt butter in a medium saucepan over medium-high heat. Add onion to pan; sauté 5 minutes or until onion is tender.
Sprinkle with flour; cook 1 minute, stirring onion mixture constantly.
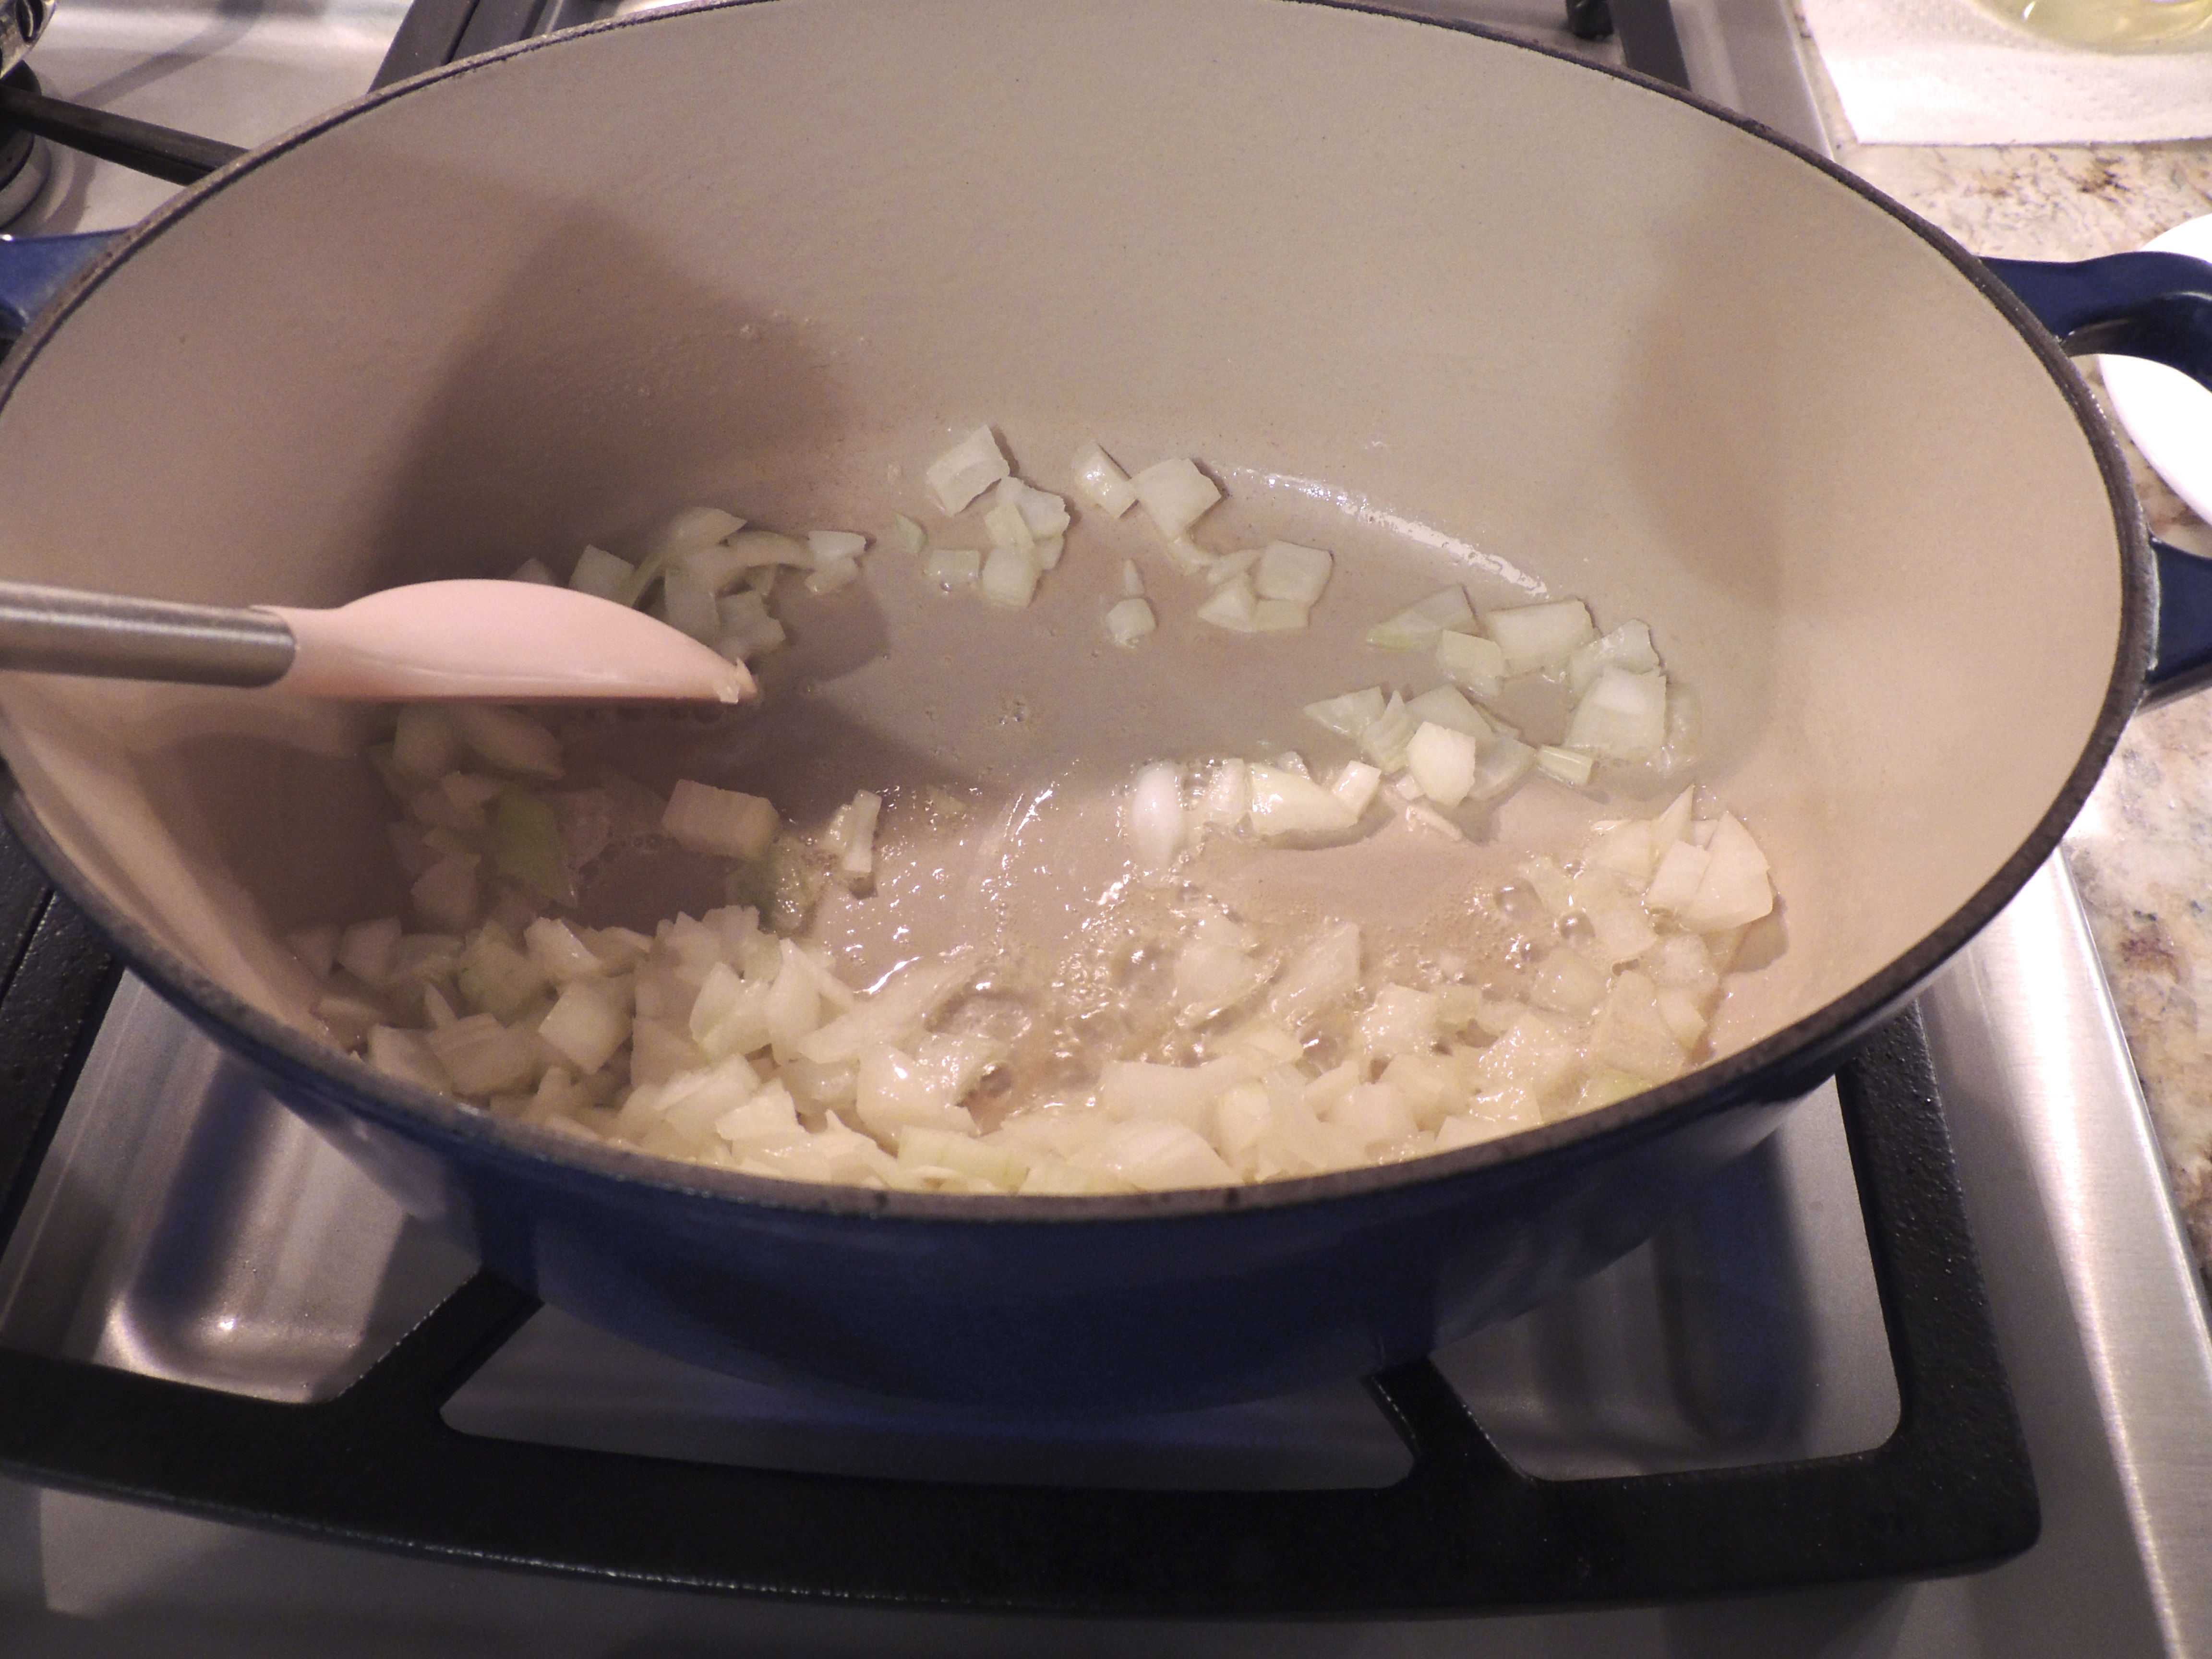
Add potato, milk, broth, and 1/2 cup water to pan; bring to a boil.
Cover, reduce heat, and simmer 10 minutes.
Add 1/2 cup reduced-fat sharp cheddar cheese and ground red pepper (IMPORTANT NOTE: remove from heat as soon as it melts so that it doesn’t curdle); cook 2 minutes or until cheese melts, stirring frequently. Top each serving evenly with 1 1/2 teaspoons chopped green onions.
Note… my secret… I use a potato masher and squish the potatoes a bit… I’m not mashing them per se but breaking down the chunks a bit so they’re smaller… this is tasty soup!
The important note above… removing the pan from the heat as soon as the cheese starts melting. I didn’t see this note at the top of the recipe and didn’t do it. It curdled… tasted great but didn’t look as good as it could have. Next time I think I will just opt to add it to each individual bowl as you can see in the top photo I over sprinkled… For as good as this soup is it’s quite hard to believe that it was this quick and easy! Thanks to Cooking Light for yet another great recipe!
There is nothing like a good homemade peanut butter cookie! I tell myself they’re healthy (yeah, right) – full of protein, ha. Well, not so bad if you only make the once in a great while! This recipe makes a lot, so share with your neighbors! I shared some and froze some so we weren’t eating them all! Try to control yourself with the cookie dough…. good luck!
With a mixer, beat together the butter, sugar and brown sugar…
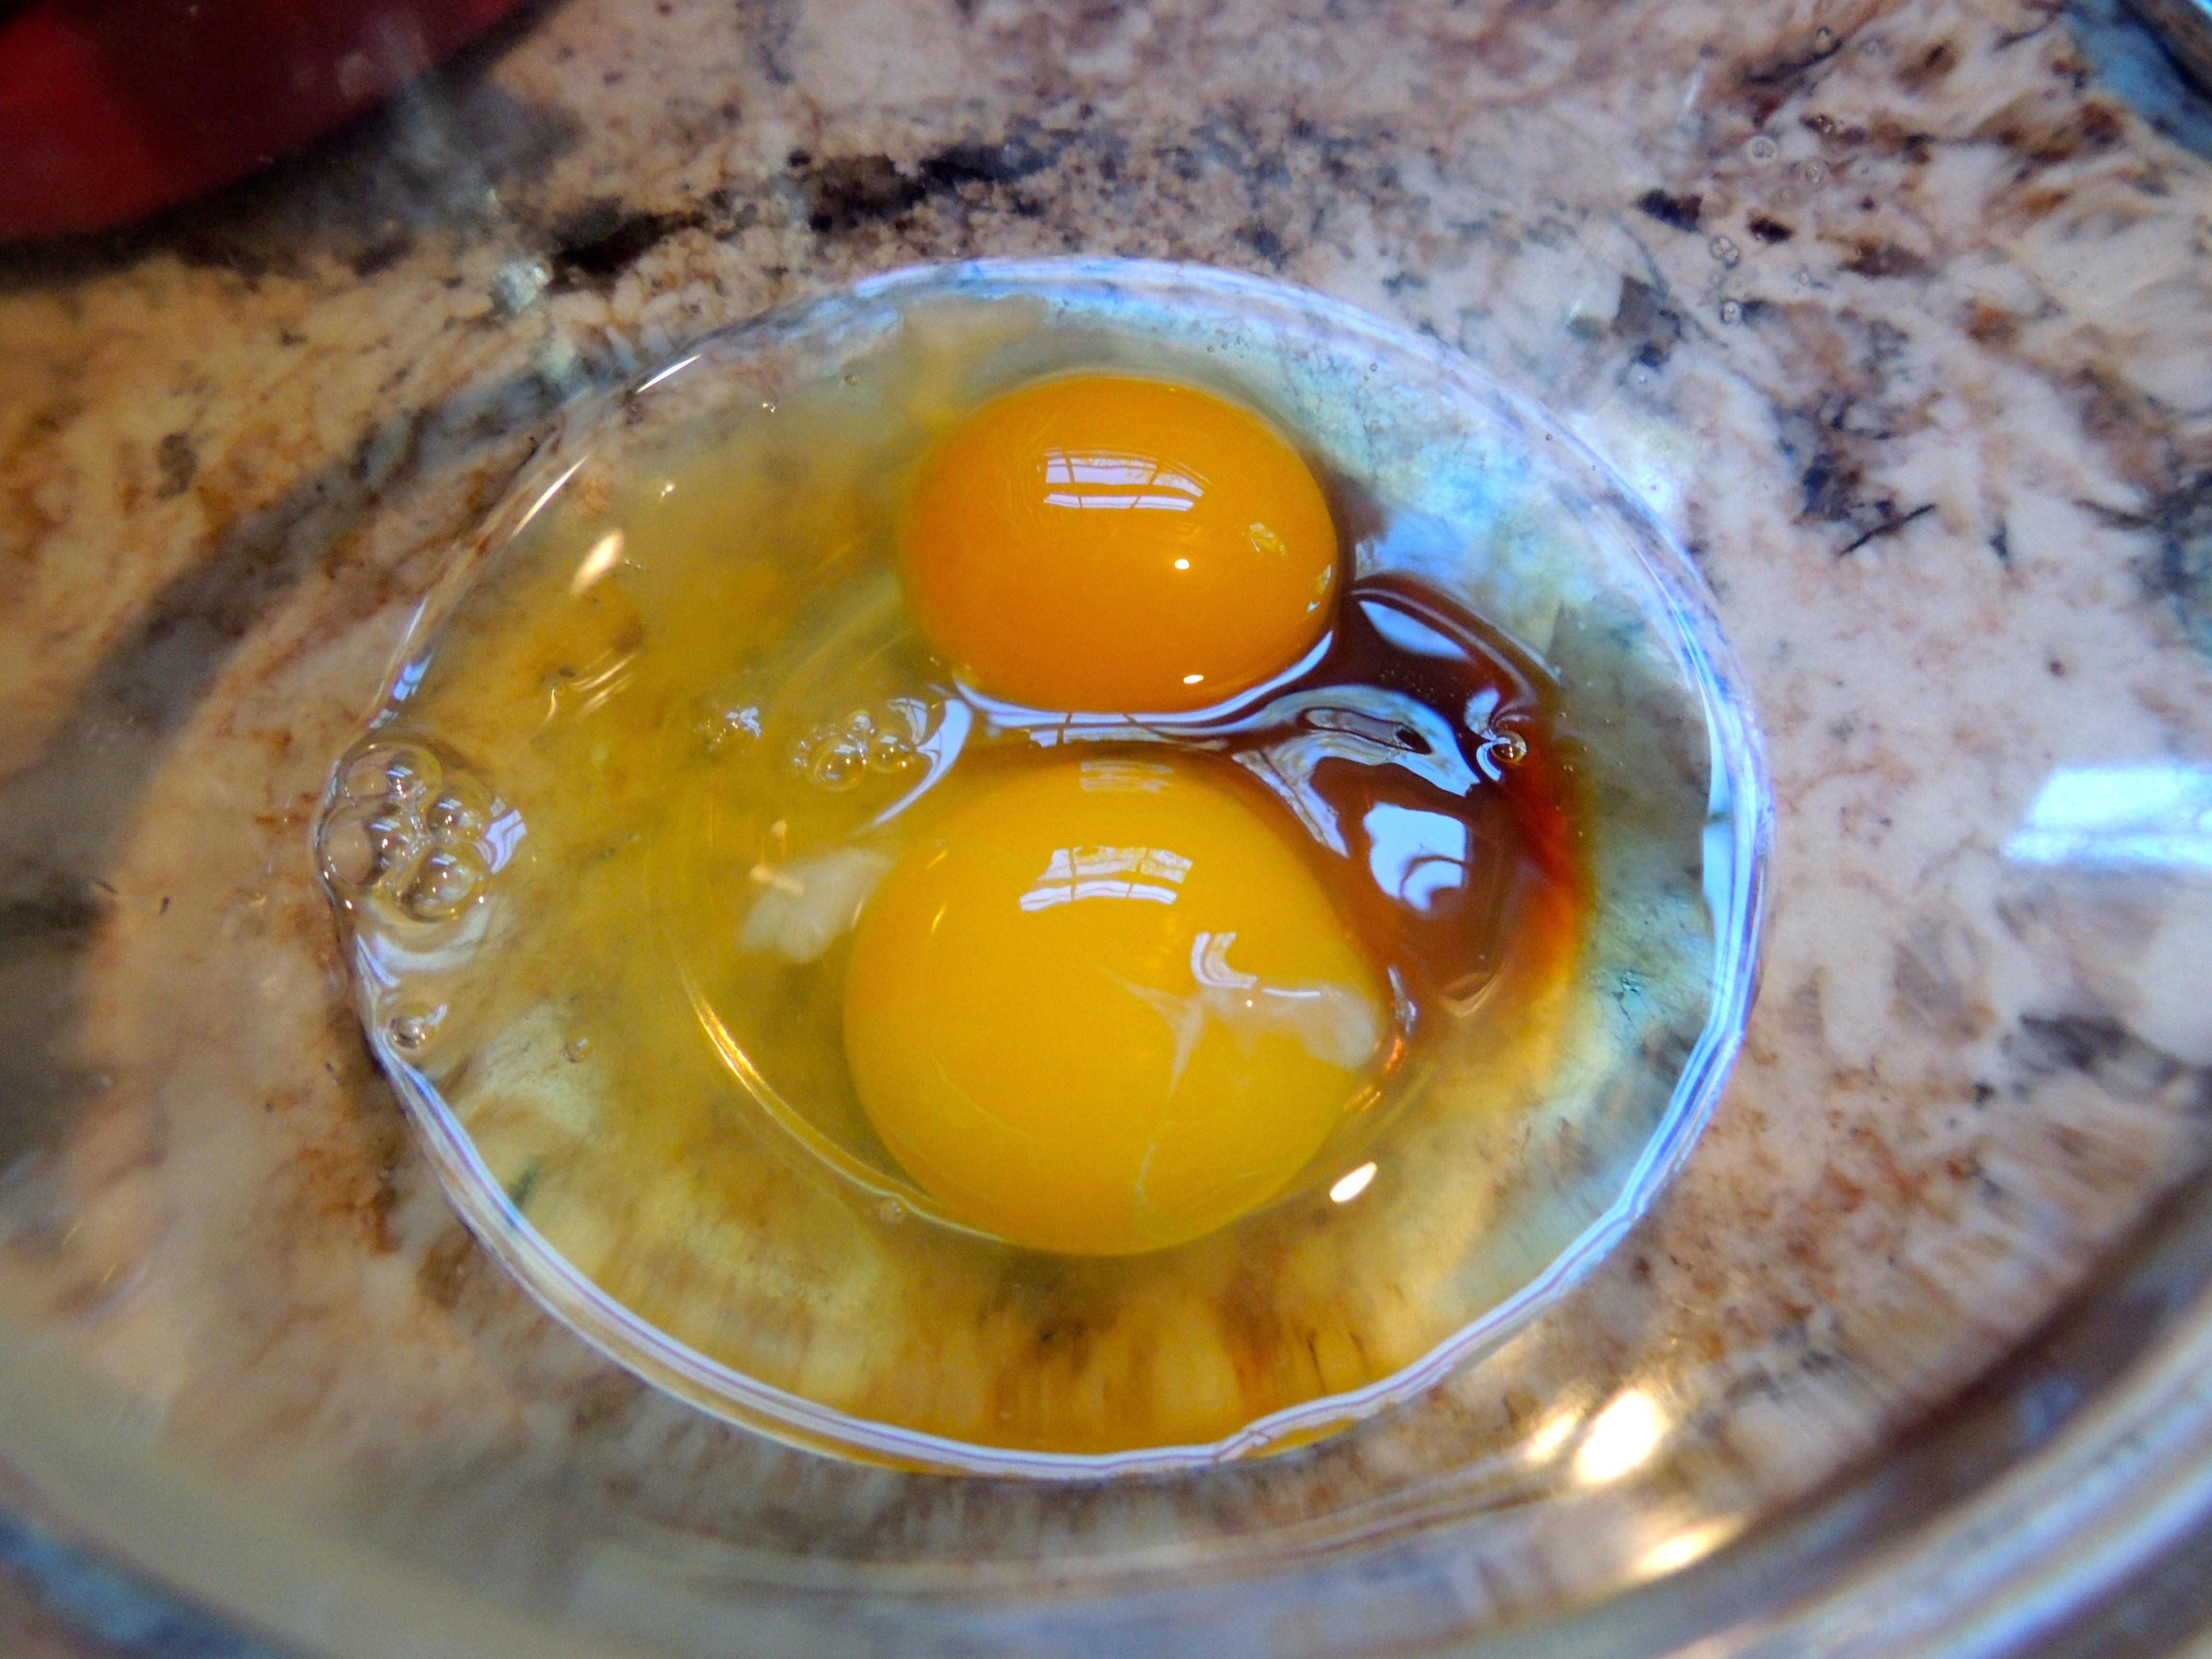
Next… eggs and vanilla!
Add eggs and vanilla… mix just to get the ingredients blended together nicely…
Ooooh, lookin’ good!
Oooh, yeah, this is what you want to see!
Dry Ingredients…
I put dry ingredients (flour, baking soda, salt) in a separate bowl, then give it a stir to mix it around, and then add to the wet ingredients…
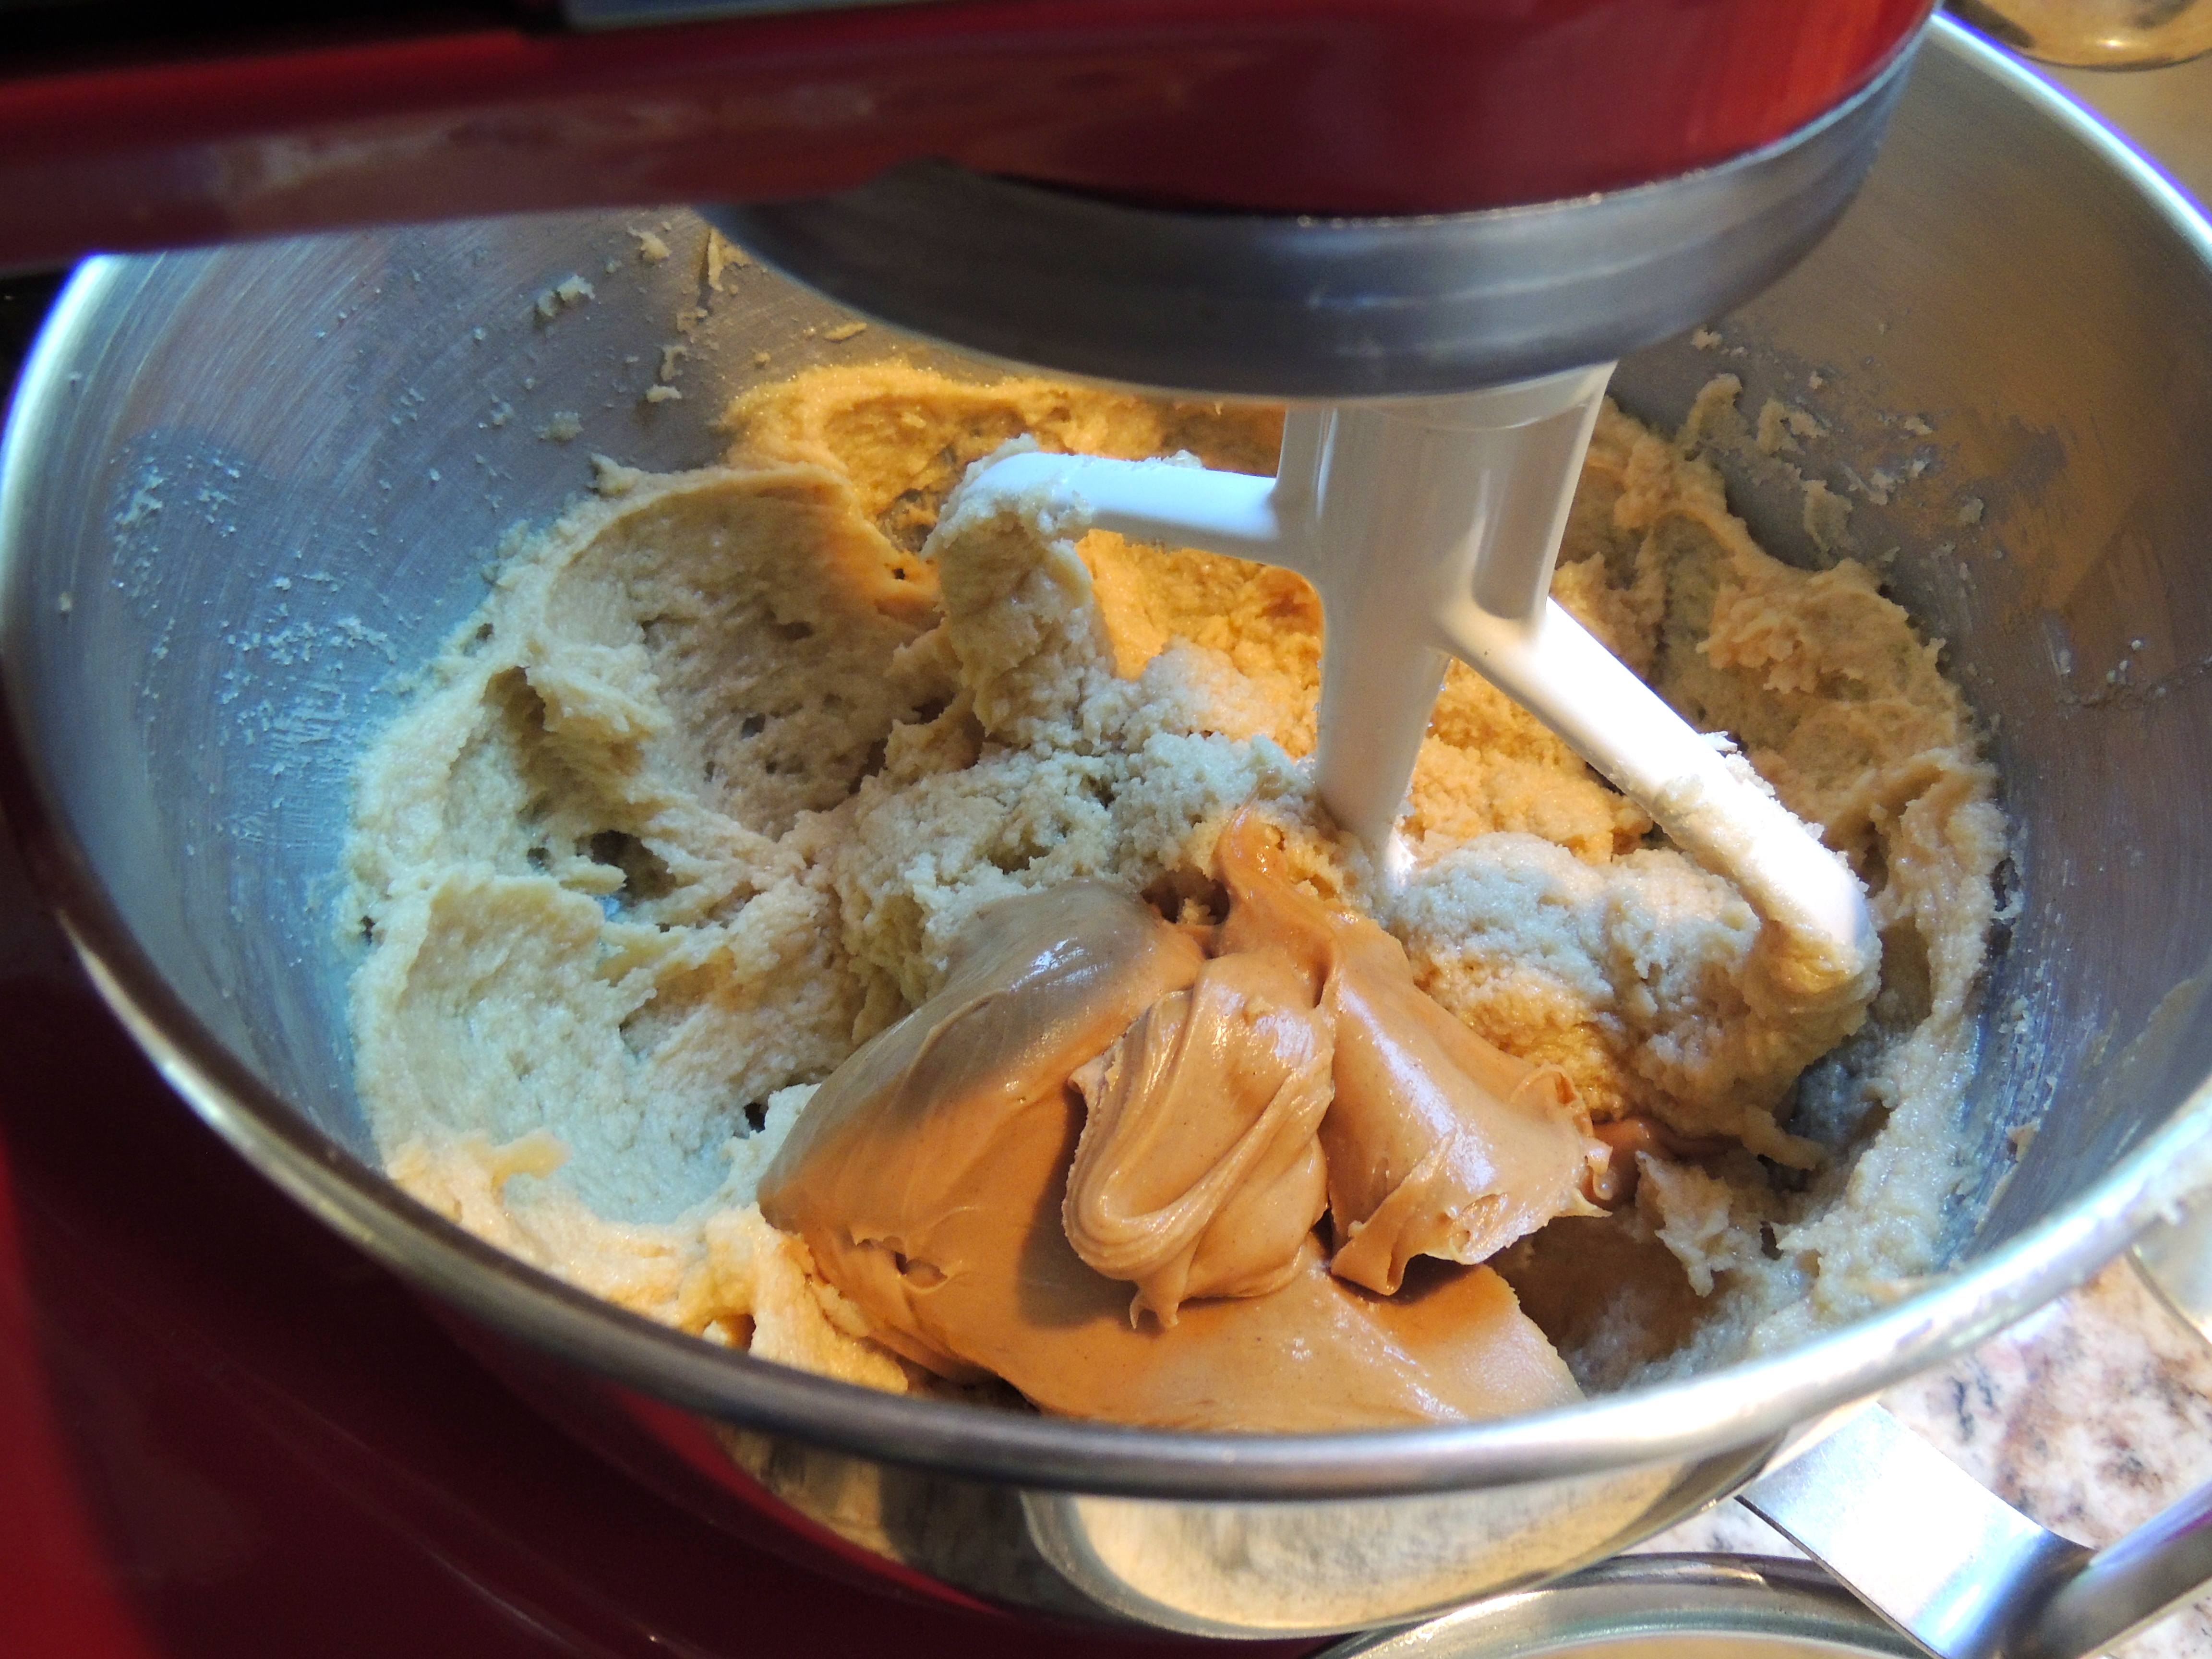
Add the peanut butter!
Next… add the magic touch… the ingredient that makes peanut butter cookies, well… peanut butter cookies! Add the peanut butter, and mix to combine.
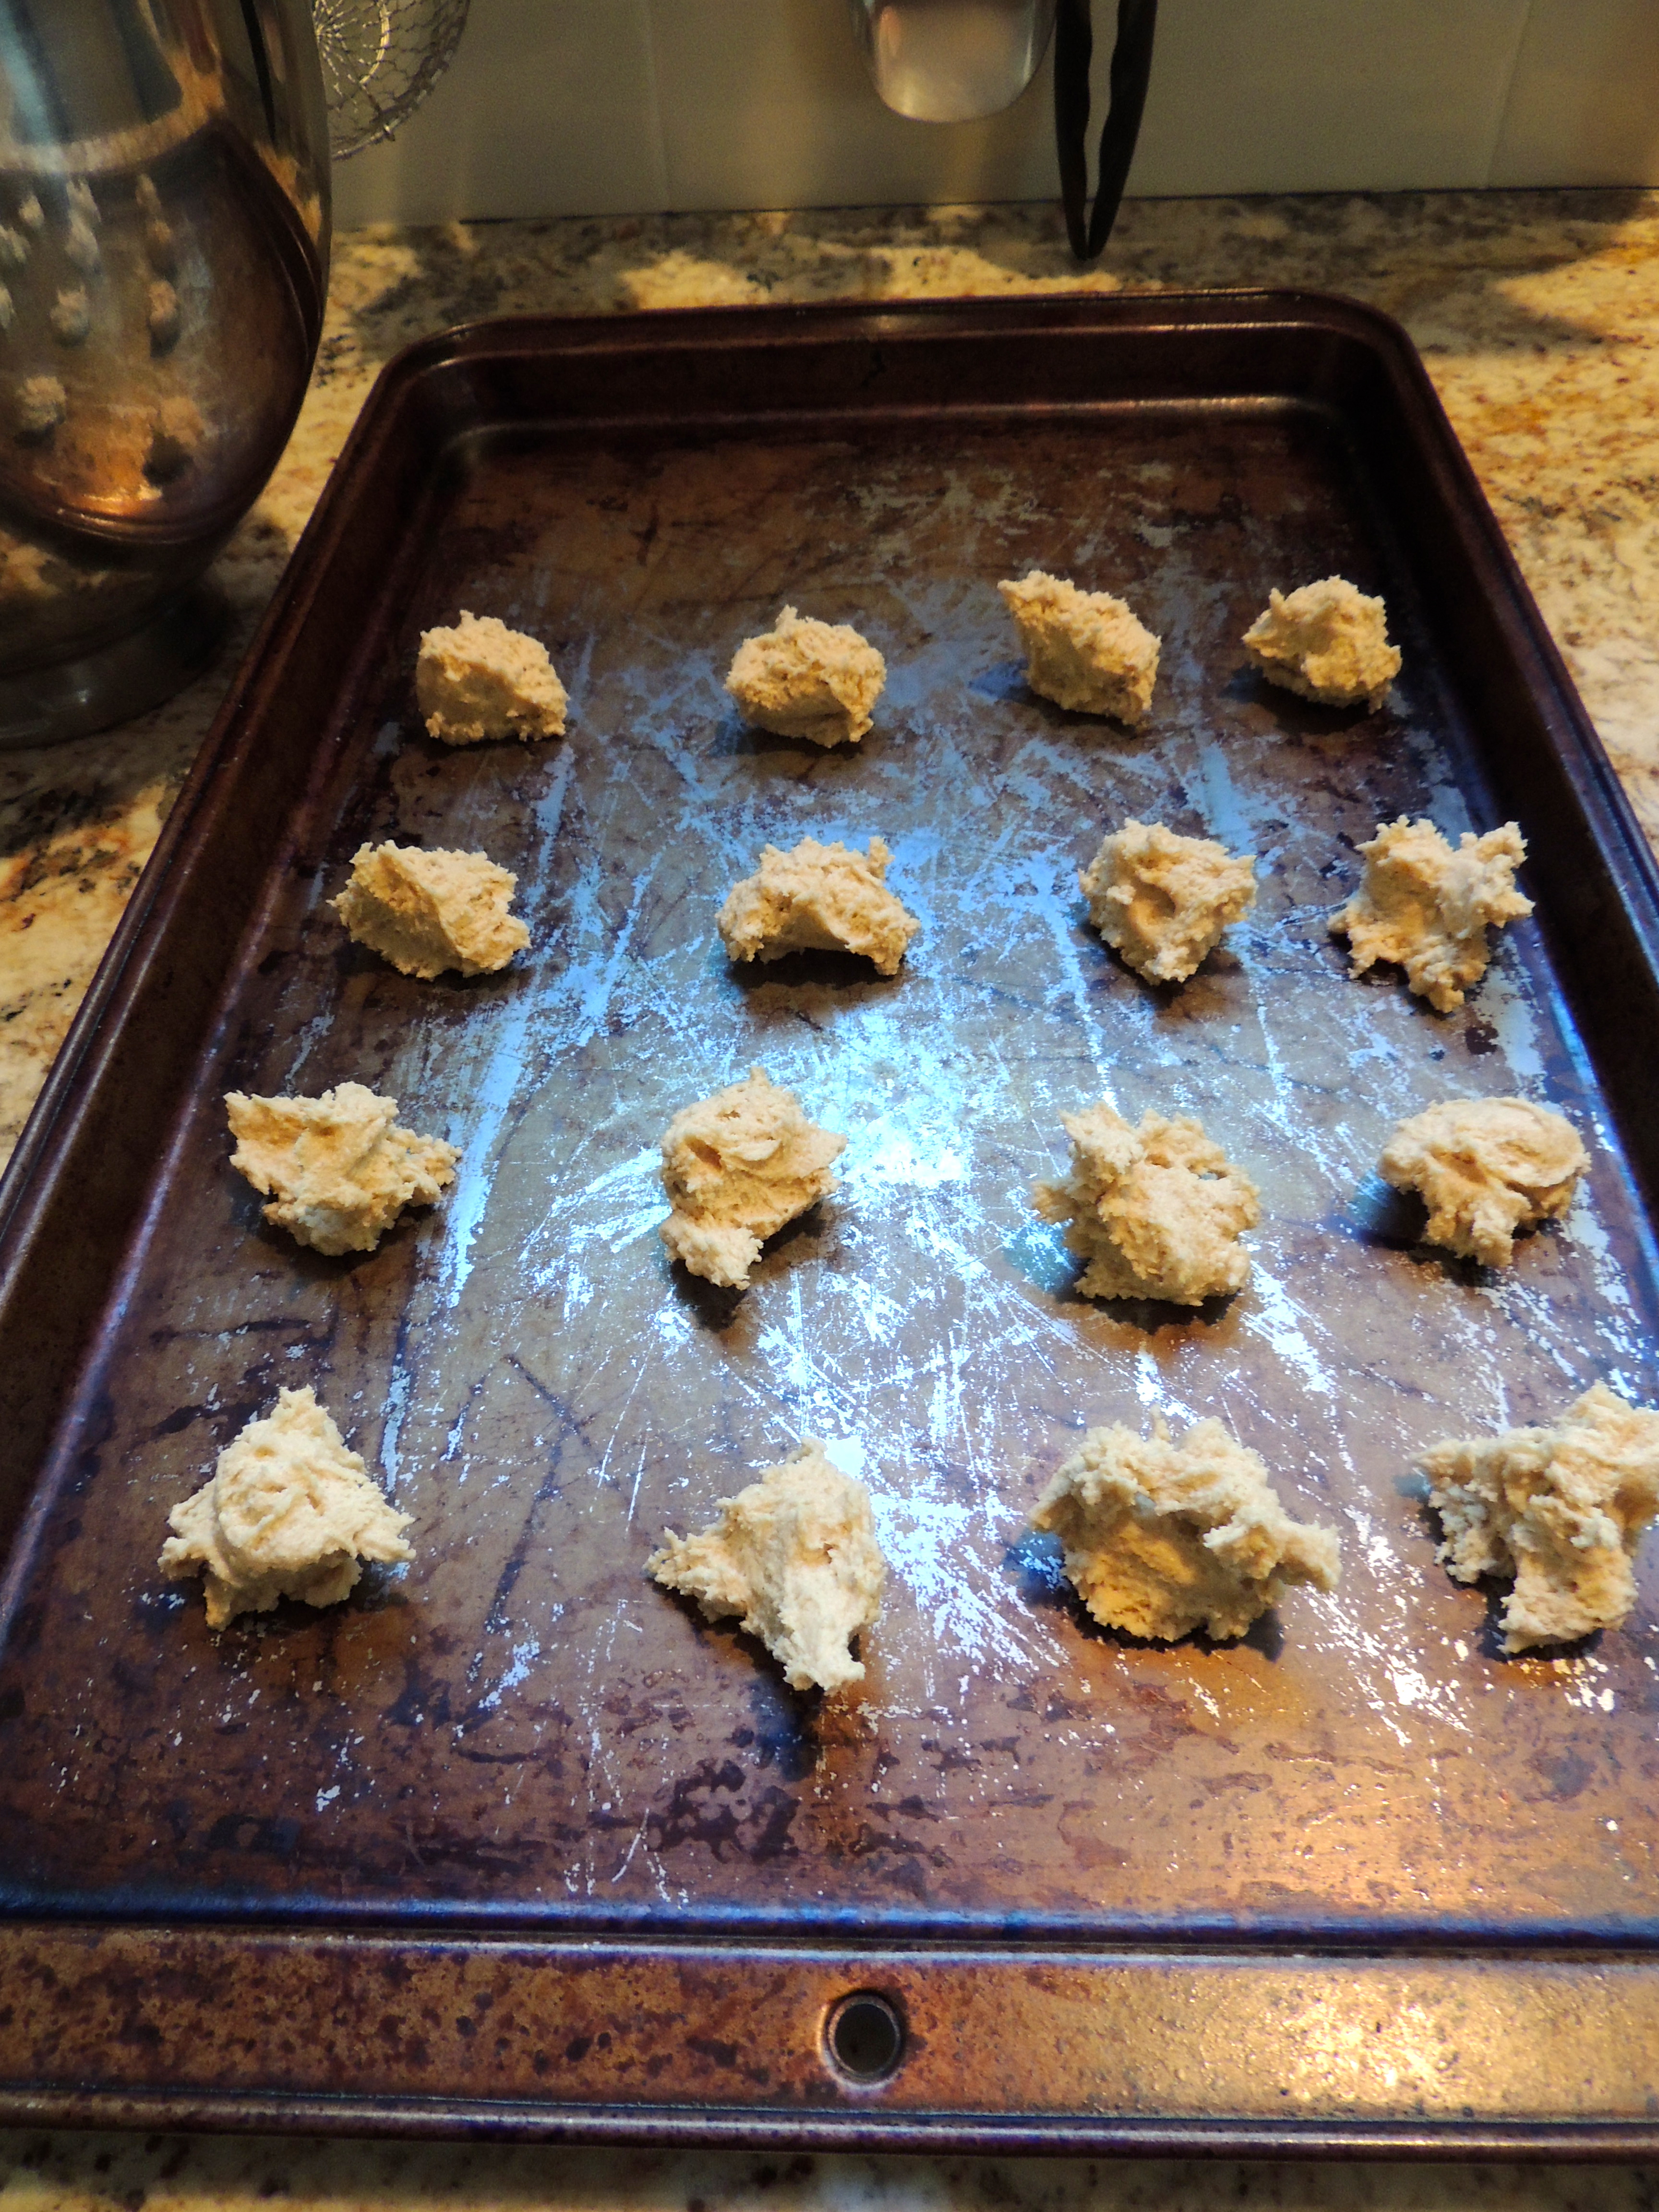
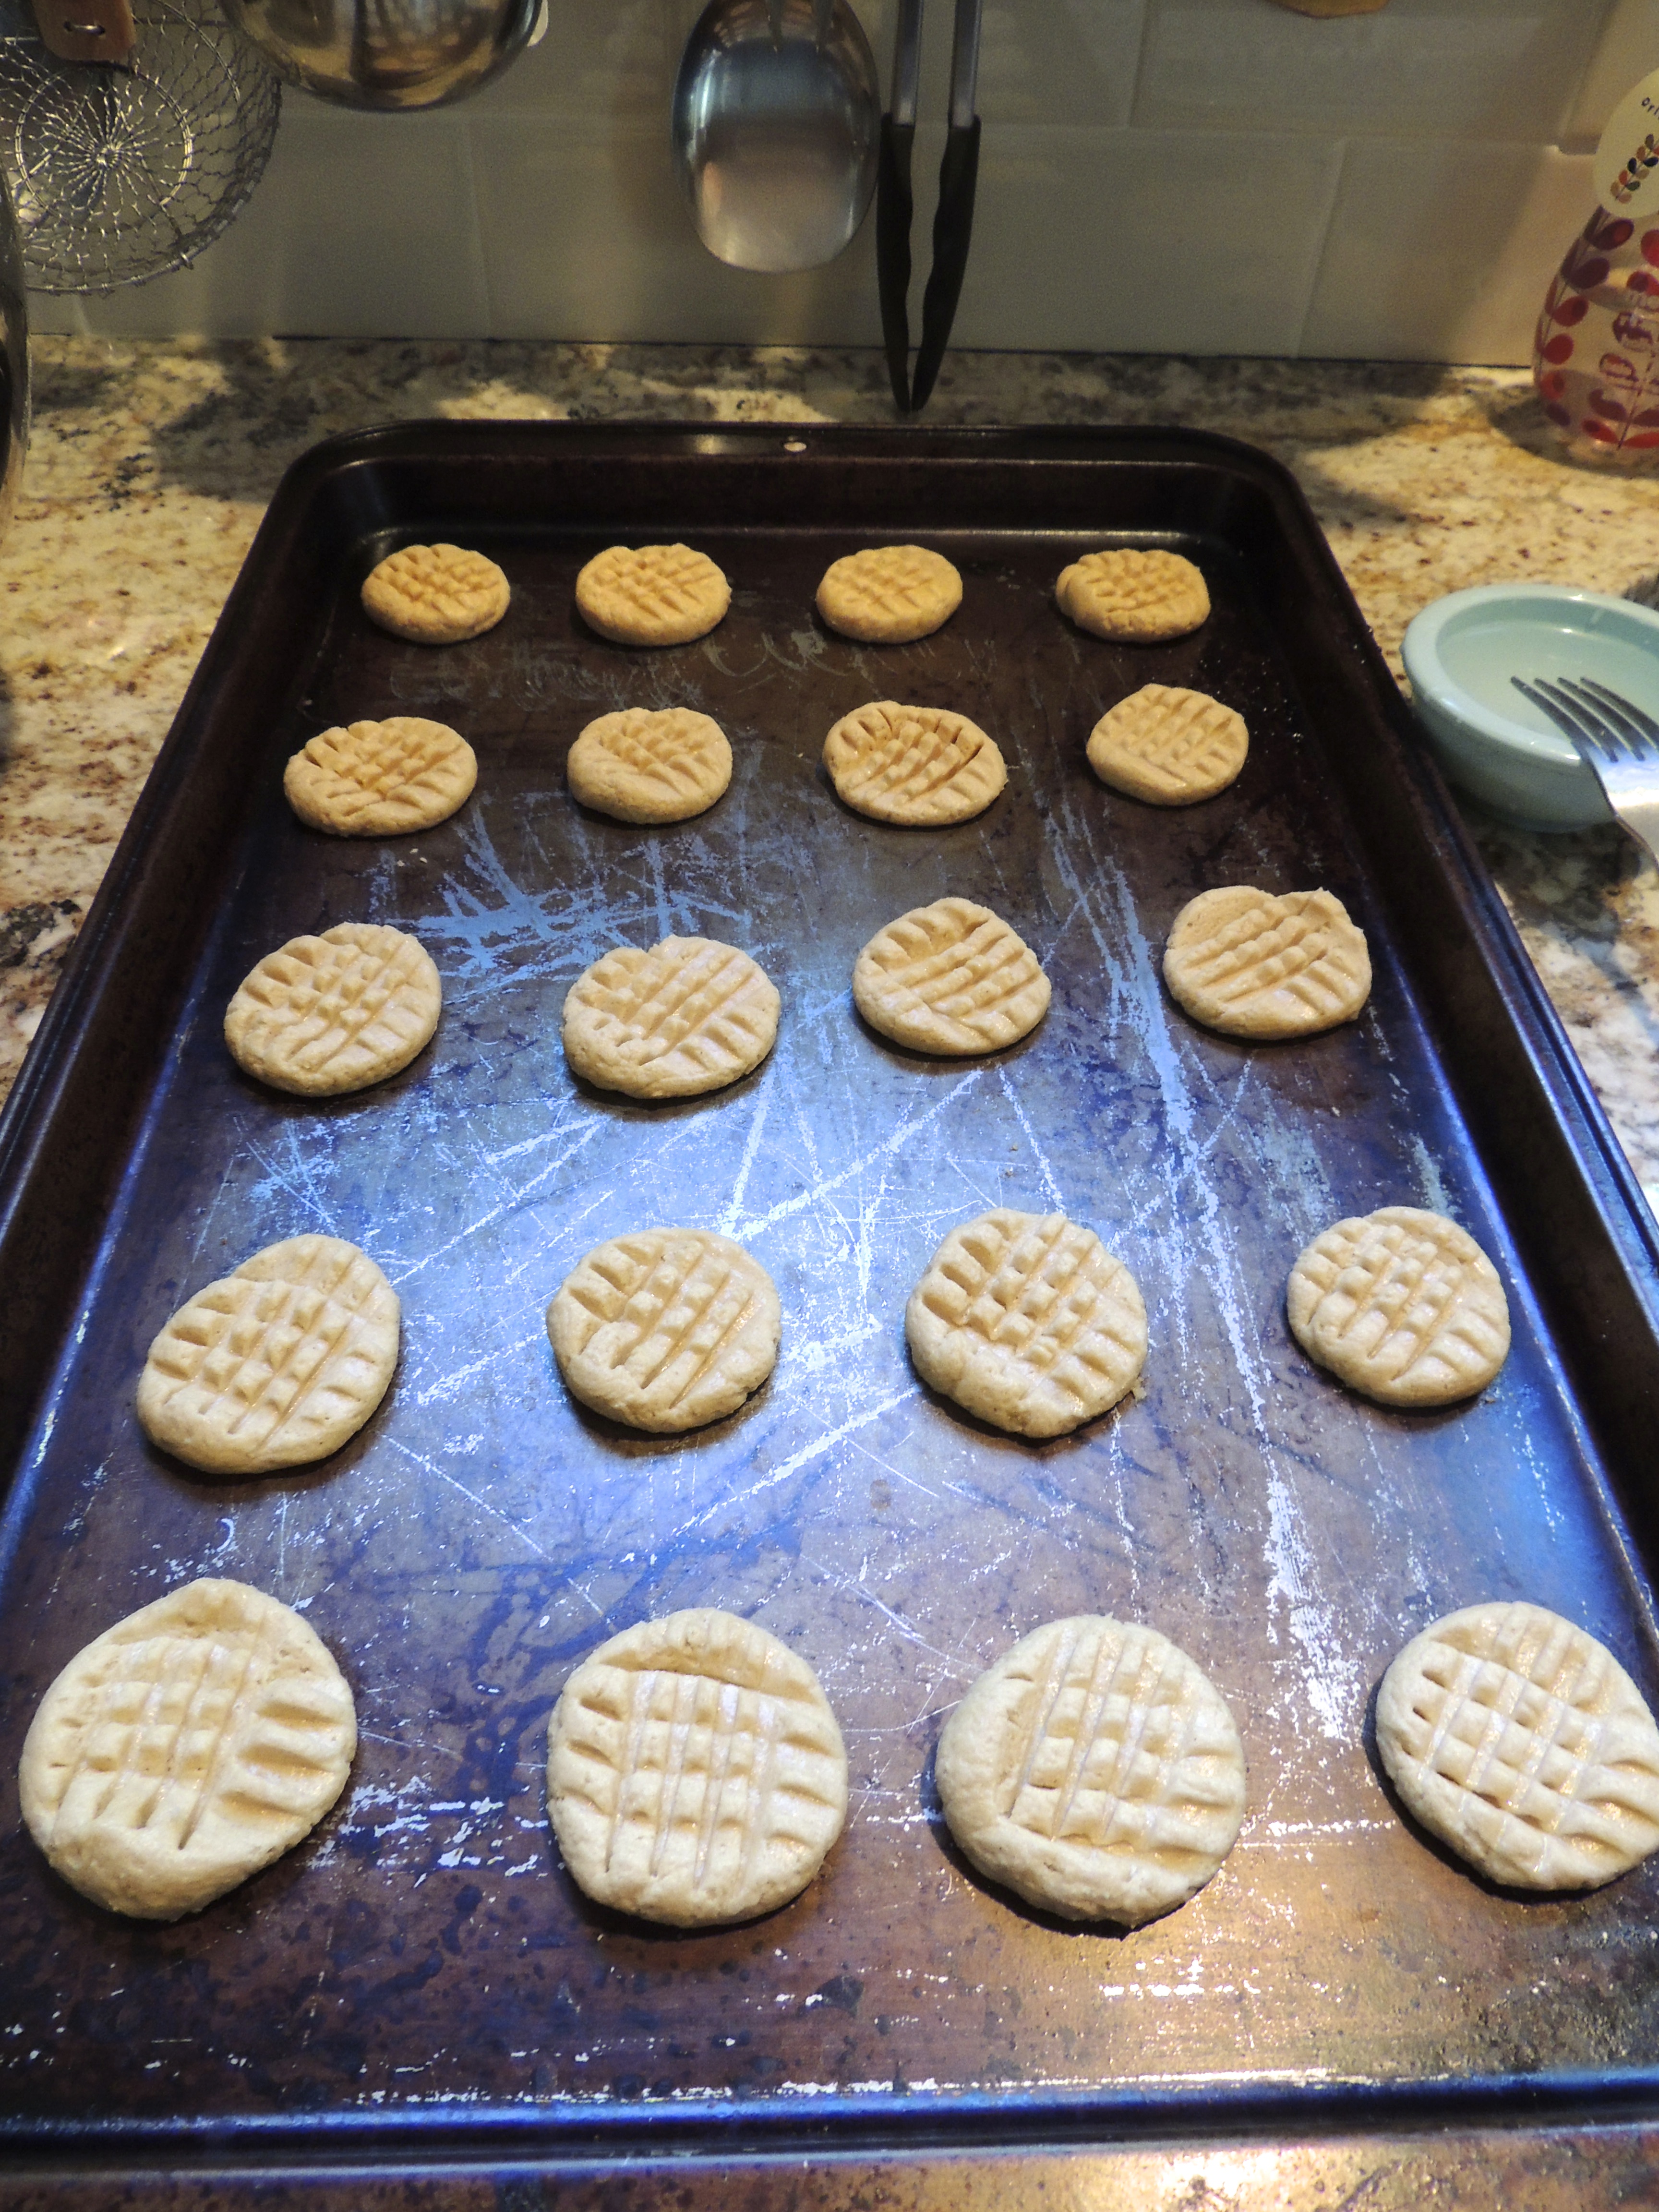
Drop by teaspoonfuls onto cookie sheet
Get two teaspoons, scoop one teaspoon (mine are rather small, they get larger as they bake), then use the other spoon to drop it onto the un-greased cookie sheet…
Roll into balls lightly with your palms
Pick up the little blop of heavenly dough, and roll between your (clean!) palms lightly to form a ball. In no way does it have to be perfect!
Press with fork (lightly)
Then dip a fork in water (and shake off excess water) then lightly press down…
Press with fork the opposite way if you like
If you’re feeling fancy, press the opposite direction…
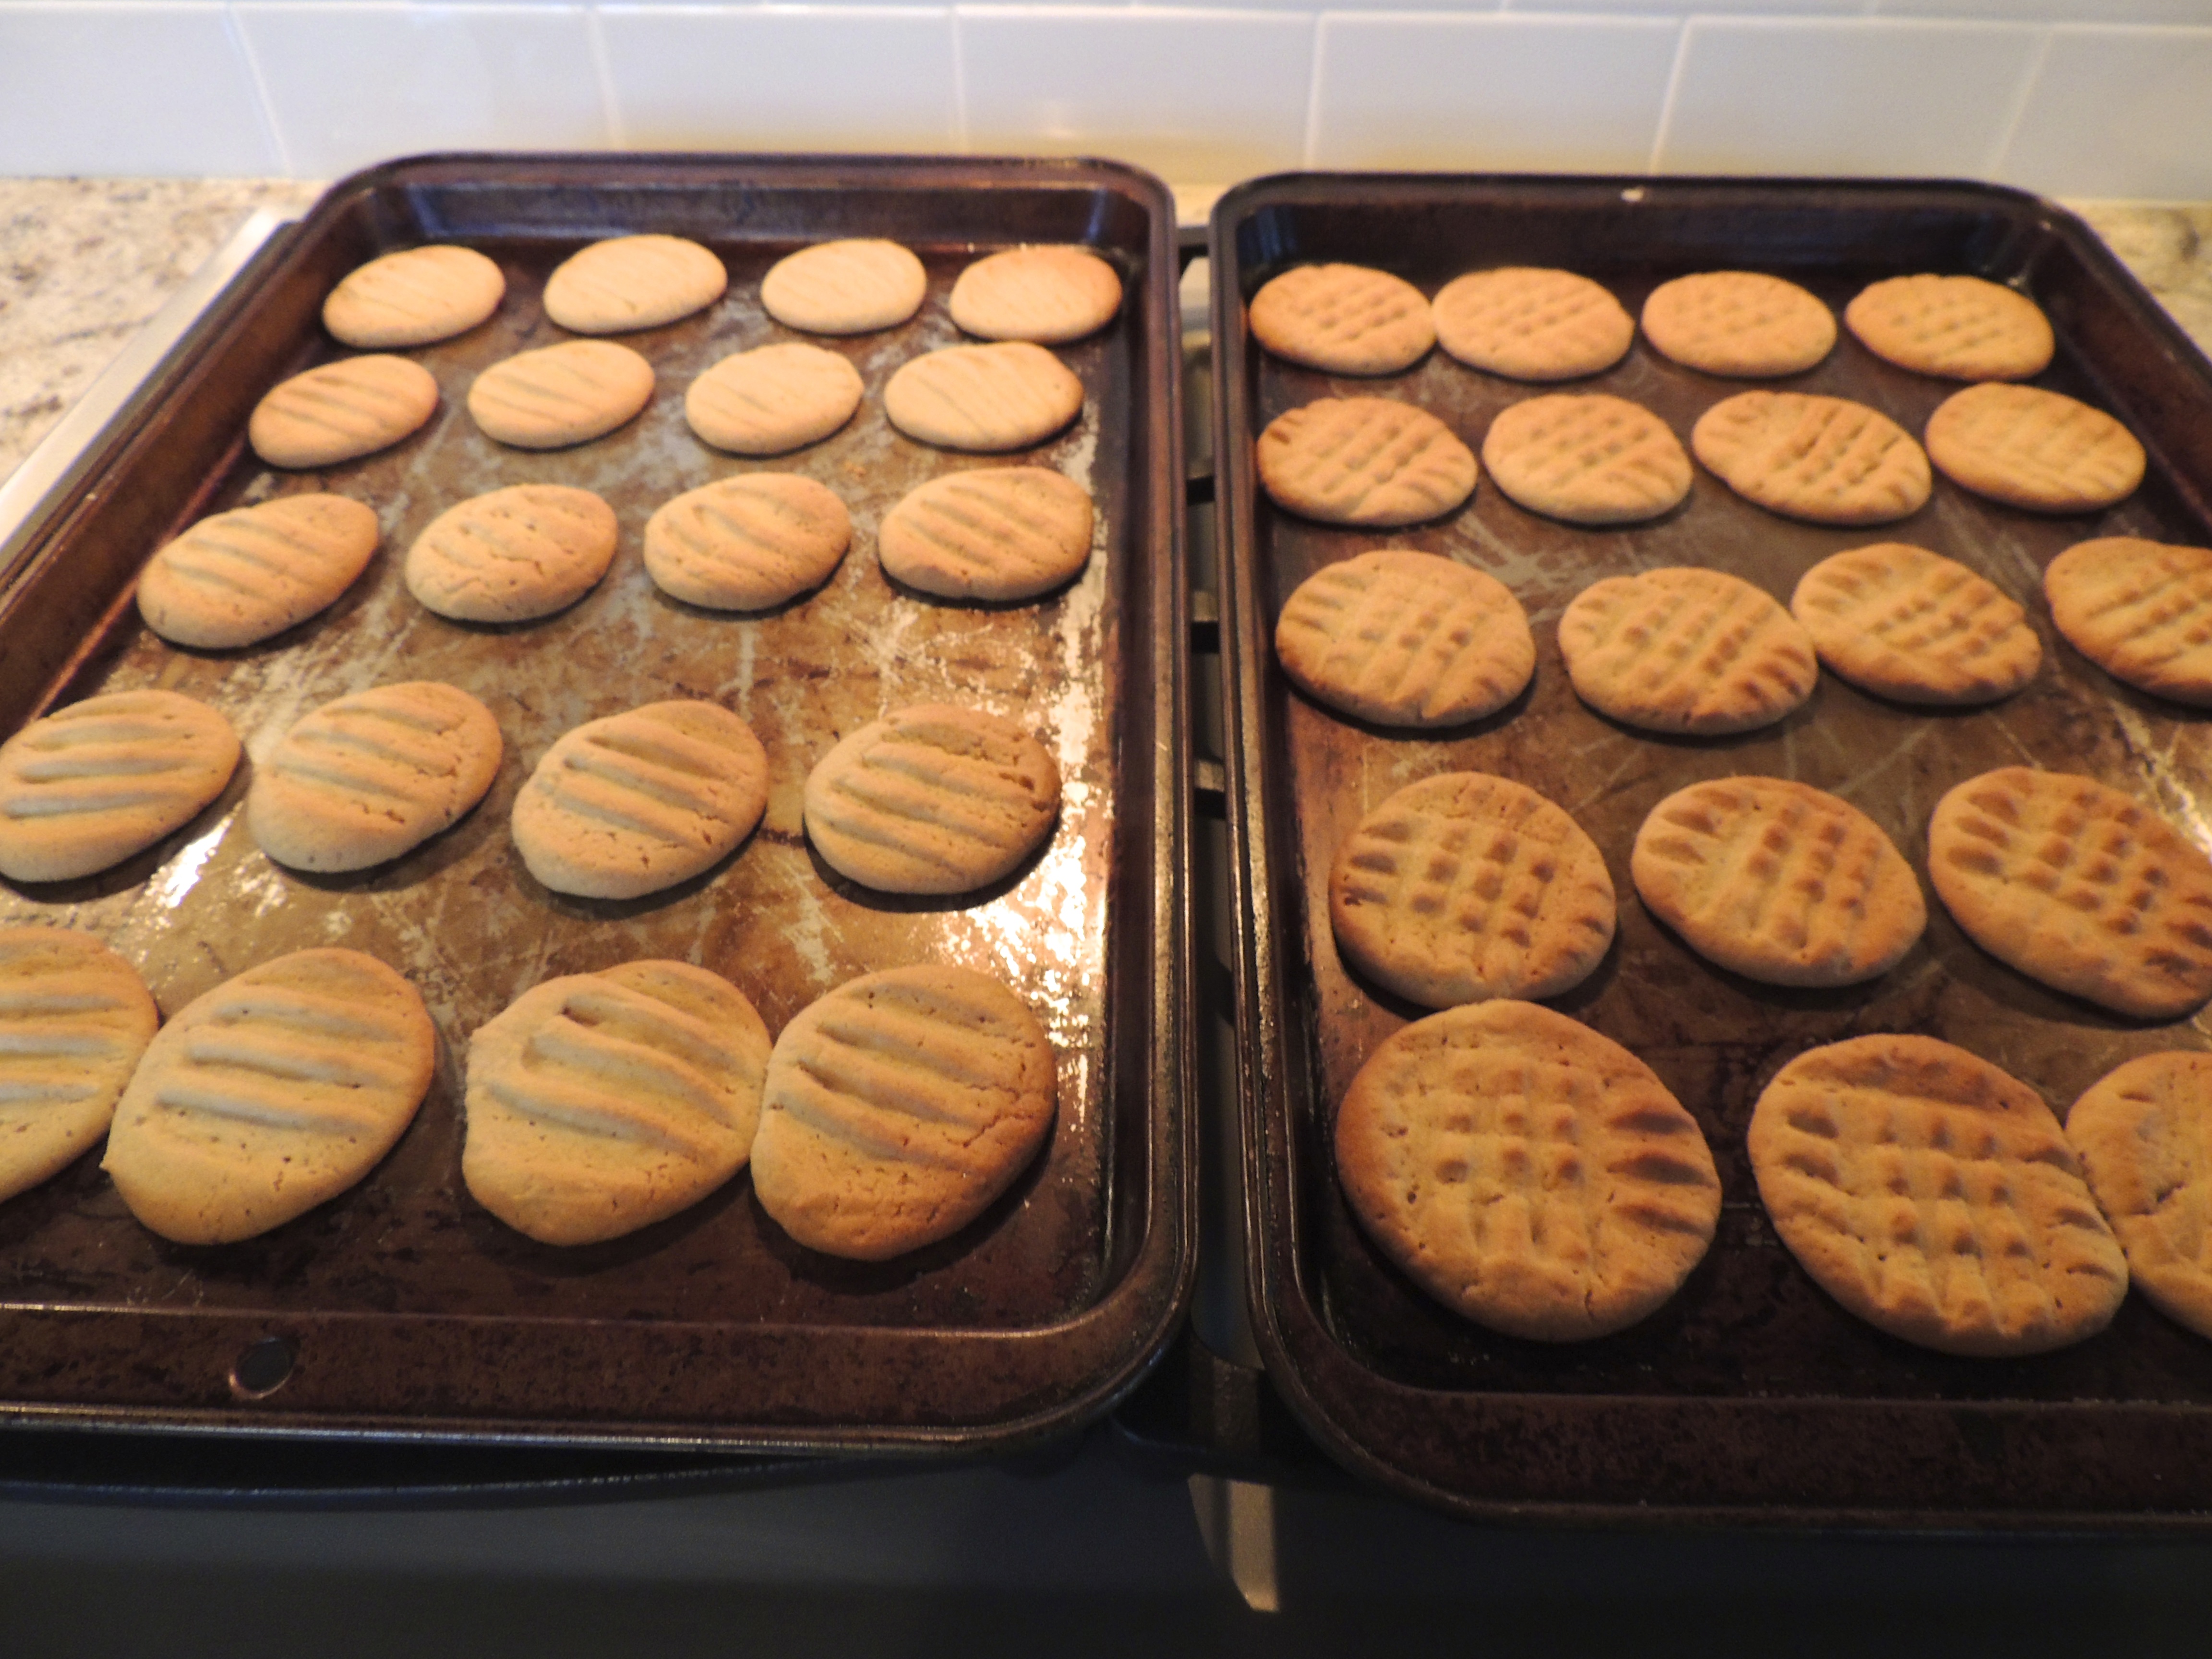
TA DA!
You will not believe how wonderful these smell!
TO FREEZE AND BAKE LATER:
Drop by teaspoonful onto cookie sheet, but leave room between them!
This recipe makes a lot of cookies (nearly 6 dozen). So I am sure to share and freeze some so that we don’t end up eating them ALL. To freeze, drop by teaspoonful onto cookie sheet then roll into balls leaving enough space between each cookie to “breathe” (allowing them to freeze).
Cover!
Then wrap in wax paper and then plastic wrap. For some reason I forgot the wax paper this time. No big deal… wrap them up good and put in the freezer several hours until they are frozen and hard.
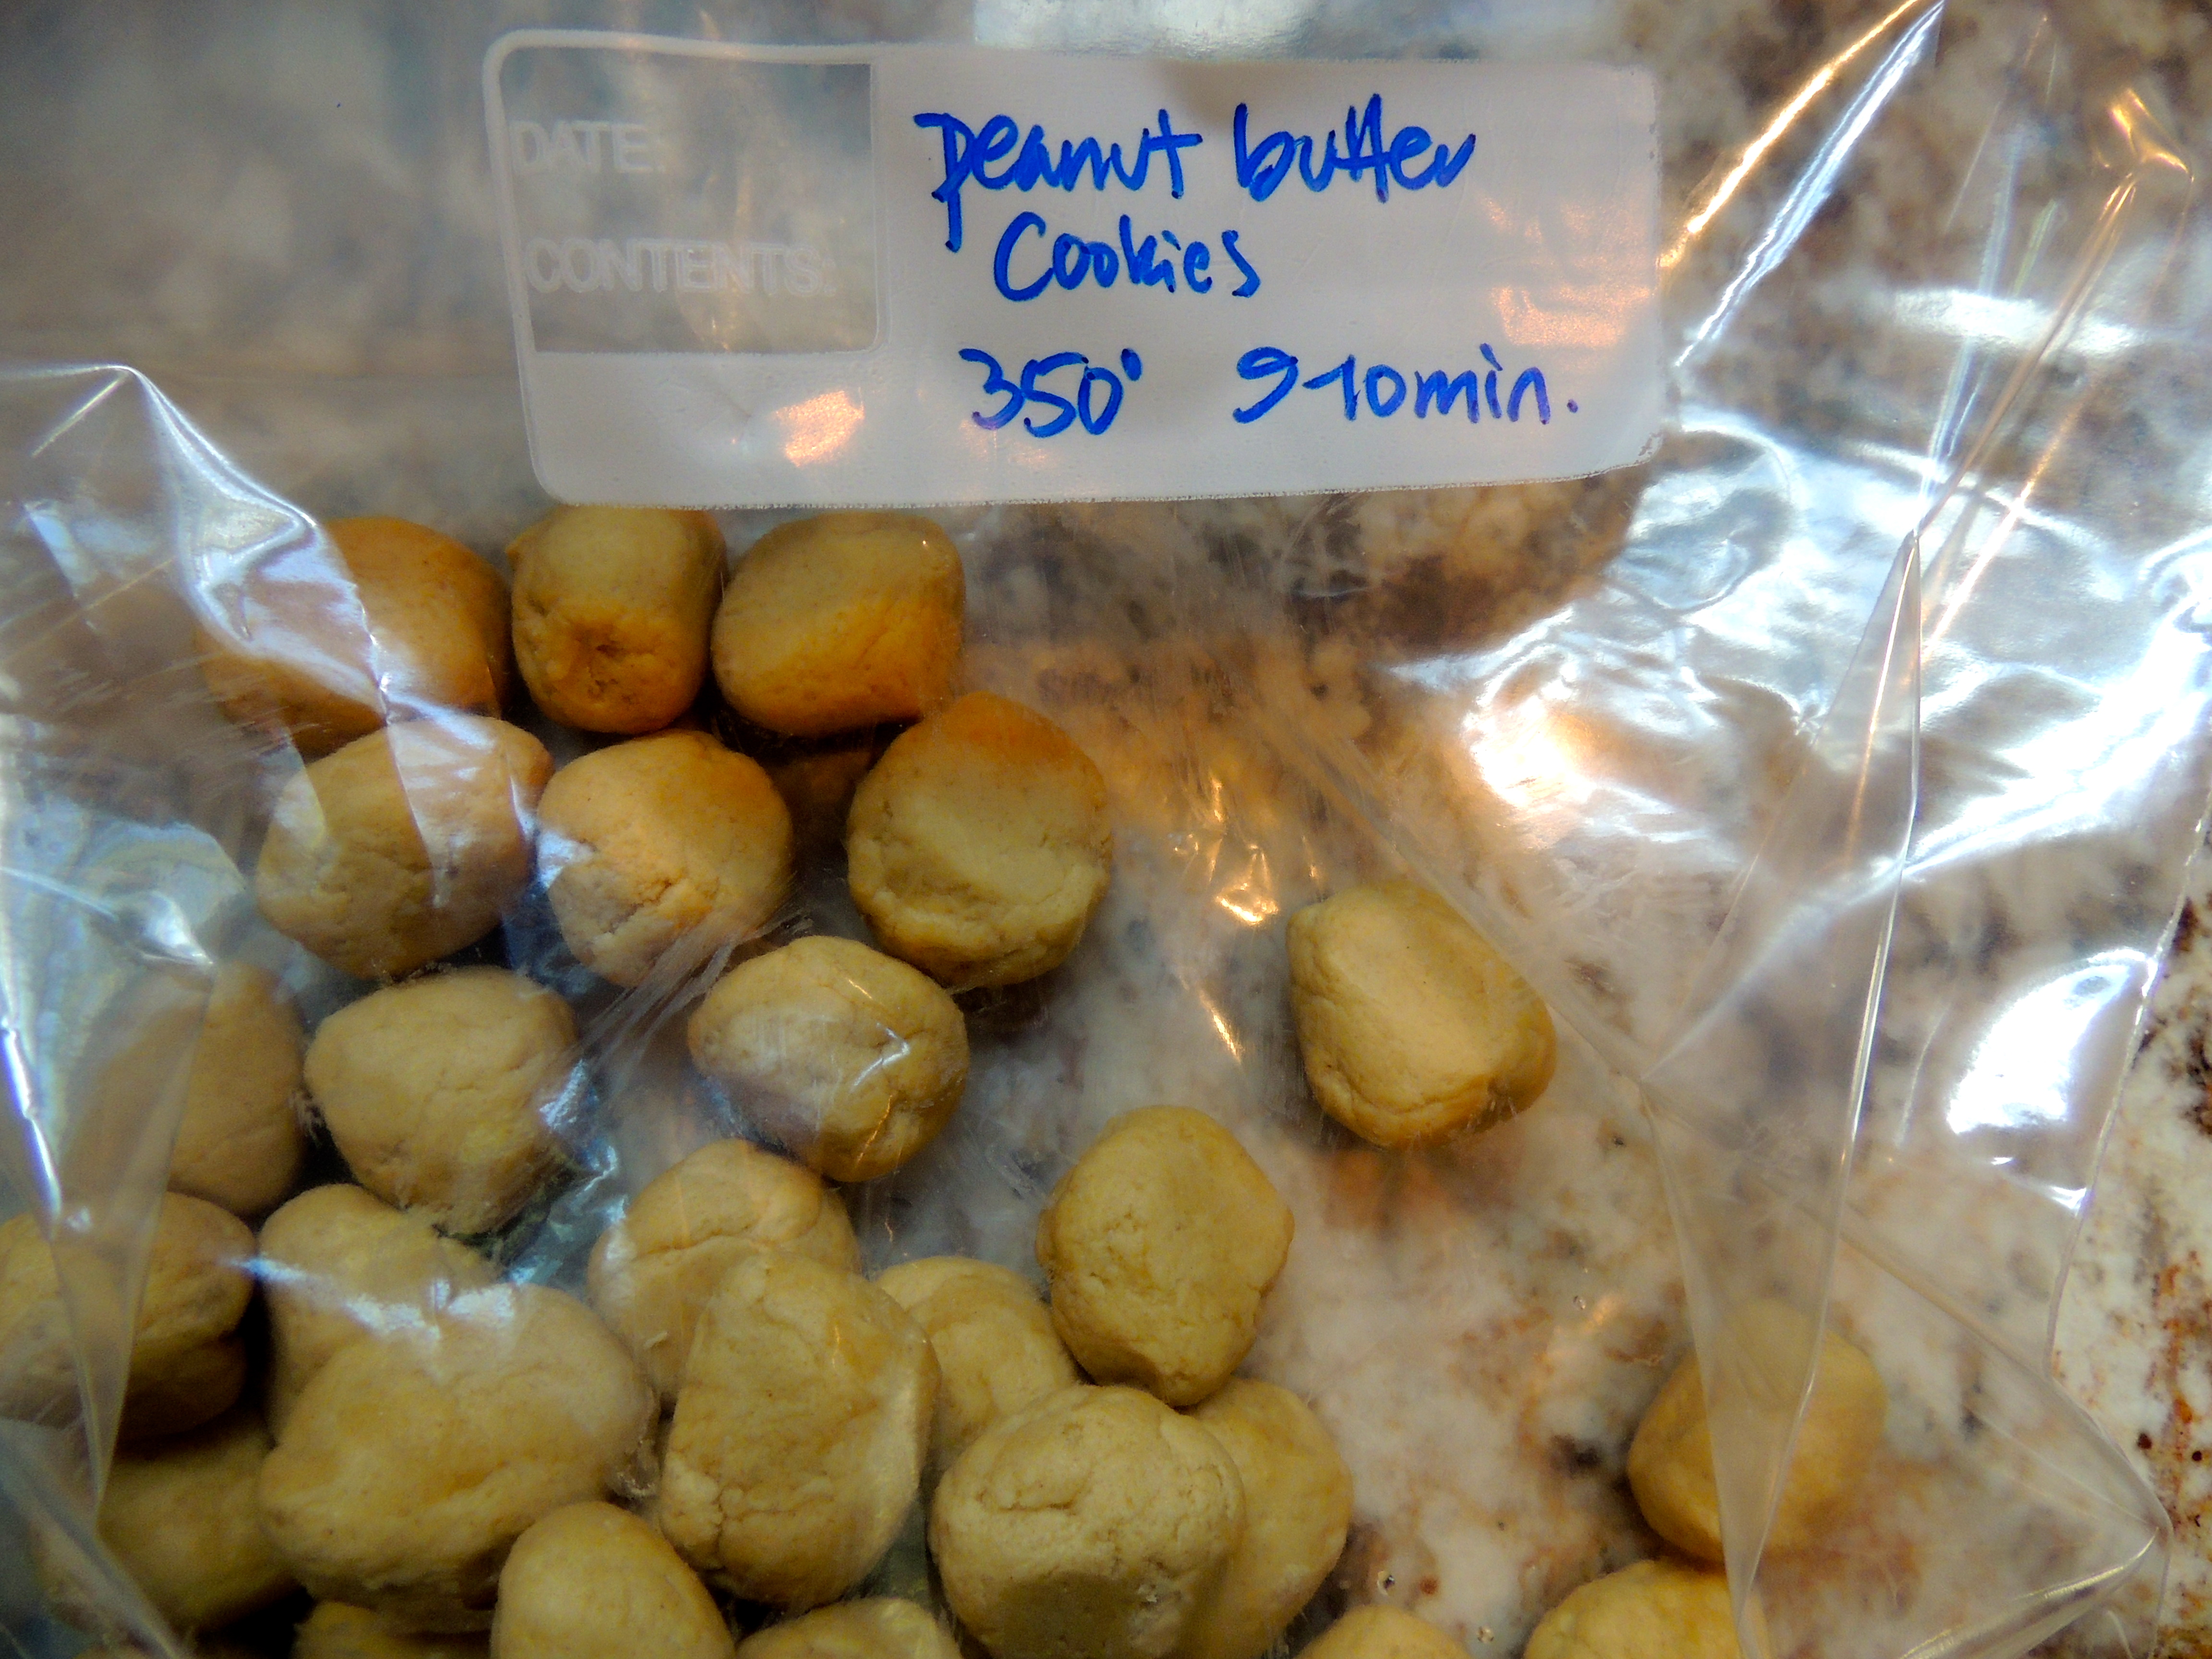
Don’t forget to label!
Once they are frozen toss them into a zip top freezer bag and be sure to label. I like to add directions for baking as well so I don’t have to look it up! To bake after freezing: place on a cookie sheet and wait until they defrost (doesn’t take too long) (you need to press with a fork dipped in water and you can’t do this when they’re frozen). Then bake at 350 degrees F for 10 minutes!
ENJOY! I think these will quickly become a favorite!!
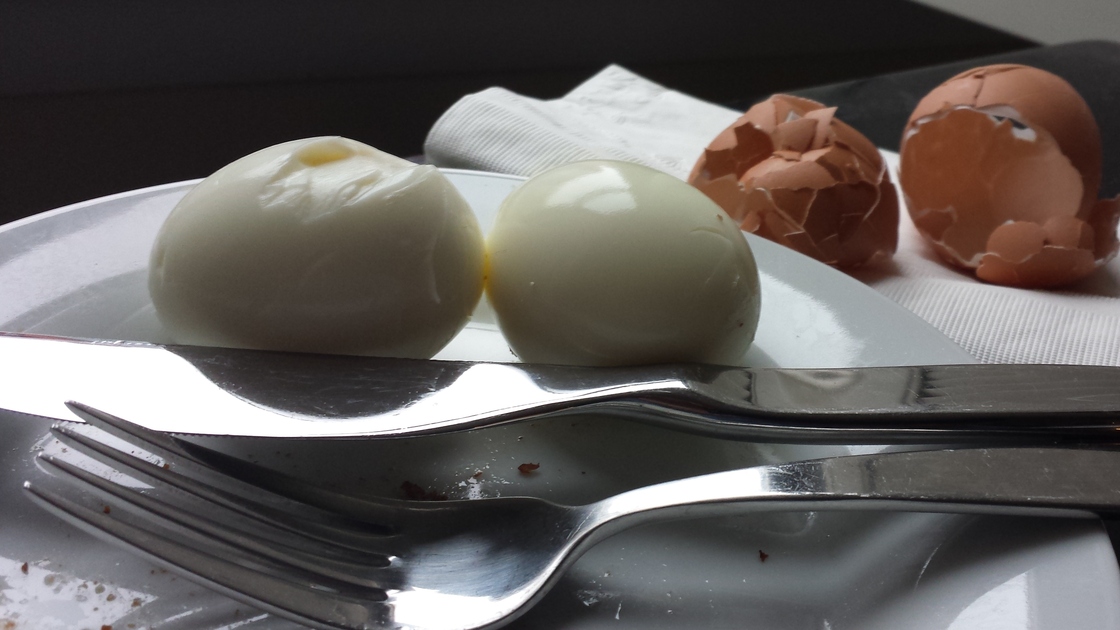
I simply cannot wait to try this! There was a great article from NPR about some everyday tasks that you might not be doing right… This is incredible! You know how when you hard boil an egg, some shells slip right off and others you can only get little tiny piece by little tiny piece, sometimes not leaving much of the egg… Well you’ve got to watch this video! Tim Ferriss shows how easy it is to remove the shells, they BLOW RIGHT OFF THE EGG. Watch and you’ll see!
A few words from Matt Thompson (NPR):
I prepared my breakfast of hard-boiled eggs a bit differently this morning. I added a teaspoon of baking soda to the boiling water. When the eggs were done, I cooled each one in ice water, then cracked both ends of the shell, held it in my fist and blew. Each time, the shell shook a bit and whistled, then out popped the egg, shell-less and delicious.
Get. Outta. Here!
Update: I was researching more about Tim Ferriss (the guy that did the video) and he has a blog that this was featured on. His blog is an amazing resource, check it out if you get a chance!
Growing up we had a tradition in our house… Christmas cookies… bake them and decorate. There was nothing better! To top it off they are the tastiest you will ever eat! The frosting sets so they don’t get smushed into each other. You don’t need any special tools (we use zip top storage bags). Make and bake the cookies. Then make the frosting. Scoop some of the “white” into a zip top bag, then divide the frosting into bowls of whatever other colors you like. (Red, green and blue is what we usually did, in addition to white). Add food coloring to each bowl and get it the color you like. A good “grinch” green mix blue and yellow food coloring until you hit that great green… or if you don’t feel adventurous, just use the green food coloring. Next, snip the very corner of the bag, and the frosting will flow through that to decorate. Easy and so much fun. You really see the artsy folks stand out here! Click HEREto print the recipe minus all the photos, etc.
Decorate however you like, neat, messy, in whatever colors you create!
CHRISTMAS BUTTER COOKIES
Sift 2 3/4 cups of flour, 1 teaspoon baking powder and 1/2 teaspoon of salt.
In mixer bowl add 3/4 cup soft butter, 1 cup sugar, 2 eggs, 1 teaspoon vanilla.
Beat until fluffy and light. Slowly beat in flour mixture. CHILL ONE HOUR.
Flour your work surface and roll out dough. Use cookie cutters to cut into desired shapes.
Place on ungreased cookie sheet. Bake at 375 degrees for 8-10 minutes.
YIELD: 4 dozen (IF you don’t eat the dough… good luck to ya!)
FROSTING
Mix 1/4 cup butter, 4 cups (1 box) confectioner’s sugar, 1/4 cup scalded cream and 1 teaspoon vanilla. Blend until smooth. Scoop into separate bowls and add food coloring (hint: yellow and blue mixed makes an awesome ‘grinch’ green). Scoop colored frosting into Ziplock bag (doesn’t have to be Ziplock, any zip top is fine, I use freezer quart size bags) and snip a little off the corner. Squeeze onto cookie to decorate! If you need the frosting thinned a bit more, I have great luck just using light cream, add a little at a time until it will easily come out of the bag to decorate.
I have a gorgeous collection of Christmas ornaments that my dad made. I made one, can’t remember which one, I think it turned out too thick for my liking… he really made each one so different, and they look festive displayed in this wooden bowl that he made. He’s a handy kind of guy. If I was in MI I would be learning how to make all this stuff… treasures!
Are you getting everything on your list accomplished? Well, no worries, me either, ha ha! It’s what the holidays are all about! Have a great day!
This recipe has been a family favorite for as far back as I can remember. My mom and dad are both excellent in the kitchen, and this is one of those soup’s you can throw together with whatever sounds good at the time, which is convenient. Add vegetables that take the longest to cook earlier in the recipe, and others that cook quickly (spinach), towards the end. Any spices that you enjoy will work well. I can remember having this with amazing French bread growing up! Hope you enjoy one of my staple recipes… click HERE to print this recipe without photos…
To recap…
Set out your ingredients, wash potatoes, greens, etc. if using…
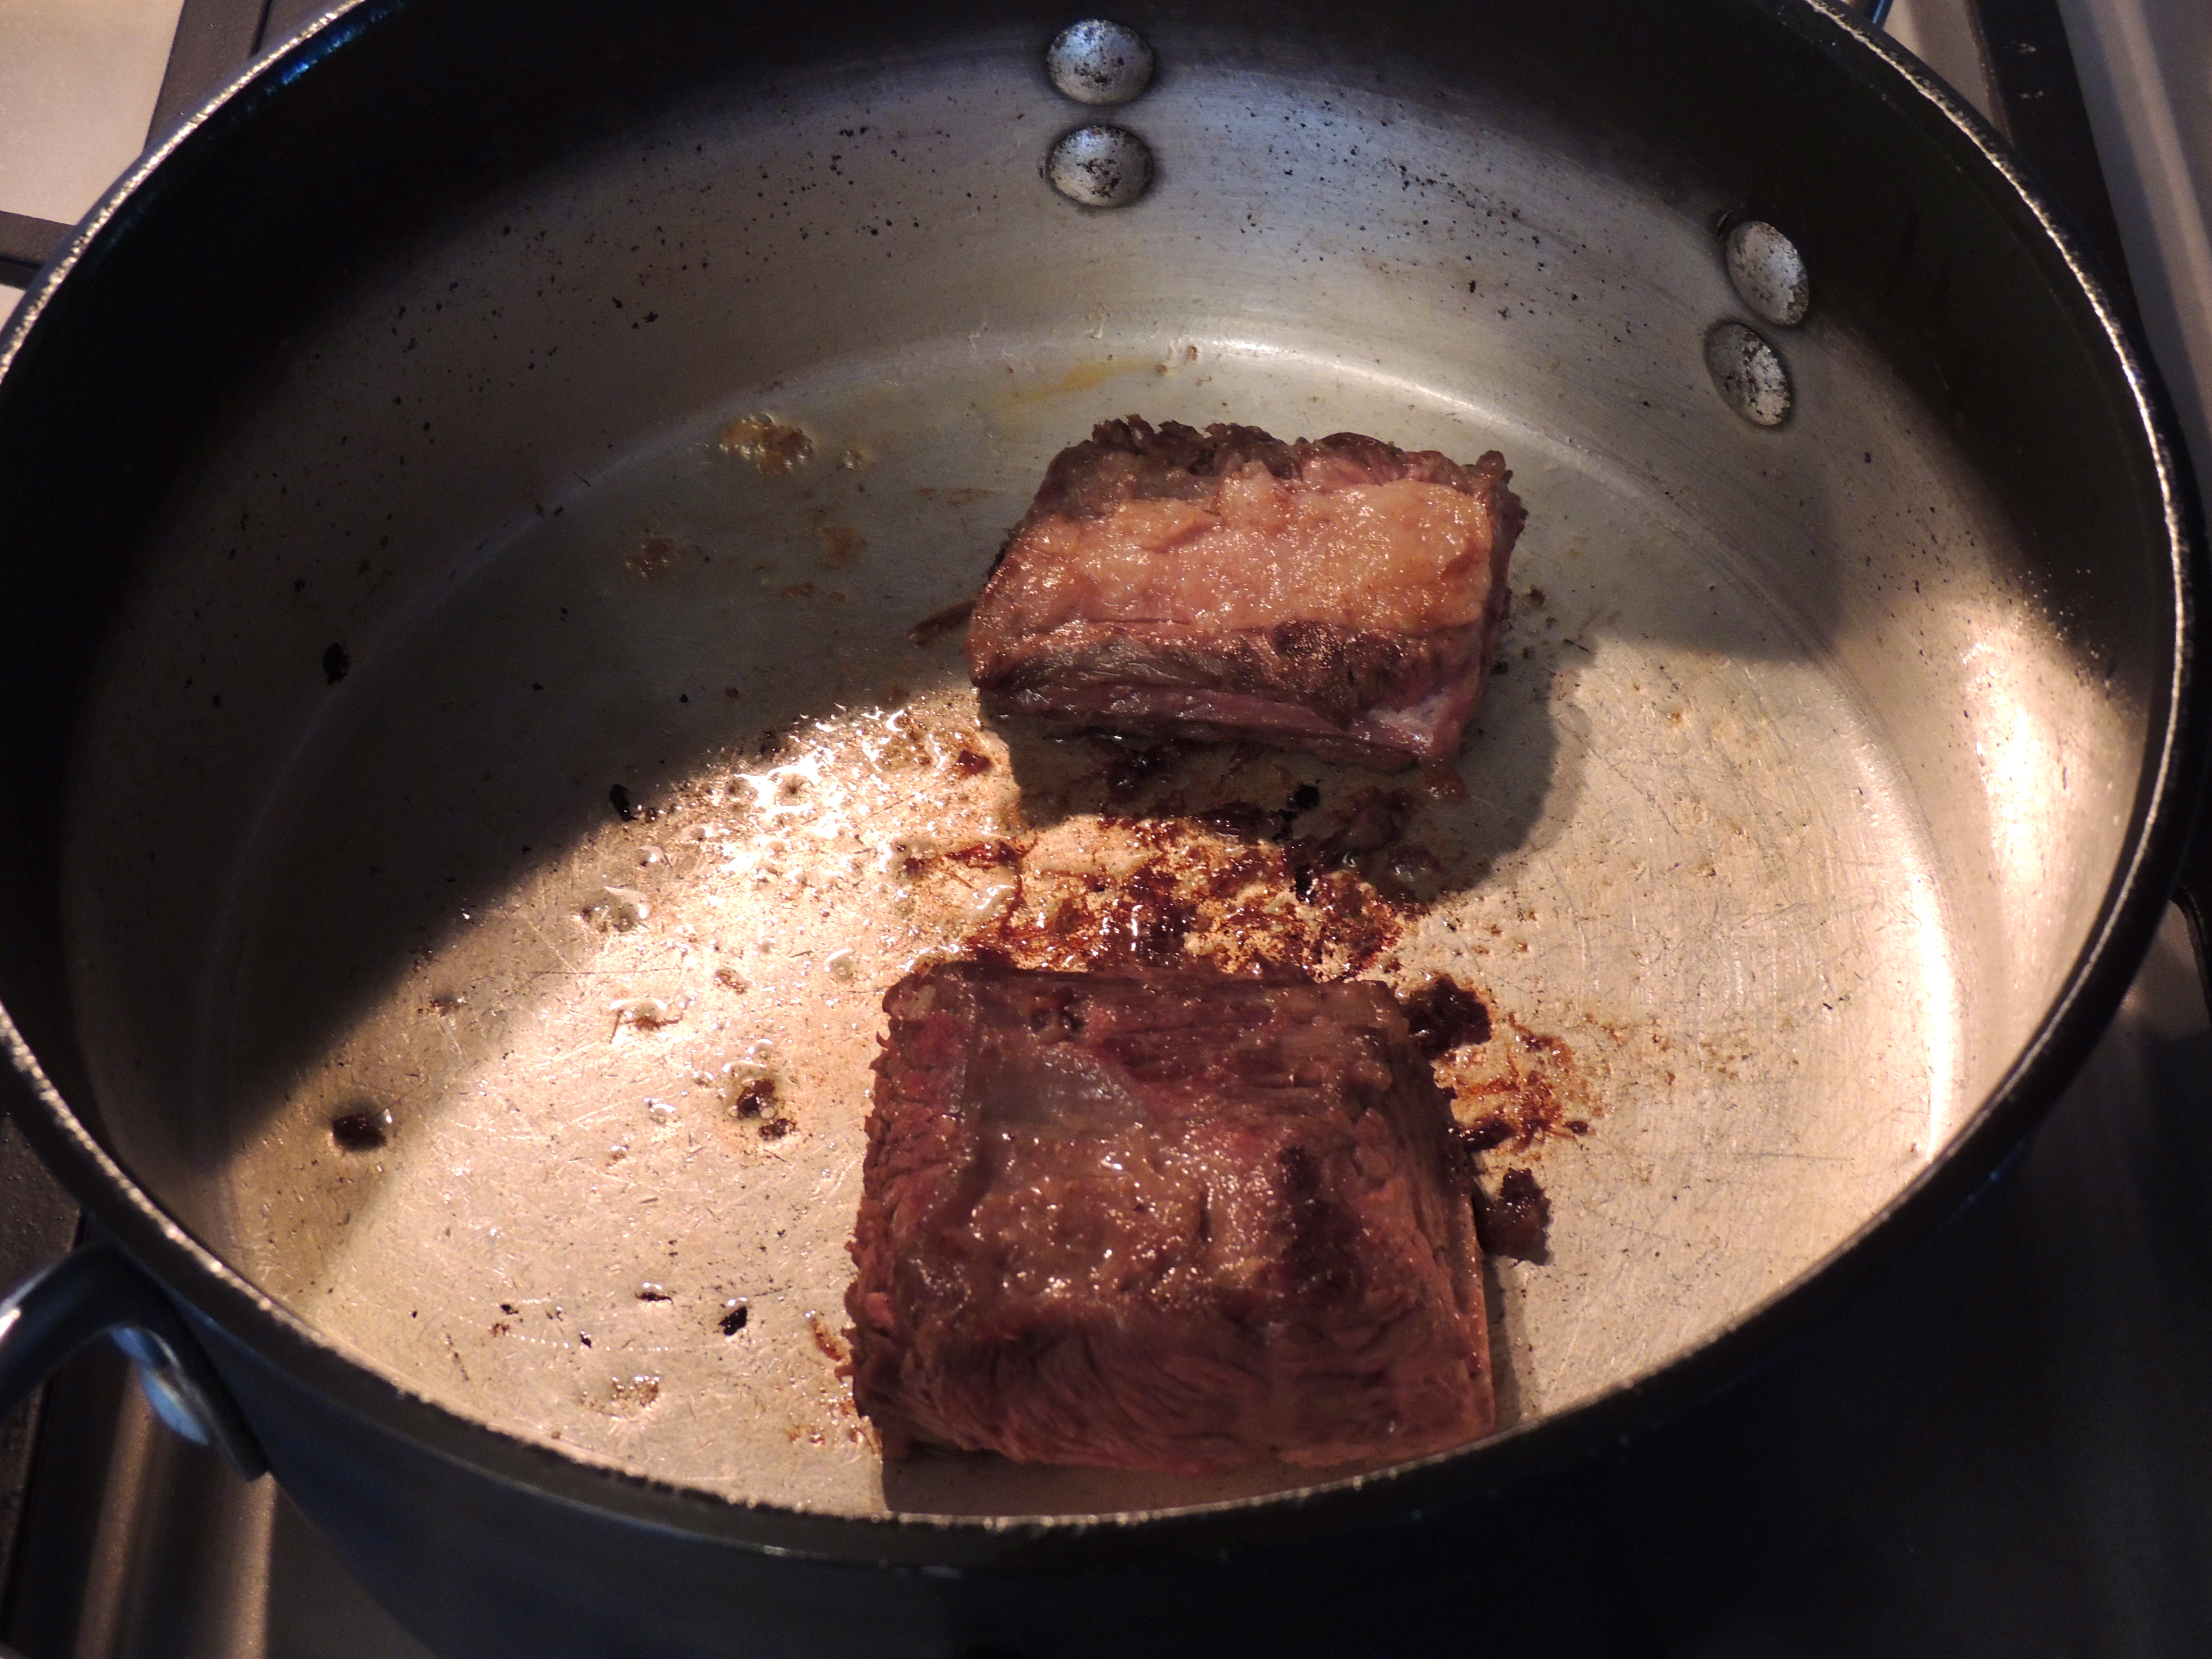
Brown the short ribs in a little olive oil – use a heavy bottom pan if possible…
Chop, chop, chop… Sometimes I sauté the carrots with the onion/celery, sometimes I don’t… whatever… easy peasy, no worries!
This time I browned the short ribs and got nice crusties on the bottom of the pan, and THEN I sautéed the onion and celery… Last time I did it all together. No rules… do what you like!
Saute veggies…
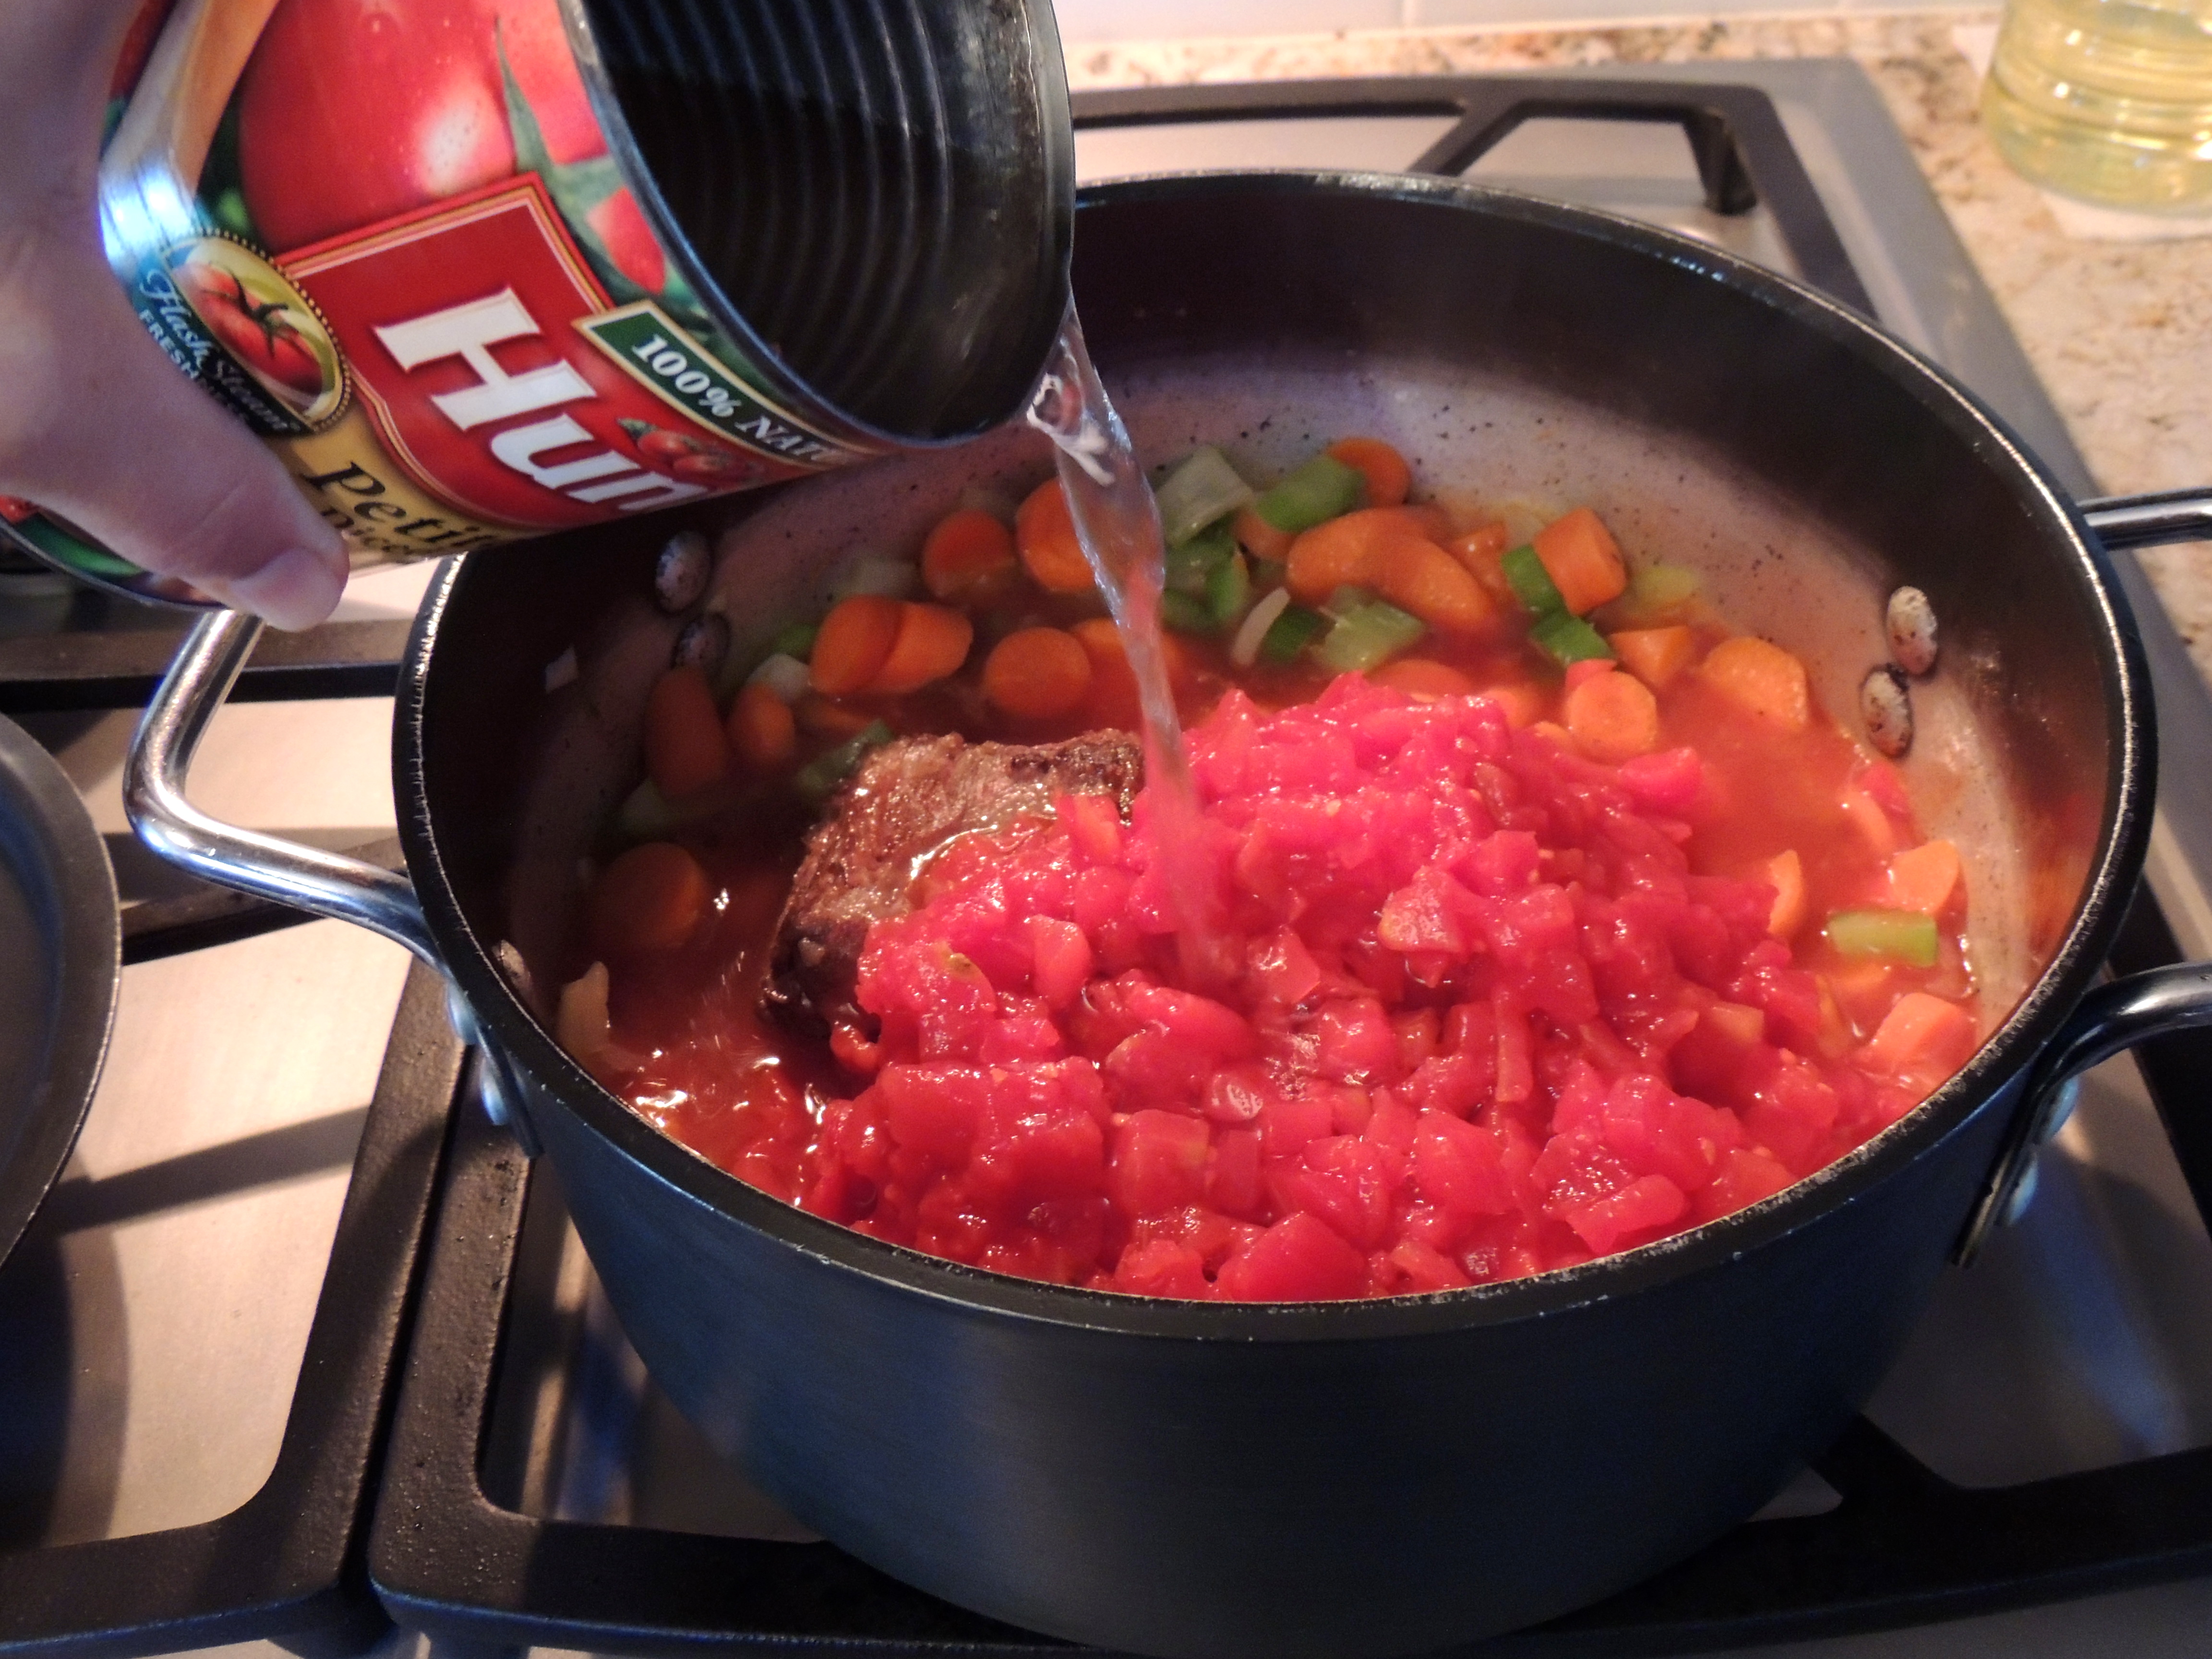
Add short ribs back to the pot… when this soup is done the meat will fall off the bone… heavenly!
Add that biggee can of tomatoes and juice, as well as at least one big can of water (or more)…
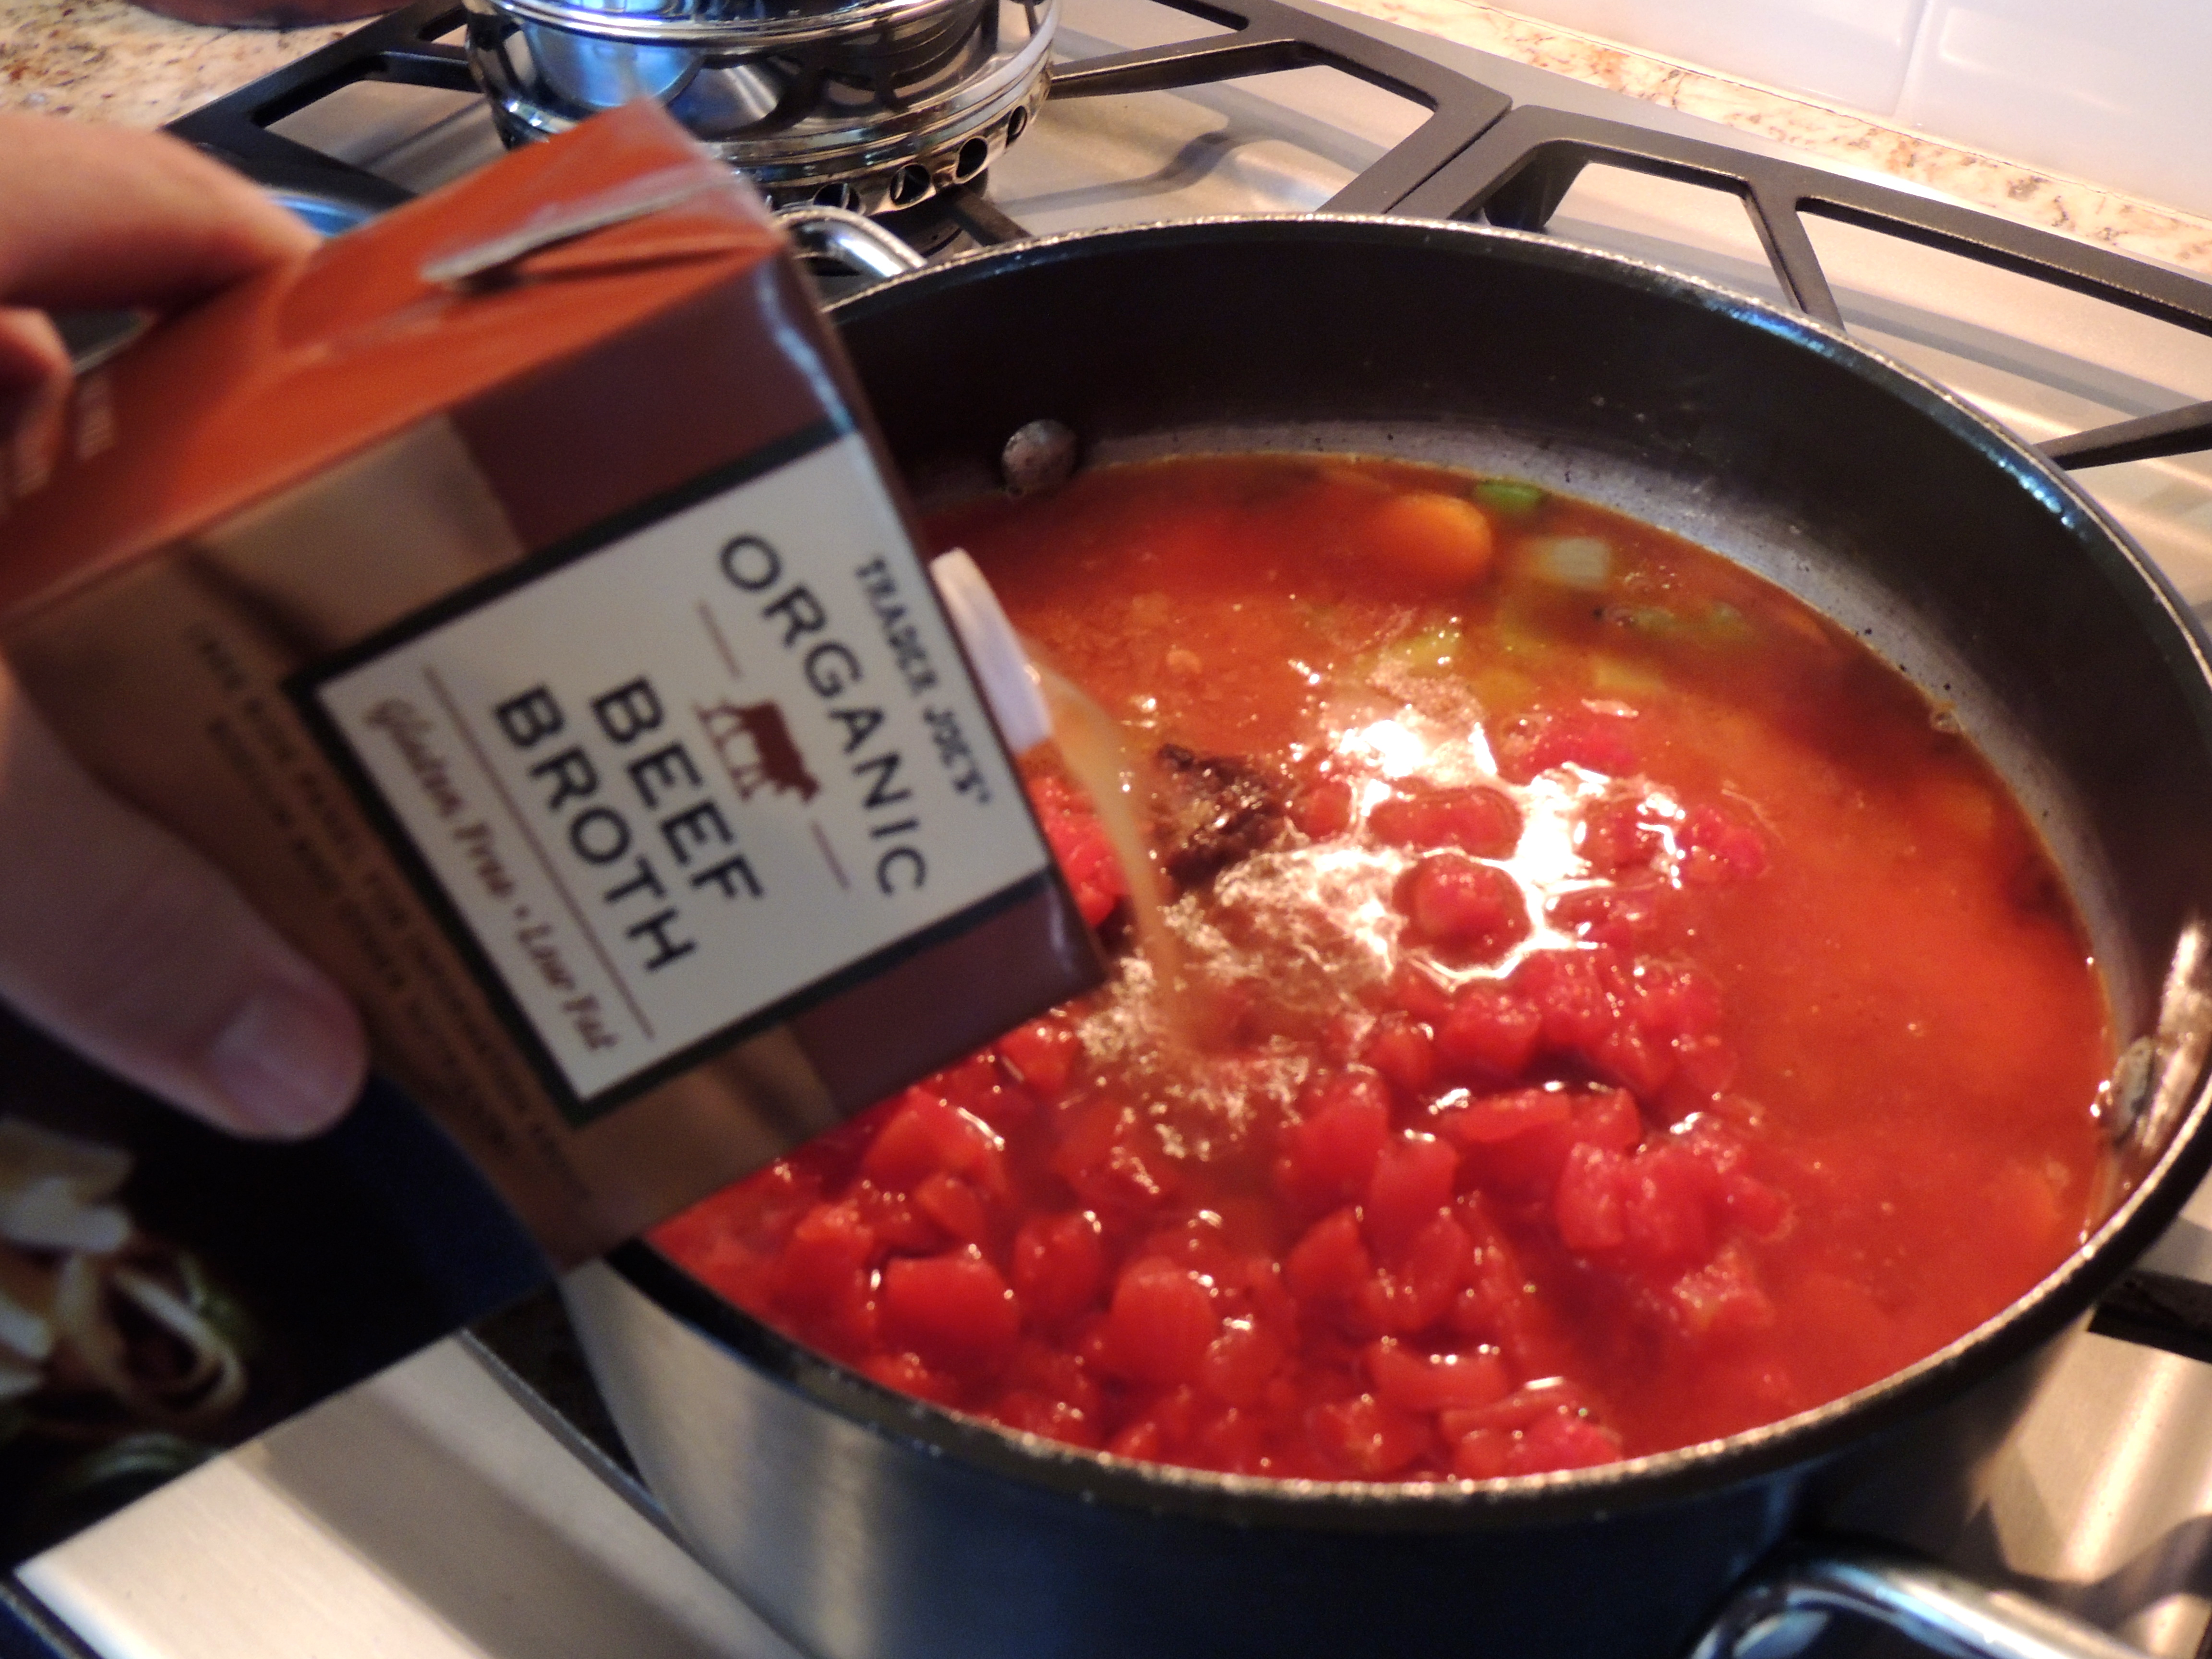
Add the beef consommé…. this gives it a nice rich flavor…
Add the big carton of beef broth… as the soup cooks down add more broth/water…
And any spices you like…
The secret is the center of the celery stalk with the leaves, throw it in whole… this will give the soup an amazing flavor!
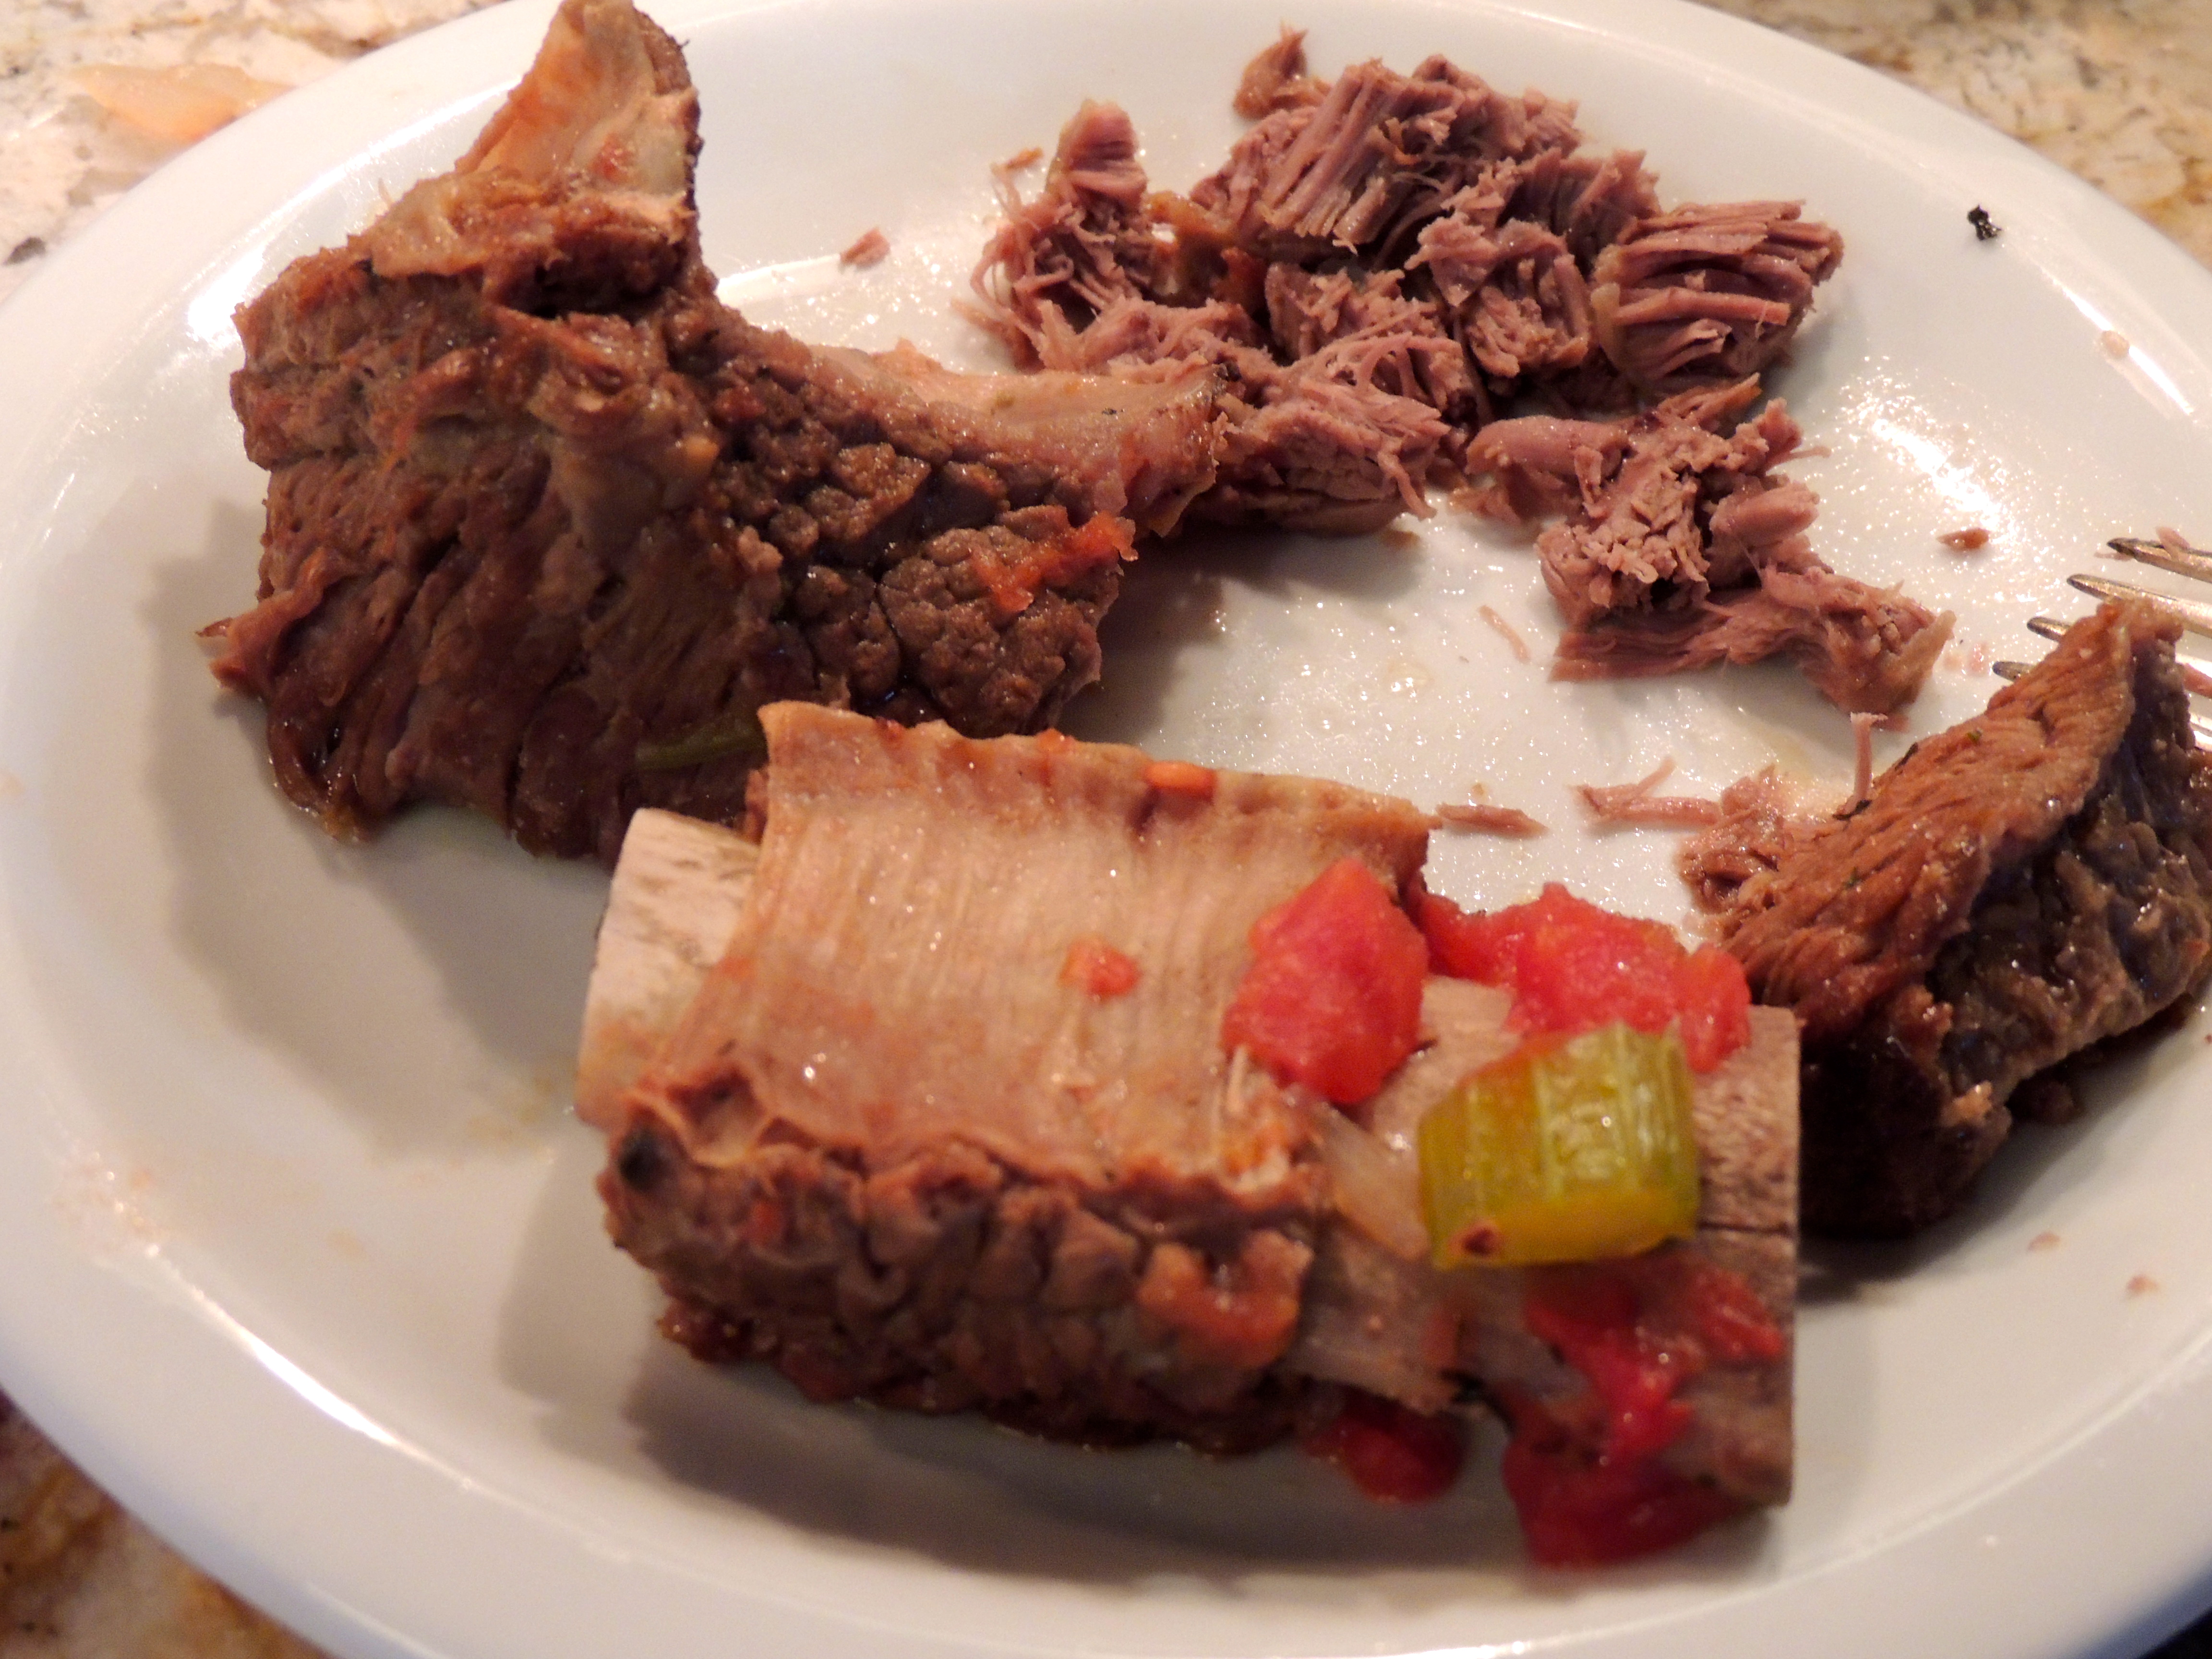
Now, take the meat off the bone and fat – toss it back in the pan… yum!
Now… a story about the photo… if that baguette looks frozen, it’s because it is! I made soup yesterday for dinner with a hot, crusty baguette. I took photos along the way, but then we were hungry… so we ate. Once the soup was in the fridge… Dang it! I realized I had forgotten to take a photo… so I just had lunch, and snapped a photo… baguette was frozen to use at a later date, but it looks nice, huh? Hee….
Fruitcake gets poo poo’d, I’m not sure why… I’m pretty sure this one will change your mind! This is a recipe that my Grandma Fidler used to make, and I still remember the wonderful smell of it! Then the recipe magically appeared in a Christmas card from my aunt. What a cool idea to share my grandma’s famous fruitcake recipe with us all! I made it and it was so delicious I cannot tell you! She brushed on brandy (several times) after baking, and wrapped in brown paper. That part isn’t on the recipe, so wing it if you like, or don’t do it at all… it’s good either way! First the recipe… and then the images to show you how easy it really is! Click HERE to print the recipe minus the photos…
Grandma’s Fruit Cake
Ingredients – (Yield: Makes 2- 9” loaves)
1 ½ cups Raisins
1 teaspoon Baking Soda
1 ½ cups Chopped Dates
2 teaspoons Cinnamon
2 Cups Sugar
1 teaspoon Ground Cloves
2 cups Boiling Water
1 teaspoon Salt
5 Tablespoons Shortening
1 cup Chopped Nuts
3 cups All Purpose Flour
1 cup Candied Fruit
2 Eggs
Directions
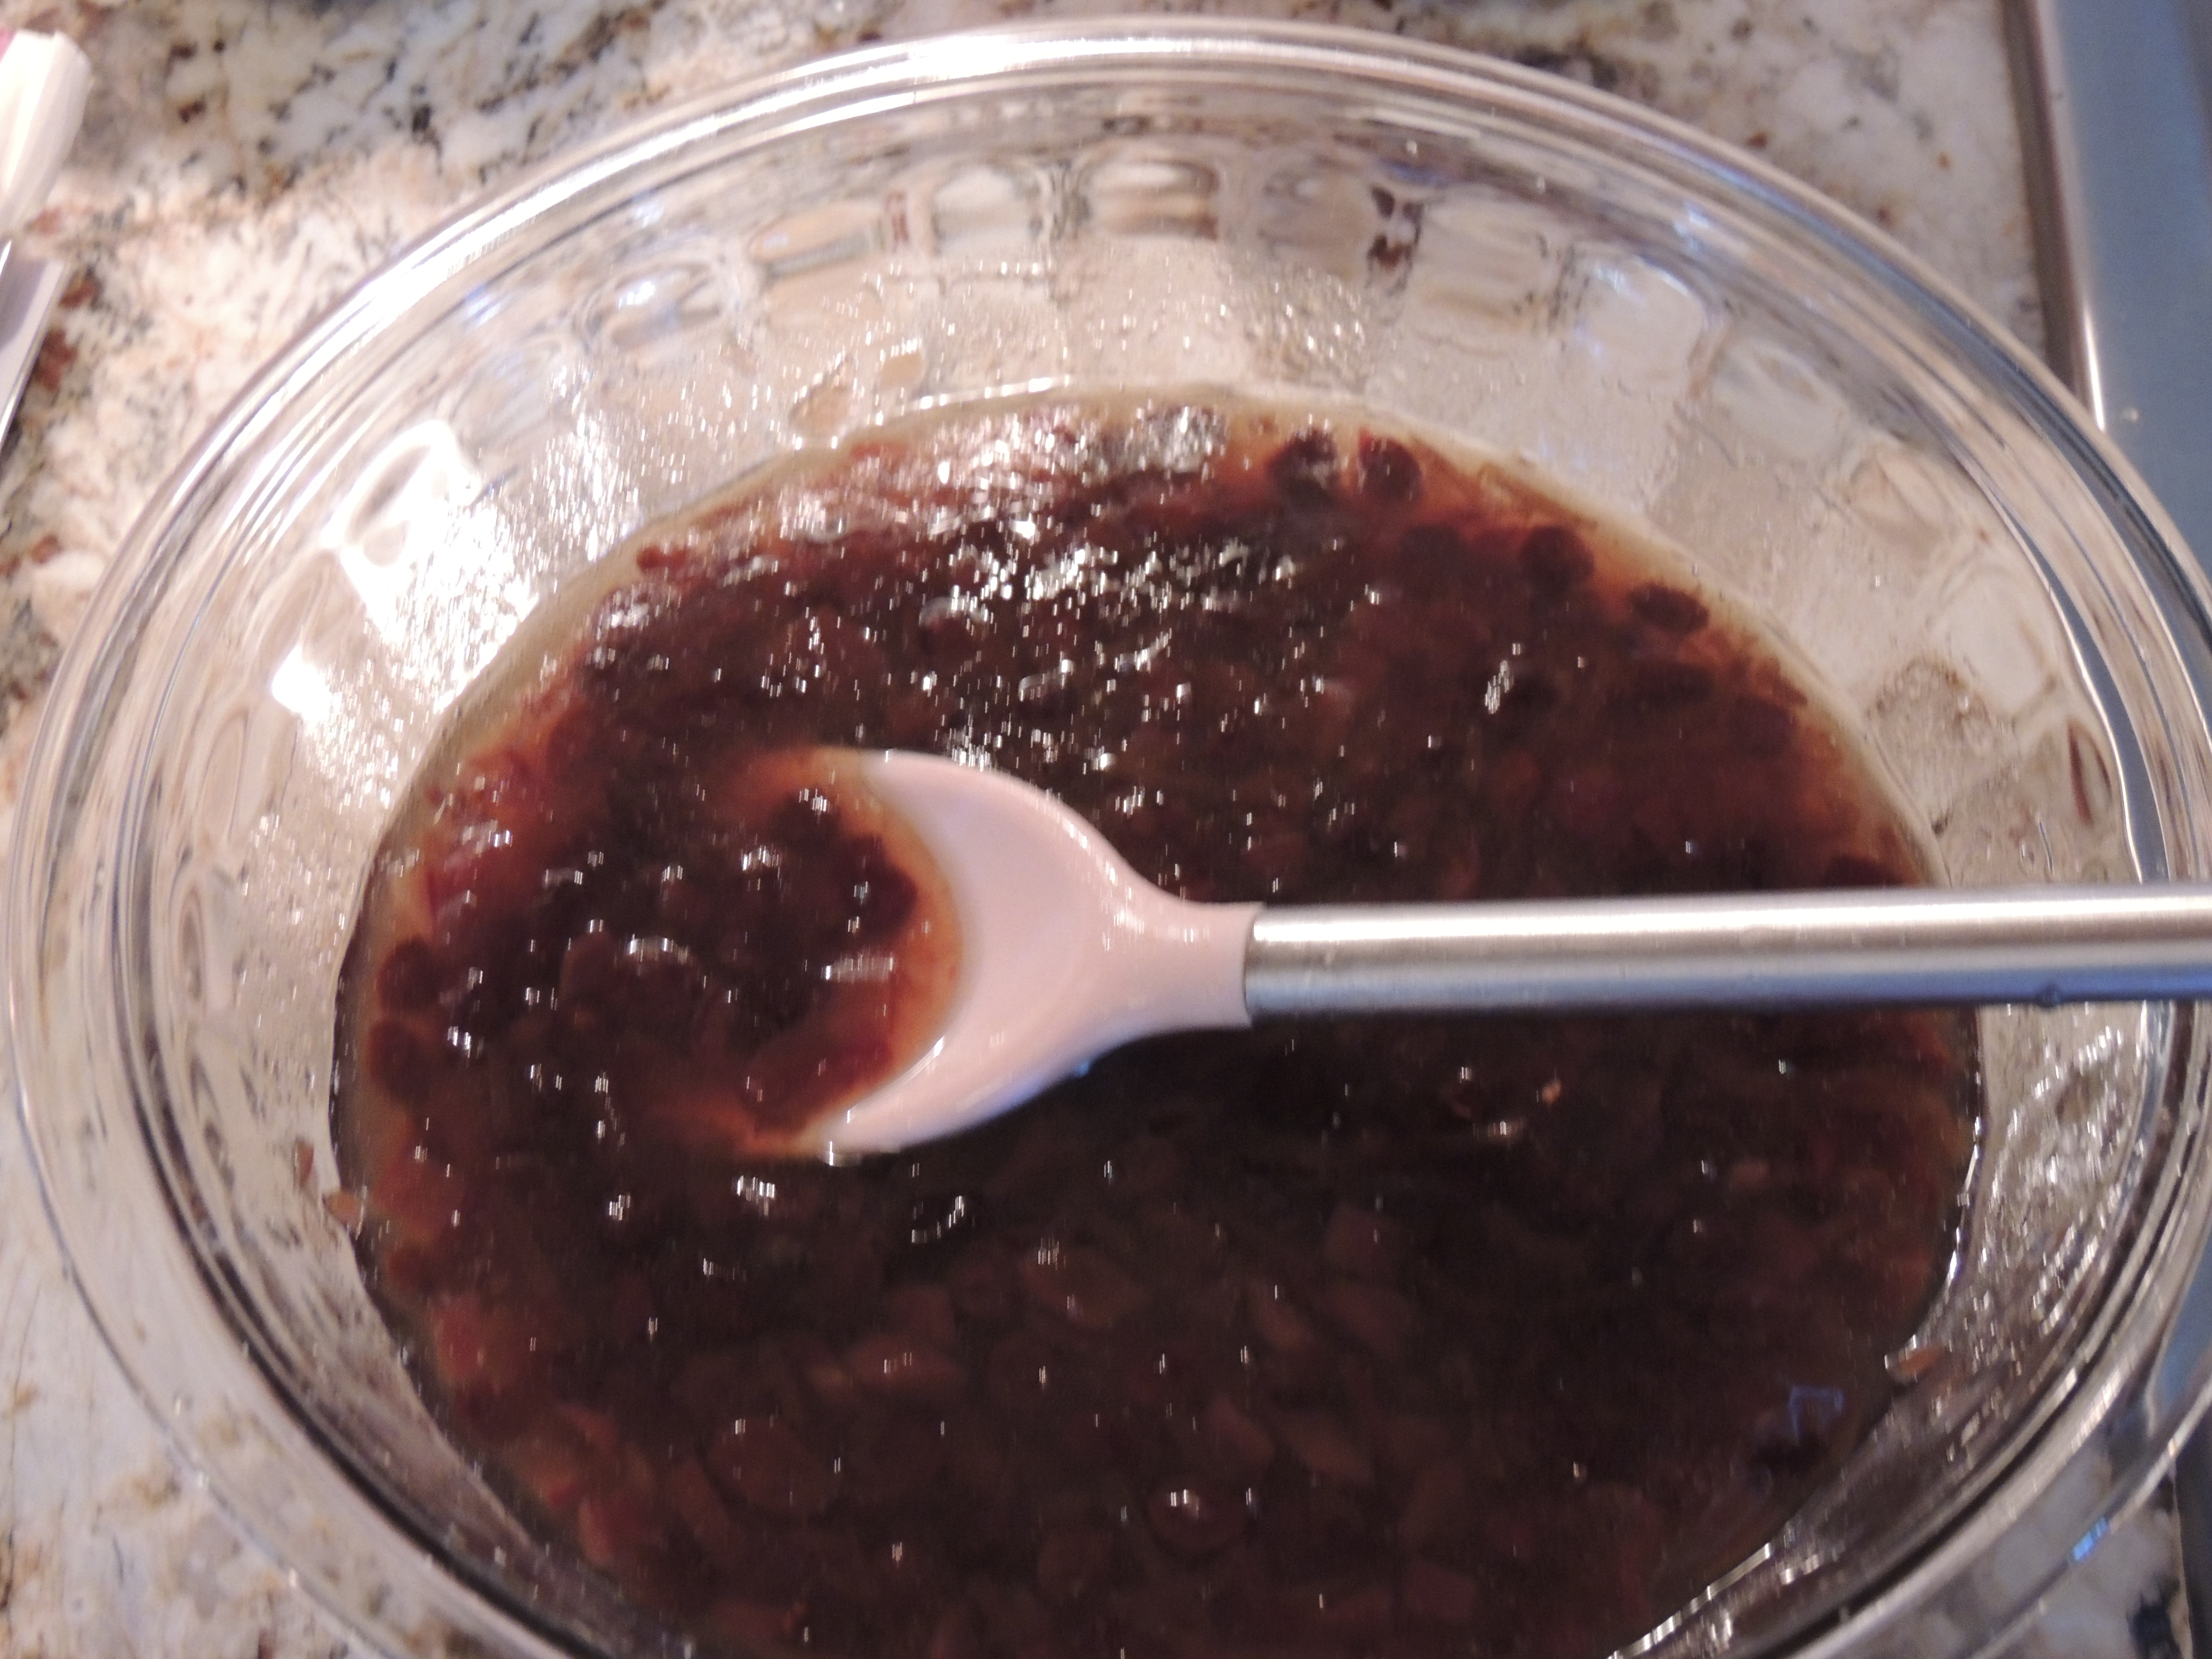
In a large saucepan add the boiling water and stir in the raisins, chopped dates, sugar and shortening. Bring contents to boil and then let simmer gently for 20 minutes, stirring occasionally. Place cooked mixture in cool place until thoroughly cooled.
After the boil…
Preheat oven to 325 degrees F.
In a large mixing bowl add Flour, Baking Soda, Cinnamon, Ground Cloves and Salt.
Mix together dry ingredients…
Blend together then add eggs.
Add eggs…
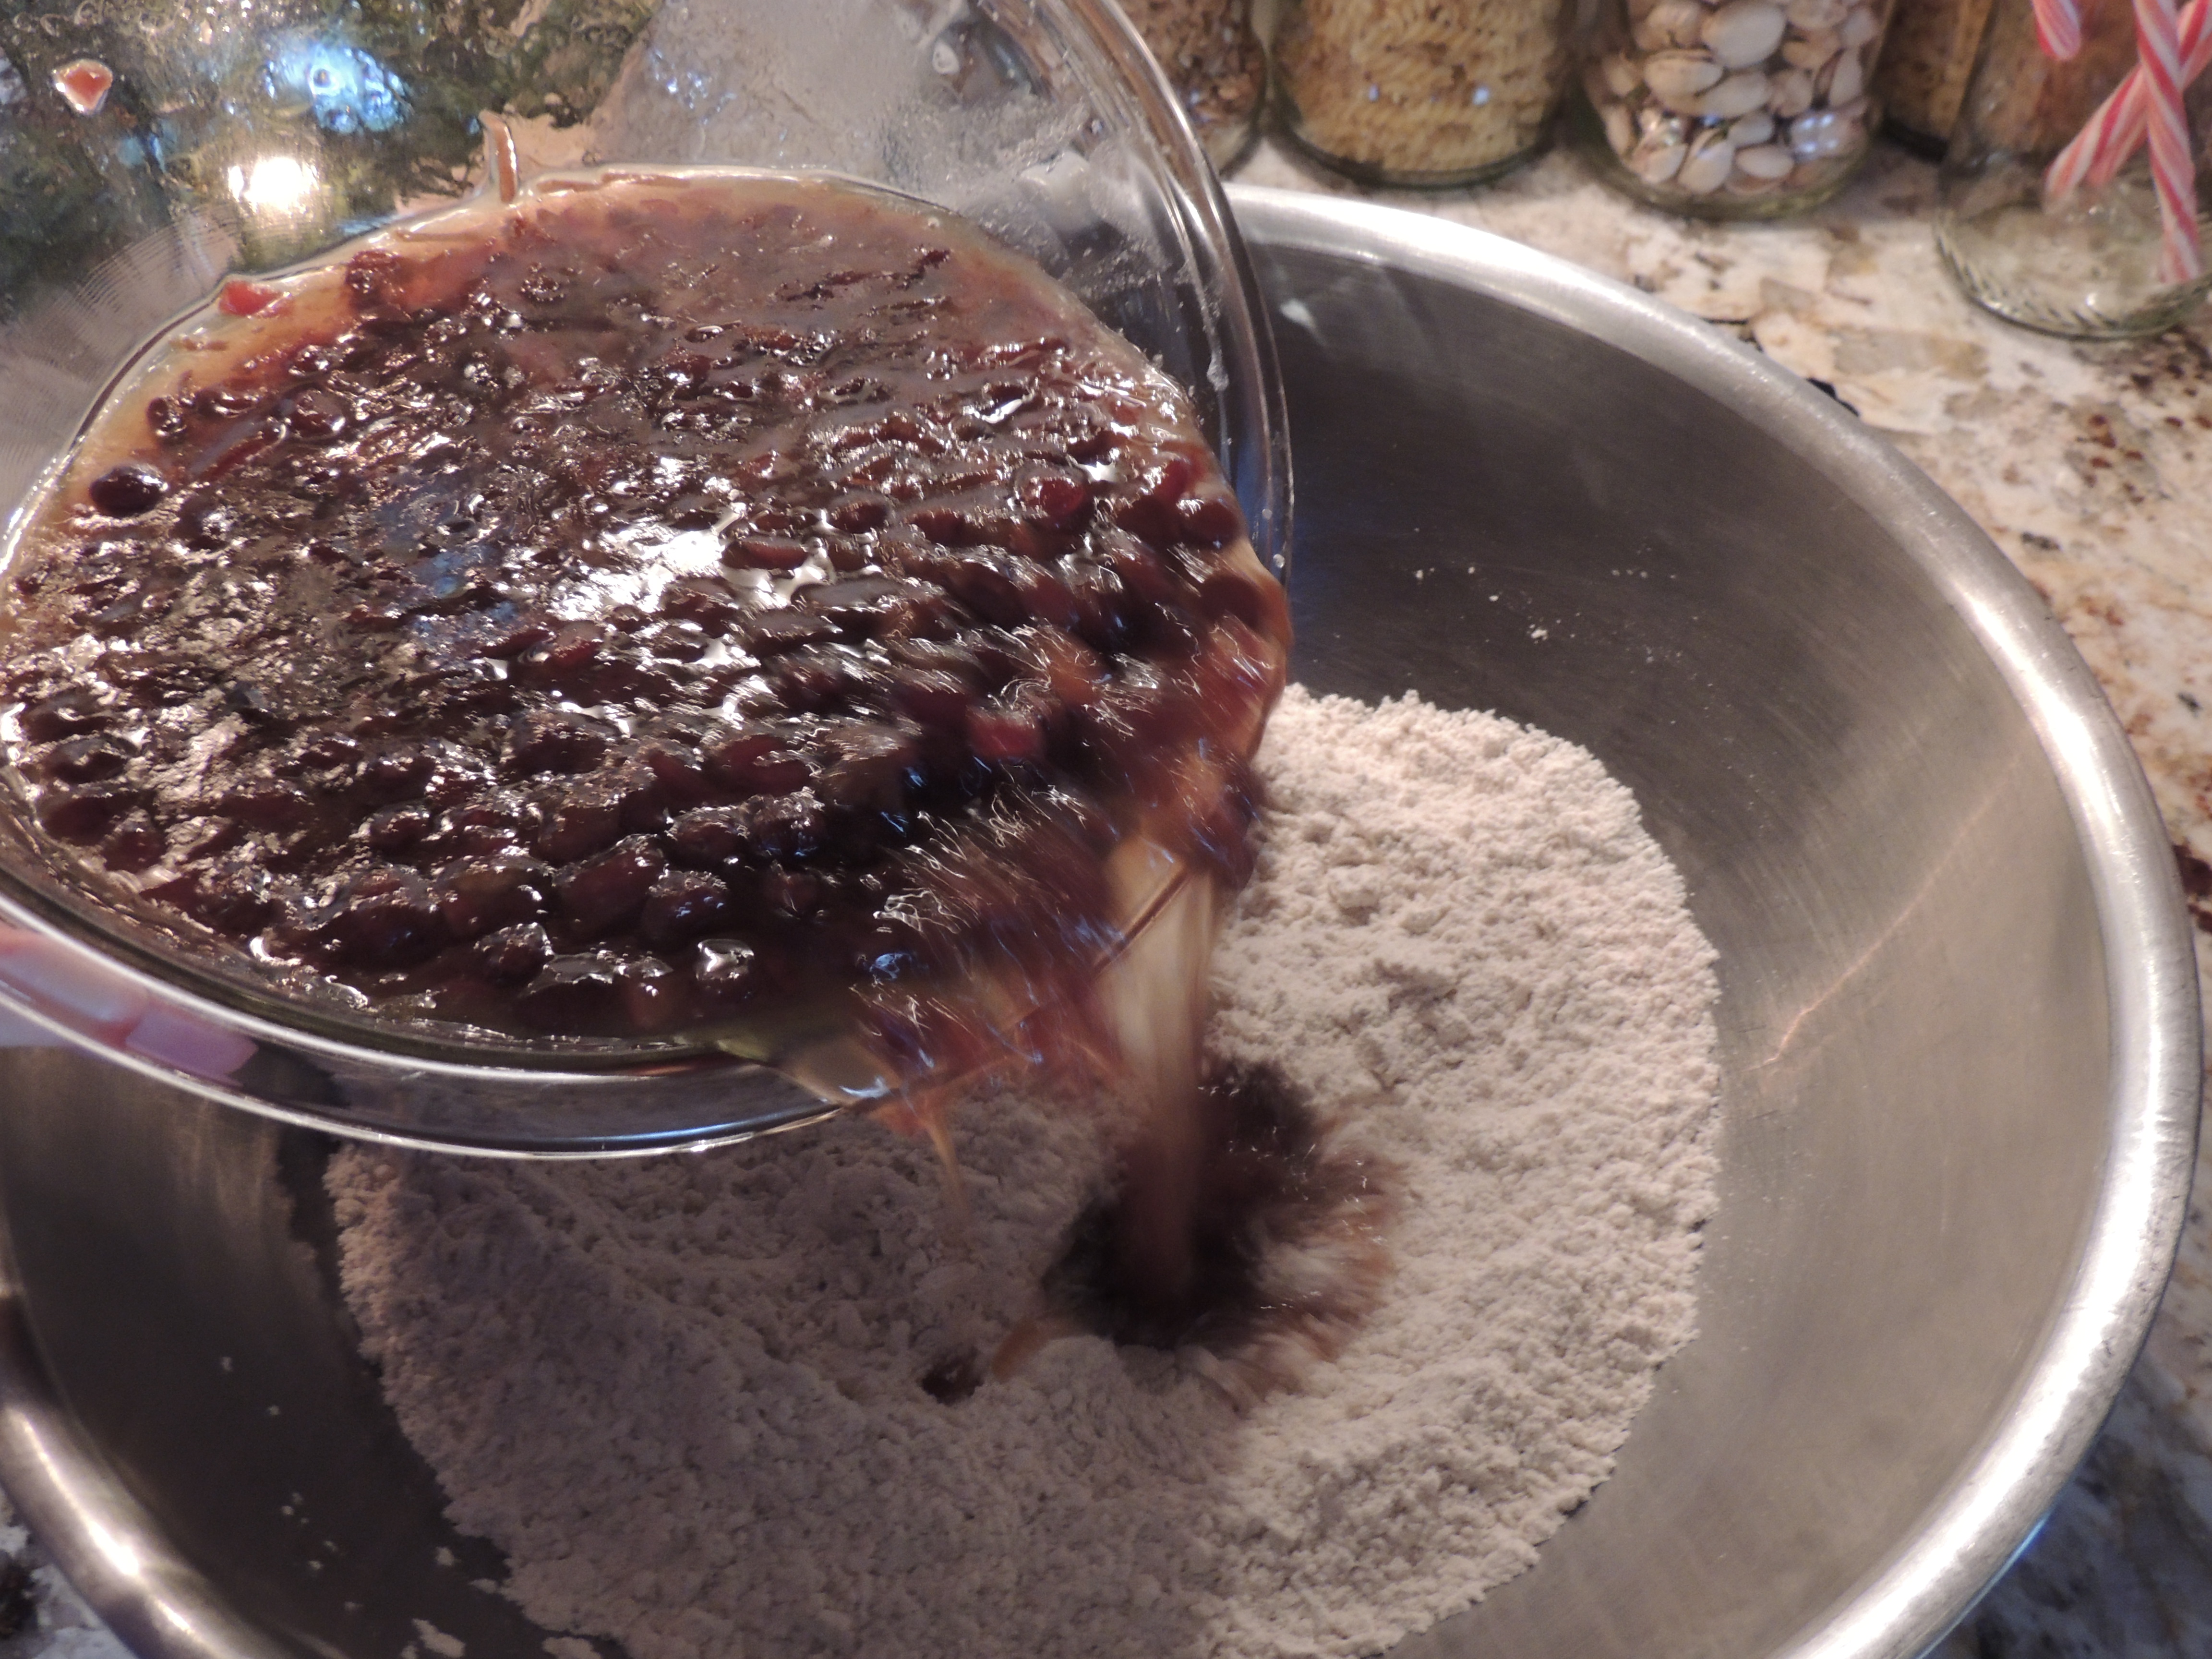
Stir in the cooled mixture adding the chopped nuts and candied fruit last.
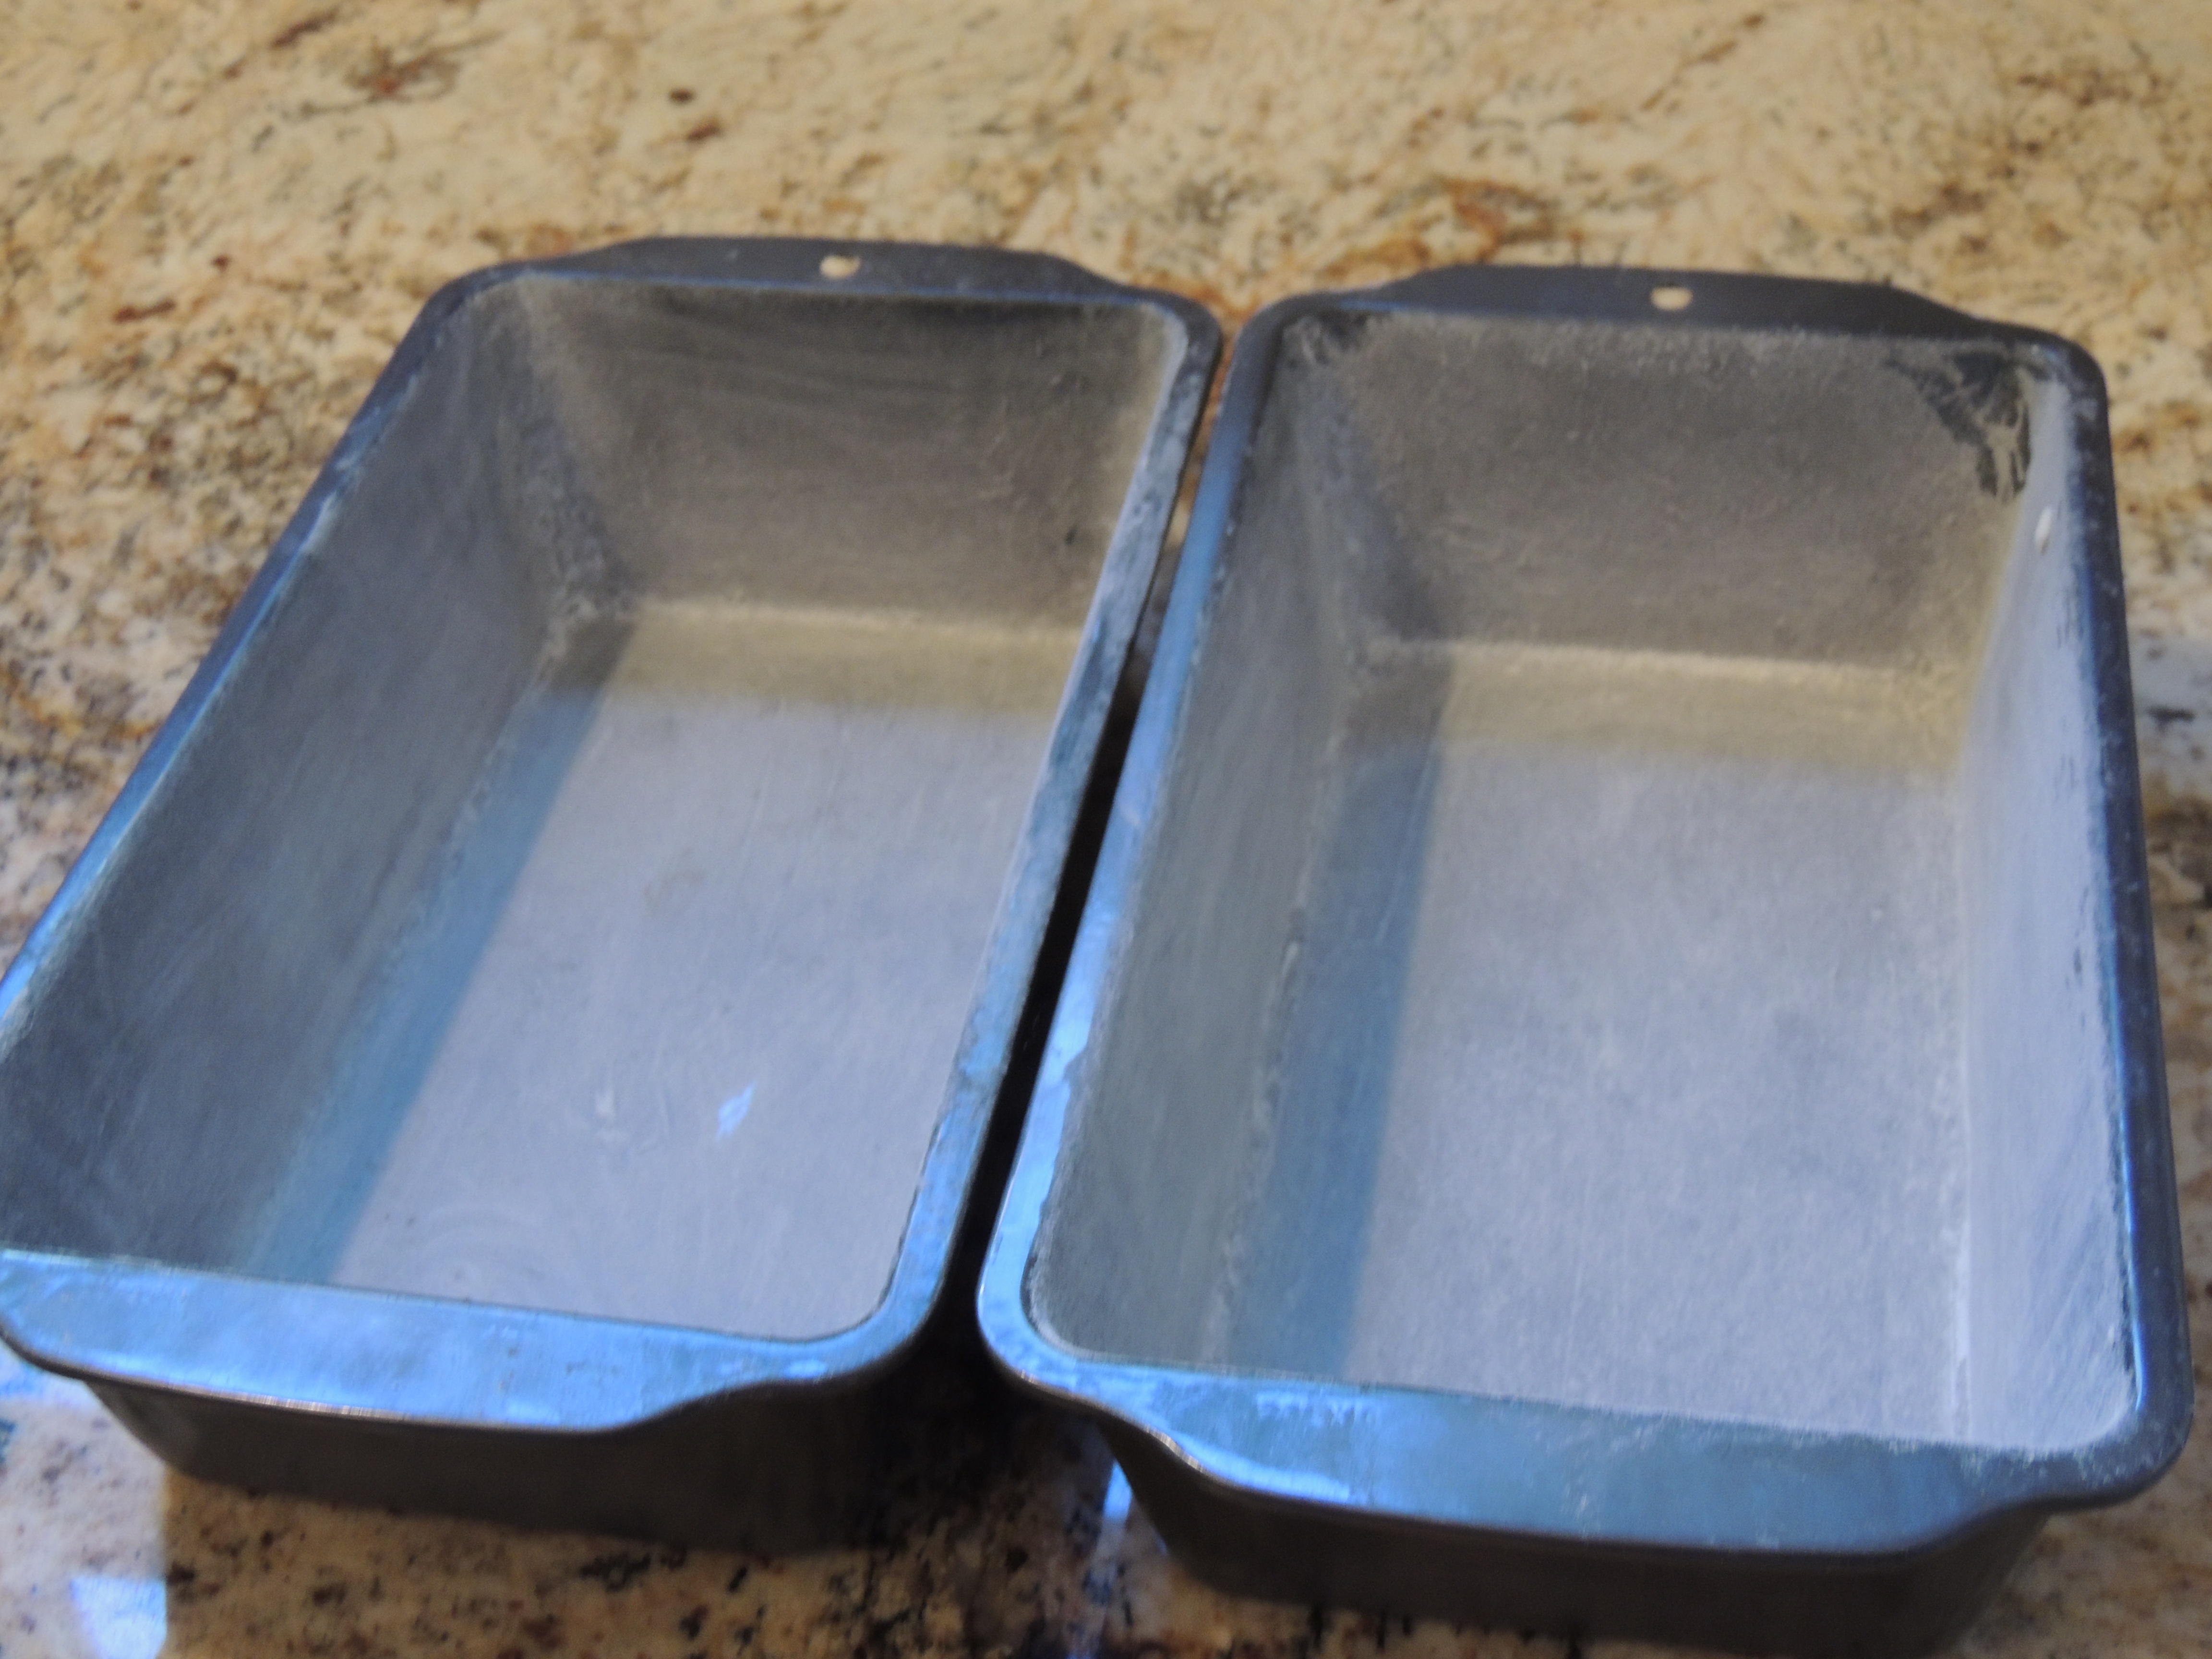
Divide into 2 well-greased and floured large loaf pans (9”x3”x3” deep) and bake for approximately 1 hour 15 minutes. Use toothpick near end of baking time to check center of loaf. Cooking times vary. (My grandma also had a note on her recipe to put water in a pie dish and place in the oven, this keeps the fruitcake moist by keeping the air moist!)
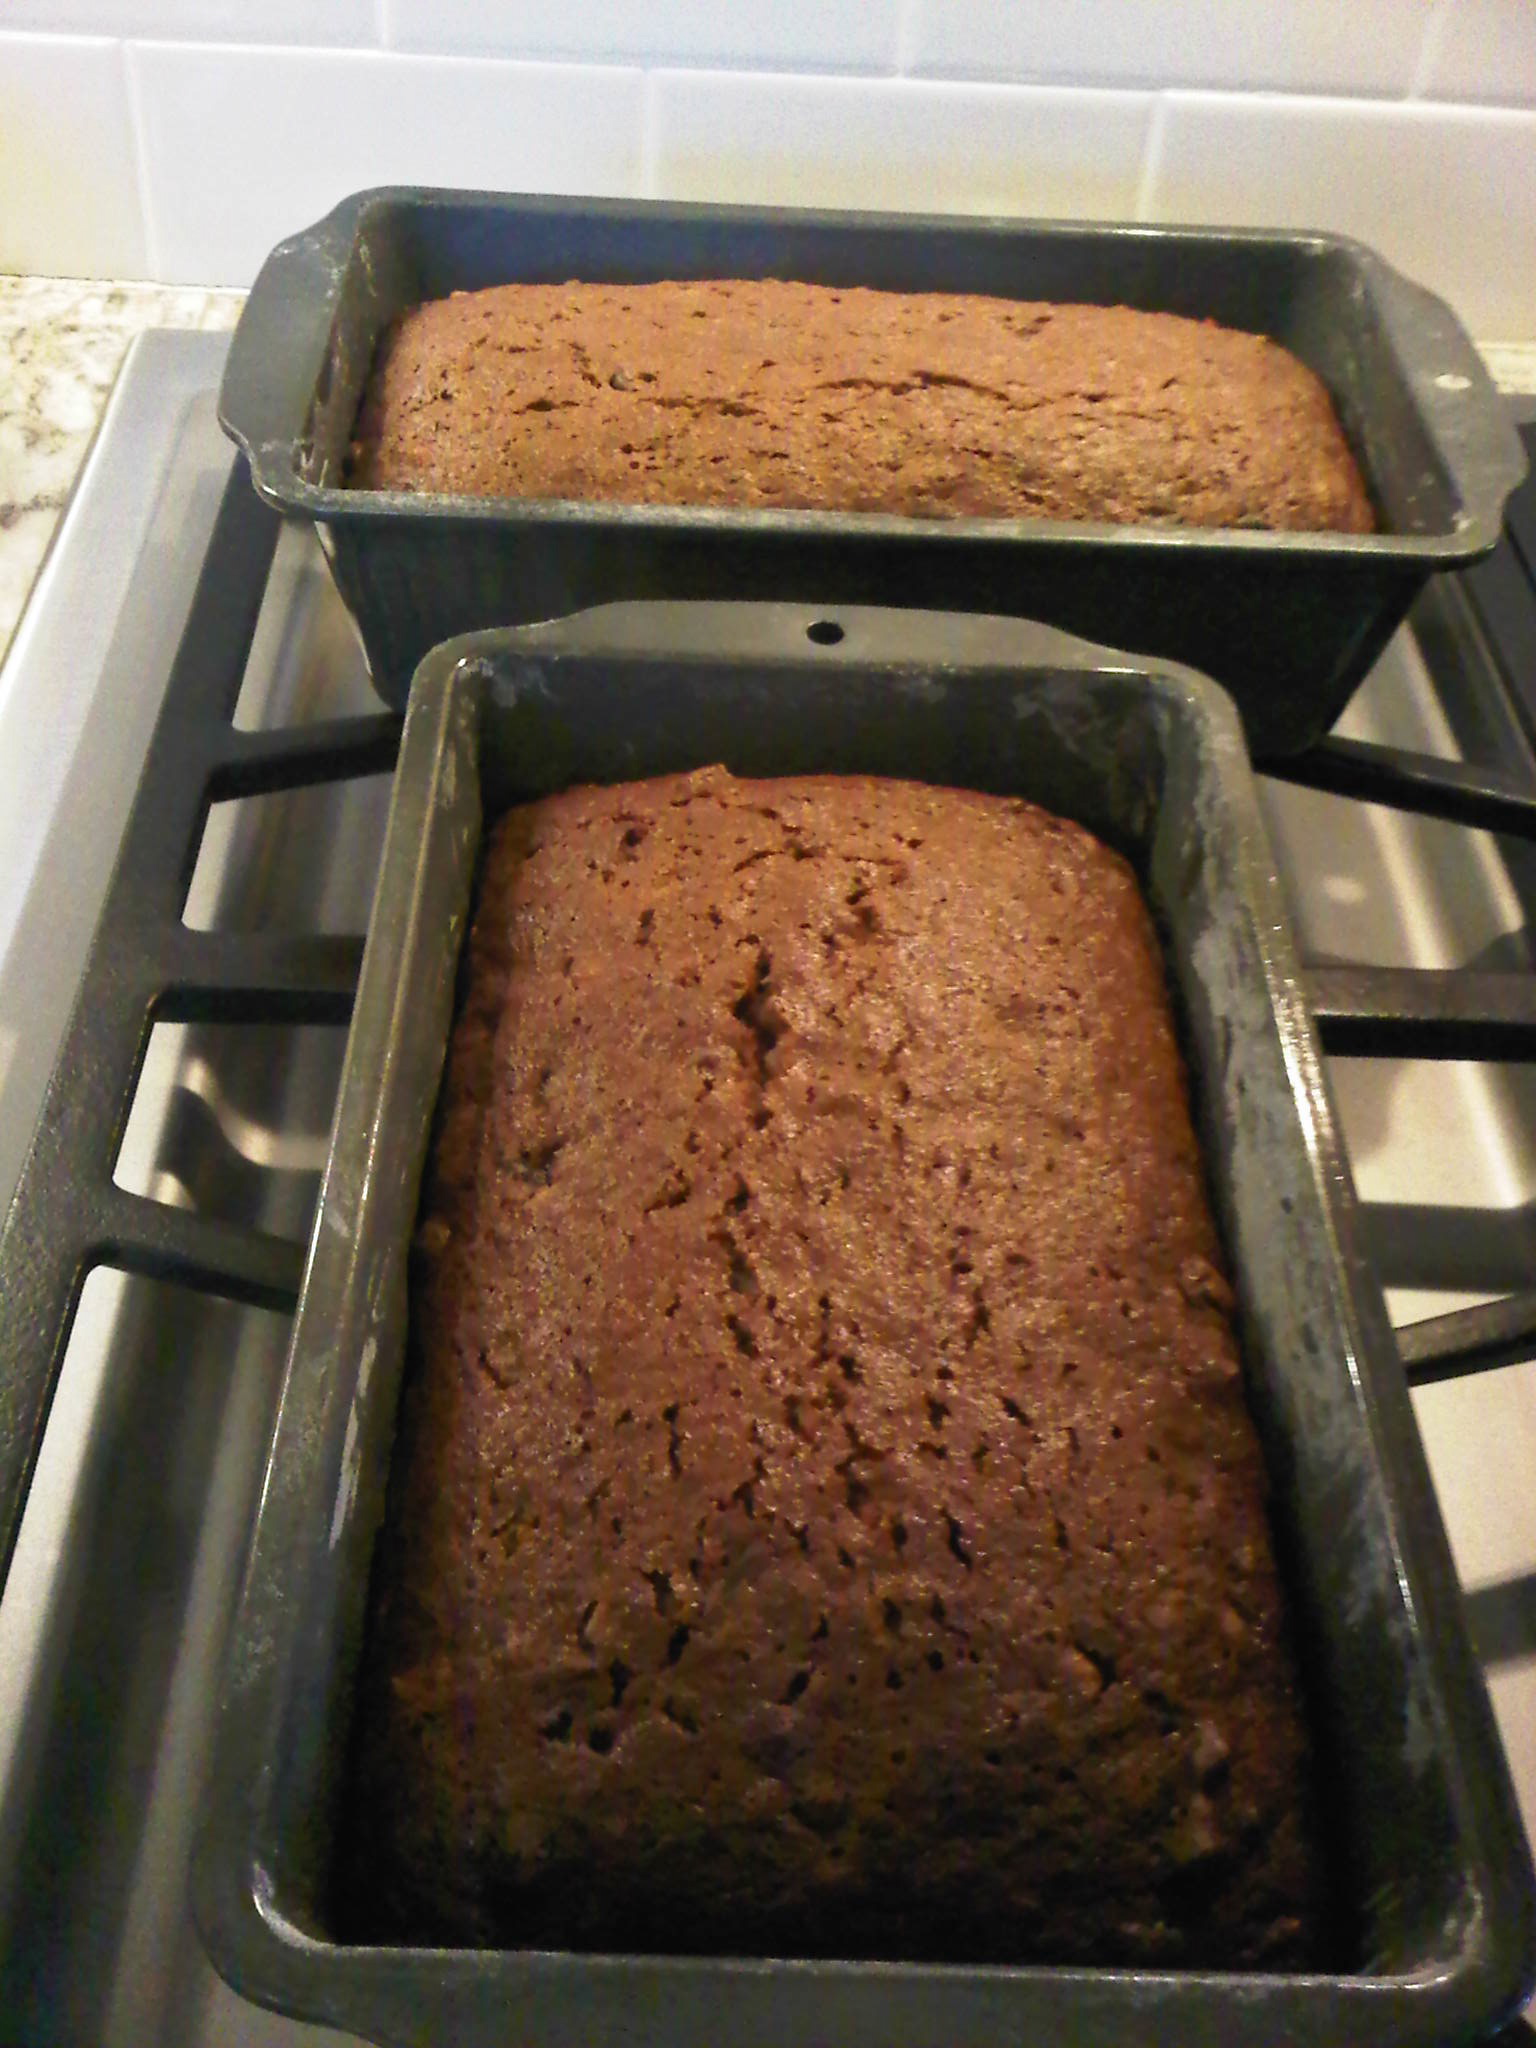
Ready for the oven!
Do you smell that yummy goodness filling your house? Ahhhh, this is wonderful!
Ta da!
Note: Cooking time varies with size of loaf pan, a medium (8×3”) bakes approximately 1 hour and mini loaf pans (5 ½ x 3”) bake approximately 45 minutes.
I love running across an intriguing recipe and giving it a whirl! I had received an email from Martha Stewart – Everyday Food – with this fabulous “recipe” in it for a Rustic Apple Tart. I say “recipe” because it was a video link, which is great, but there was no recipe… and to remember each step when you haven’t worked with puff pastry much in the past seemed to be a little dangerous to me, ha ha… So here is the “recipe” as well as the link to their video (which is amazing, be sure to watch it first, Sarah Carey did a great job with the quick demo!). There are only a few ingredients, it’s fairly quick to make and it comes out absolutely gorgeous! Tasty, beautiful and very professional looking, thanks to the glaze that goes on top (which doesn’t really add to the taste, just the beauty). Click HERE to print the recipe only.
RUSTIC APPLE TART
Puff Pastry (1 sheet)
3 Granny Smith Apples
1/3 cup sugar (or a little less)
1 large egg yolk
1 tsp water
Defrost puff pastry in refrigerator.
Once defrosted, leave folded and roll out to 8×14 on a lightly floured surface.
TRIM EDGES – need a clean edge, otherwise it won’t puff up, she used a pizza cutter
Place on baking sheet and PUT IN FREEZER 10-15 minutes (this is very important)!
Filling:
Peel and core 3 Granny Smith Apples, cut into 1/4″ slices
Add 1/3 cup sugar (or less) and mix.
In separate bowl, mix 1 large egg YOLK (discard white) and 1 tsp water, set aside.
Dough out of freezer.
Brush on egg wash (don’t let drip down the sides, it could inhibit it from rising)
Create border 3/4″ from edge, cut halfway through dough with a knife.
Arrange apples within border.
Dot the top of the tart with 2 Tablespoons of butter.
Bake at 375 for 30-35 minutes.
While tart is still warm mix up this glaze…
Glaze
2 Tablespoons of apricot jam or apple jelly
1 Tablespoon water
Mix and heat until warm.
Brush this mixture on the tart while it’s still warm.
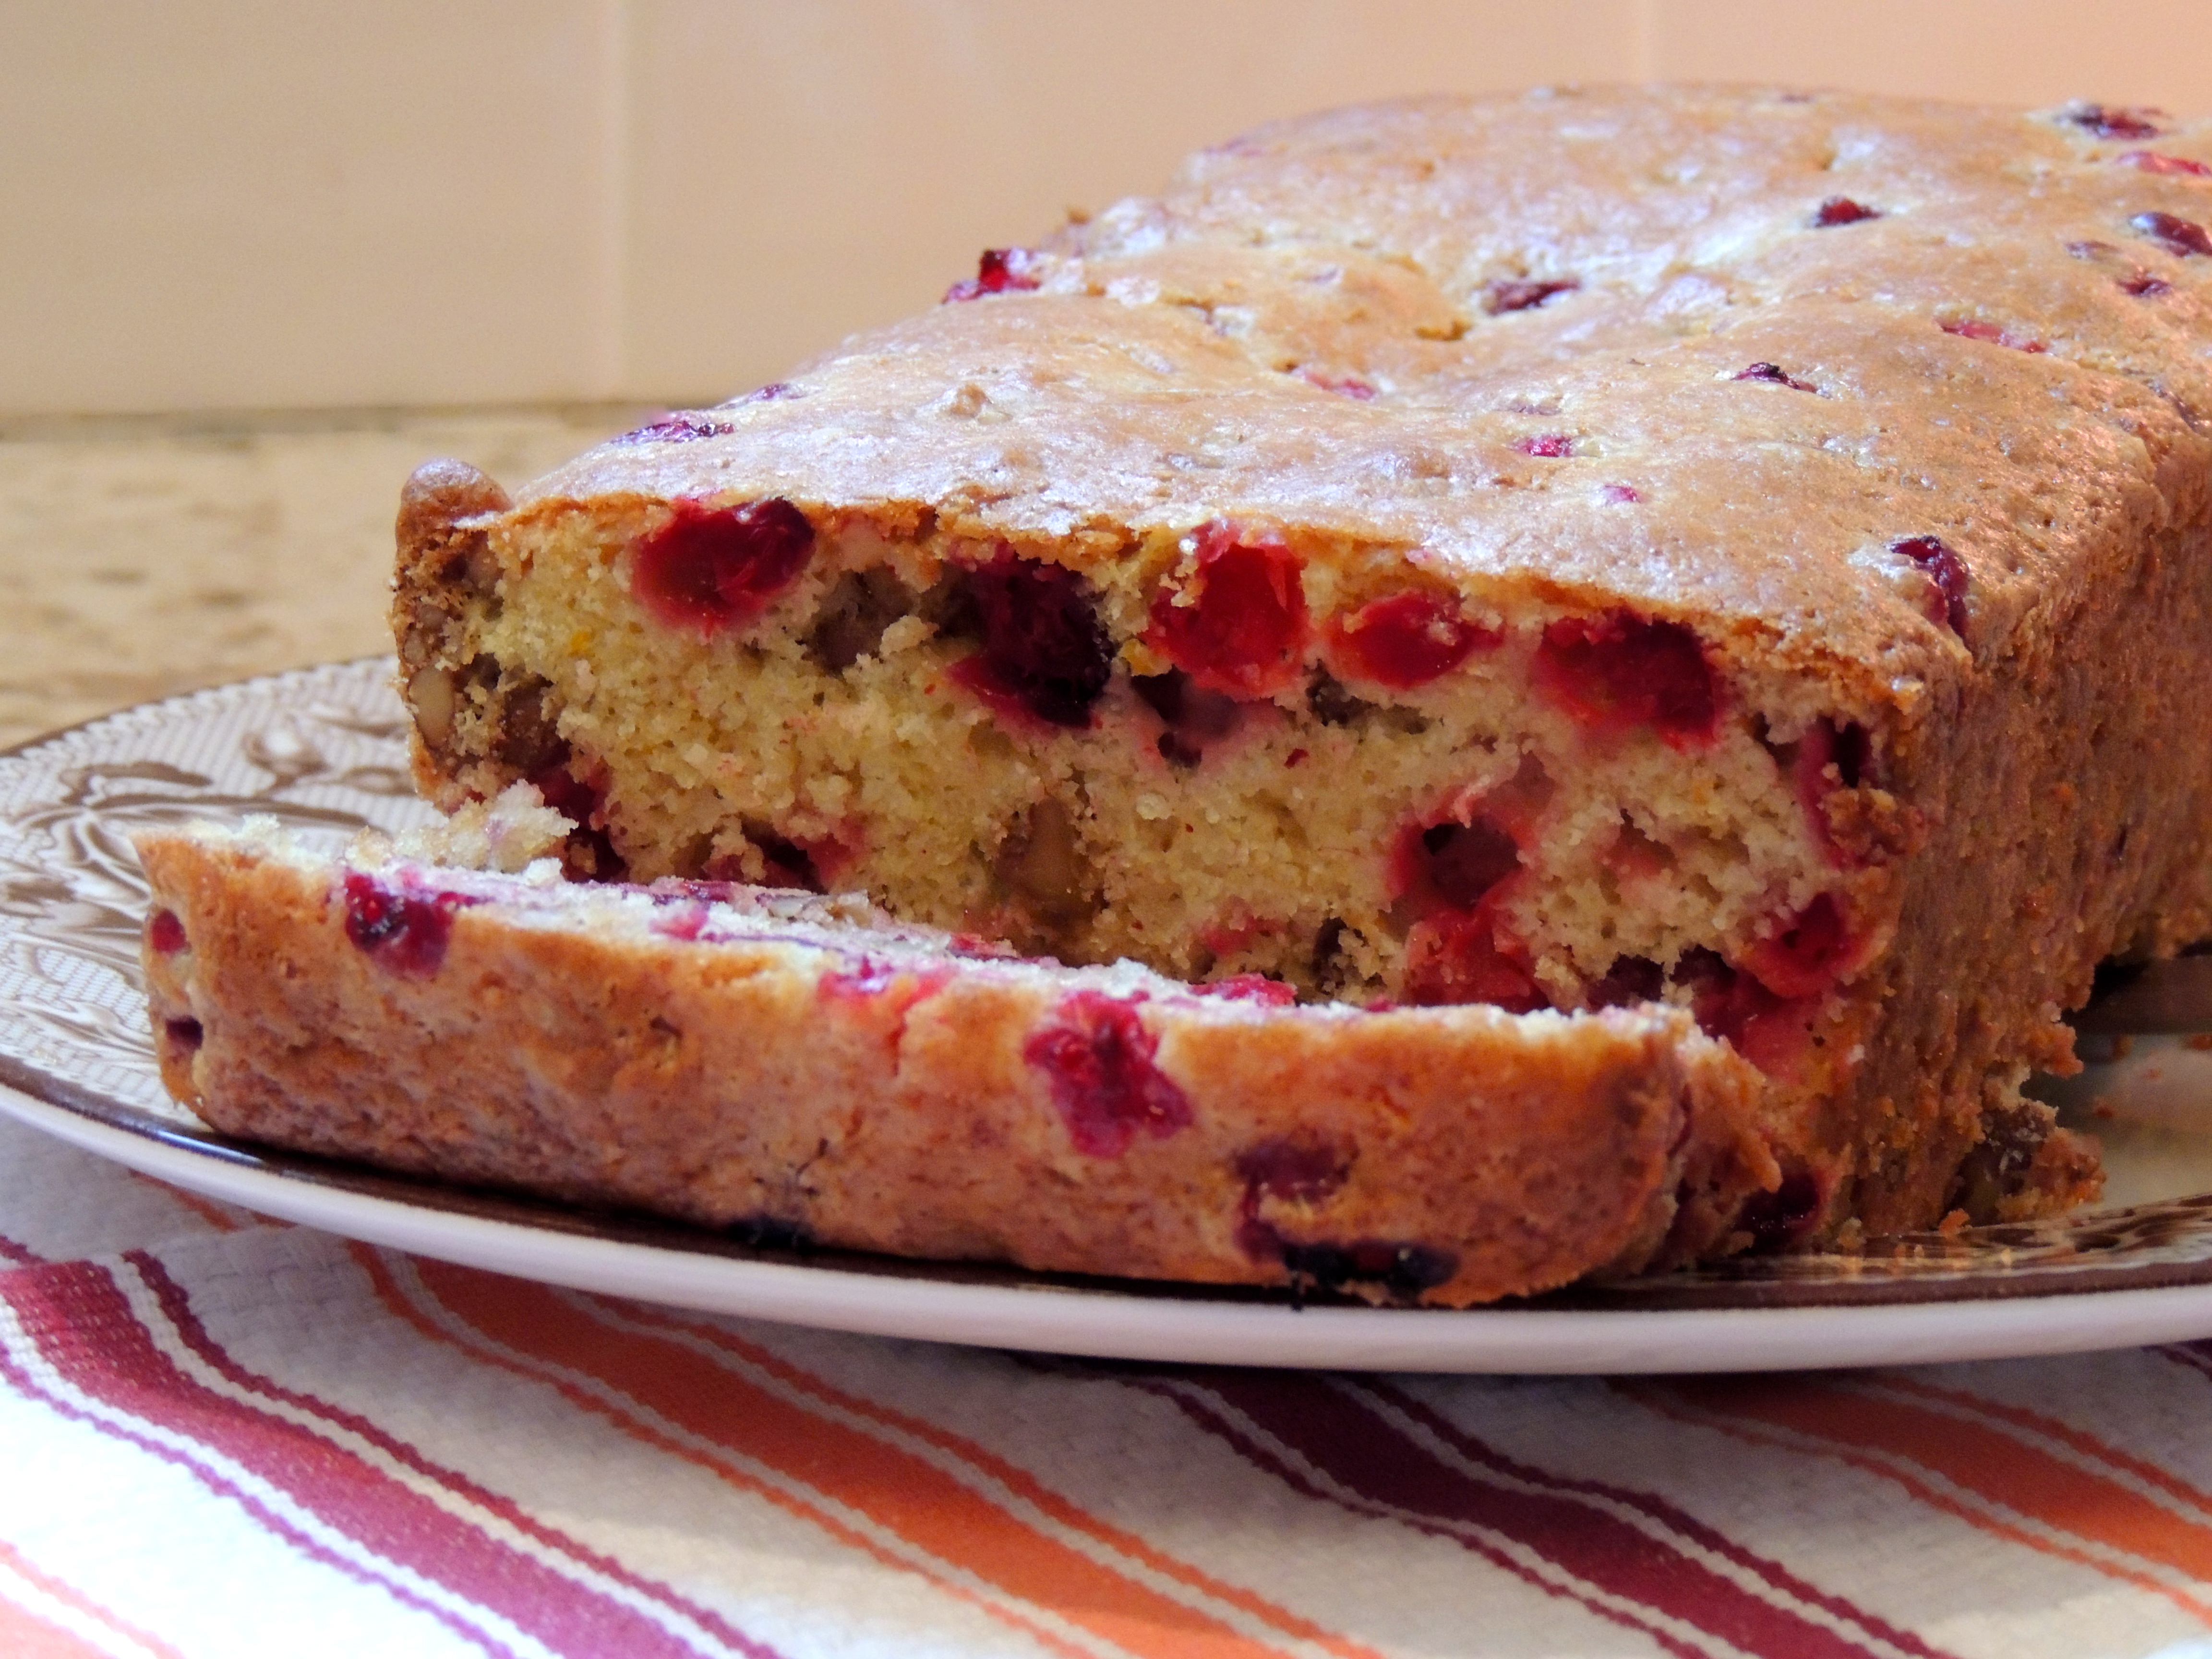
This is a fabulous recipe that you may have run across before… it’s on the back of the Ocean Spray Cranberry bag (fresh cranberries in the produce department). This is the perfect time of year to pick up a few bags. Cranberries freeze well and you can make your own cranberry sauce (you will not believe how quick and easy it is – you will never run to the store for it again!)…. and the taste?? SO. MUCH. BETTER. THAN. CANNED.
2 cups flour
1 cup sugar
1 1/2 teaspoons baking powder
1 teaspoon salt
1/2 teaspoon baking soda
3/4 cup orange juice
1 tablespoon grated orange peel
2 tablespoons shortening
1 egg, well beaten
1 1/2 cups Ocean Spray® Fresh or Frozen Cranberries, coarsely chopped
1/2 cup chopped nuts
Directions:
Preheat oven to 350ºF. Grease a 9 x 5-inch loaf pan.
Mix together flour, sugar, baking powder, salt and baking soda in a medium mixing bowl. Stir in orange juice, orange peel, shortening and egg. Mix until well blended. Stir in cranberries and nuts. Spread evenly in loaf pan.
Bake for 55 minutes or until a toothpick inserted in the center comes out clean. Cool on a rack for 15 minutes. Remove from pan; cool completely. Wrap and store overnight. Makes 1 loaf (16 slices).
To recap:
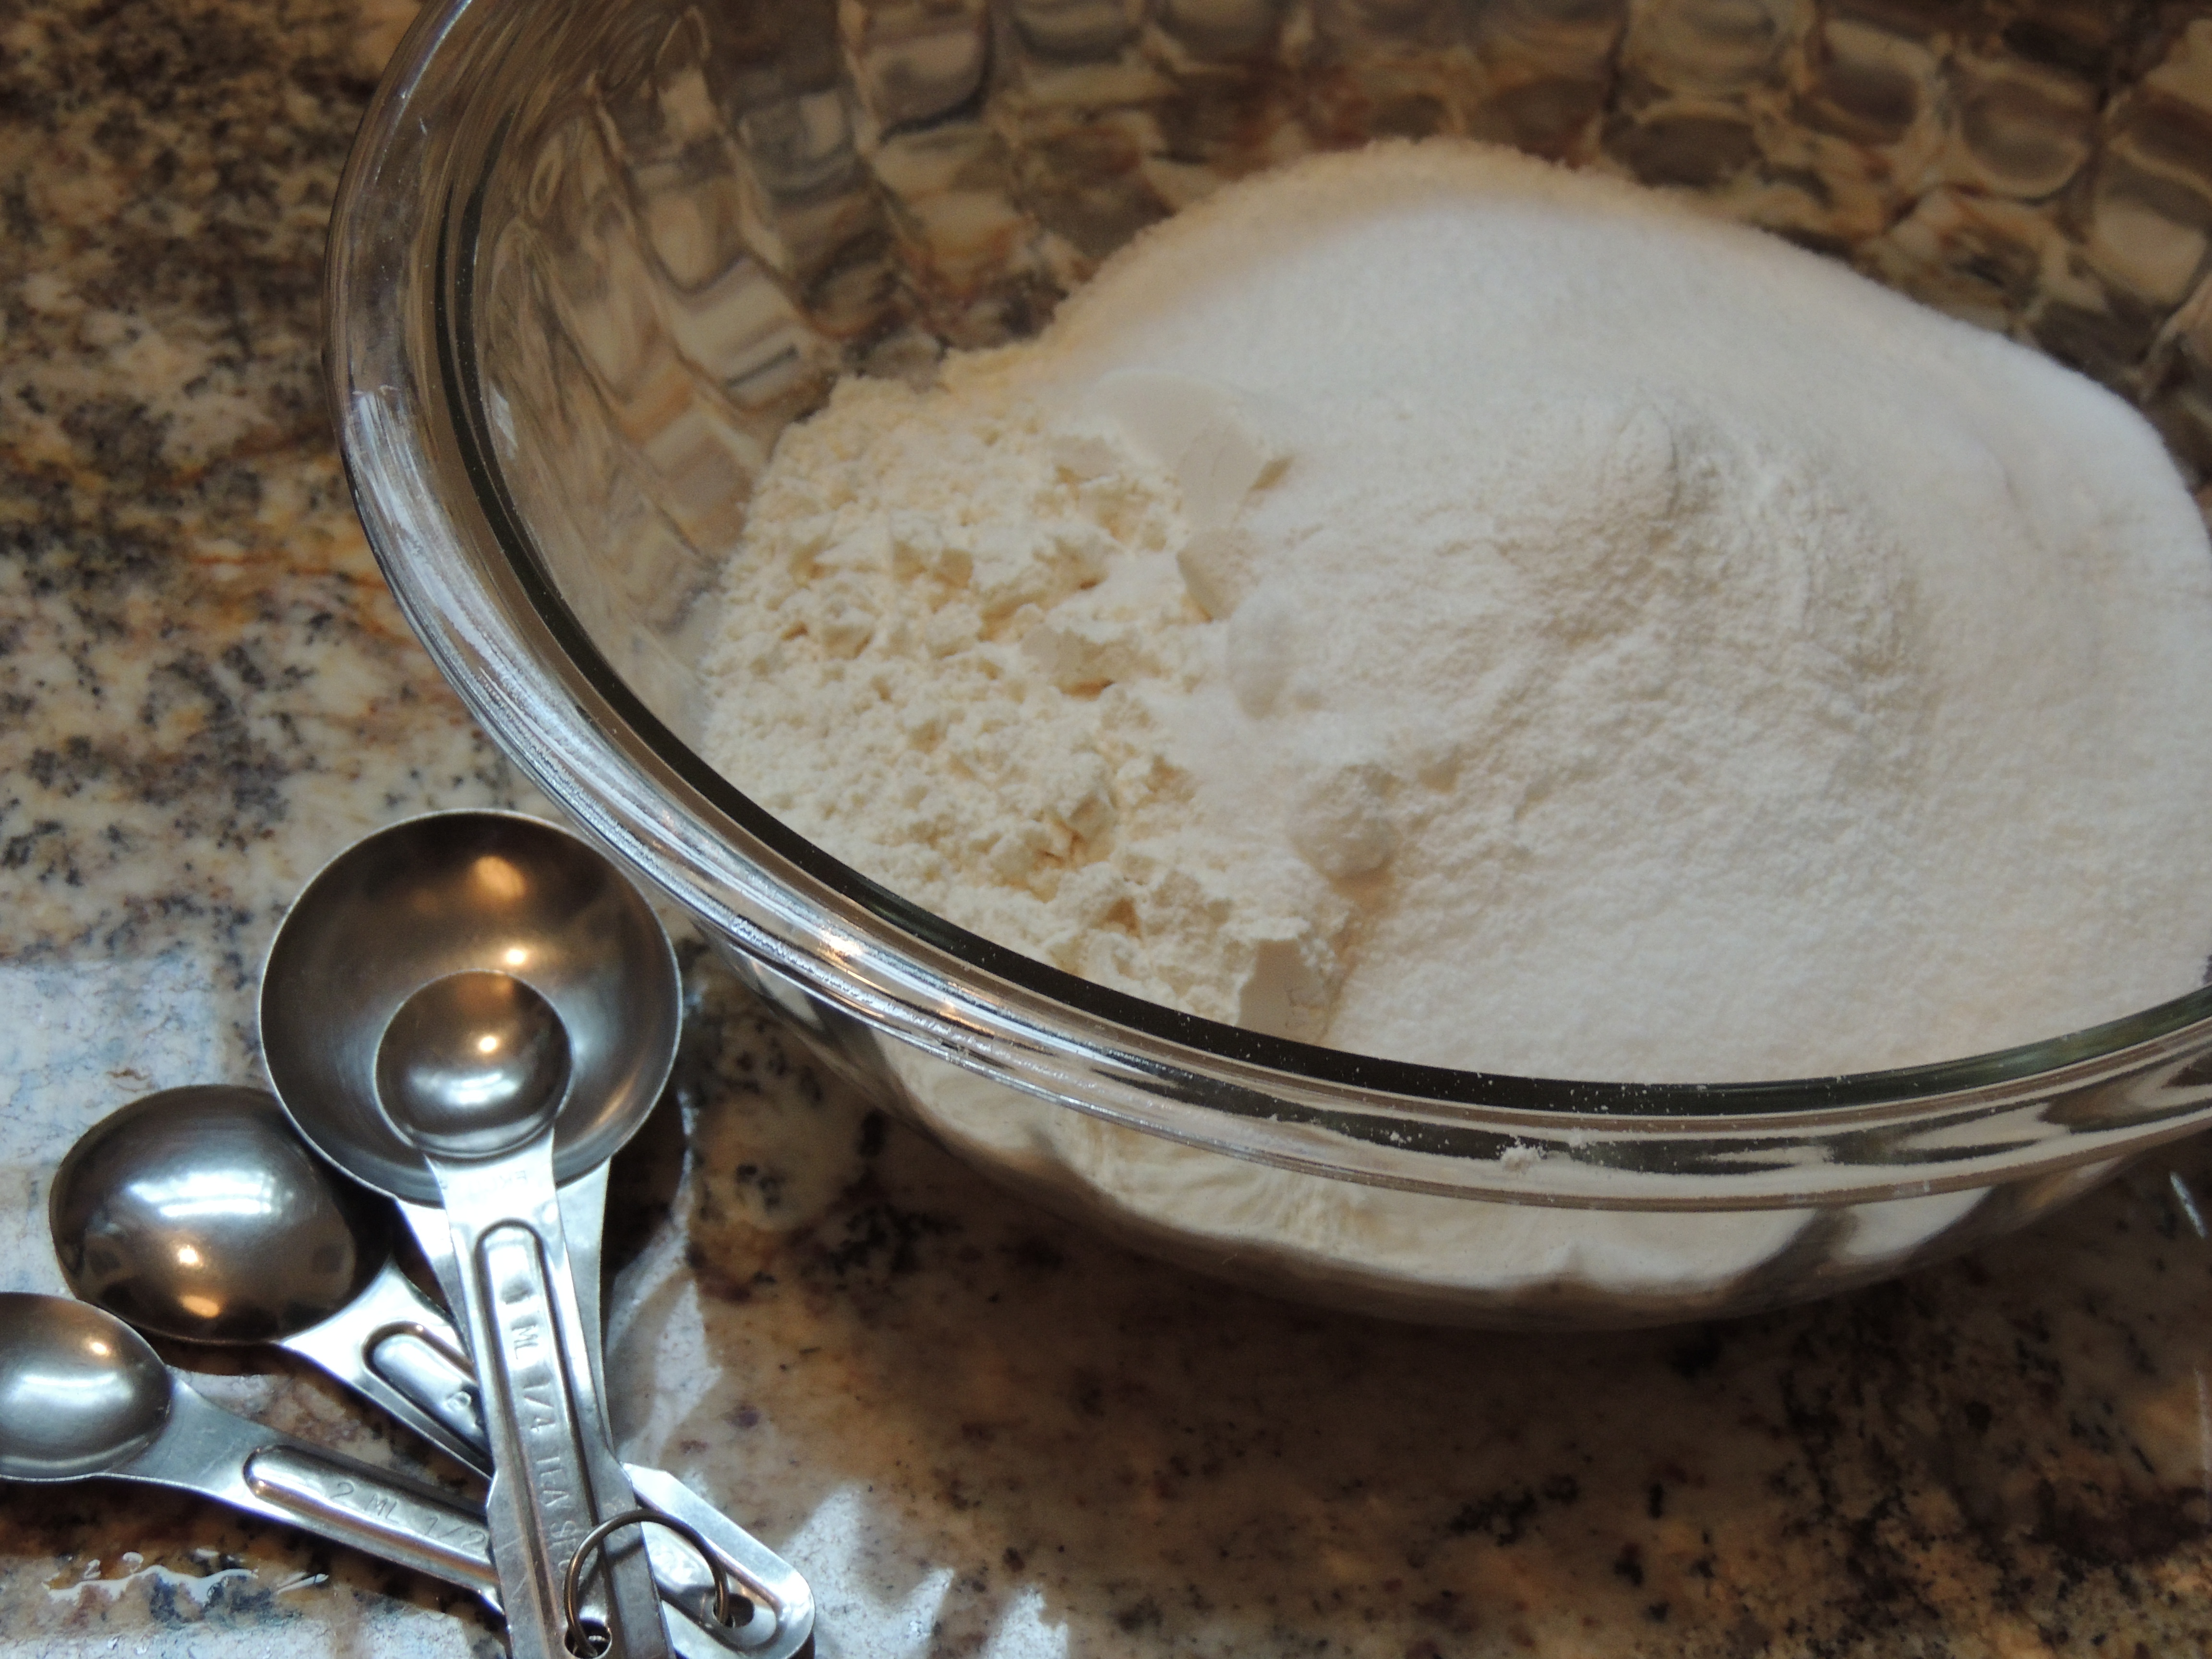
Mix together dry ingredients (flour, sugar, baking powder/soda, salt)
Dry ingredients…
Then add the wet ingredients, orange juice, orange peel, shortening and egg, once mixed together add the fresh cranberries and chopped nuts and pour into prepared pan…
Ready for the oven!
Pop it into the oven, sit back, have a tea and wait… ooooh, smell that wonderful smell… it’s delicious hot, cold and it freezes well! E N J O Y !
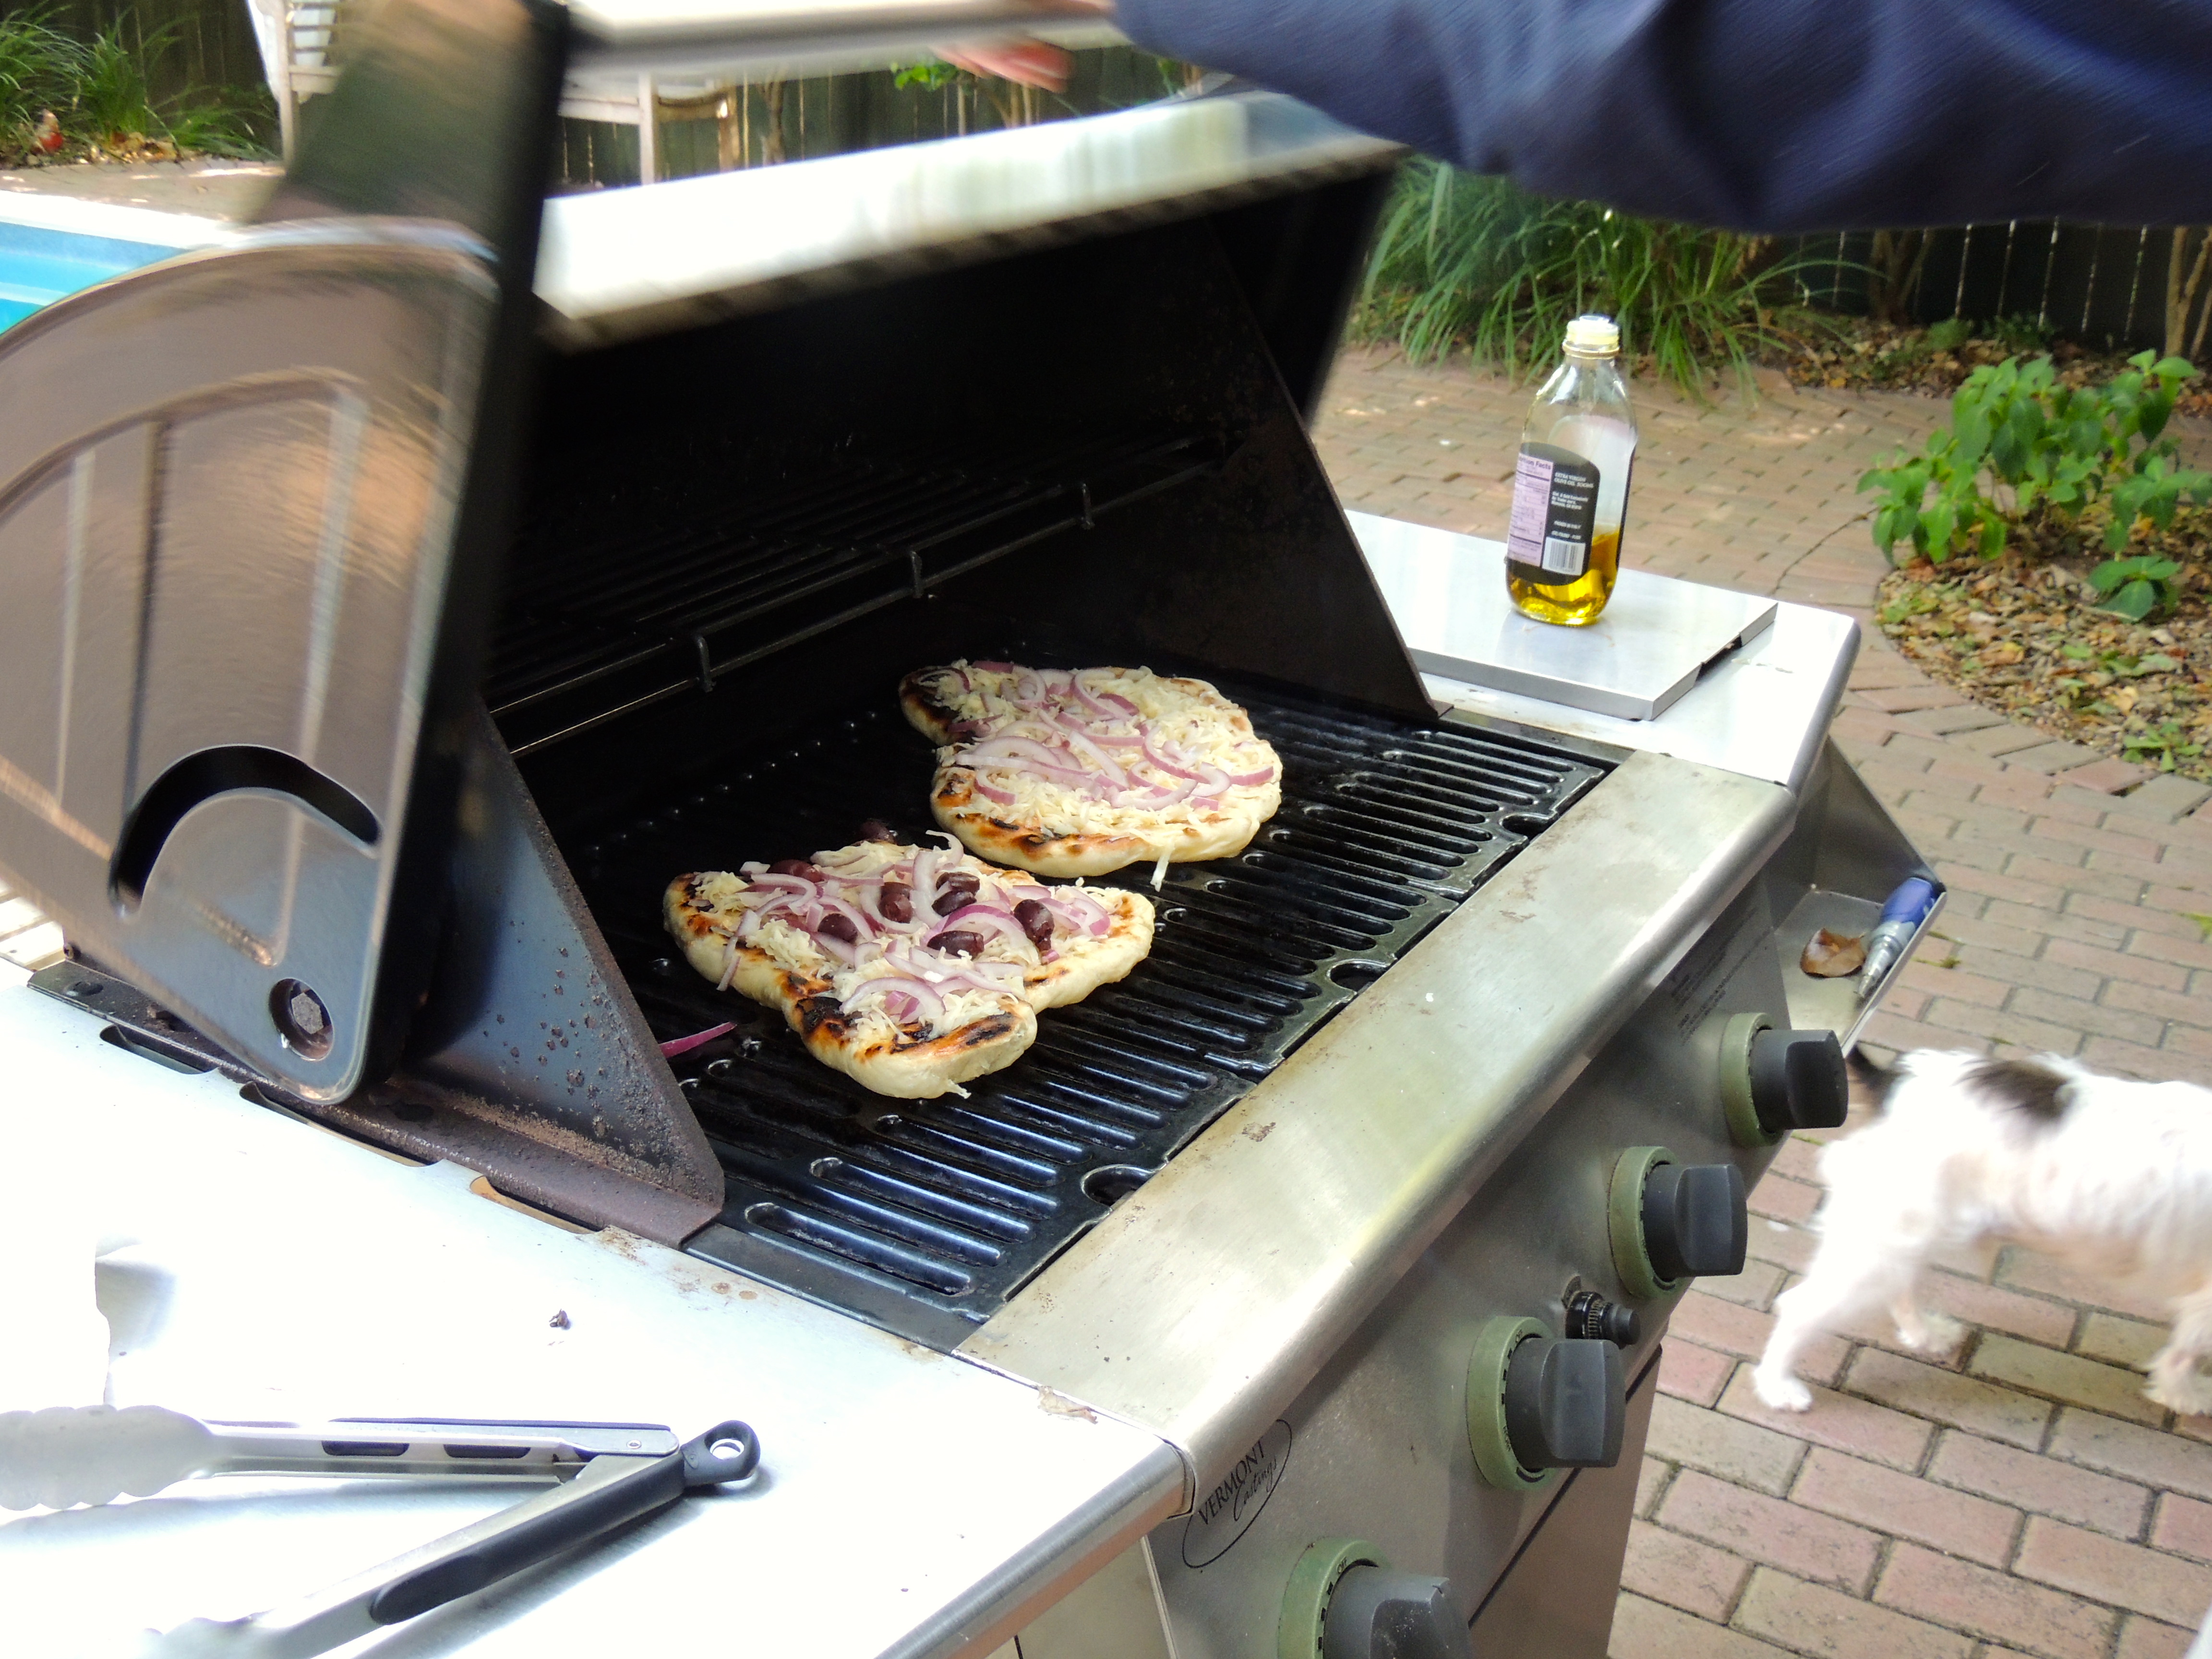
A friend and I were walking one morning and she was telling me about how they made grilled pizza… Grilled pizza? I had heard of it, but dough on a grill? Seems like a sticky nightmare. I’m here to tell you it is LIFE CHANGING! Seriously. It’s so quick and easy and you can change it up with different toppings! I found a website that gave direction on how to grill a pizza (SimplyRecipes.com) – I’m telling you… this is one you want to try! Check out the link I provided for details, but here is what I did:
HOW TO GRILL PIZZA
I bought pizza dough at the grocery store. Many stores now have it in their bakery section. You can also make it yourself, either way works!
Turn your grill on high.
Get your toppings ready, because once the pizza comes off the grill you work swiftly to get it back on, so it’s important to have everything ready to use… The top pizza I used pizza sauce, cheese, fresh mushrooms* and fresh basil. I had posted this photo on Facebook and mentioned that it was beyond fabulous, but the mushrooms made it a little watery, and I received a comment back from a master pizza maker… the secret? Sauté the mushrooms first! Tada! That did the trick!! You can make it traditional with pizza sauce or step out of the box and try just olive oil, cheese, red onion and olives – that was nice too…
Ok… next step… let the dough sit in a olive oil coated (lightly) bowl with a clean towel over it for about 30 minutes.
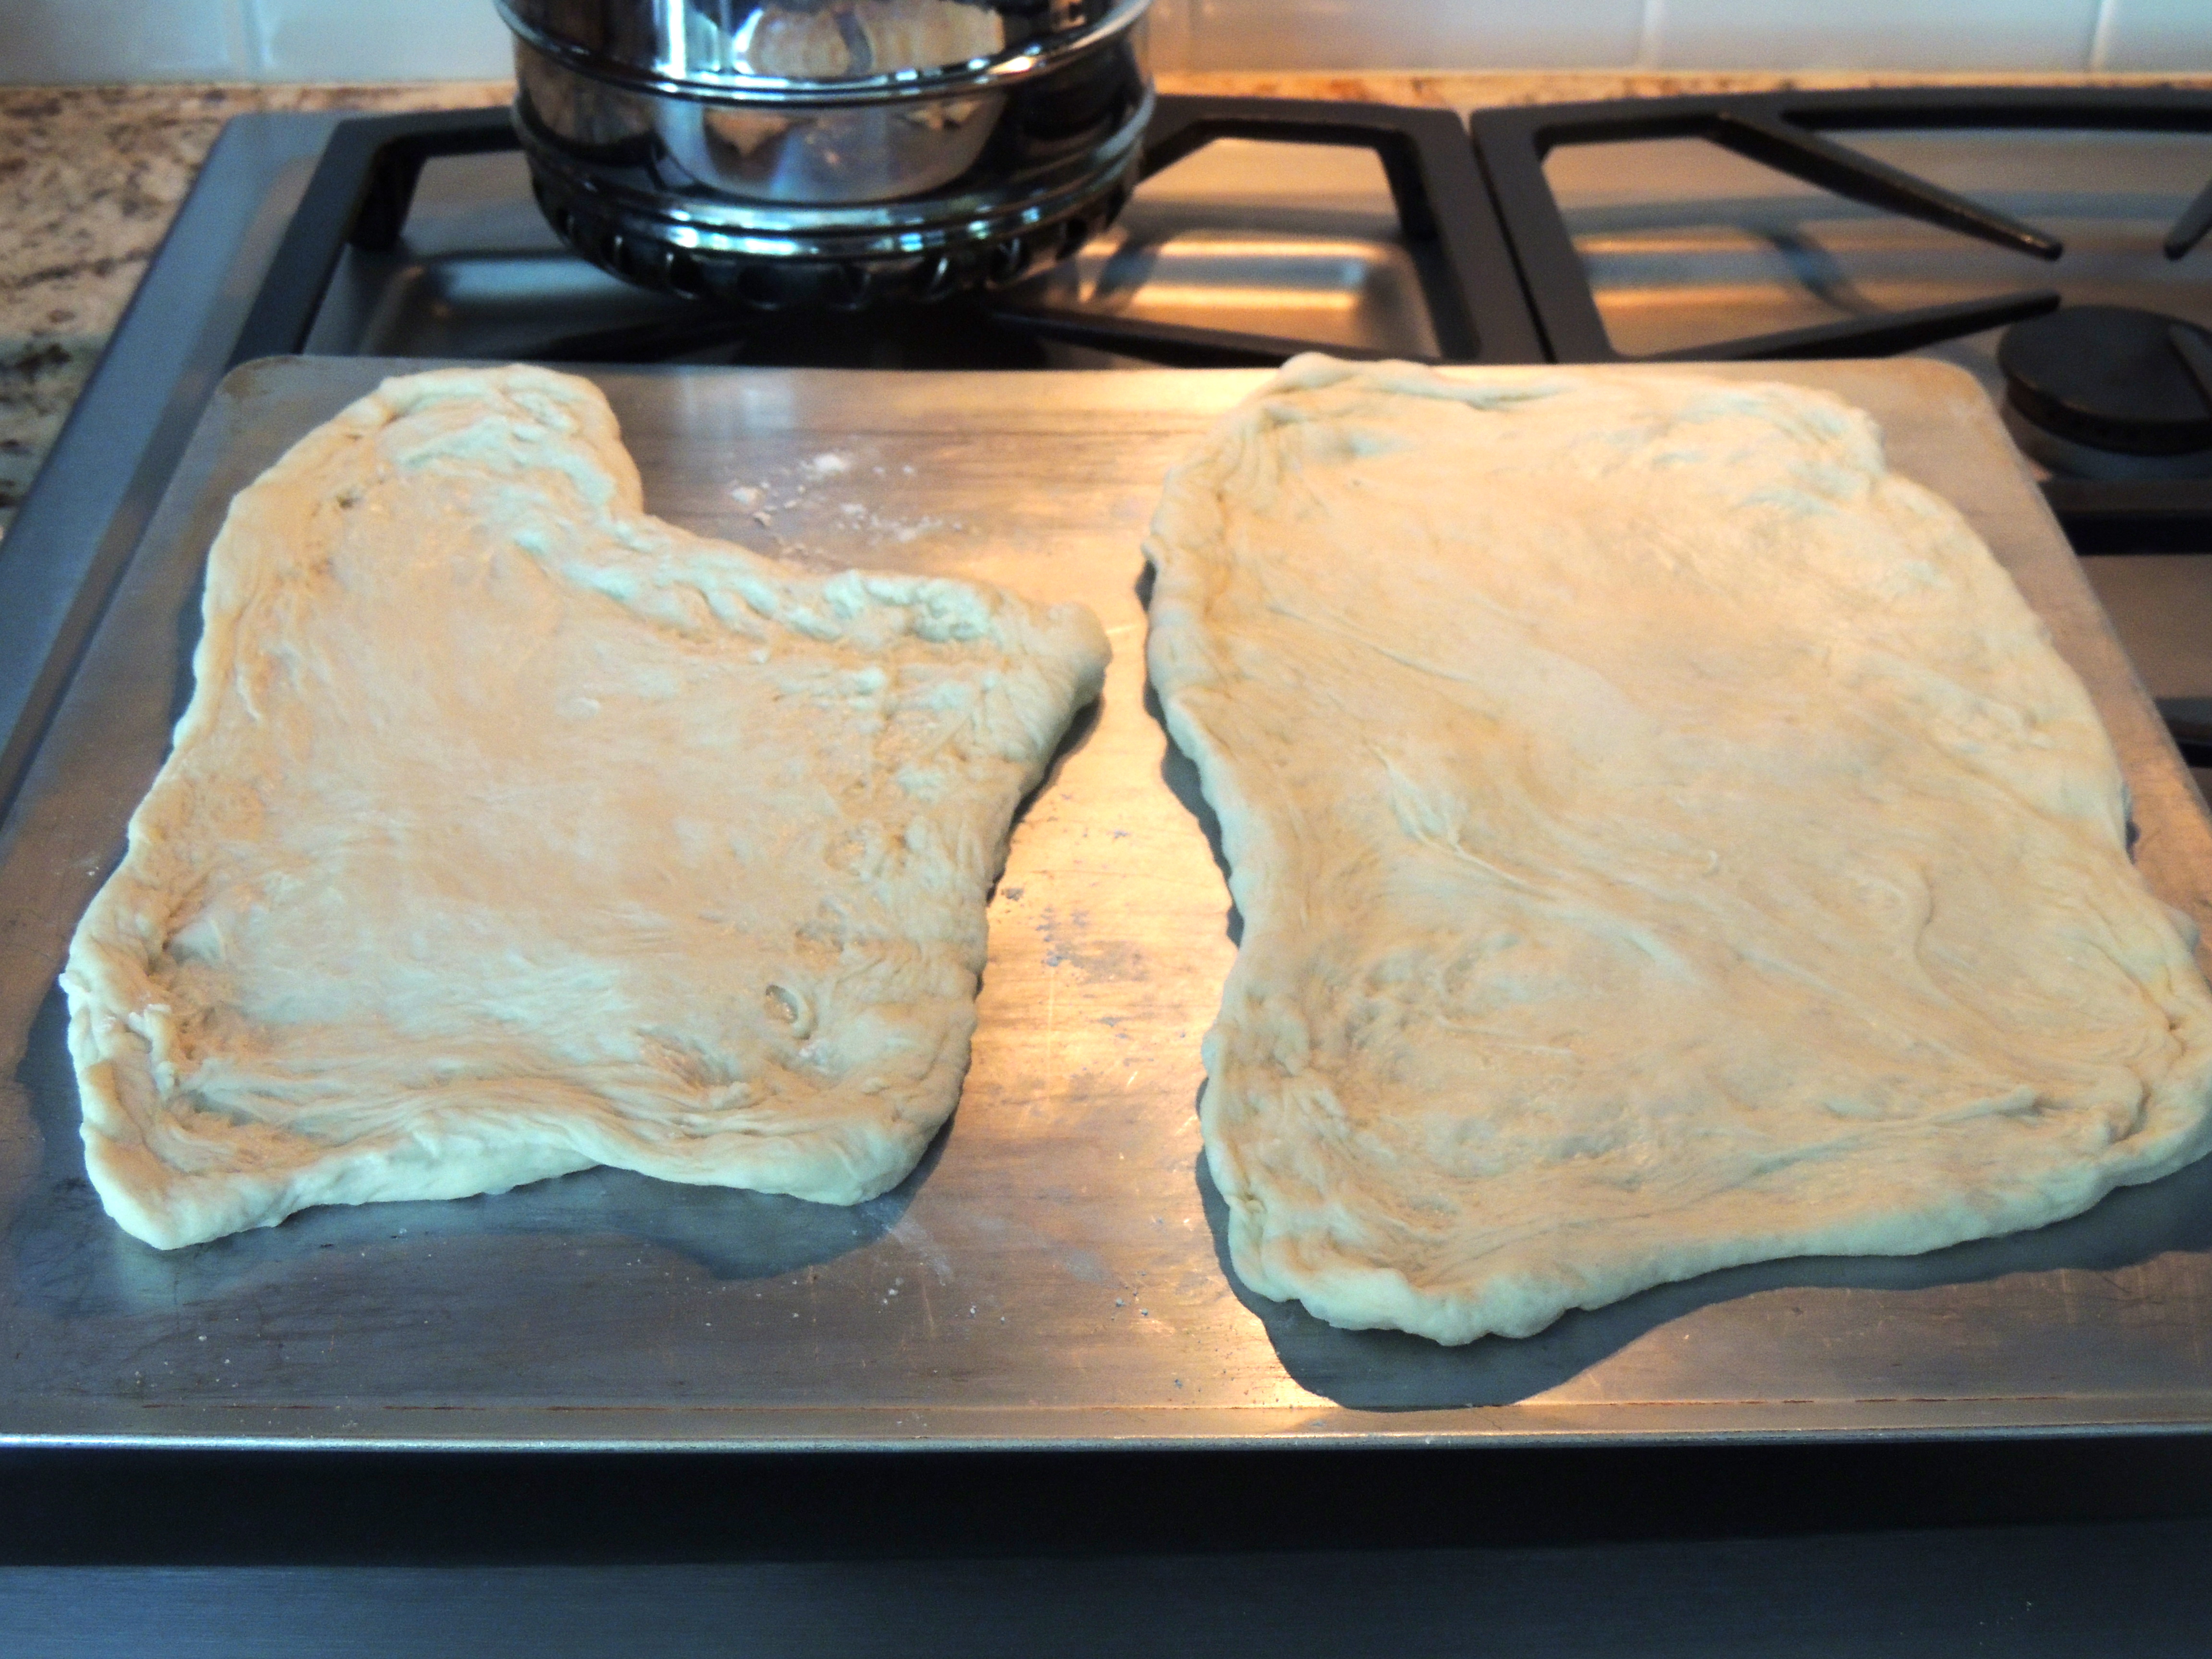
Then shape the dough, first by flattening with hands, then pick up and let it hang to stretch. I find this approach works best. You can use a light dusting of flour to keep it from sticking to the counter/your hands, etc. I cut the dough in half first and I make two pizzas with one package of pie dough, it seems easier to handle that way.
Shape them how you like, they don’t have to be round… I like my funky shapes… Place them on a rimless baking sheet or an upside down cookie sheet. If the dough seems sticky, dust with a little cornmeal or flour…
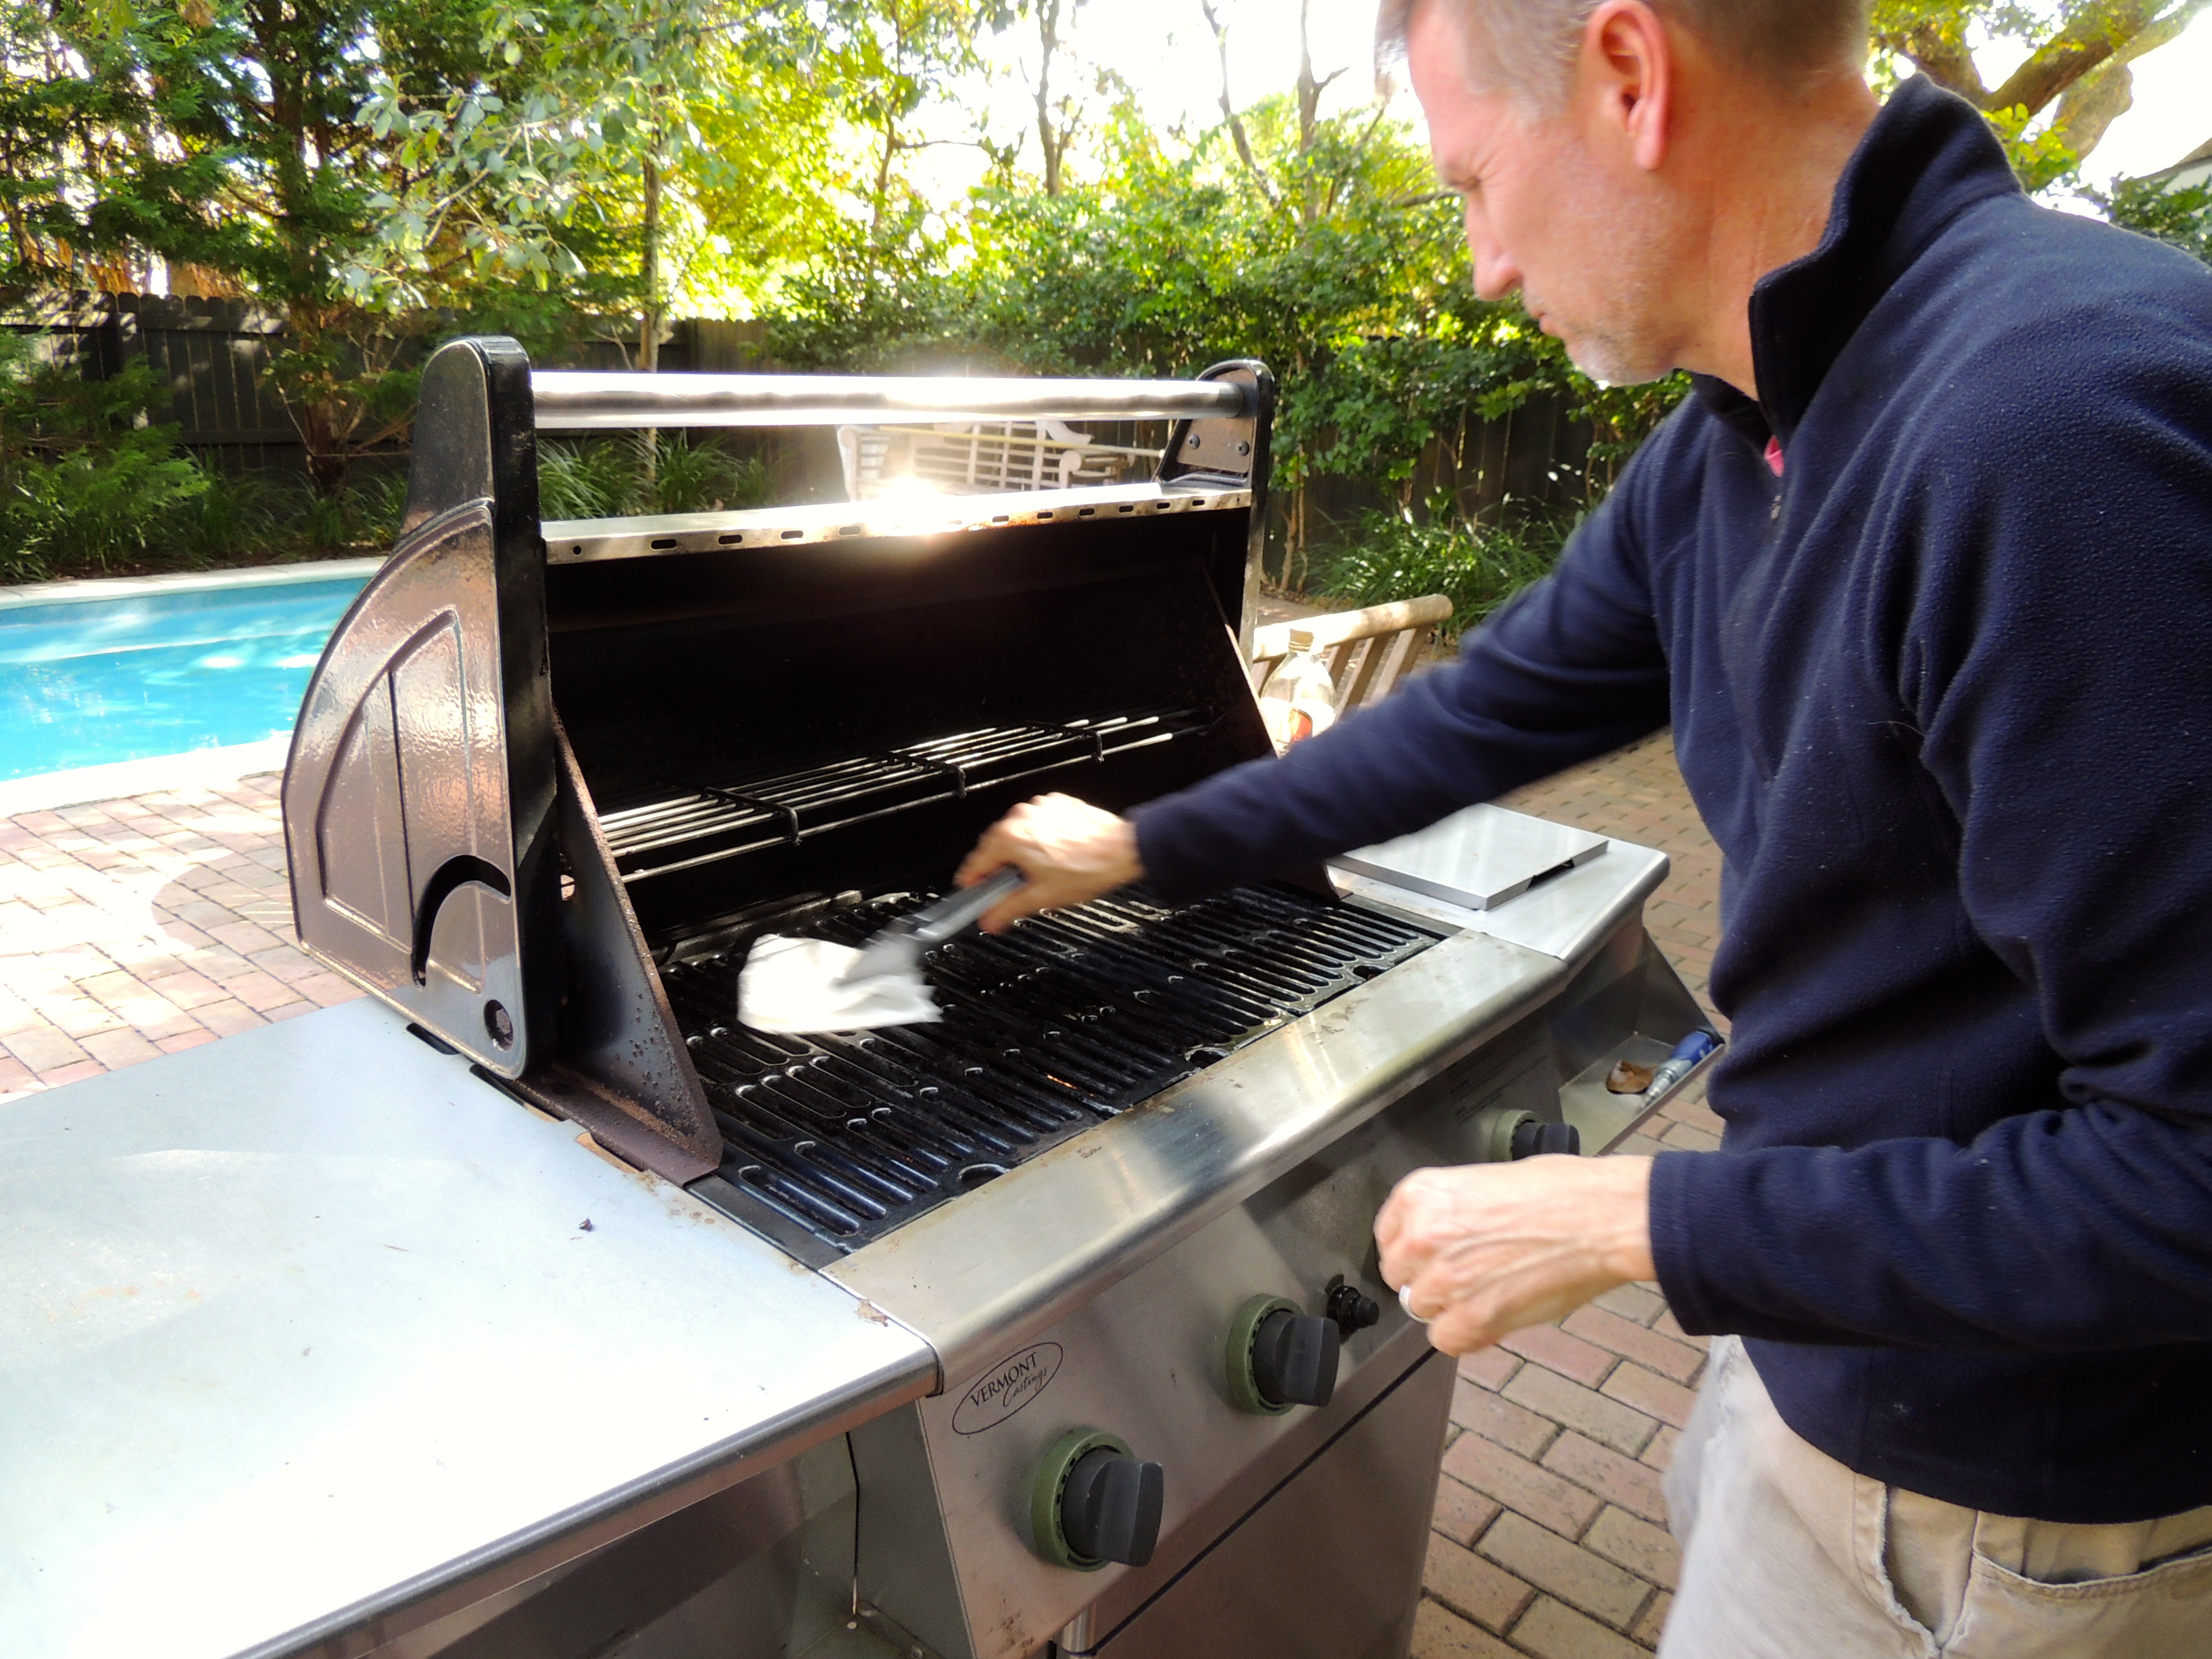
Once the grill is hot, oil the grates with olive oil. We used paper towels dipped in olive oil and used tongs…
Slide the crust on to the grill (or sometimes it’s easier to pick it up and plop it on the grill, whatever works for you)…
Then IMMEDIATELY CLOSE THE GRILL… cook approximately 2 minutes, check it if you smell burning. It’s ok for the crust to get charred a bit. You can check it part way through to see if its browning evenly, if not rotate it a bit if you can. Ours has never taken more than 2 minutes.
Now remove the dough from the grill, and place on the rimless baking sheet COOKED SIDE UP.
Make a mad dash to wherever your toppings are located, hopefully nearby… place the toppings on the cooked side of the dough. Add sauce or olive oil, then cheese, veggies, meat, but go lightly on top or it will be soggy and heavy. This one was made with olive oil instead of sauce, asiago cheese (Trader Joe’s!), red onion (next time I would sauté first) and olives.
Time to get it back on the grill!
and… CLOSE. THE. LID. Wait about 2-3 minutes until cheese is bubbly and bottom starts to char.
Then sit back and enjoy! Have you ever tasted crust like that? So heavenly light and crispy… just like it was made with a wood burning oven. Out of this world!!
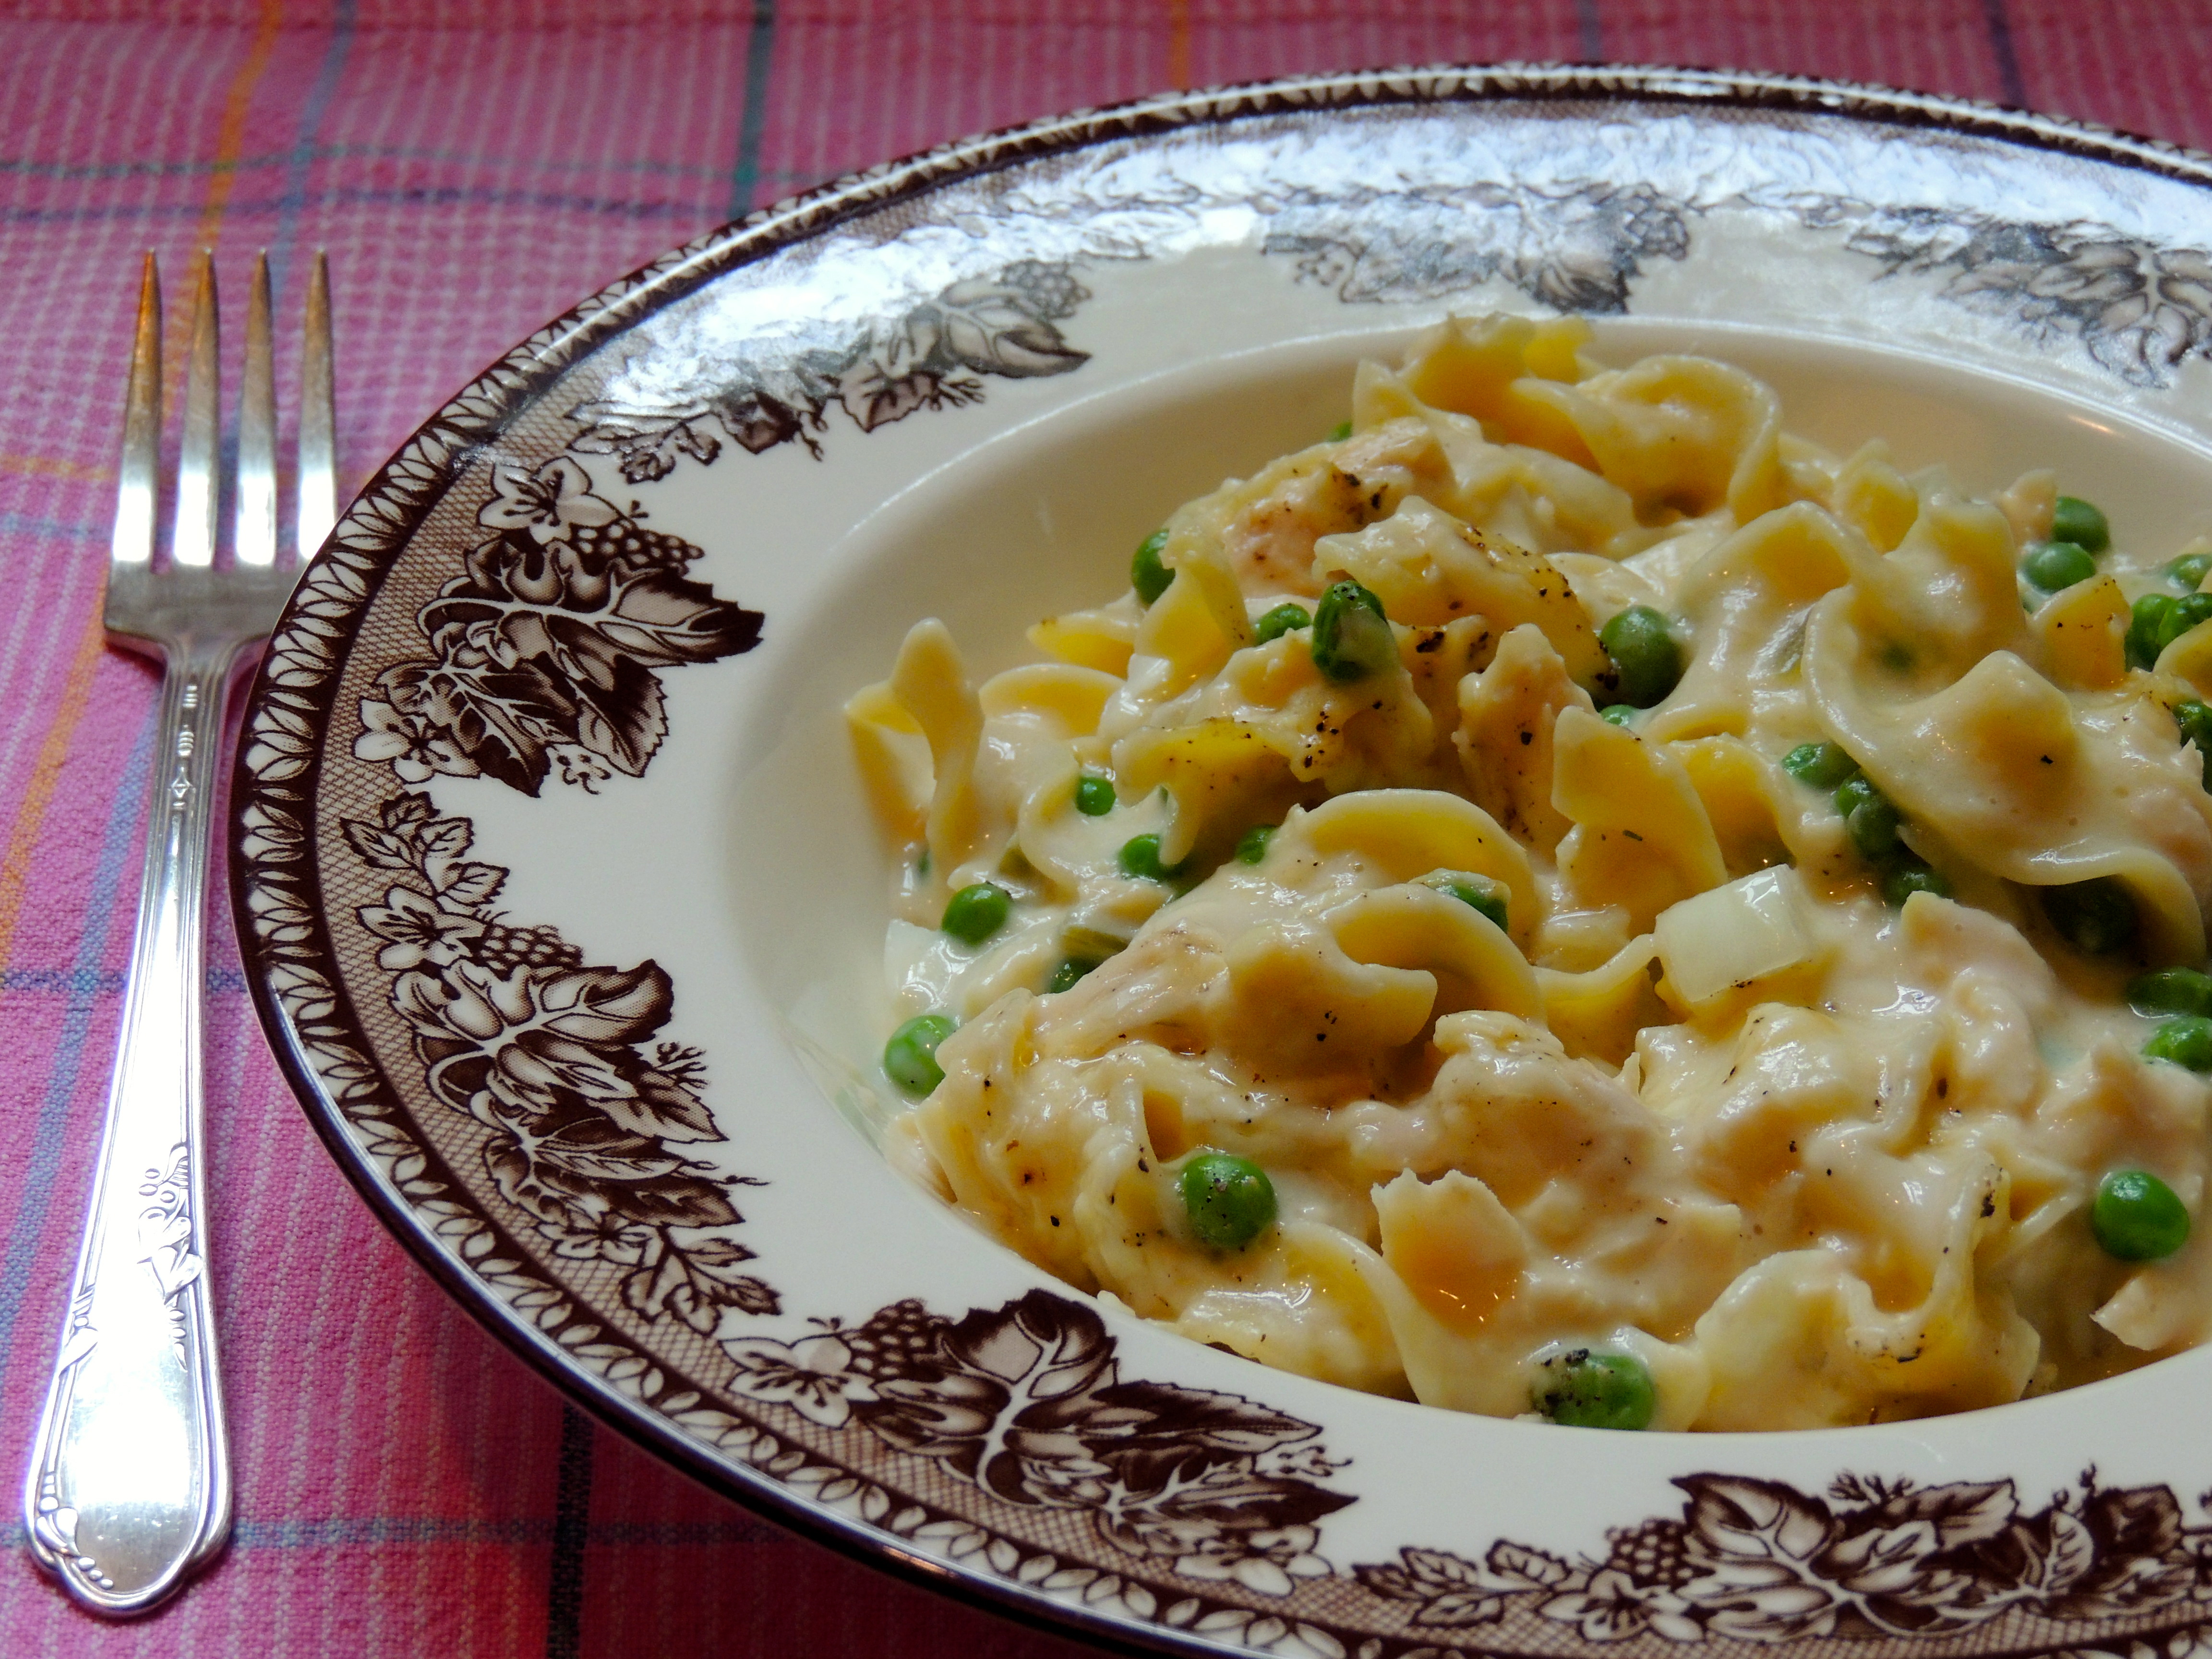
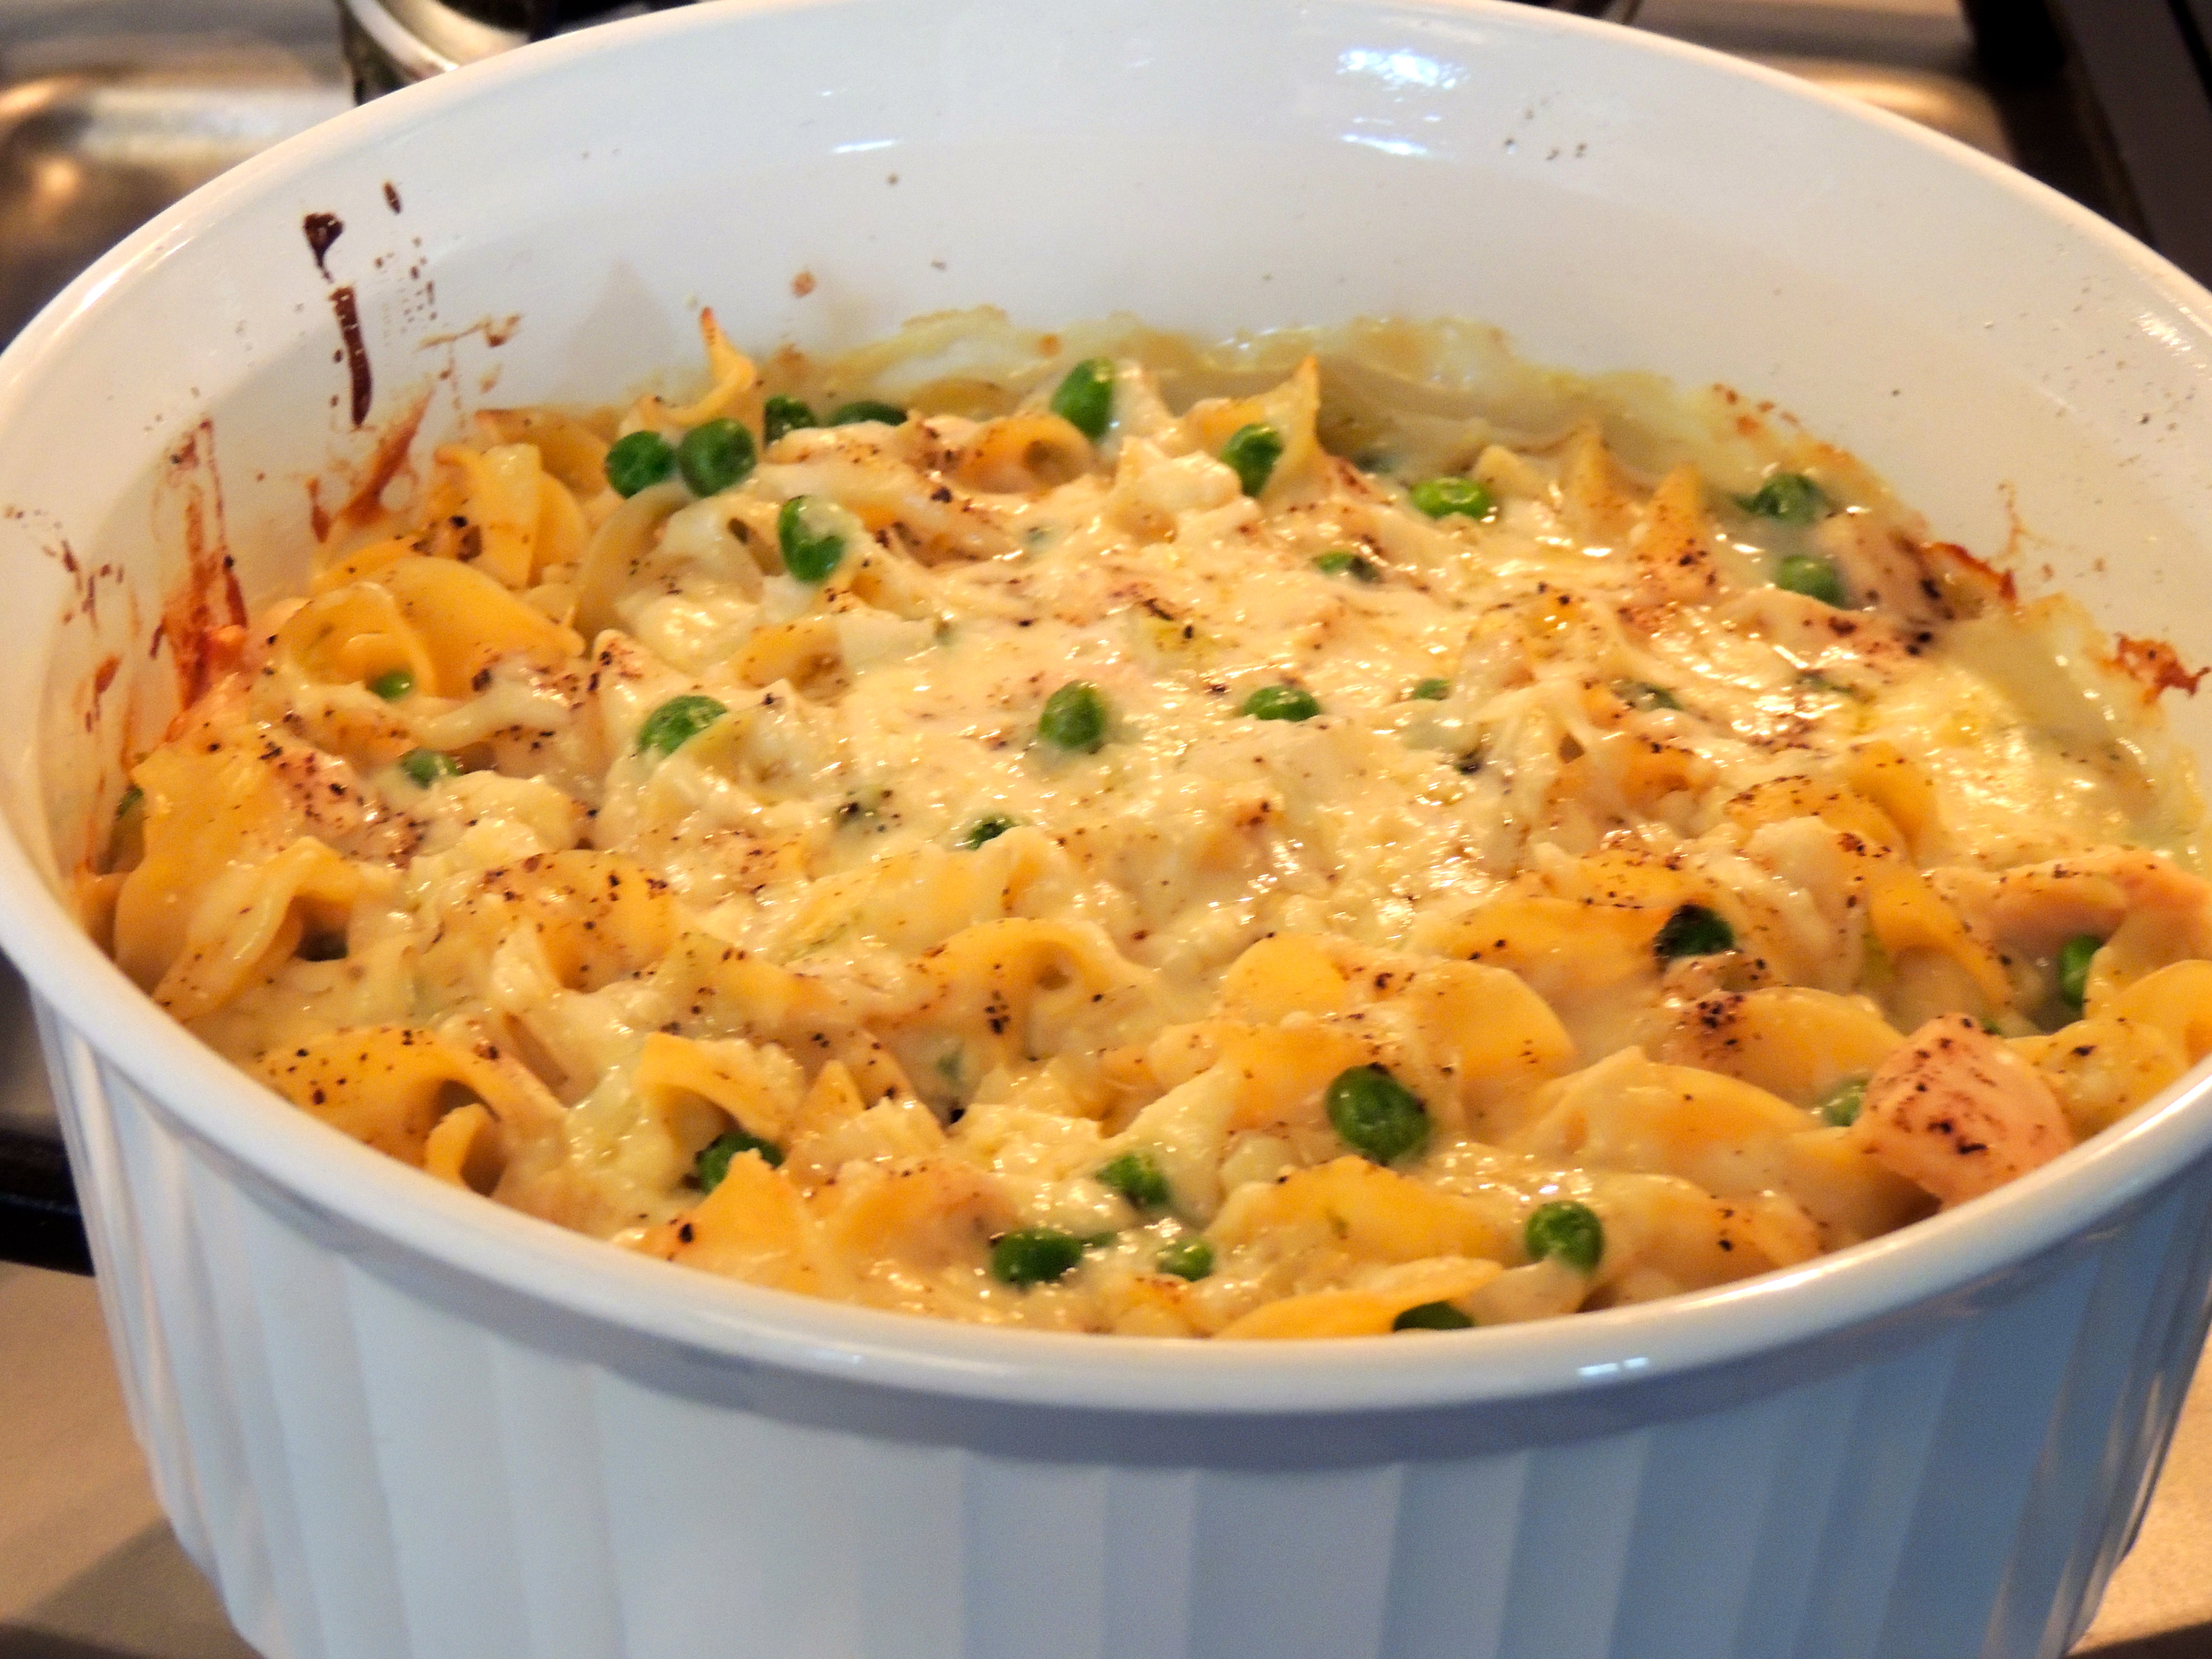
Tuna Casserole! Creamy (above) bake with lid, or bake without the lid for less creamy…
Don’t laugh! This is the ultimate in comfort food and sometimes its just what you need! I remember this from when I was a kid and I still love it to this day! One weekend Fred and I were brainstorming what to make for the week for dinner… I said TUNA CASSEROLE… Ick, pew, nasty and a bunch of other words popped out of his mouth… What? That’s when I realized the entire world did not love this as much as I did. How could that be? I looked up recipes for tuna casserole and the majority do not have cheese. Well… ick, pew, nasty comes to mind! NOW I know why people don’t like it… trust me on this… this will make you smile, it is delicious beyond belief… you can add the peas (or not)… I prefer them on the side… Fred likes them all mixed in… so we make it both ways. Its quick, easy and very good… even better heated up the next day… have this and a salad and you will be happy camper!
6 oz. (½ package) Egg Noodles (I use Manischewitz or Publix brand)
1- 10 ¾ oz can Cream of Celery Soup
1 soup can of Milk (I use 2%)
8 oz Cheddar Cheese, shredded (I use Cracker Barrel Extra Sharp 2%)
1 Small Onion, chopped
1 – 7 oz can tuna, drained
Pepper
Baby Peas (optional) – a handful or two
Preheat oven to 350 degrees F.
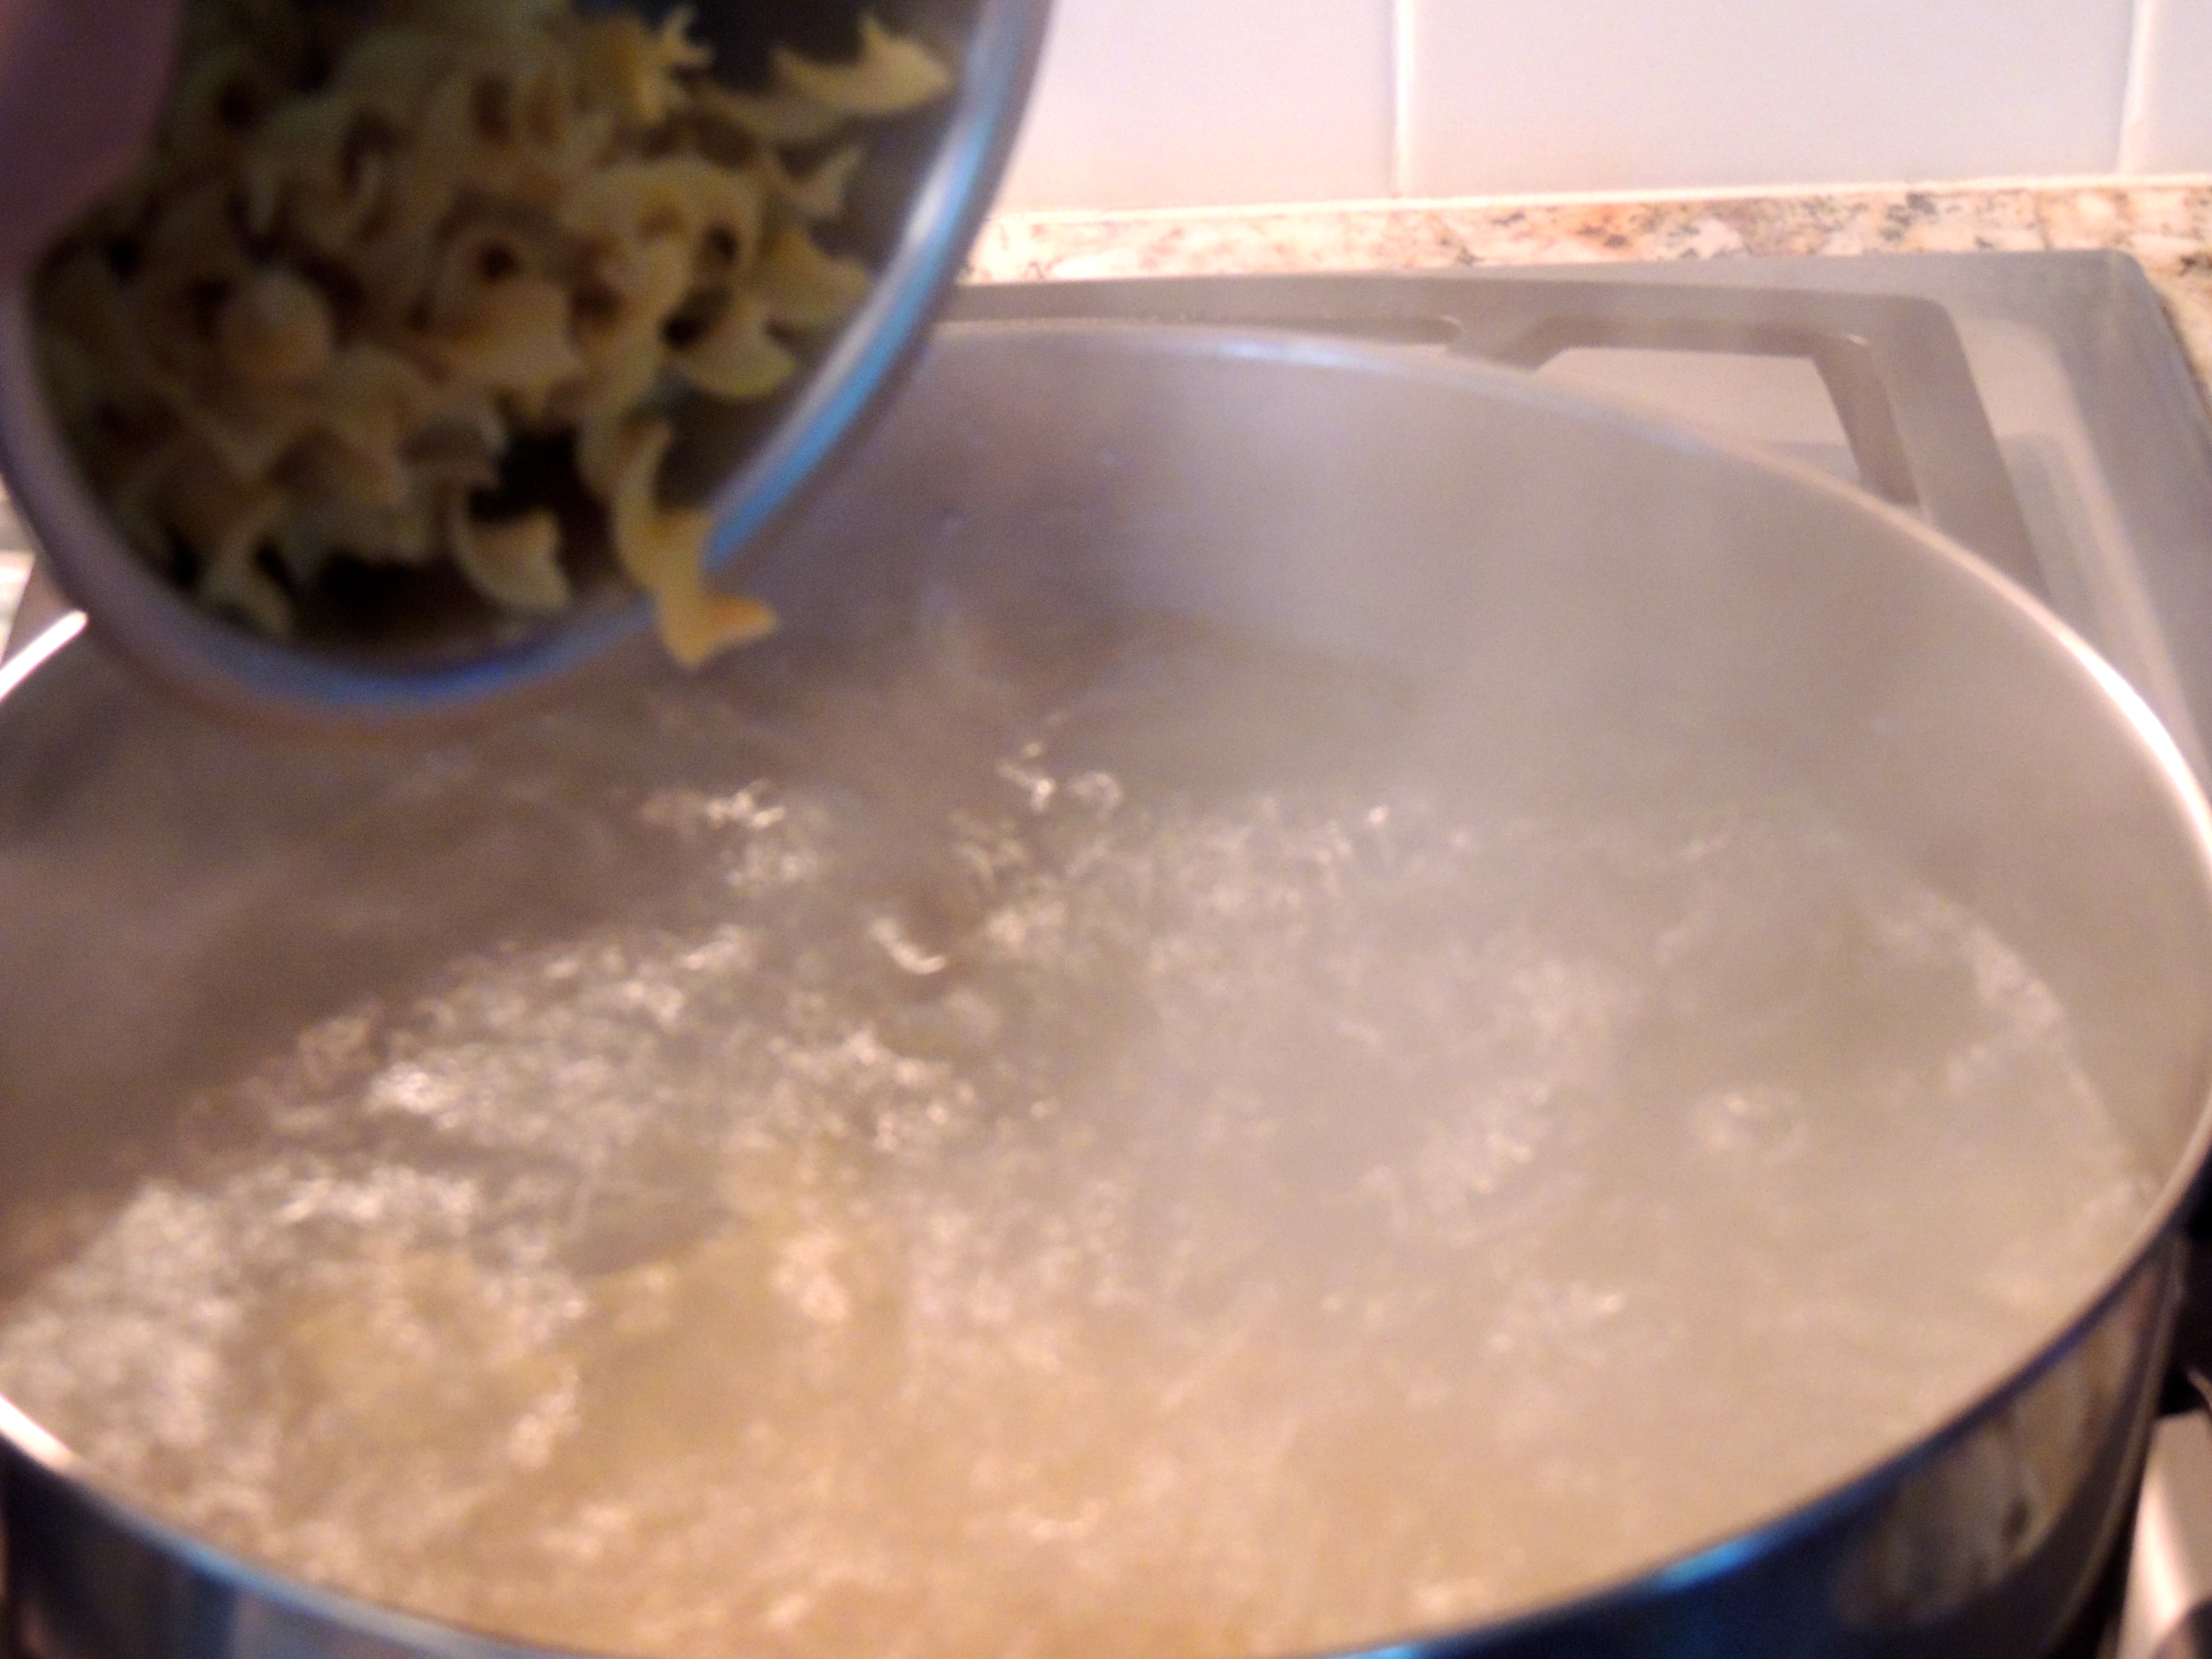
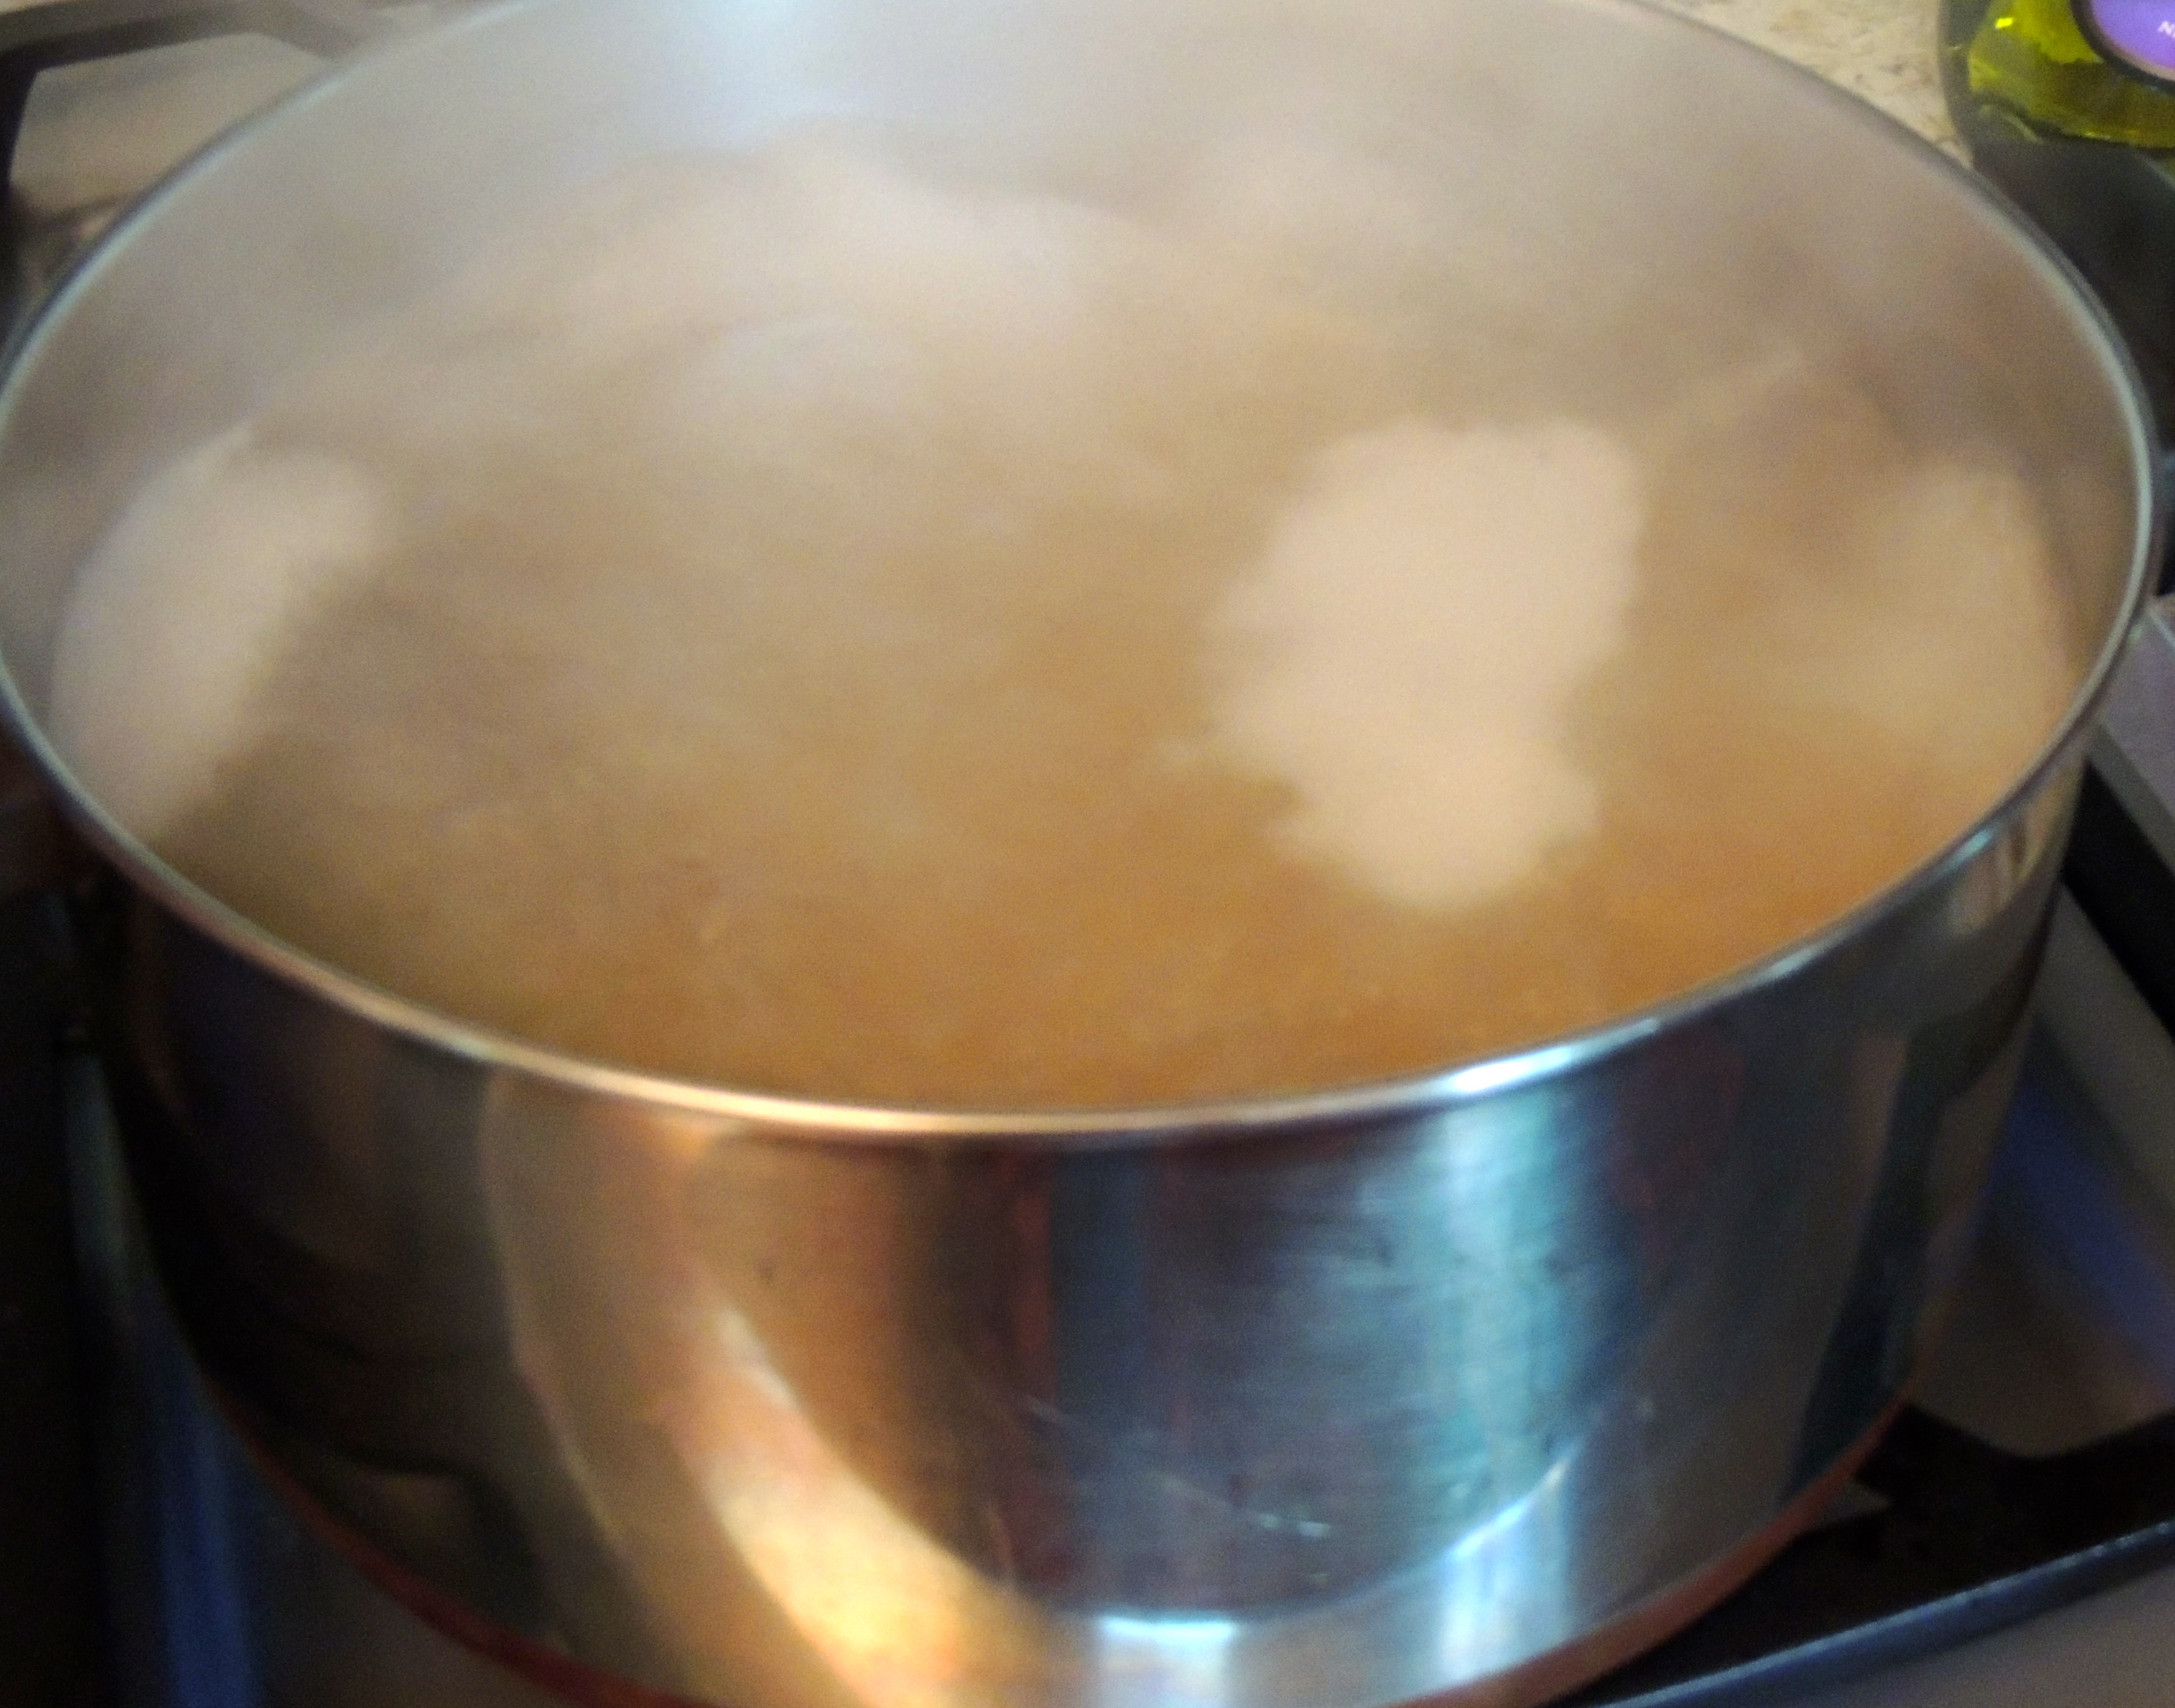
Bring a large pot of water to a boil for the egg noodles…
Boil the noodles…
While the water is getting hot…
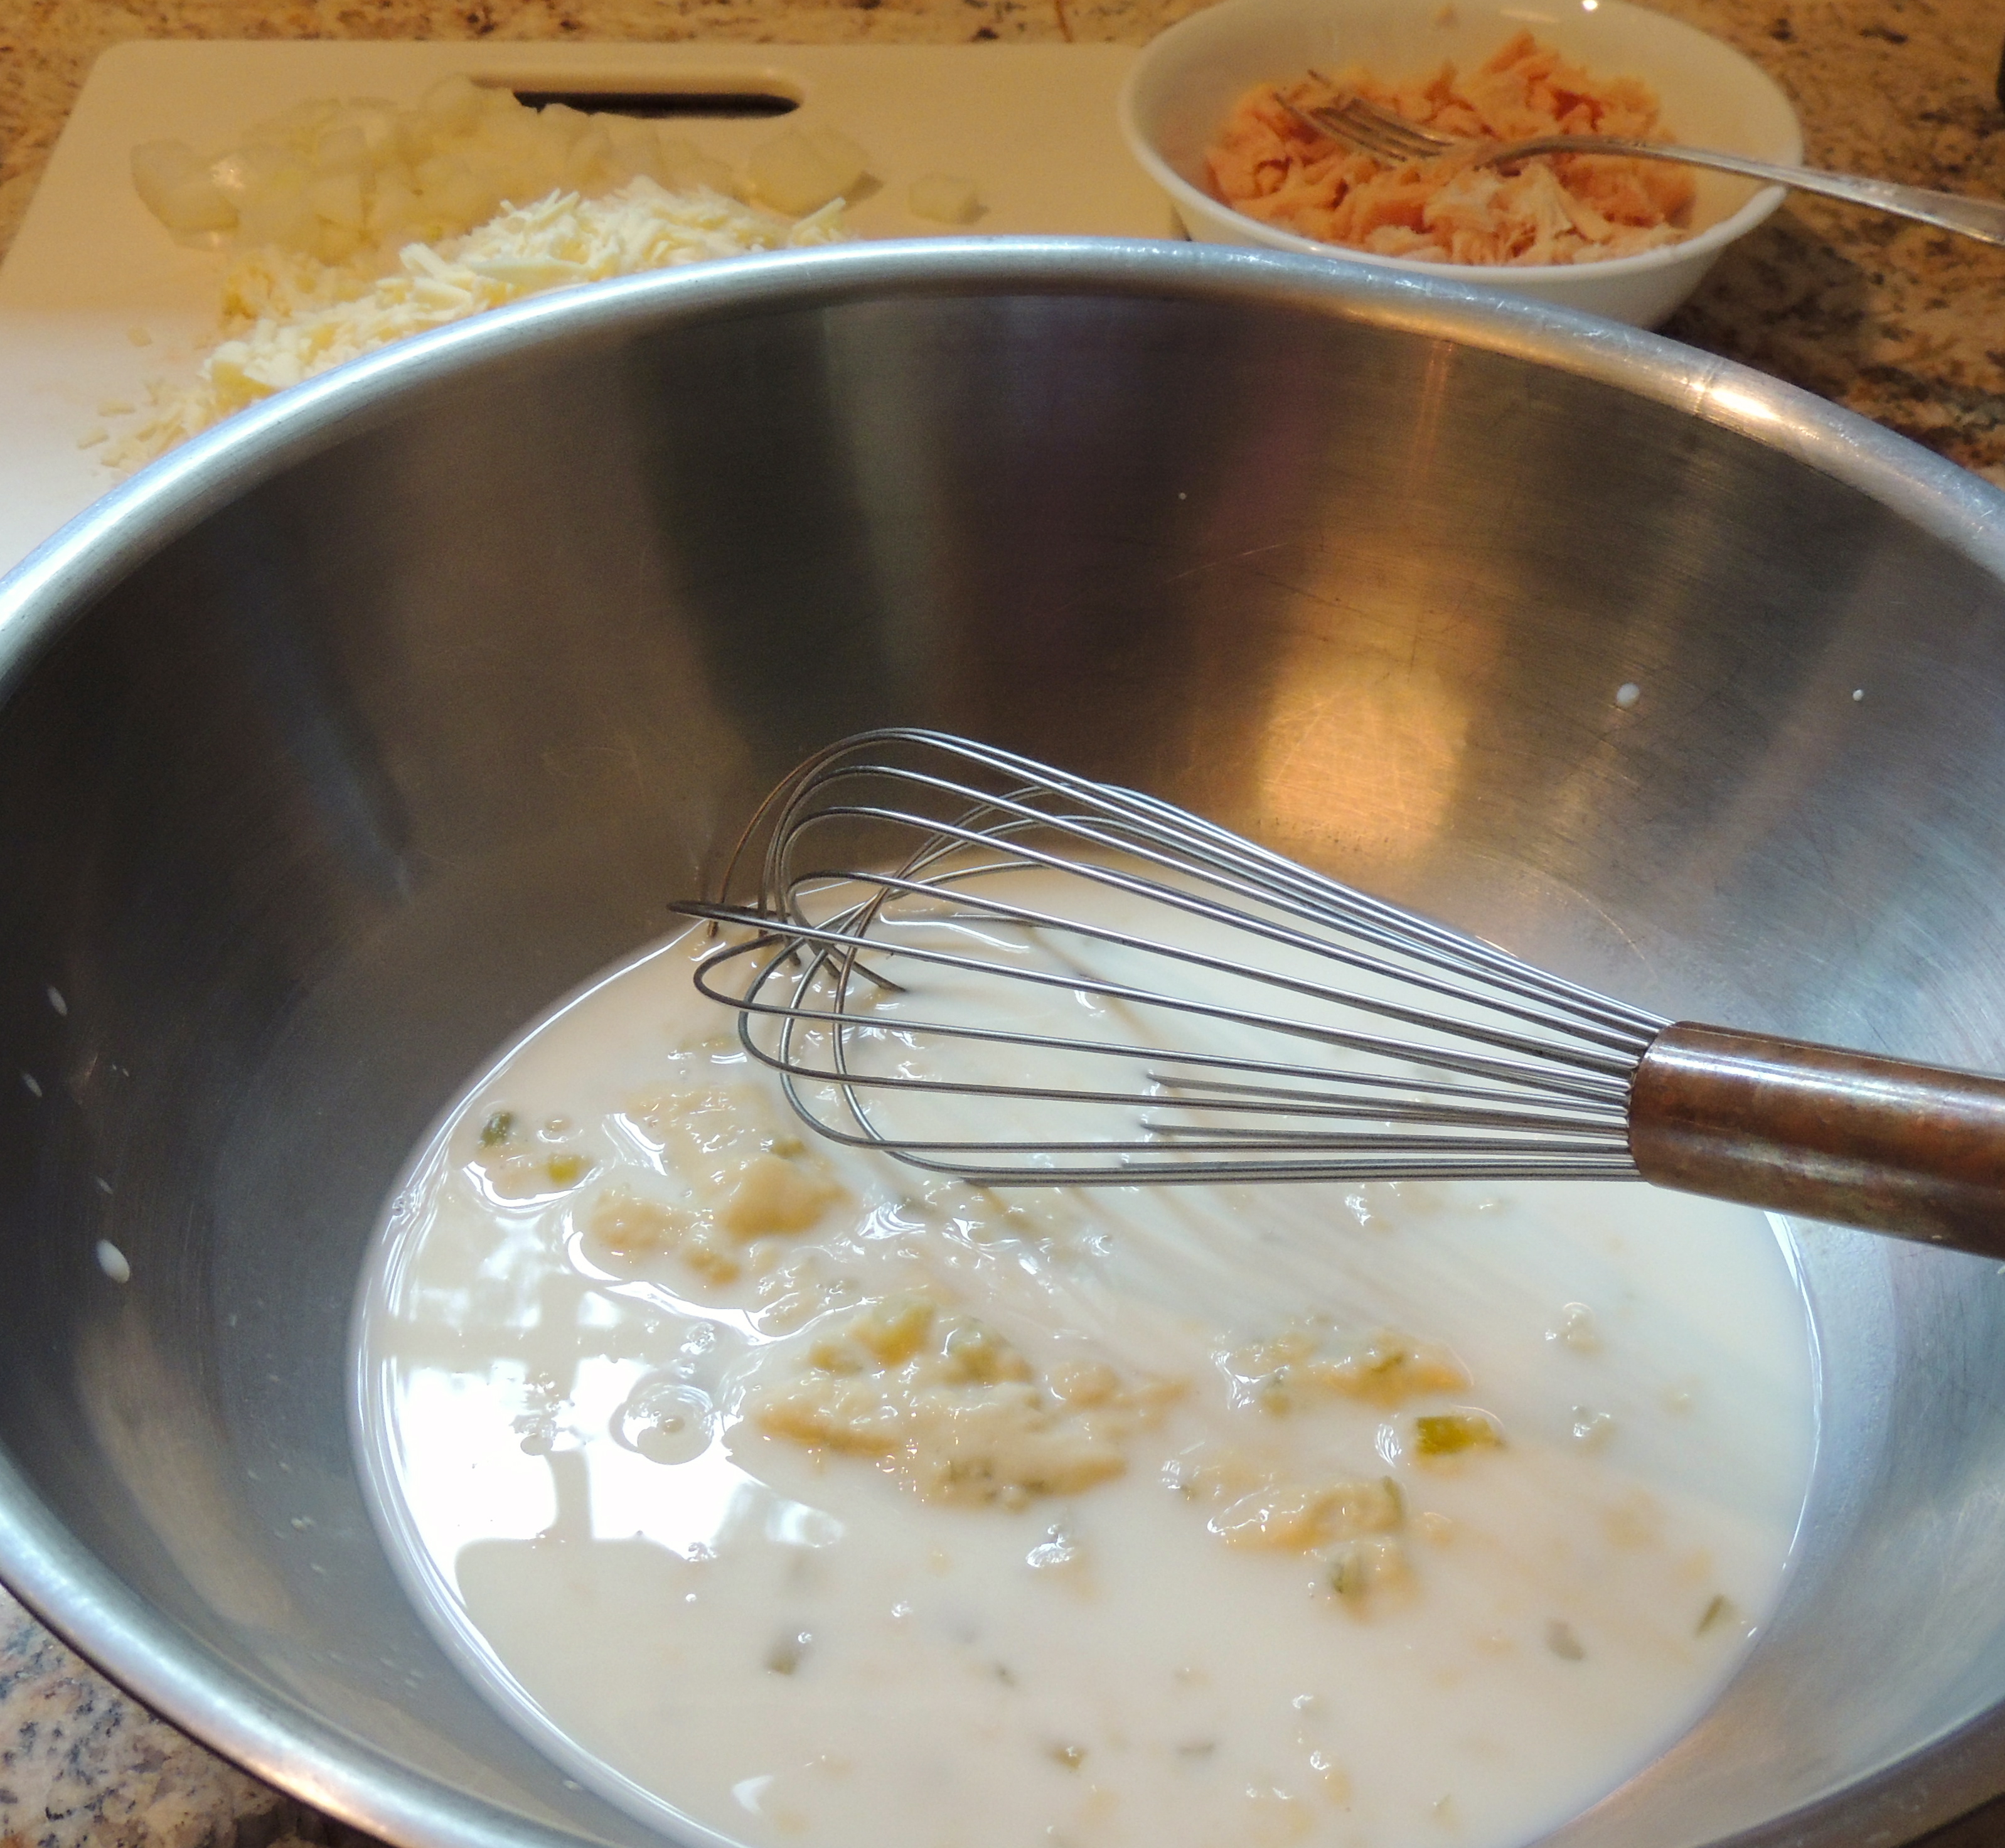
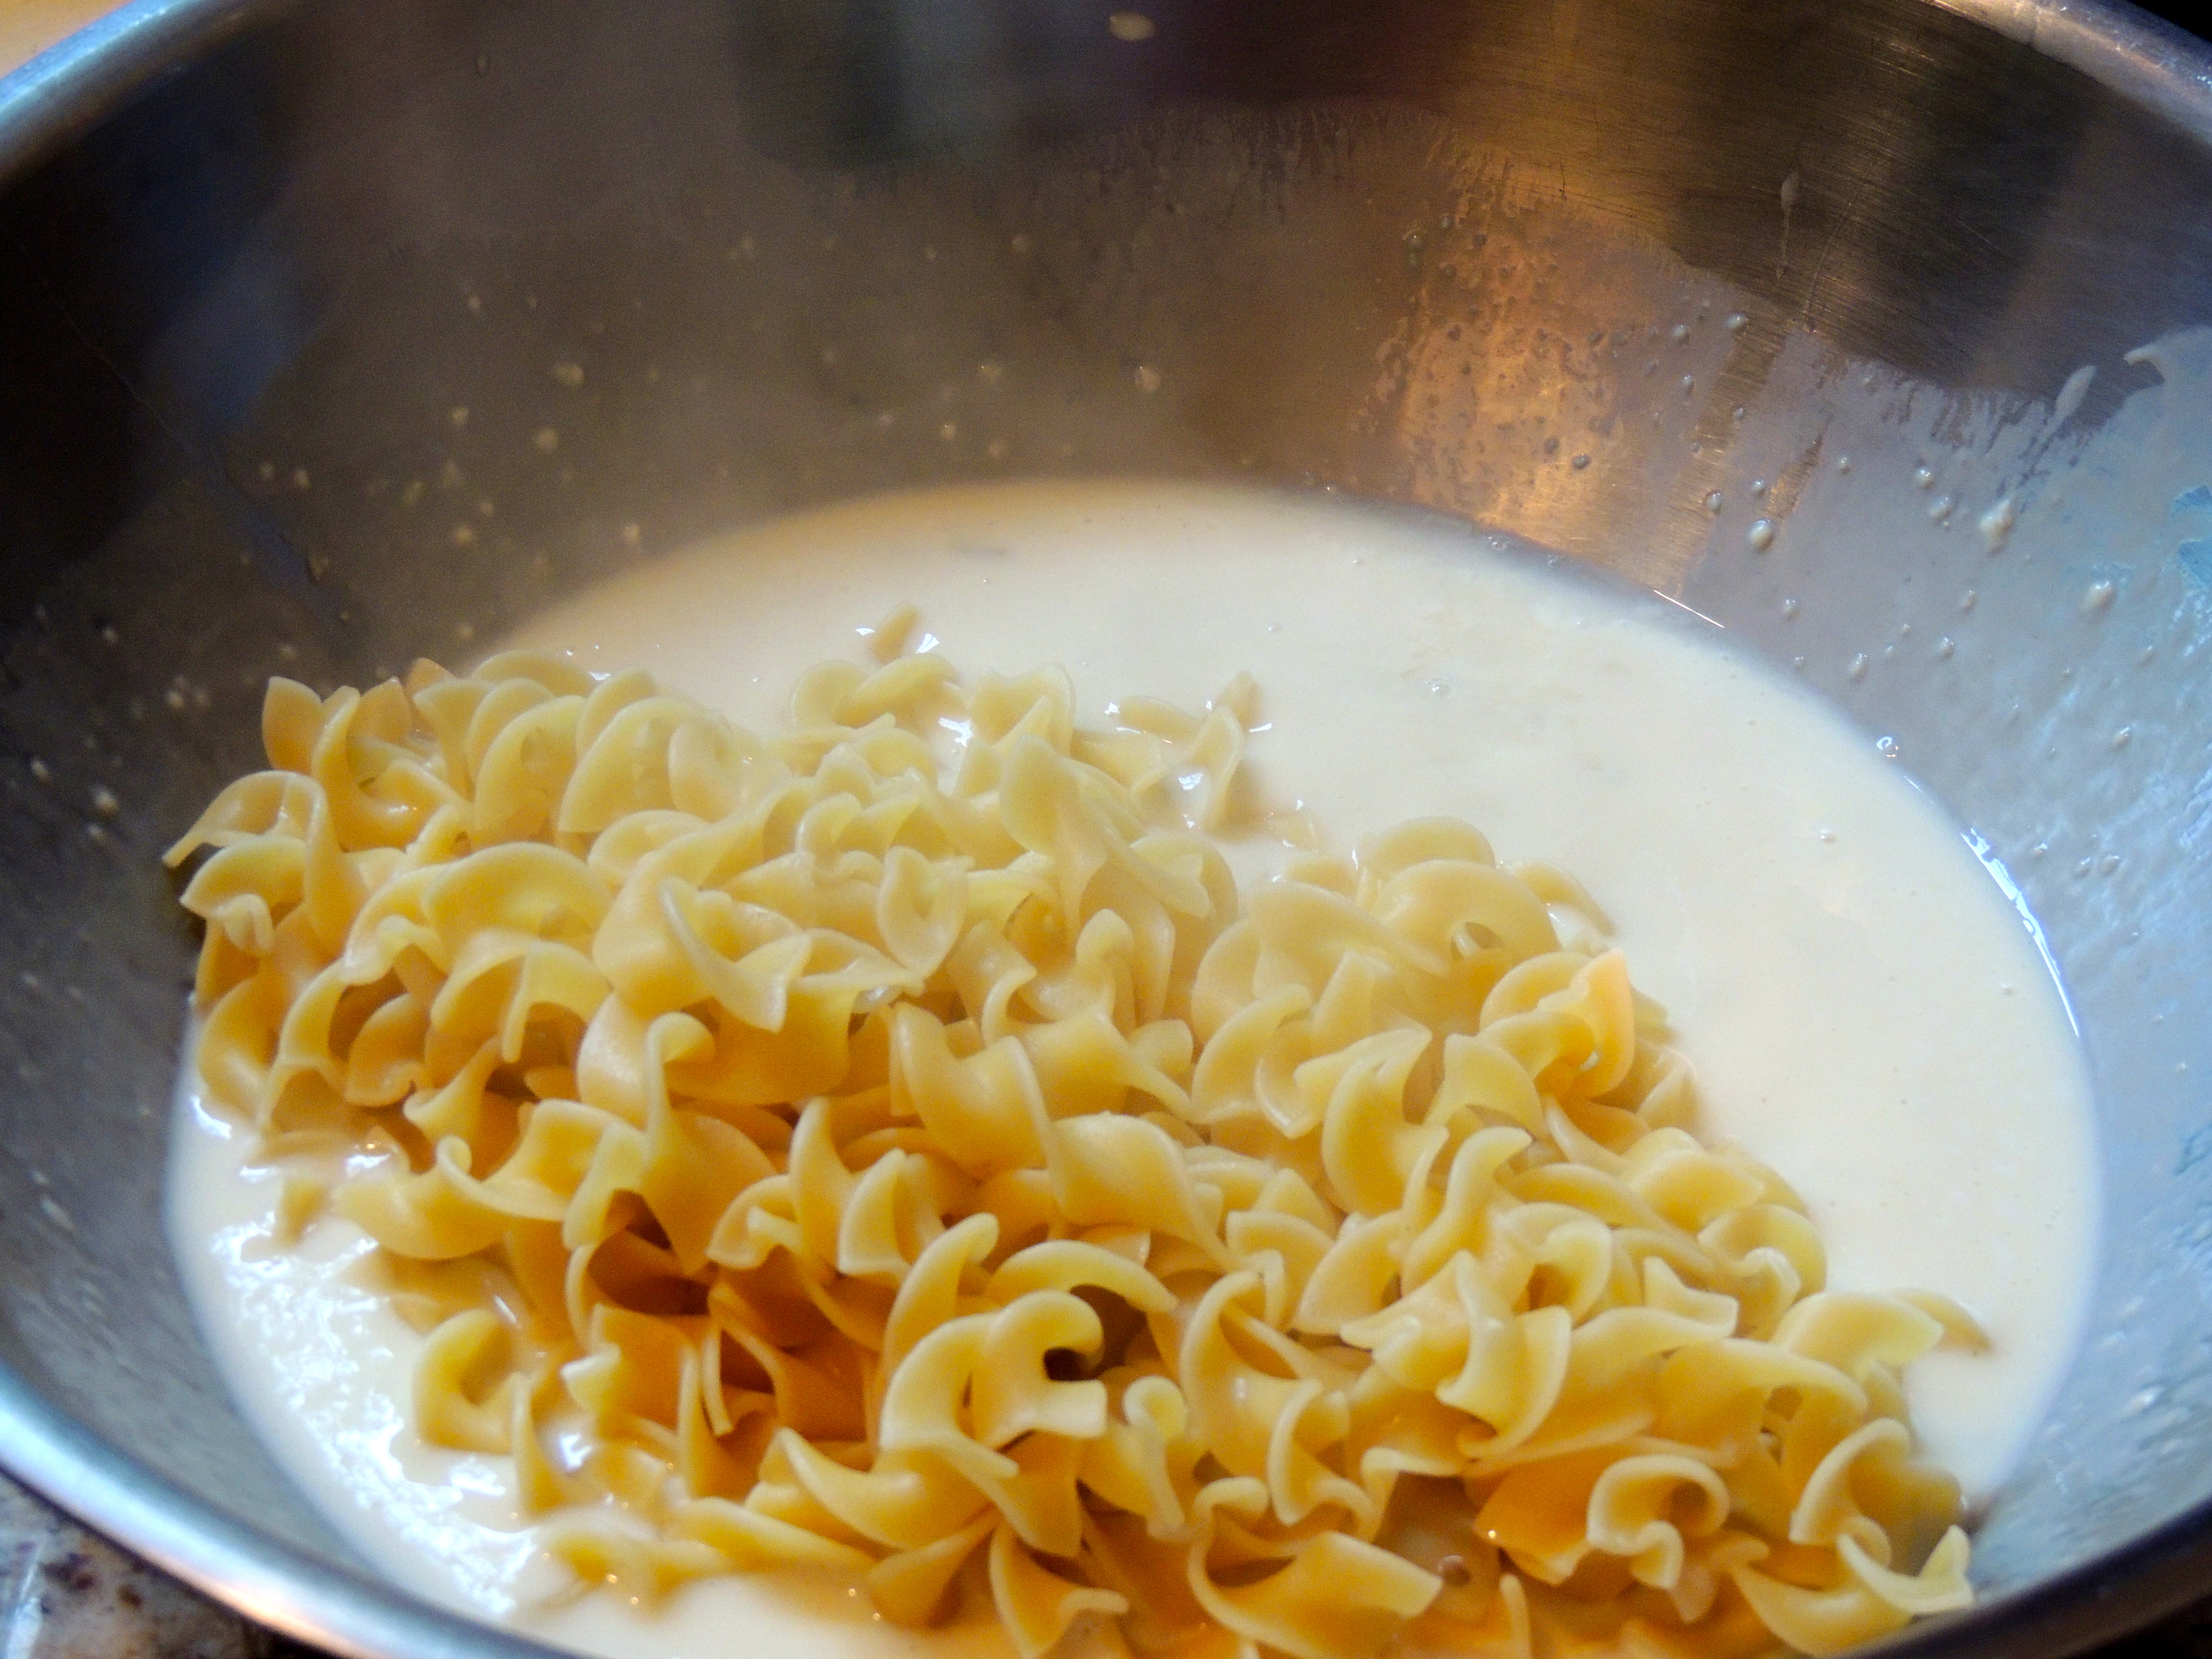
In a large bowl, add the cream of celery soup, milk, chopped onion, tuna, pepper and peas (optional).
Stir or whisk ingredients together in large bowl…
Once the pasta finishes cooking, drain it in a colander, and then add the noodles to the large bowl with ingredients. Give it a stir.
Add hot noodles to soup/milk mixture…
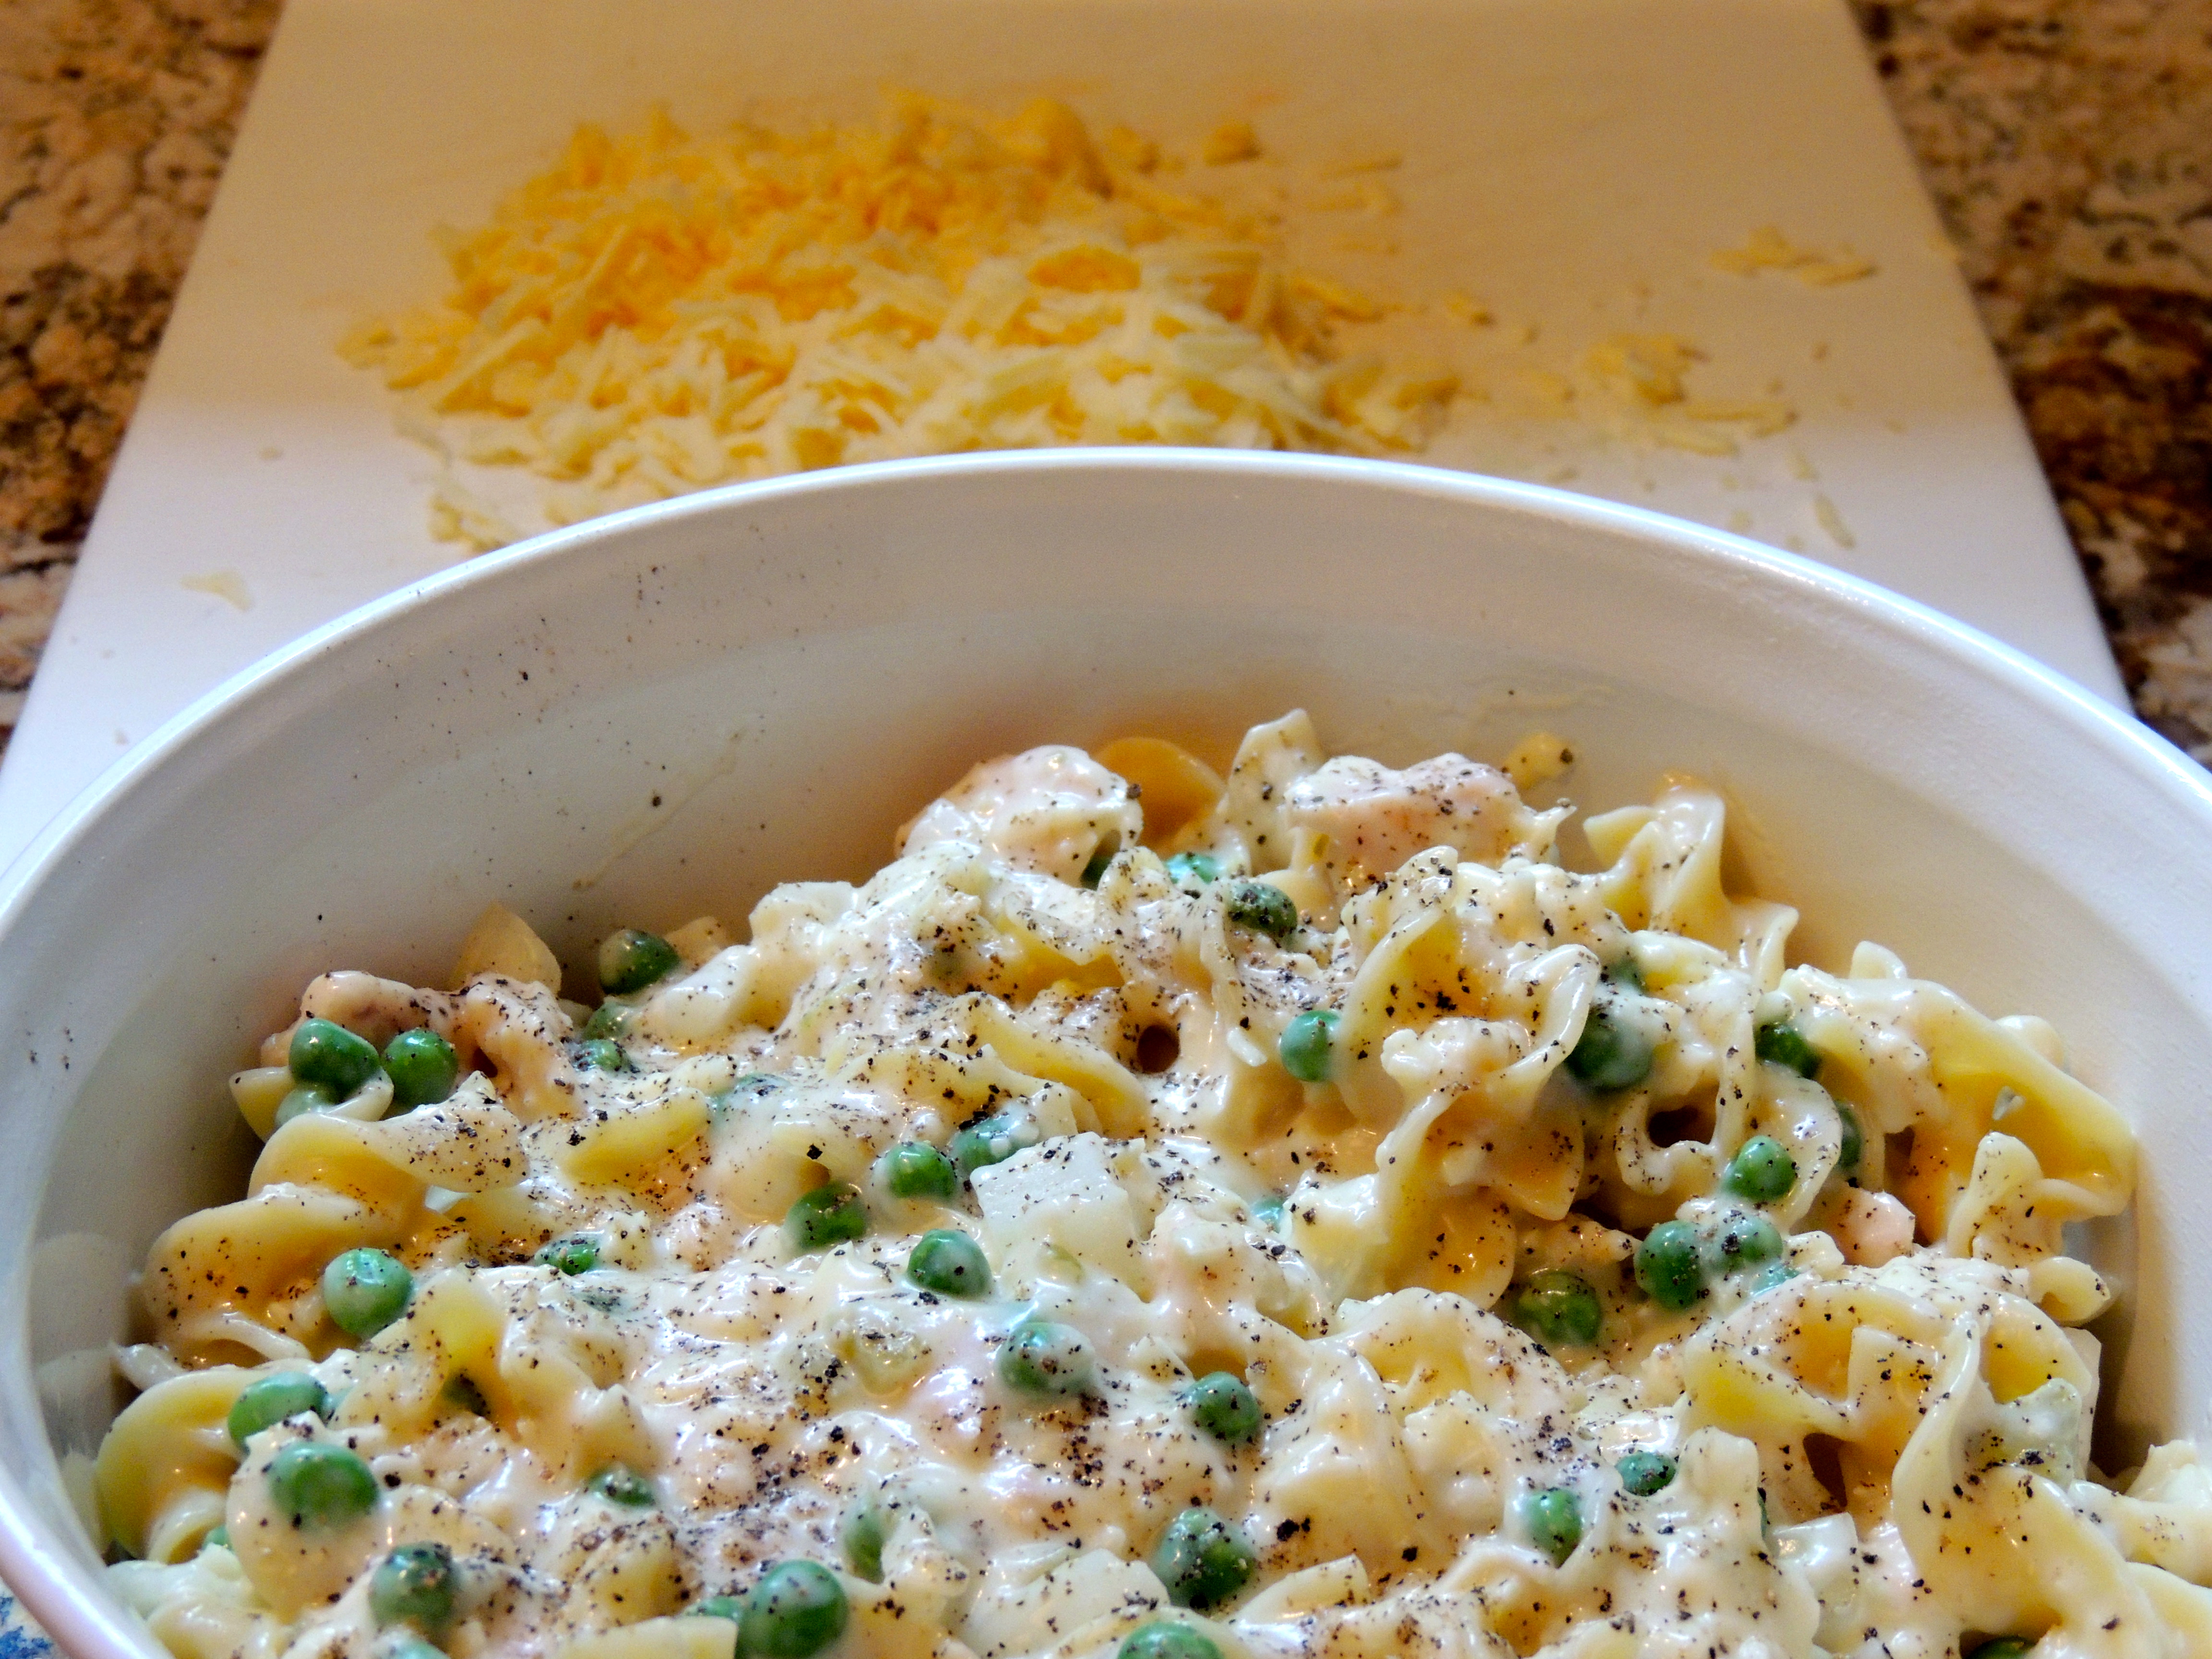
Add the cheese and stir to mix, reserving a handful or two to sprinkle on top. Sprinkle with pepper and top with the remaining cheese.
Stir together, save a little cheese for the top!
Bake for 20-30 minutes or until bubbly. I usually keep the lid on because I like mine creamy. If you like a crunchy texture on top, you can bake it without the lid.
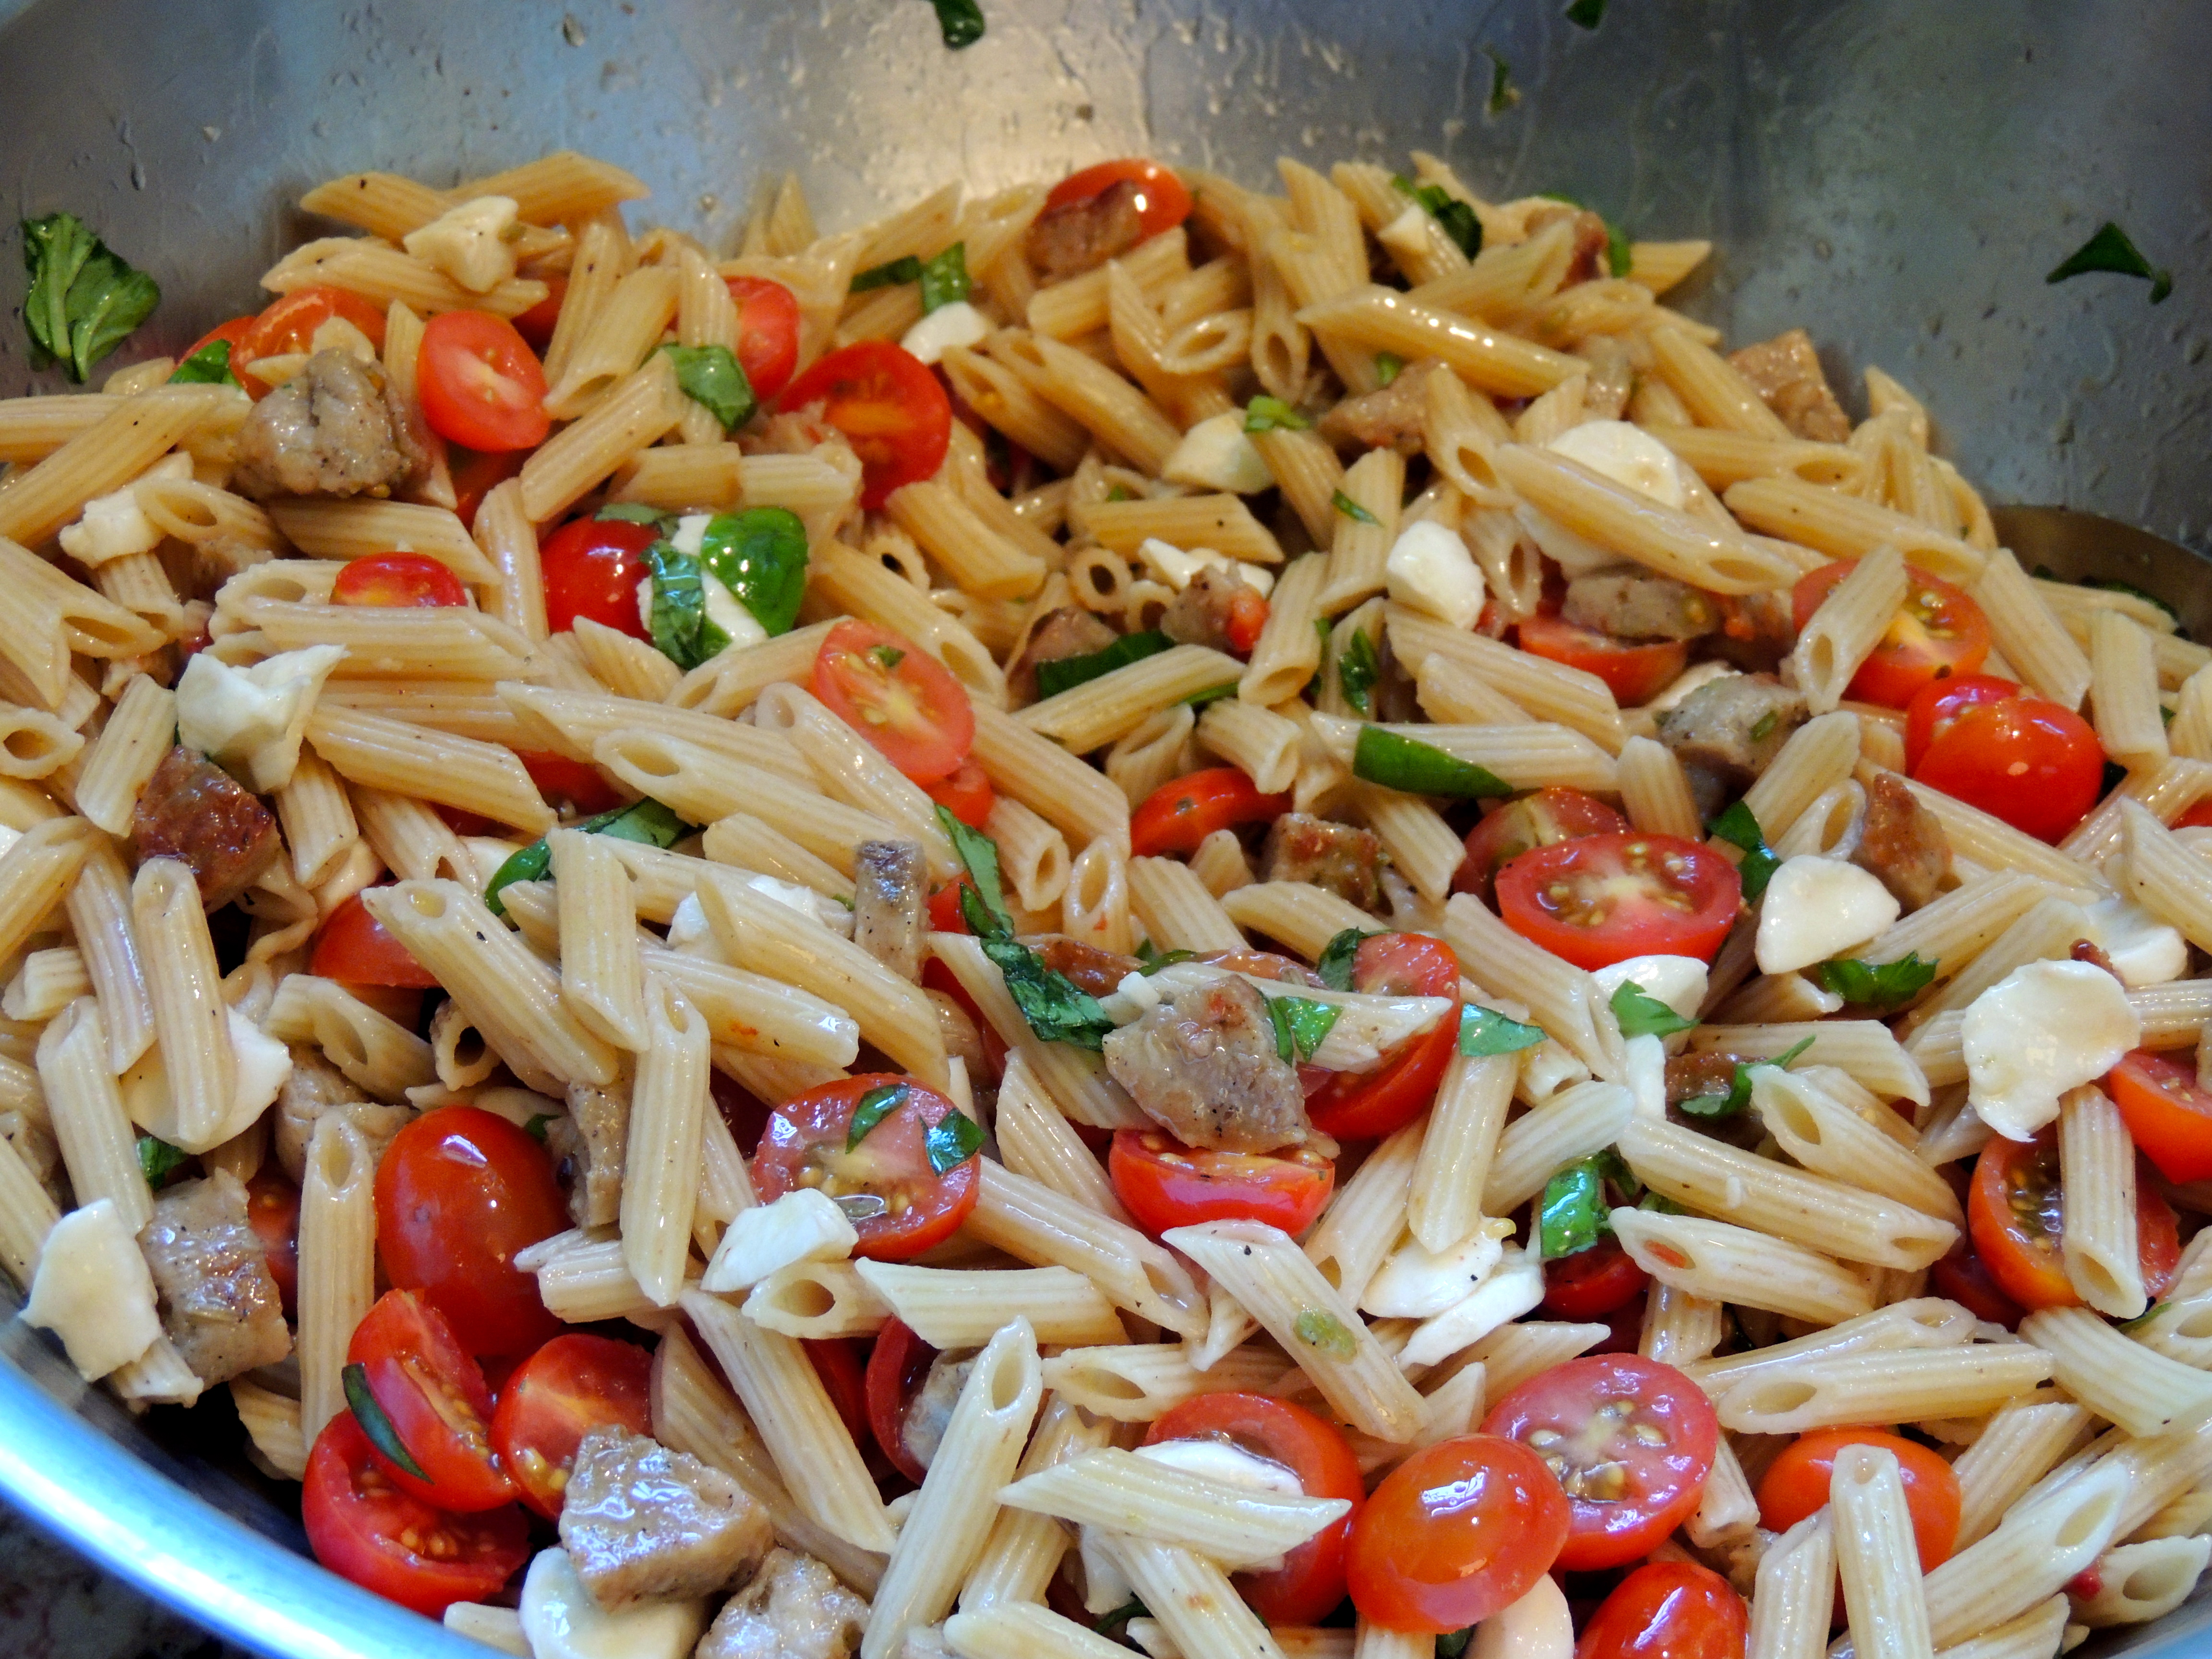
This recipe is too good to be true! A perfect combination of healthy ingredients, chicken sweet Italian sausage, fresh spinach, fresh mozzarella, grape tomatoes, fresh basil and white wheat pasta… these ingredients together with a dressing of olive oil and balsamic vinegar will make you so happy… W A R N I N G : You may crave this after you’ve made it once. Don’t say I didn’t warn ya!
Pasta with Italian Sausage, Tomatoes, Fresh Mozzarella and Basil
1 – 12 oz pkg white wheat pasta (like Barilla)
1 pkg Chicken Sweet Italian Sausage (like Al Fresco), skins removed, cut into small pieces
1 container of FRESH Mozarella, cut into fairly small pieces
1 large container (or 2 small) Grape Tomatoes, cut in half
Fresh Basil (to taste)
⅓ – ½ cup Olive Oil
⅛ – ¼ cup Balsamic Vinegar
Pepper
Spinach
In a large nonstick frying pan add a small amount of olive oil. Cook cut up sausage until browned. Remove from pan and place on a plate that has a few paper towels on it.
Start a large pot of water to boil the pasta, while you’re waiting for it to boil,…
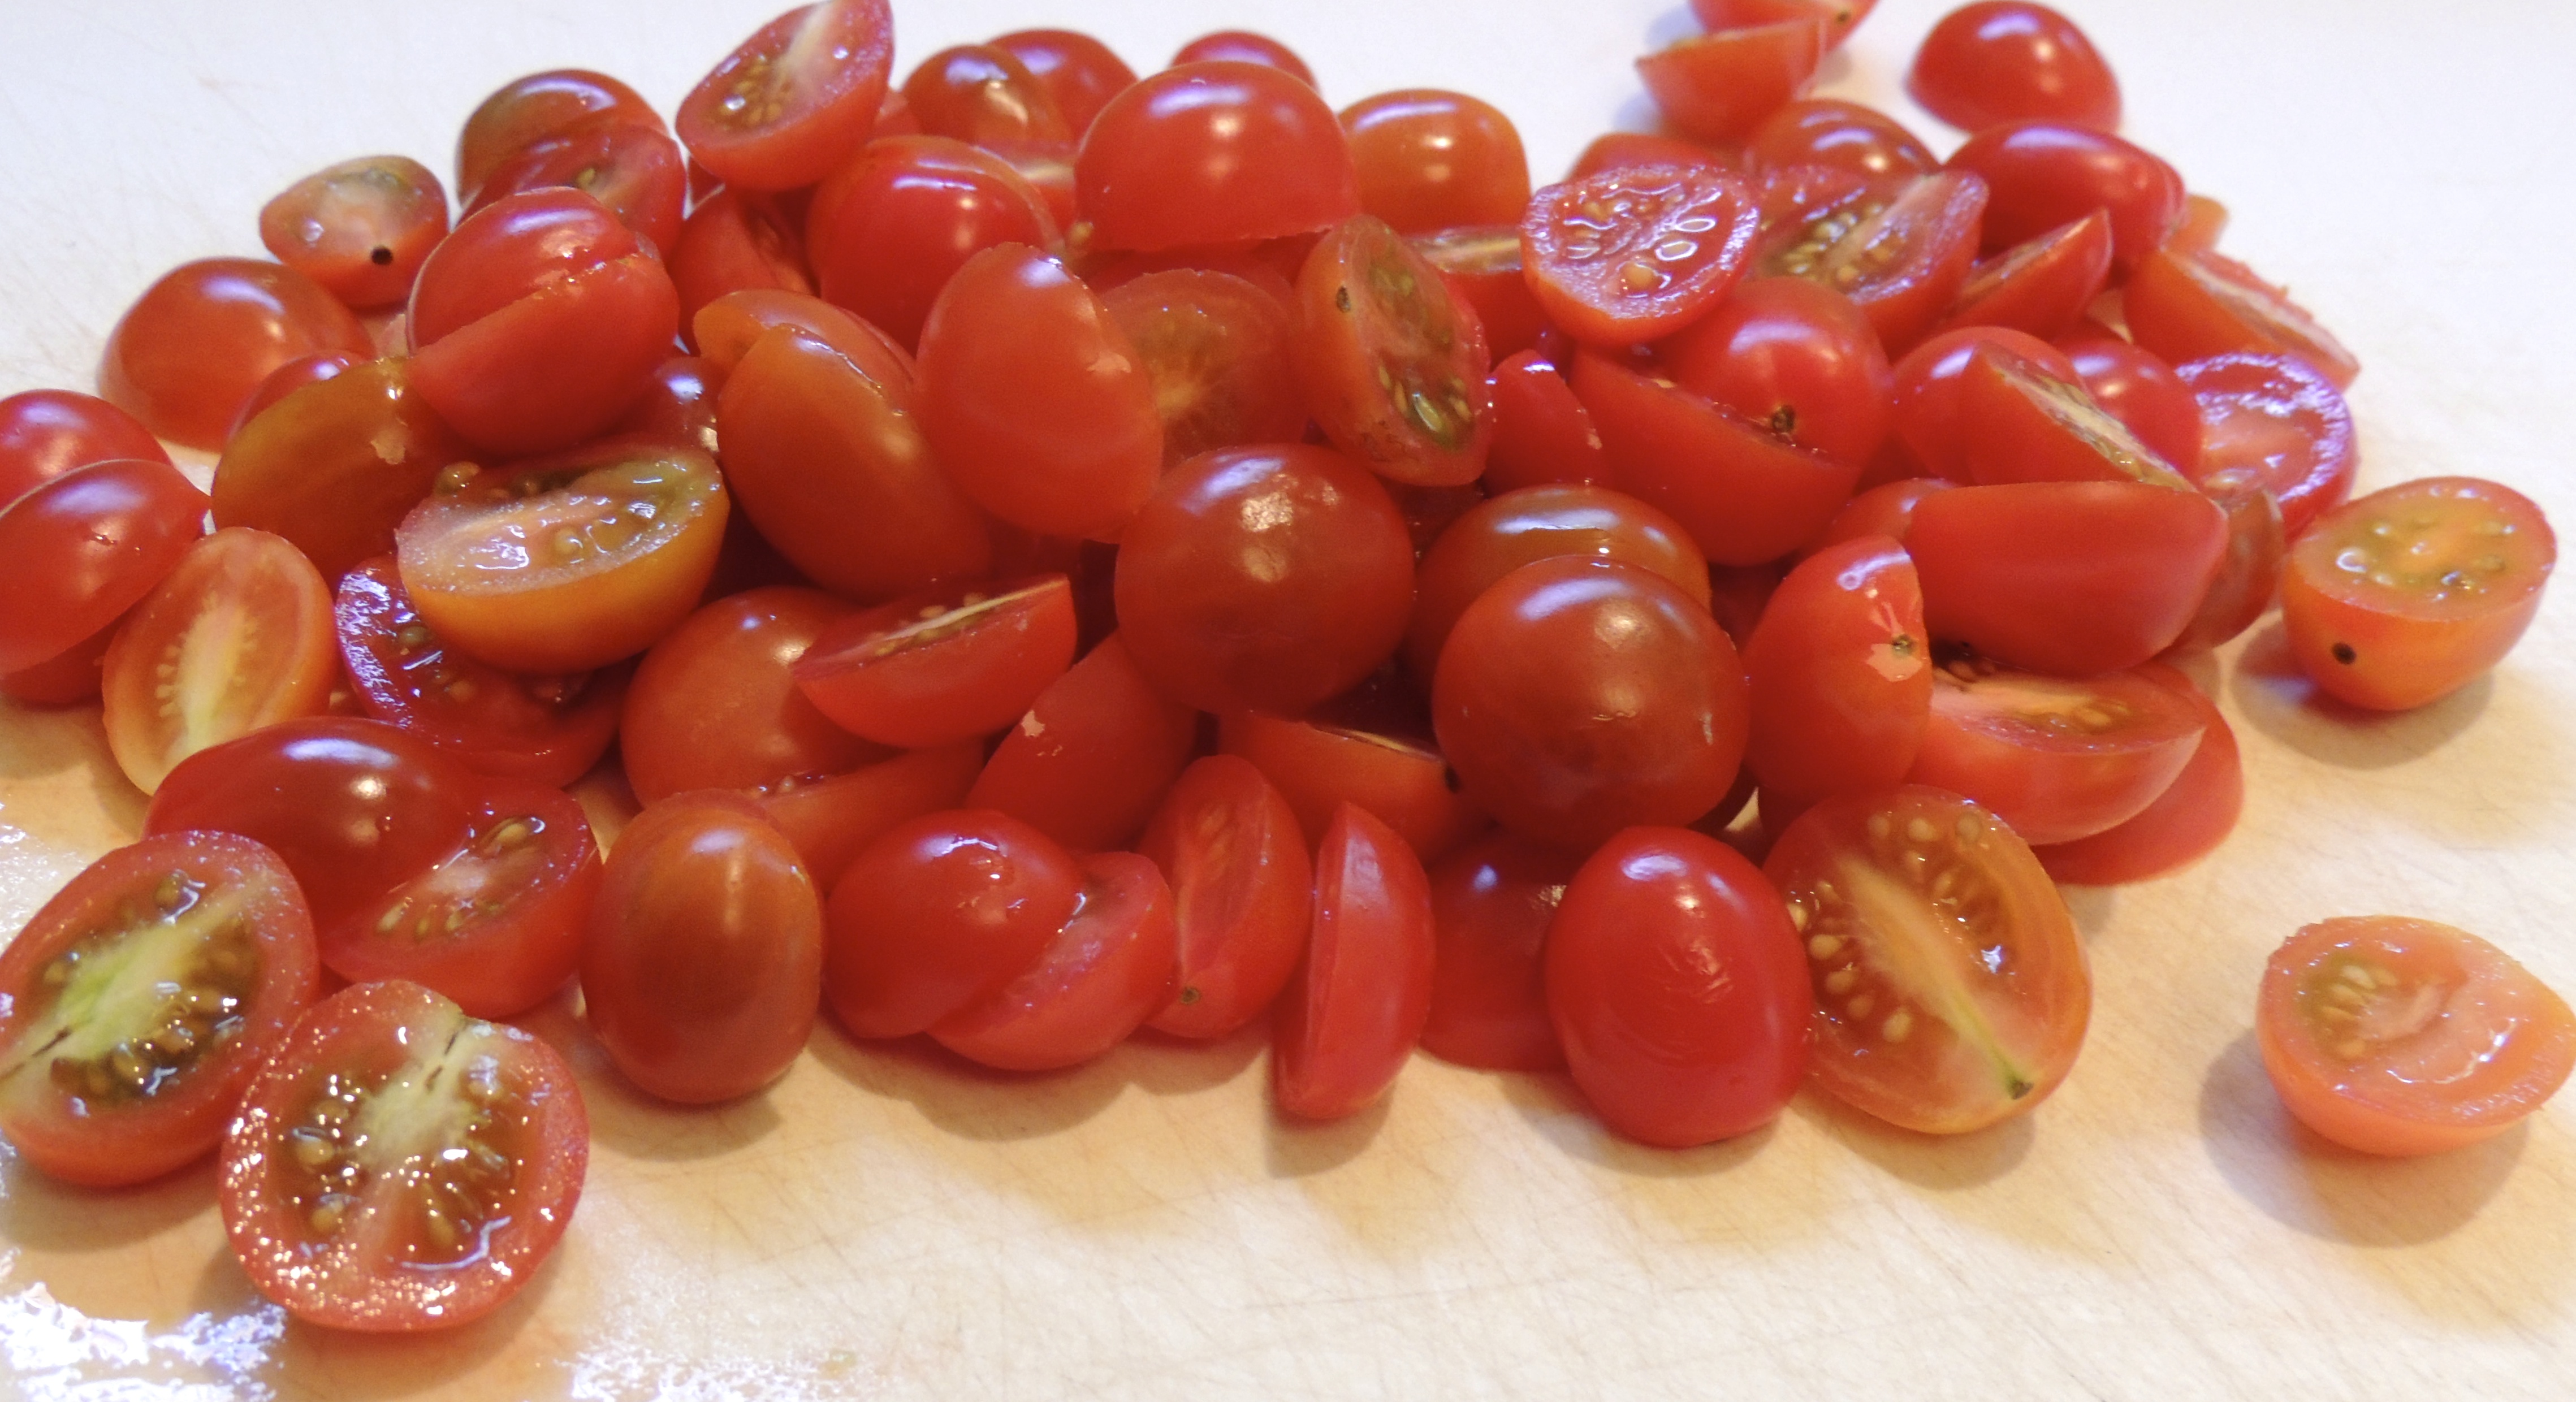
Cut the grape tomatoes in half, set aside.
Wash the basil and chop it up, set aside.
Cut the mozzarella into small bite sized pieces, set aside.
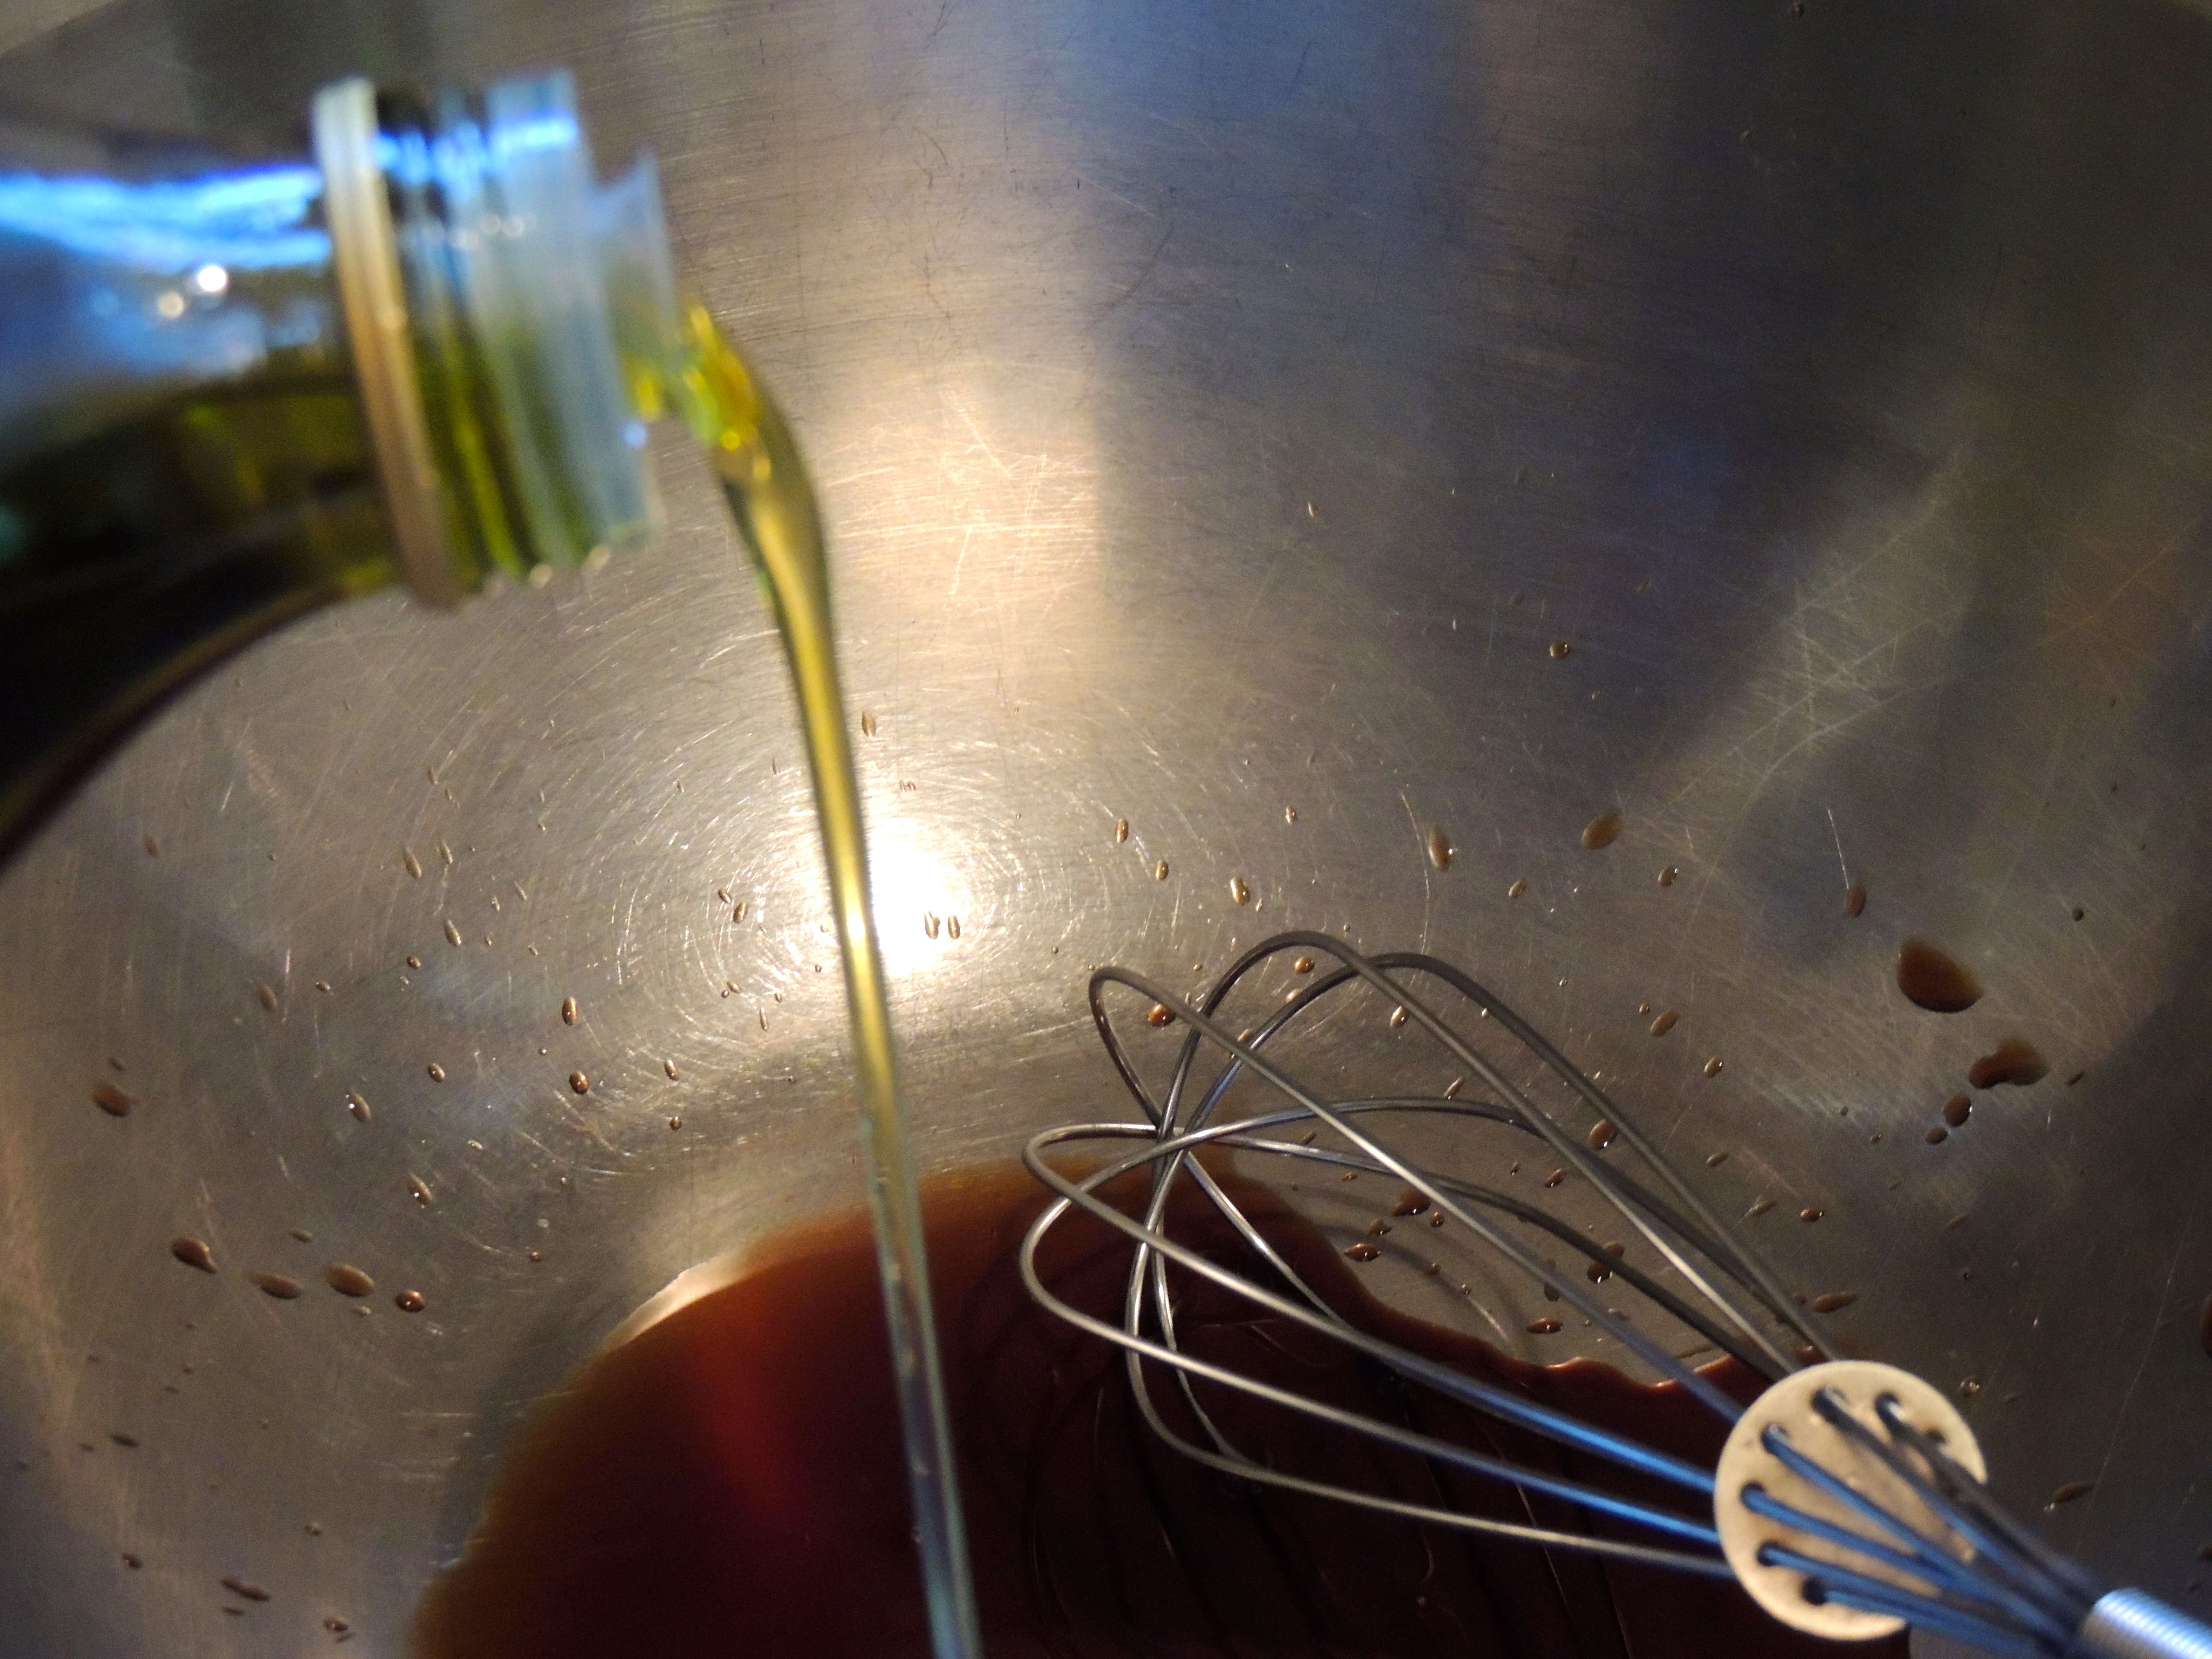
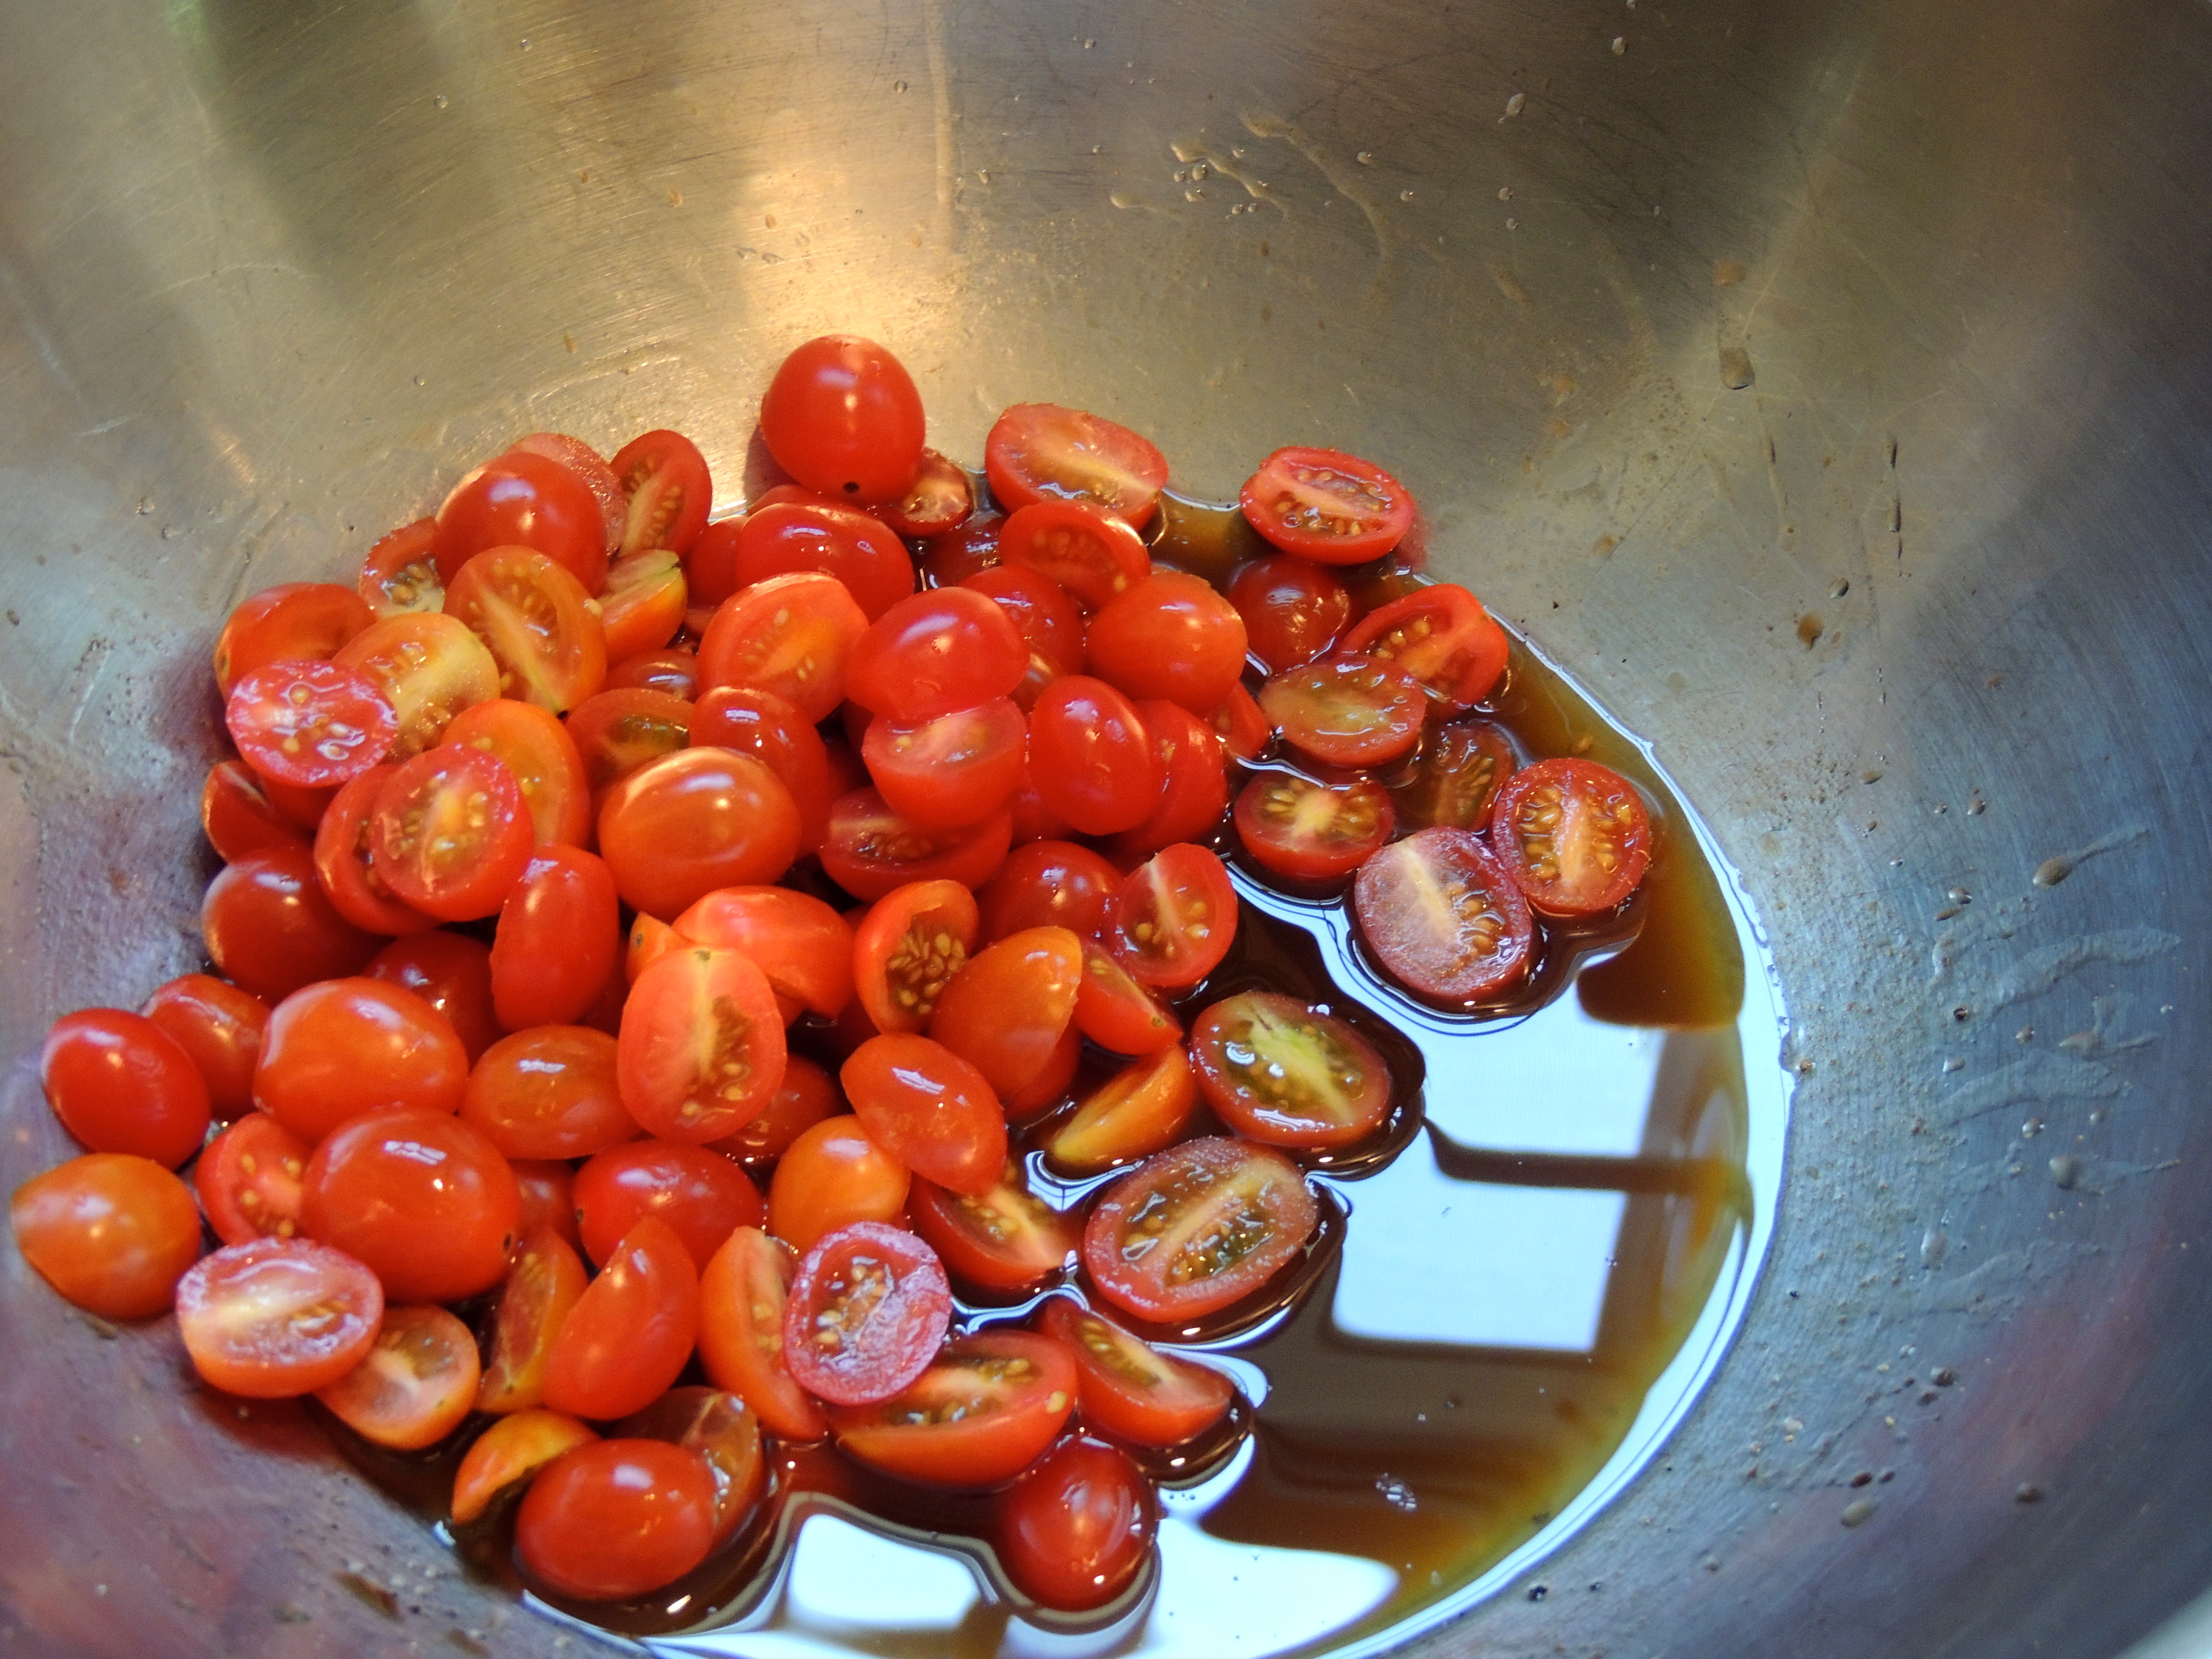
In a large bowl, add the balsamic vinegar. I never measure, I just eyeball it to see what I will need to coat the pasta well, it’s ok if it’s more on the heavy olive oil side, you’re going to put this salad on top of fresh spinach, so you will need it! Slowly whisk in ⅓ – ½ cup of olive oil. If you whisk it slowly it will emulsify (become one where it won’t separate). Add some pepper. Go ahead and toss in your cut up tomatoes into the olive oil/balsamic mixture so they can be absorbing those wonderful flavors!
Once your pasta has finished cooking to the al dente stage (firm to the bite), drain it well, and place it in the large bowl with the oil/vinegar. I give it a quick stir to coat the pasta well and then I cover the grape tomatoes with the hot pasta and let it sit for a few minutes.
After a few minutes add the fresh mozzarella, the cooked sausage and the fresh basil. Stir to coat.
You can eat it like it is, or wait until it’s chilled. I usually will take it out of the fridge for 5-10 minutes so that the olive oil will have a change to un-congeal… Place several large handfuls of fresh spinach and then a few large scoops of pasta salad… it melds together wonderfully! Enjoy!
WOOT! WOOT!Confetti falls from the sky, the music is blaring… this is my 1,000th post on this blog! A daily post for nearly three years… I can’t believe I’ve made it this far! A big thank you to all of you who read it!
This was a thrilling find on FINECOOKING.COM! I like a sure thing… a recipe where the cooking time is fairly consistent… this has worked for EVERY pork tenderloin that we have grilled this summer. I guess if you had a large one or a tiny one, the results might vary a bit, but use a meat thermometer if you have one, and you’ll be fine!
I didn’t brine our pork tenderloin, I took a ziplock and micro planed a few cloves of garlic (or mince), poured in some olive oil (enough to coat the pork) and some pepper… mush it around and add the pork tenderloin. Seal the bag, move it around to get it nice and coated. [Note: something you might not know about me… I’m weird about meat… 1) it can only go on the bottom shelf in the fridge per dr. oz… so no meat drips (*GASP*) to prevent contamination of any other food 2) I put the sealed bag inside another bag (told ya… weird) 3) I put that bag inside a plastic container (see… weird! when that container comes out of the fridge it goes directly to the dishwasher… it does not pass GO, it does not collect $200… straight to the DW!)… I drive Fred crazy… enough said…]
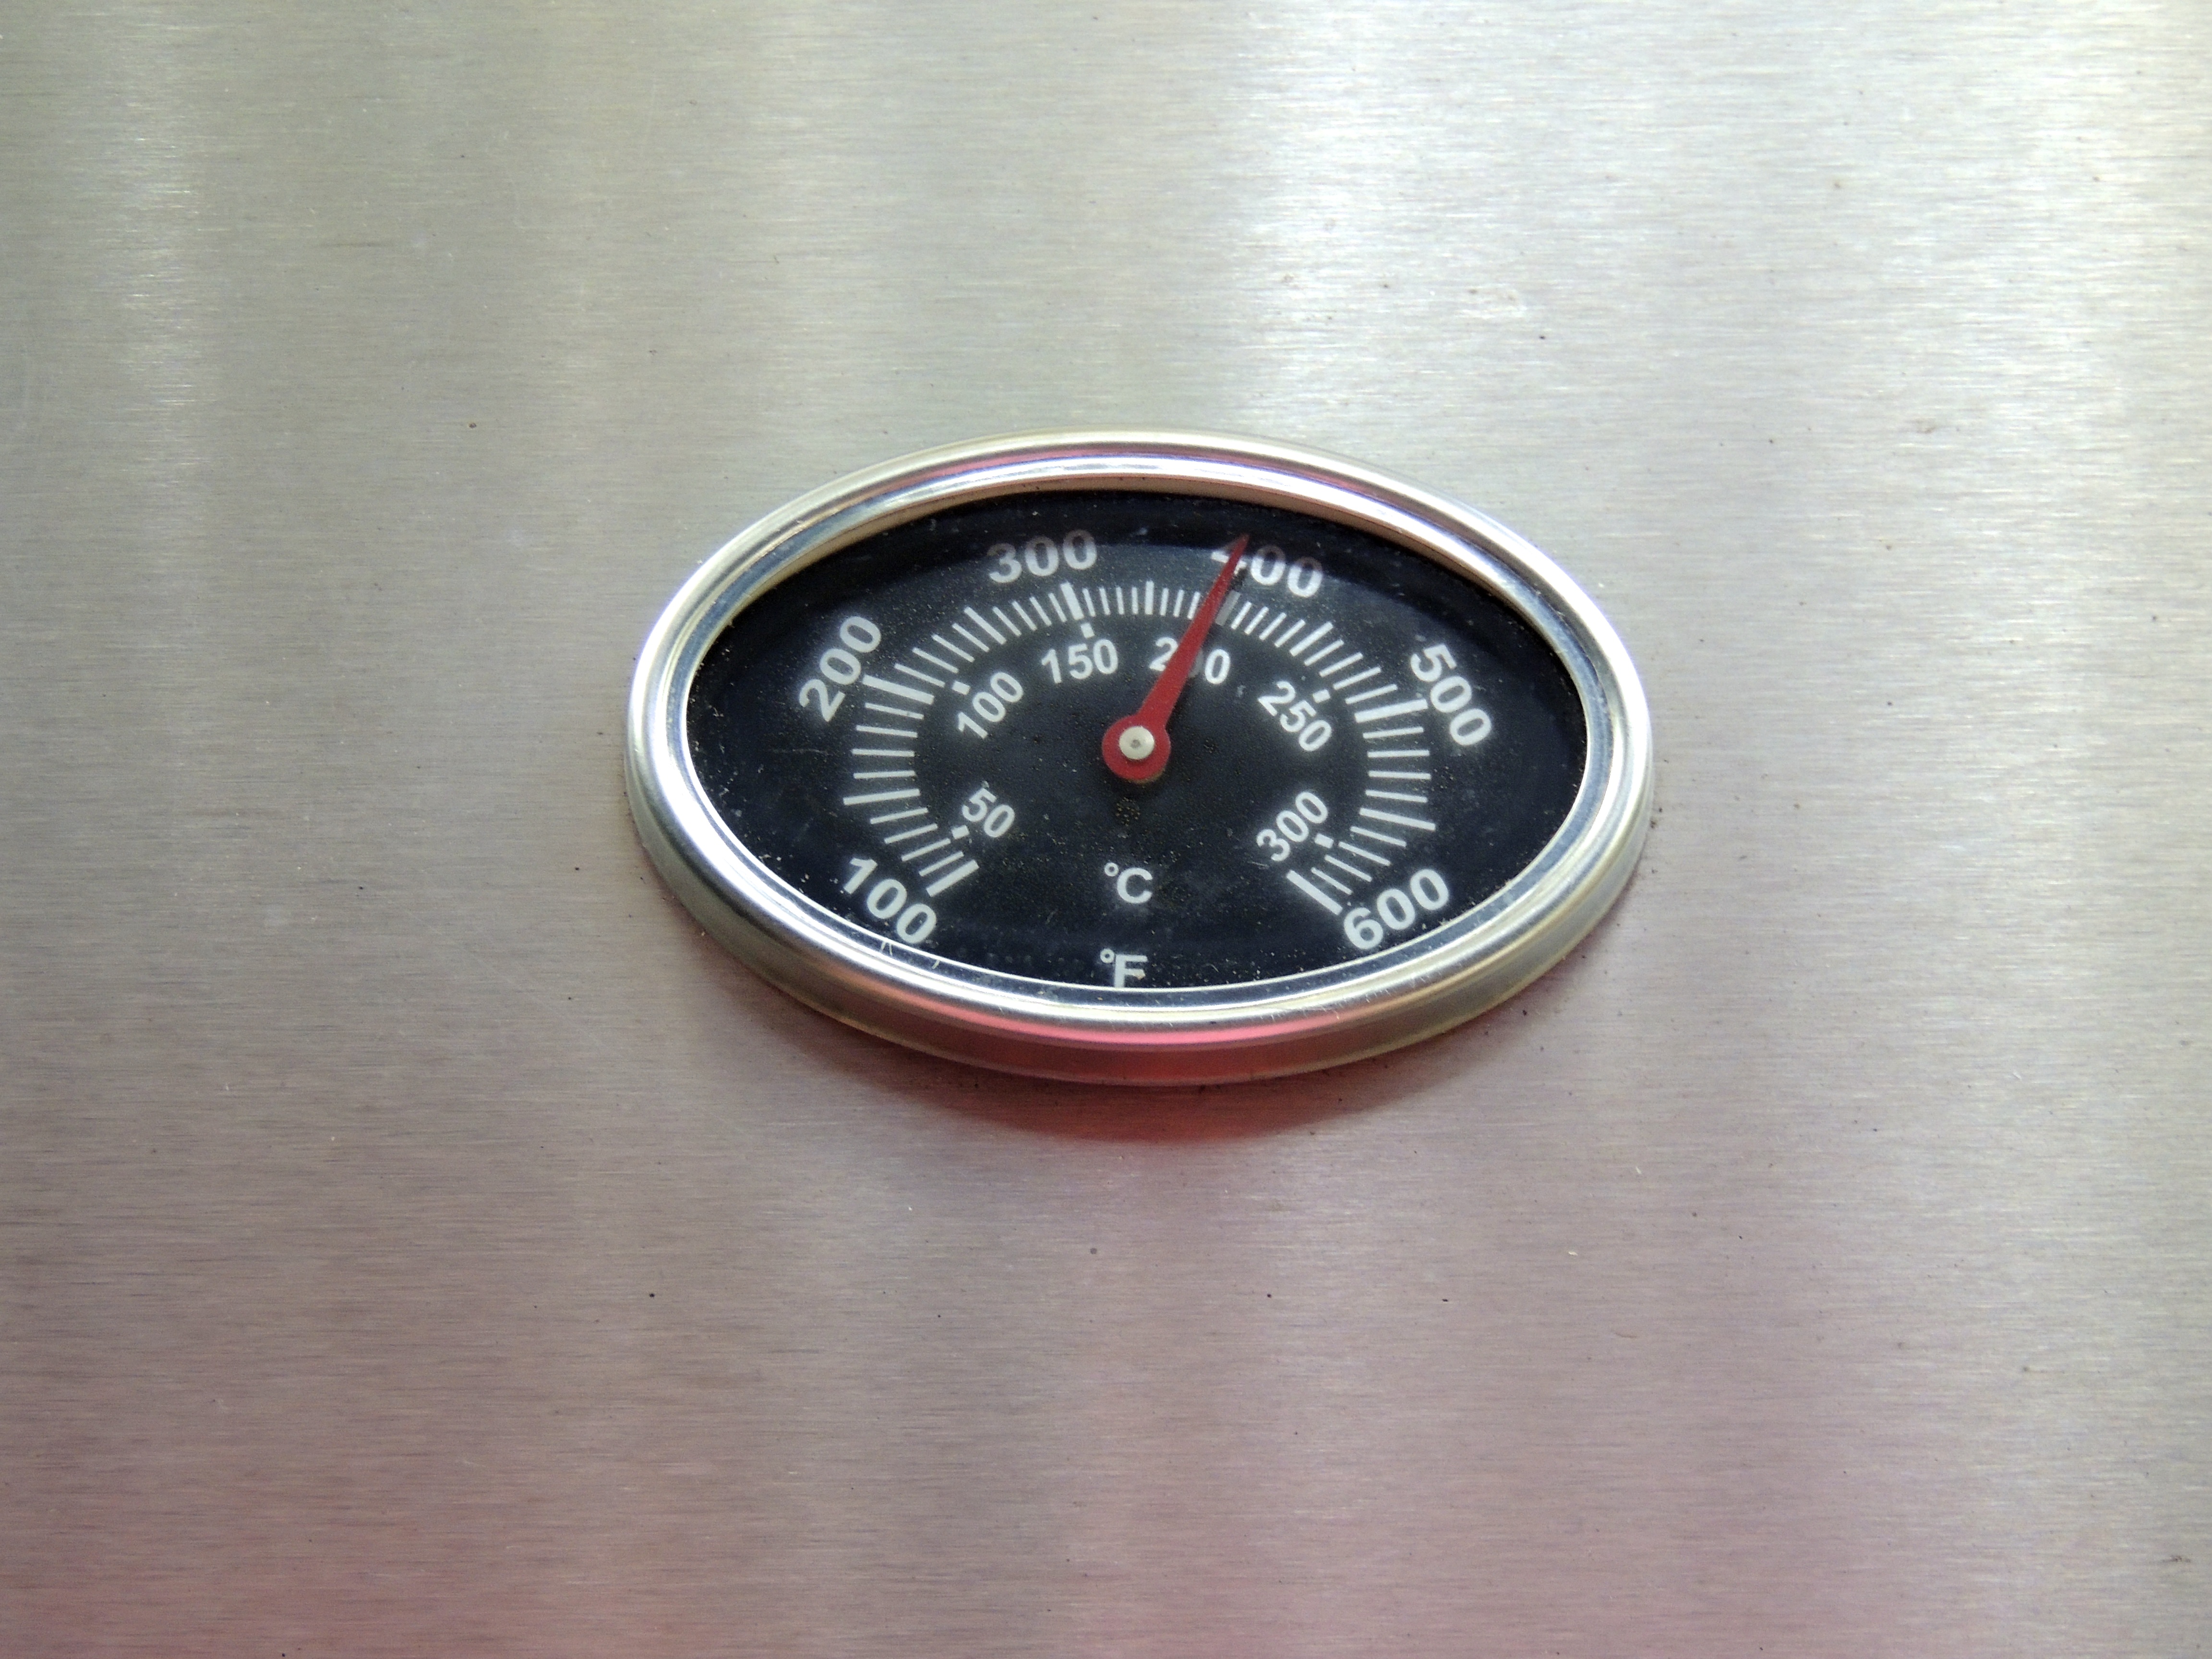
Grill burners all on high… Fred puts the pork on at 400 degrees… temp continues to rise… or you can wait until it reaches a higher temp… either way yields great results!
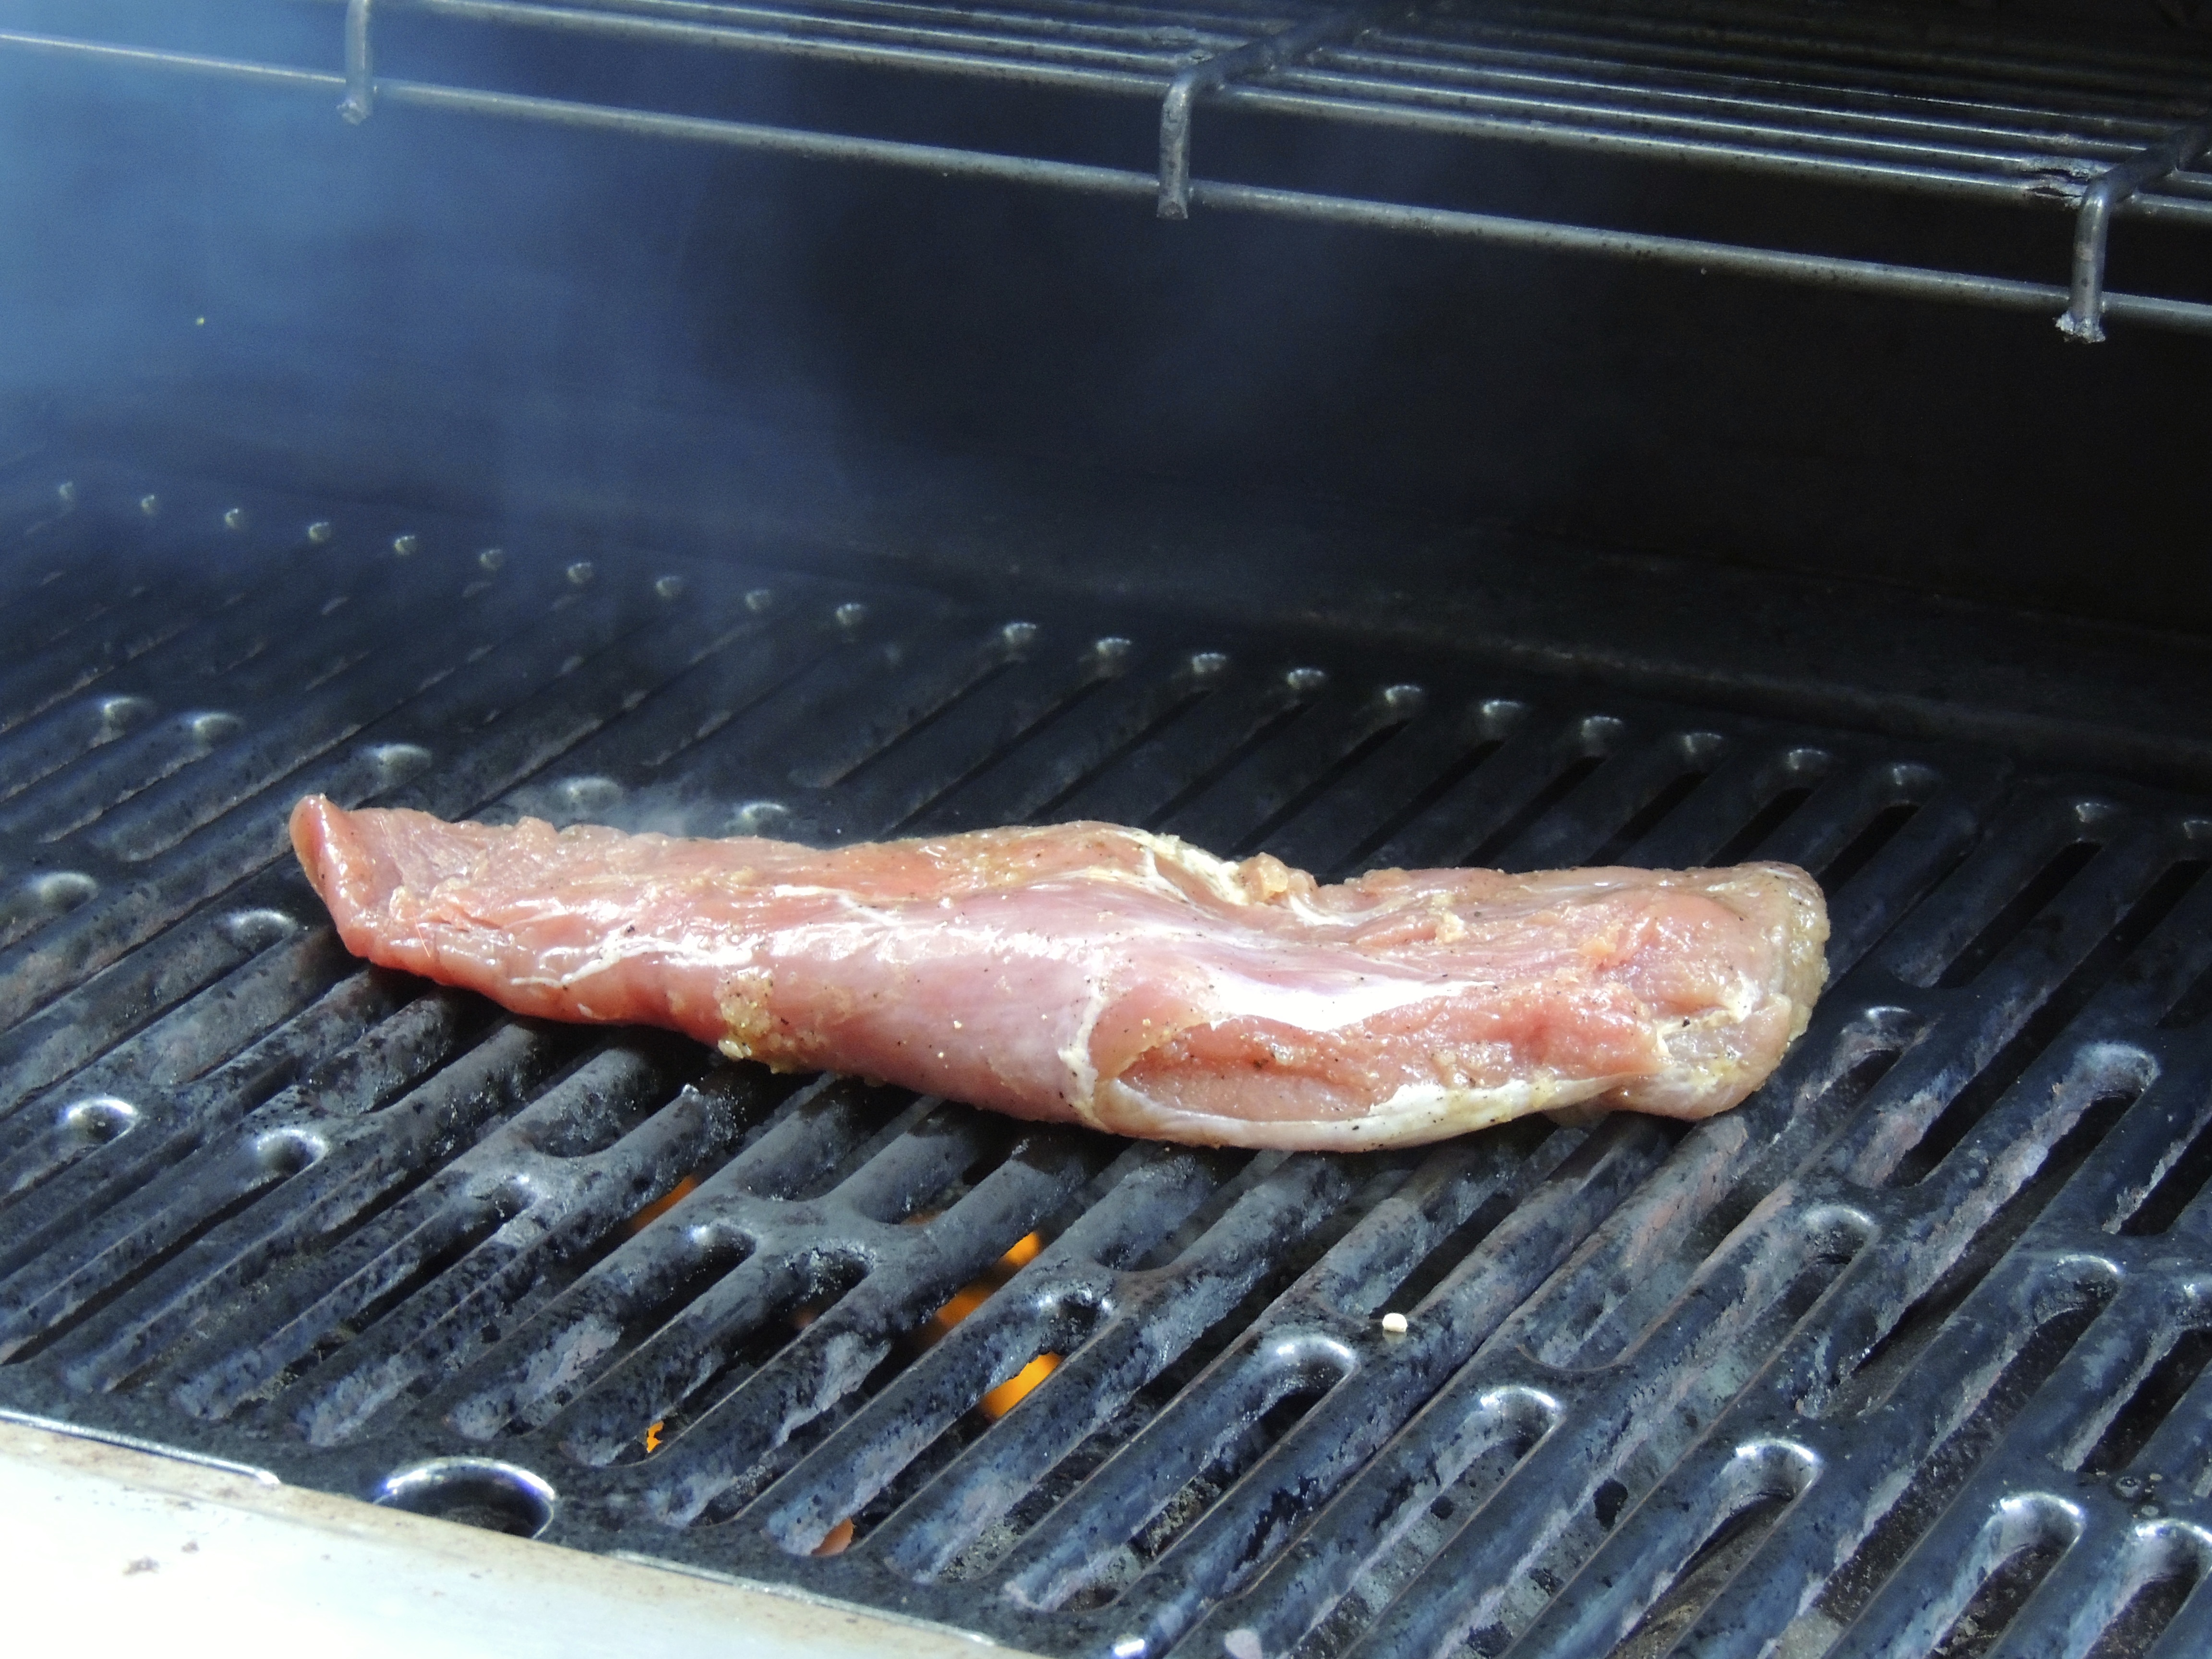
Place the oiled pork tenderloin onto a hot grill and CLOSE THE LID. NO PEEKING!
Set timer for 7 MINUTES… yep, use a timer for each step, you don’t want to forget… because if you’re like me, you’ll have good intentions, you’ll keep your eye on the grill for 6 minutes and 50 seconds and then something will capture your attention and off you go… then you think to yourself… what’s burning?? Ugh, that would be dinner… that scenario hasn’t happened yet because I use a timer, but I guarantee you that it would… if I didn’t…
When timer goes off, FLIP the pork tenderloin… (note the action shot, thankyouverymuch!)… CLOSE THE LID! NO PEEKING.
Set the timer for 6 minutes! (Did I say no peeking?) – it’s really important that the grill is closed… so I wonder why I didn’t take a photo of that? Hmmm…
When the timer goes off… TURN THE GRILL OFF… DO NOT OPEN THE LID!!!
Set the timer for 5 minutes!
Then… just to be sure it’s done, insert an instant read thermometer (thickest part of the meat), it should read 145-150 degrees. If it doesn’t just close the lid and check on it in a few more minutes. Ours always has registered perfectly!
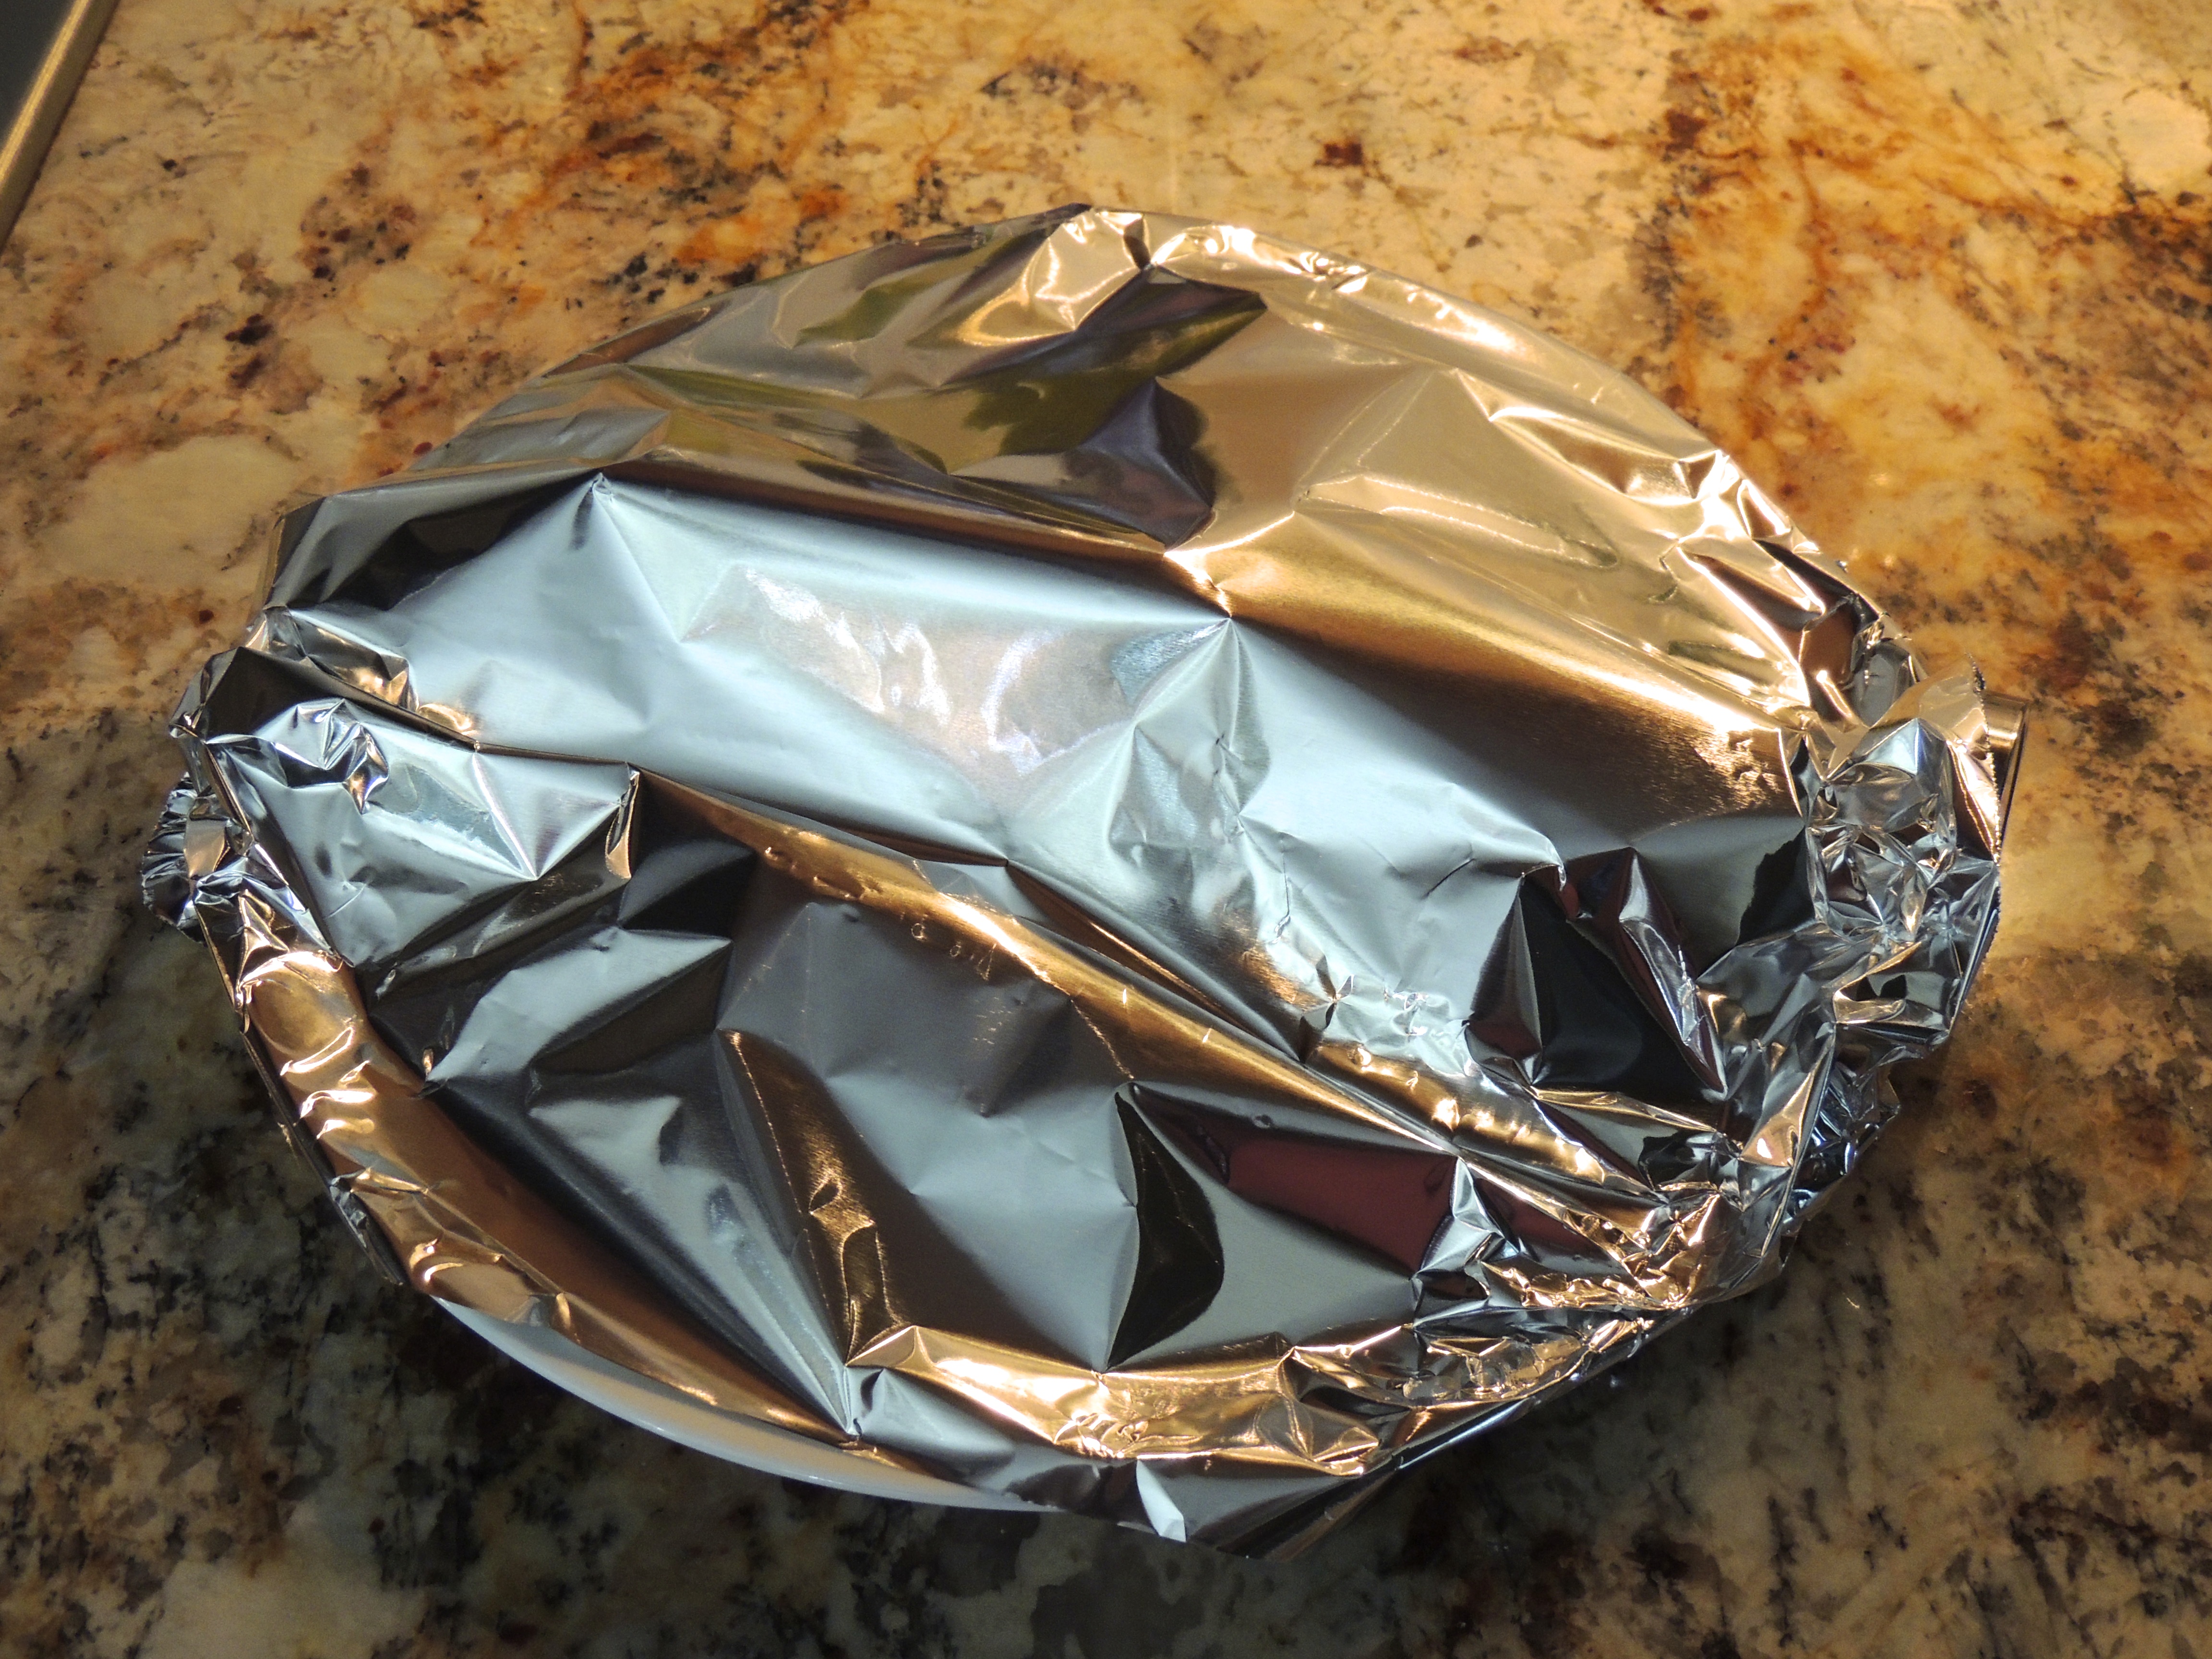
Then remove the pork from the grill, place a piece of foil over the top and let it rest for 5 minutes… it’s worked hard, it needs a break!
To recap this 7-6-5 method: Grill on high, place oiled pork tenderloin on grill, close lid – 7 minutes.
Flip to other side, close lid… 6 minutes
Turn grill off… (keep lid closed) 5 minutes
Take temp… let rest 5 minutes if it’s reached 145-150
From FineCooking.com (Use this link to see their entire recipe, I did not brine my, however, they show you how… I need to try it some time! This link also gives details for charcoal grills)
Season and grill
Rub the brined tenderloins all over with the glaze and then season with the pepper. Or, season to taste with another flavoring of your choice.
Heat a gas grill, turning all the burners to high until the grill is fully heated, 10 to 15 minutes.
Put the pork on the hot grill grate. Close the lid and grill for 7 minutes.
Turn the pork over, close the lid, and grill for another 6 minutes.
Turn off the heat (keep the lid closed) and continue to cook the pork for another 5 minutes. At this point, an instant-read thermometer inserted into the middle of the thickest end of the tenderloin should read 145° to 150°F. (If not, close the lid and let the pork continue to roast in the residual grill heat.)
Remove the pork from the grill and let rest for 5 minutes before carving. Cut across the grain into 1/2-inch slices and serve immediately, with the sauce of your choice.
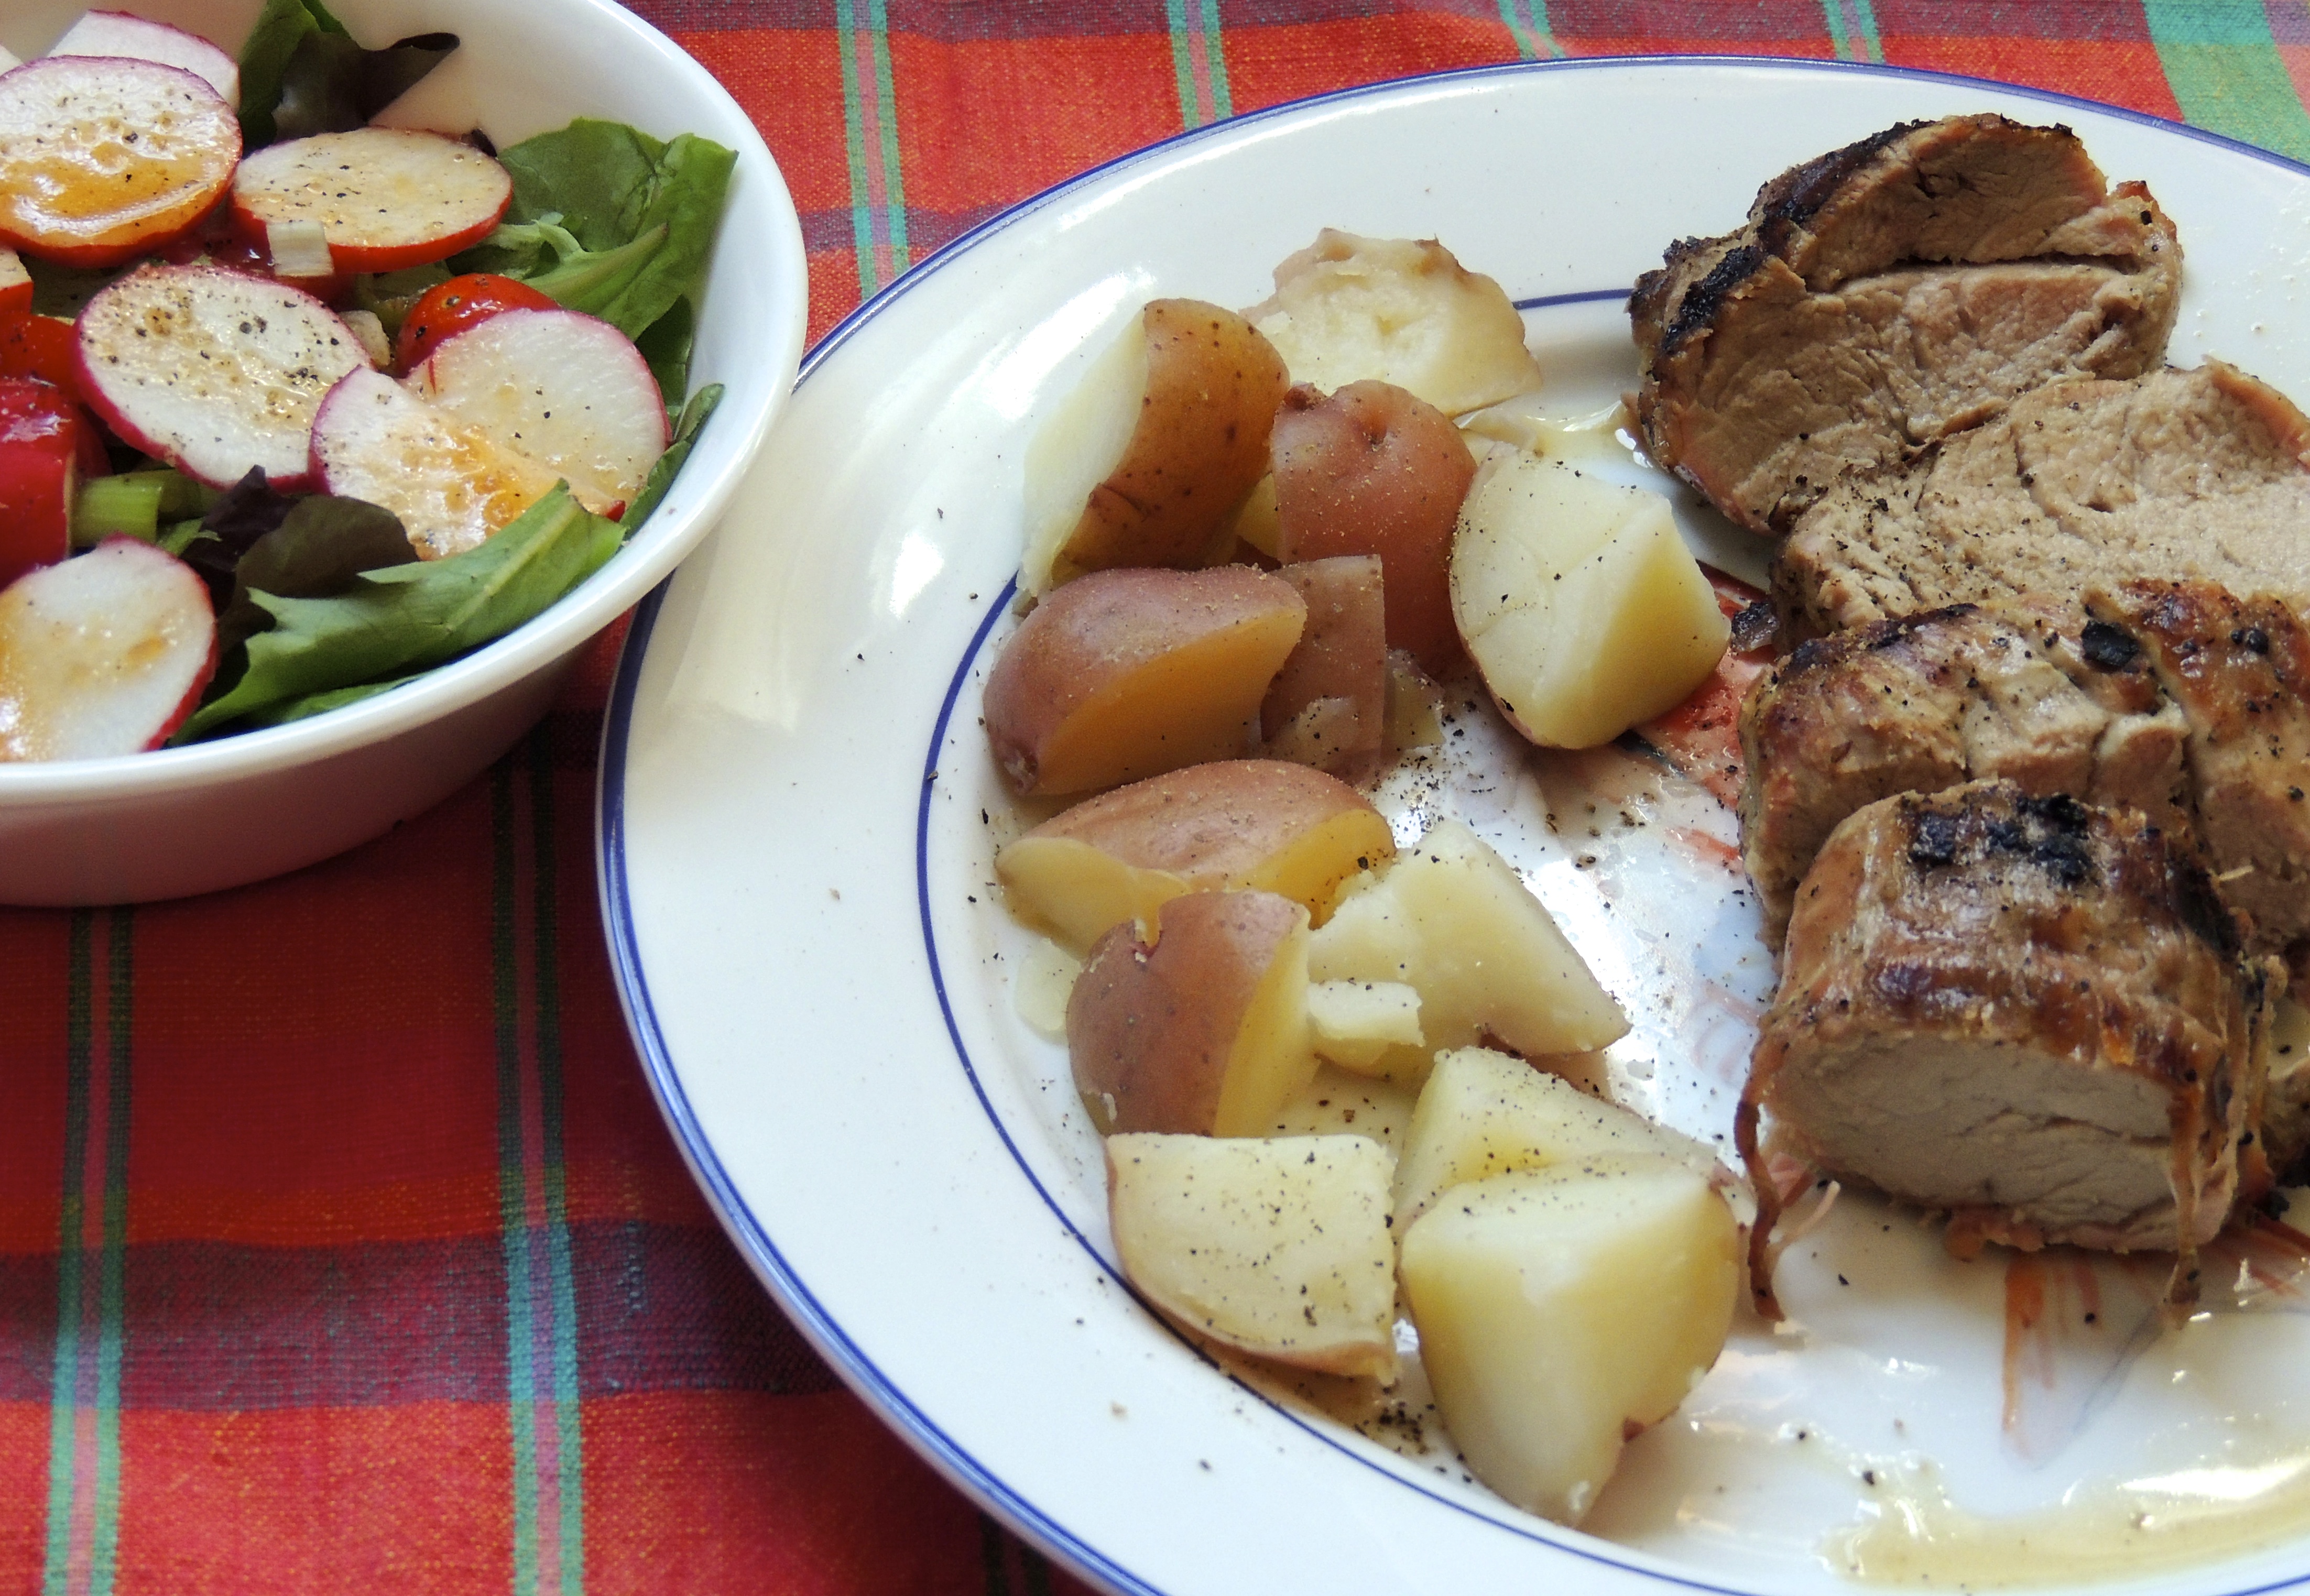
It’s nice to have this recipe isn’t it? Pork tenderloin is a lean cut of meat, although it is considered “red meat” for those of you who limit your red meat intake… it goes great with little red potatoes, a salad, or rice and blackbeans… yum!
I was thrilled to find this recipe on FineCooking.com… woohoo! Happy to share my good finds with you!
We try to plan a few meat free days throughout the week… this recipe for Black Beans and Saffron Rice is a perfect substitute for meat. High in protein and fiber it fills you up and keeps you full! With that being said… I also make this as a side dish to accompany a nice grilled pork tenderloin! It’s a great combination of flavors!
BLACK BEANS AND SAFFRON RICE
I N G R E D I E N T S
Mahatma Yellow Saffron Rice (or made from scratch… which is an upcoming post!)
1 container of Black Beans (my favorite brand is FIG, Food Is Good, they are so tasty! But any brand will do!)
1 onion, chopped
Little olive oil (1 Tablespoon or less)
Jalapeño’s (I buy the already diced in the jar, near the pickles at the grocery store) 1 Tablespoon, more or less to taste
D I R E C T I O N S
Cook rice according to package directions.
Drizzle a little olive oil in saucepan, sauté the chopped onion until soft.
Add a tablespoon (more or less depending upon how hot you like it) of chopped jalapeño , stir for a few seconds
Add container of Black Beans (I buy black beans that have water only or water and sea salt)
Bring to a simmer… add a little water if necessary, put a lid and leave it just cracked.
I cook about 15-20 minutes… test a few, are they wonderful? Or are they a little crunchy? If they aren’t done, let them cook a little longer…
Scoop some rice into a dish, top with the black beans.