Strawberry Shortcake Recipe from the Magnolia Journal (Joanna Gaines)!

Quick, easy and delicious!

My mom bought me a subscription to the Magnolia Journal – Wow, what a great gift idea! I took a peek at the magazine and set it aside for when I could spend some time perusing the pages. Well, I must have run across the shortcake recipe and I couldn’t find it anywhere. Thankfully, it’s all over the Internet, but I also found it… guess where? Right in the magazine where I first saw it, sigh…  Continue reading “Strawberry Shortcake Recipe from the Magnolia Journal (Joanna Gaines)!”

Advertisement

The most delicious cake ever – made with ingredients you probably have on hand RIGHT NOW!

Delicious Chocolate Cake!

Let me start by saying, this is a hell of a photo, isn’t it? You may have gathered from my other posts, I’m so excited once I finish a recipe that we sit down and eat… bite one… then it hits me… P H O T O ! !  I wish I would have thought of taking a photo of the cake prior to cutting, but this is it… see how dark this cake is? Very moist and light. Not too chocolatey and not too sweet. I opted for some whipped cream instead of confectioner’s sugar or frosting. It was PERFECT! Just scroll down and look at the list of ingredients… you probably have all of them don’t you? Well then, why are you sitting there?!

I saw this recipe in an email from FOOD52.com. When I saw that it was a one layer chocolate cake, with no frosting, I was intrigued. You can make it and sprinkle powdered sugar, make frosting, or top with whipped cream.

Best of all you don’t need a mixer, you simply need two bowls and a 9″ cake pan.

Get. Out!

No butter or eggs…

Get. Outta. Here!

OK, I had to try it. I was skeptical, because… well, I never made a cake without essential ingredients. Turns out they aren’t essential at all! This cake was light, fluffy, and not too sweet. It came together quickly. Dry ingredients in one bowl, wet ingredients in the other. Mix then get the air bubbles out by tapping several times and BAM! Best cake ever!

Is there anything better than the smell of a chocolate cake wafting through your house? N. O. There truly is not.

I would also like to take this opportunity to mention that now is your chance to preorder the new cookbook by Food52 called Genius Recipes. It looks like a beautiful book, and it will be jam-packed with fabulous recipes!

Note: I used Hershey’s Cocoa – Special Dark. I’m not sure if that’s why it’s so dark, but it’s fabulous!

Click HERE to print the recipe by itself without all my blah, blah, blah…

Food52

Catch you back here tomorrow, after your cake 😉

Rustic Apple Tart recipe…

Rustic Apple Tart
Rustic Apple Tart

I love running across an intriguing recipe and giving it a whirl! I had received an email from Martha Stewart – Everyday Food – with this fabulous “recipe” in it for a Rustic Apple Tart. I say “recipe” because it was a video link, which is great, but there was no recipe… and to remember each step when you haven’t worked with puff pastry much in the past seemed to be a little dangerous to me, ha ha… So here is the “recipe” as well as the link to their video (which is amazing, be sure to watch it first, Sarah Carey did a great job with the quick demo!). There are only a few ingredients, it’s fairly quick to make and it comes out absolutely gorgeous! Tasty, beautiful and very professional looking, thanks to the glaze that goes on top (which doesn’t really add to the taste, just the beauty). Click HERE to print the recipe only.

RUSTIC APPLE TART

Puff Pastry (1 sheet)
3 Granny Smith Apples
1/3 cup sugar (or a little less)
1 large egg yolk
1 tsp water
Defrost puff pastry in refrigerator.
Once defrosted, leave folded and roll out to 8×14 on a lightly floured surface.
TRIM EDGES – need a clean edge, otherwise it won’t puff up, she used a pizza cutter
Place on baking sheet and PUT IN FREEZER 10-15 minutes (this is very important)!
Filling:
Peel and core 3 Granny Smith Apples, cut into 1/4″ slices
Add 1/3 cup sugar (or less) and mix.
In separate bowl, mix 1 large egg YOLK (discard white) and 1 tsp water, set aside.
Dough out of freezer.
Brush on egg wash (don’t let drip down the sides, it could inhibit it from rising)
Create border 3/4″ from edge, cut halfway through dough with a knife.
Arrange apples within border.
Dot the top of the tart with 2 Tablespoons of butter.
Bake at 375 for 30-35 minutes.
While tart is still warm mix up this glaze…

Glaze

2 Tablespoons of apricot jam or apple jelly
1 Tablespoon water
Mix and heat until warm.
Brush this mixture on the tart while it’s still warm.
Cut and serve!

F L A S H B A C K

O N E   Y E A R   A G O…       Featured Artist… Matt Linz!  

T W O   Y E A R S   A G O…   The Hump Bar from the set of ARMY WIVES… Charleston, SC

Catch you back here tomorrow!

[recipe] – RHUBARB PIE! Ohhhh, best ever!

Image

Rhubarb. You either love it or you hate it. I happen to love it. Rhubarb makes the best pie ever. Some people mix it with strawberries… hmmmm, not me, I like it with just rhubarb. I’m funny that way…

Last month was my birthday, and my mother-in-law surprised me with a rhubarb pie, and it was delicious! I swore I was going to freeze some of it, but it was gone before I got around to doing it… Oops!

I was a weird kid… never wanted cake for my birthday, always wanted pie. So my mom would bake me a pie. I love a good pie! I showed you how to make an APPLE PIE on an earlier post… Easy as… you guessed it! Fruit pies are easy as pie to make. Sometimes they may be a bit juicy and make the bottom crust soggy, other times they won’t. Go with it, don’t worry about it, it’s good no matter how it ends up! My favorite are fruit pies (I refer to blueberry pie as ‘antioxidant pie’, hee… hmmm, sounding good right now!).

As I mentioned, I didn’t make the pie above… but I have made this pie before. I don’t usually put a lattice crust, just because it’s quicker to have a top crust and make a pretty design with a knife to let the steam escape. But if you have the time, the lattice really makes it pretty!

I use Pillsbury pie crust (red box in the refrigerator section of the grocery store). I never use any other. I’ve picked up a well known brand and it was horrible… that’s a lot of money down the drain if the crust is bad. So unless you know for a fact that the crust is good, either make one, or buy Pillsbury pie crust…

Here’s a video from the AllRecipes.com website, it shows how to make the “Fresh Rhubarb Pie” step by step…

Here is the link to the RHUBARB PIE recipe on the AllRecipe.com website, from that location you can click to print!

Best Rhubarb Pie Ever!

FRESH RHUBARB PIE    (recipe by Carol via AllRecipes.com)

INGREDIENTS

4 cups cut rhubarb

1 1/3 cups sugar (recipe says 1 1/3-2 cups sugar… I’ve never needed more than 1 1/3 cups, and it could probably be lowered to 1 cup)

6 Tablespoons flour

1 Tablespoon butter

1 recipe pastry for 2 pie crusts (or Pillsbury pie crust in the red package located in the refrigerated section of your grocery store).

Preheat the oven to 450 degrees.

Open the pie crust package, it contains two crusts (follow directions on box).

Place one crust in the pie dish (roll it out if you need to). A regular pie dish works great, you don’t have to use a deep dish pie dish (like for an apple pie), although you can… I don’t have a regular pie dish, so I use a deep dish for everything…

Then mix up the filling… this takes a lot of skill… kidding! I said it’s easy as pie, right? Here’s what you do…

Combine the sugar and flour. Sprinkle 1/4 of it over the pastry in the pie plate. Then add the rhubarb to the pie dish, even it out with your hands. Sprinkle the remaining sugar/flour mixture over the rhubarb. Dot the rhubarb with small pieces of butter. Cover with a top crust and seal. Cut a few small vents in the center of the crust to allow steam to escape.

Place pie dish on cookie sheet and put in the oven. Bake at 450 for 15 MINUTES. Then REDUCE OVEN TEMPERATURE to 350 degrees, and continue to bake for 40-45 minutes.

This pie is fabulous warm or cold. It’s best served with vanilla ice cream!

Let me know how you like it! I’ve had this recipe since 2008… my dad found it online… good going dad!

Catch you back here tomorrow!

How To Make An Apple Pie…

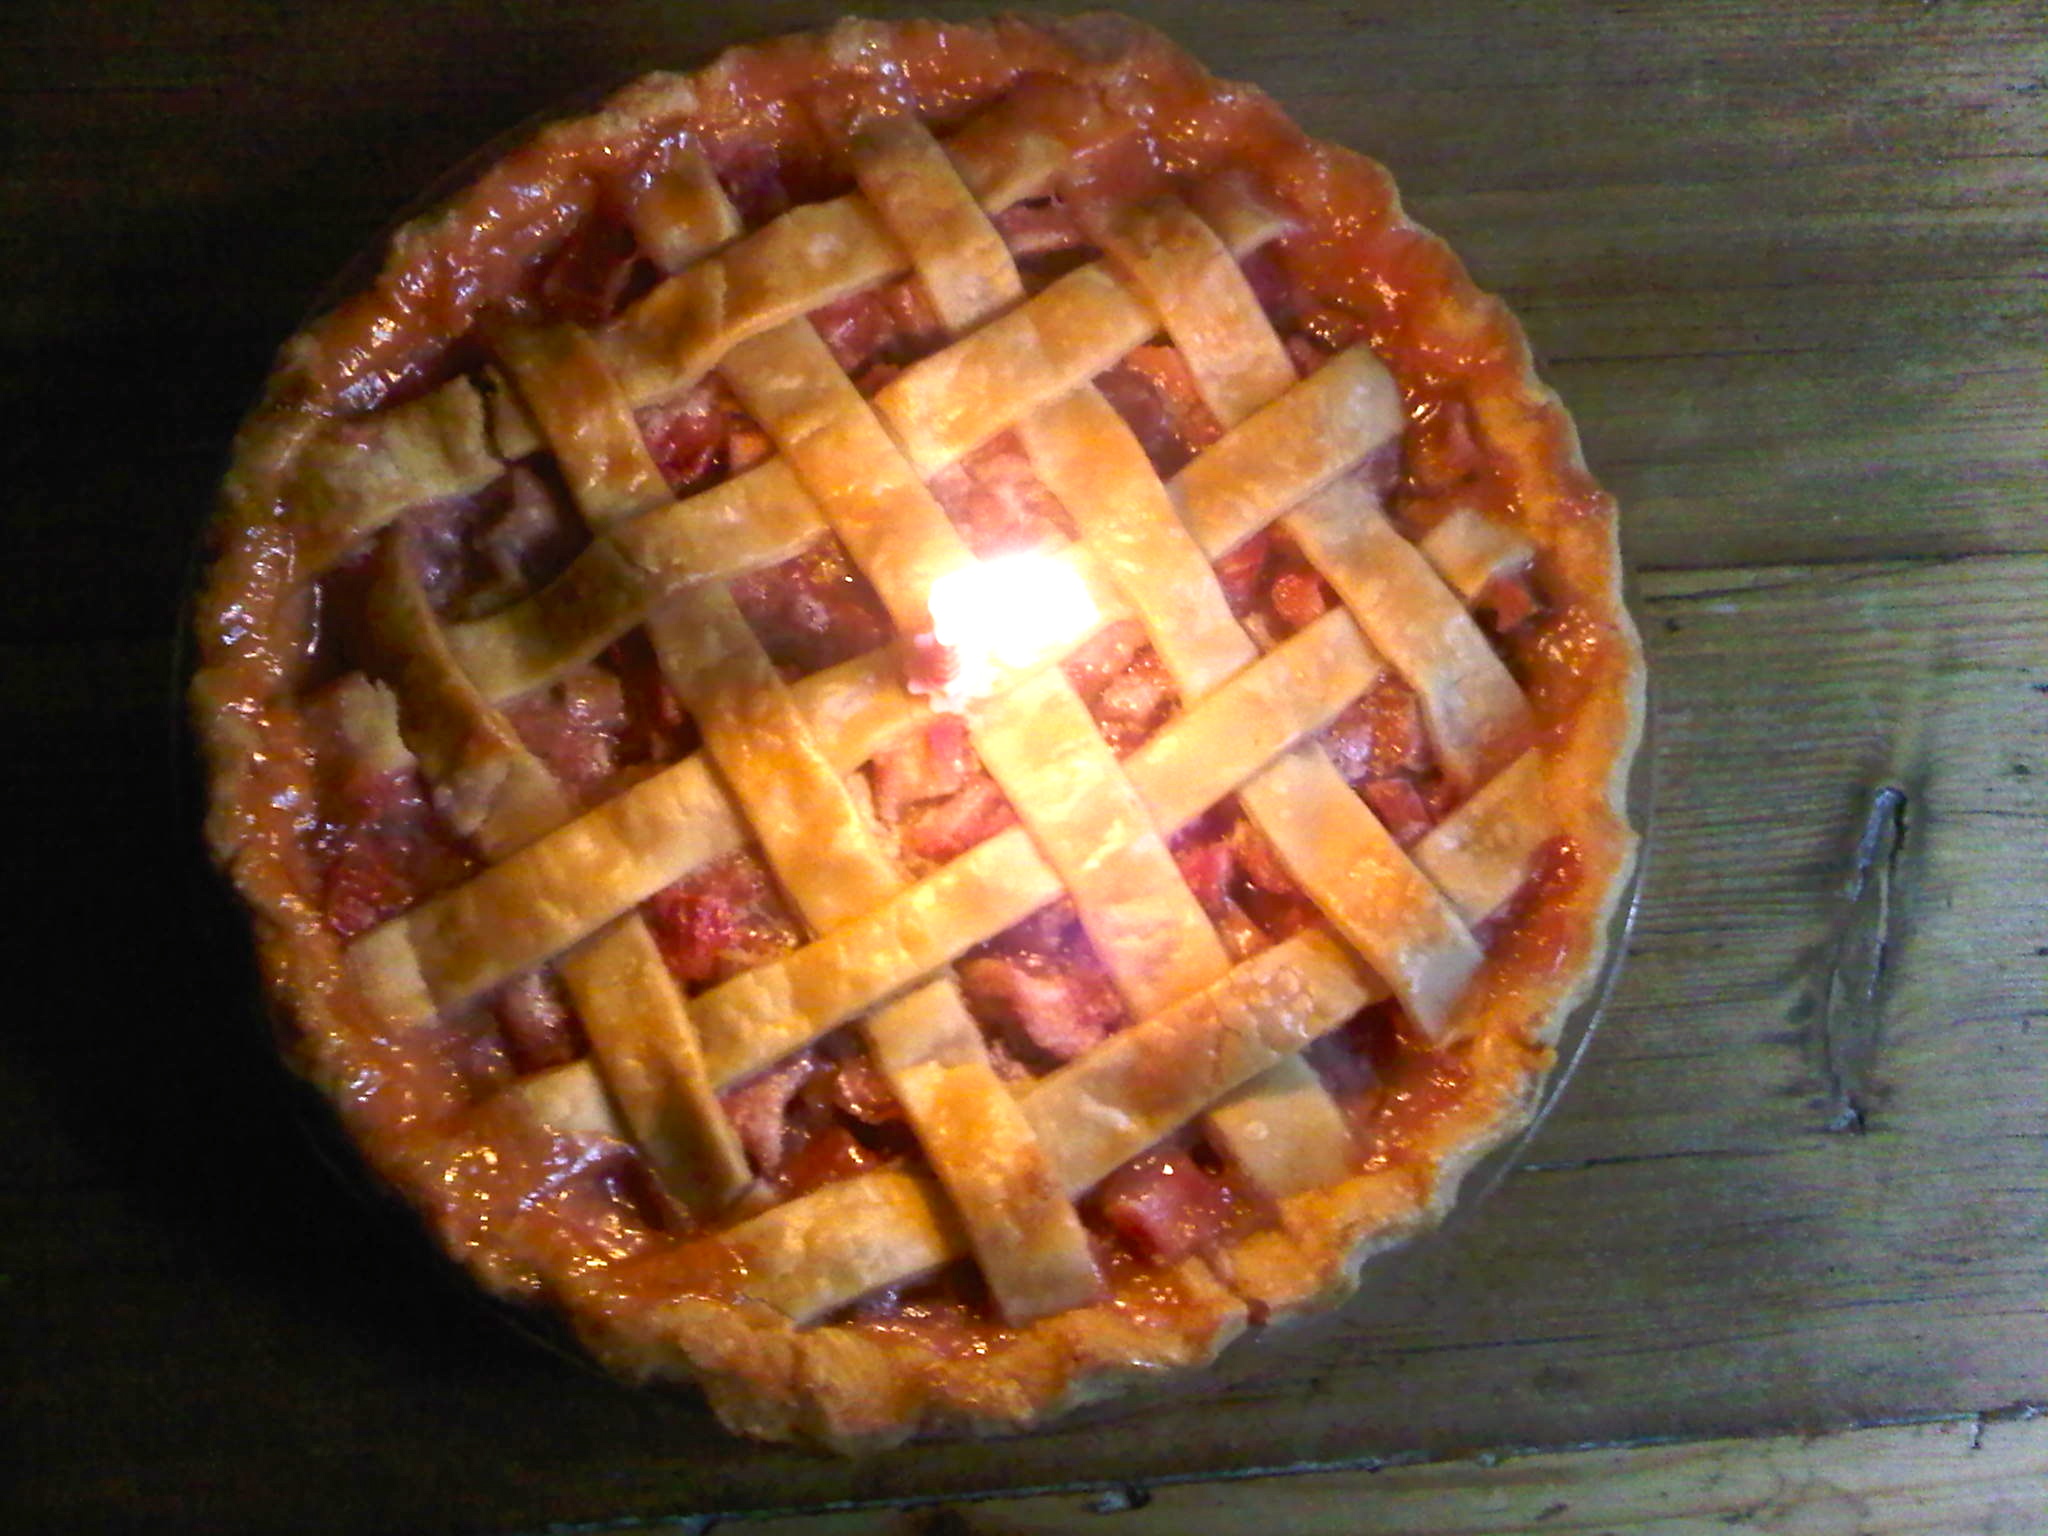
Apple pie. It’s the most American dessert on the planet. I call it “health pie”, ha ha… apples are fruit and fruit is healthy! Ok, so that may be pushing it, but it’s better than a pie without fruit, look at it that way! With the use of a good pie crust (thank you Pillsbury!), this recipe comes together so quickly you won’t believe it. People will want your recipe… the paparazzi will be snapping pictures of you and following you around like a movie star, seriously, it’s that good!

APPLE PIE  (adapted from Better Homes & Gardens  New Cookbook, 12th edition):

Ingredients

2 3/4 pounds of thinly sliced peeled tart apples (Granny Smith)

1/2 cup granulated sugar (or a wee bit less)

2 tablespoons all-purpose flour  (I also sprinkle maybe a few teaspoons in the bottom of the empty pie crust before I add the apples)

1/2 teaspoon ground cinnamon (I use a little more)

1/8 teaspoon ground nutmeg

Milk to brush on top crust (optional)

Raw Sugar  to sprinkle on top crust (optional)

2 pie crusts (homemade or I use 1 box Pillsbury Pie Crust in a red box, refrigerated section in grocery store)

I use a deep dish pie plate, that way I can sneak in more apples… generally buy a 3# bag and use about 2 3/4# of them… leaves a few to munch on as a snack!

Personally I use Granny Smith and no lemon juice… the original recipe calls for whatever type apple you like, if it’s not granny smith, then add 1tablespoon of fresh lemon juice.

Other than the crust, there aren’t a lot of ingredients… see, quick and easy!

Preheat your oven to 375 degrees. Peel and slice your apples…

Line a pie plate with one pie crust…

In a large mixing bowl add the sugar, flour, cinnamon and nutmeg. Give it a good stir, then toss in the apples… and gently toss to coat the apples with the sugar mixture.

Add the apple mixture to the lined pie plate… and place the second crust on top of the apples, then pinch to form a seal, you can do this with your fingers then press with a fork, or your thumbs to make it look nicer… doesn’t really matter what it looks like because it’s going to taste so darn good! Hey, who’s old looking hands are those??!! Egads! Do you realize how difficult it is to crimp a pie crust with you non-dominant hand while taking a photo of yourself with your other hand? Hmmm, awkward, but wanted to show you it’s just pressing the two together, however you can do it…

Cut slits in the top crust to allow steam to escape. This is important so that you don’t end up with a soggy pie crust! I cut the slits in the crust and then use the knife to separate it a wee bit so it doesn’t fall back together… soggy pie crust = sadness, trust me… hmmm, sounds like I know from experience…

Some people like to brush the top crust lightly with milk, then sprinkle sugar. I did it this time, sprinkled (very lightly) raw sugar. Sometimes I do this, most of the time I don’t. I like it both ways. Top with a pie crust shield like Mrs. Anderson’s pie crust shield if you’ve got one, otherwise foil works, it’s just more cumbersome. You cover the edge of the pie to prevent over browning. Usually with this shield I can leave it on the entire time (60 minutes), but check it after the pie has been in the oven for a while and make your decision…

I place the pie dish on a foil lined cookie sheet. Sometimes it gets wacky bubbly and overflows and turns to glue. Very time consuming to get clean. Foil is my friend.

Ok, it’s ready to pop in the 375 degree oven for 40 minutes. Remove foil/shield and bake 20 minutes more or until fruit is tender (I stick a fork in a slit and if it goes through the apple easily then the fruit is tender) AND the FILLING IS BUBBLY. That’s how you know it’s done. Watch the edges where the juice leaks out, it should be bubbling.

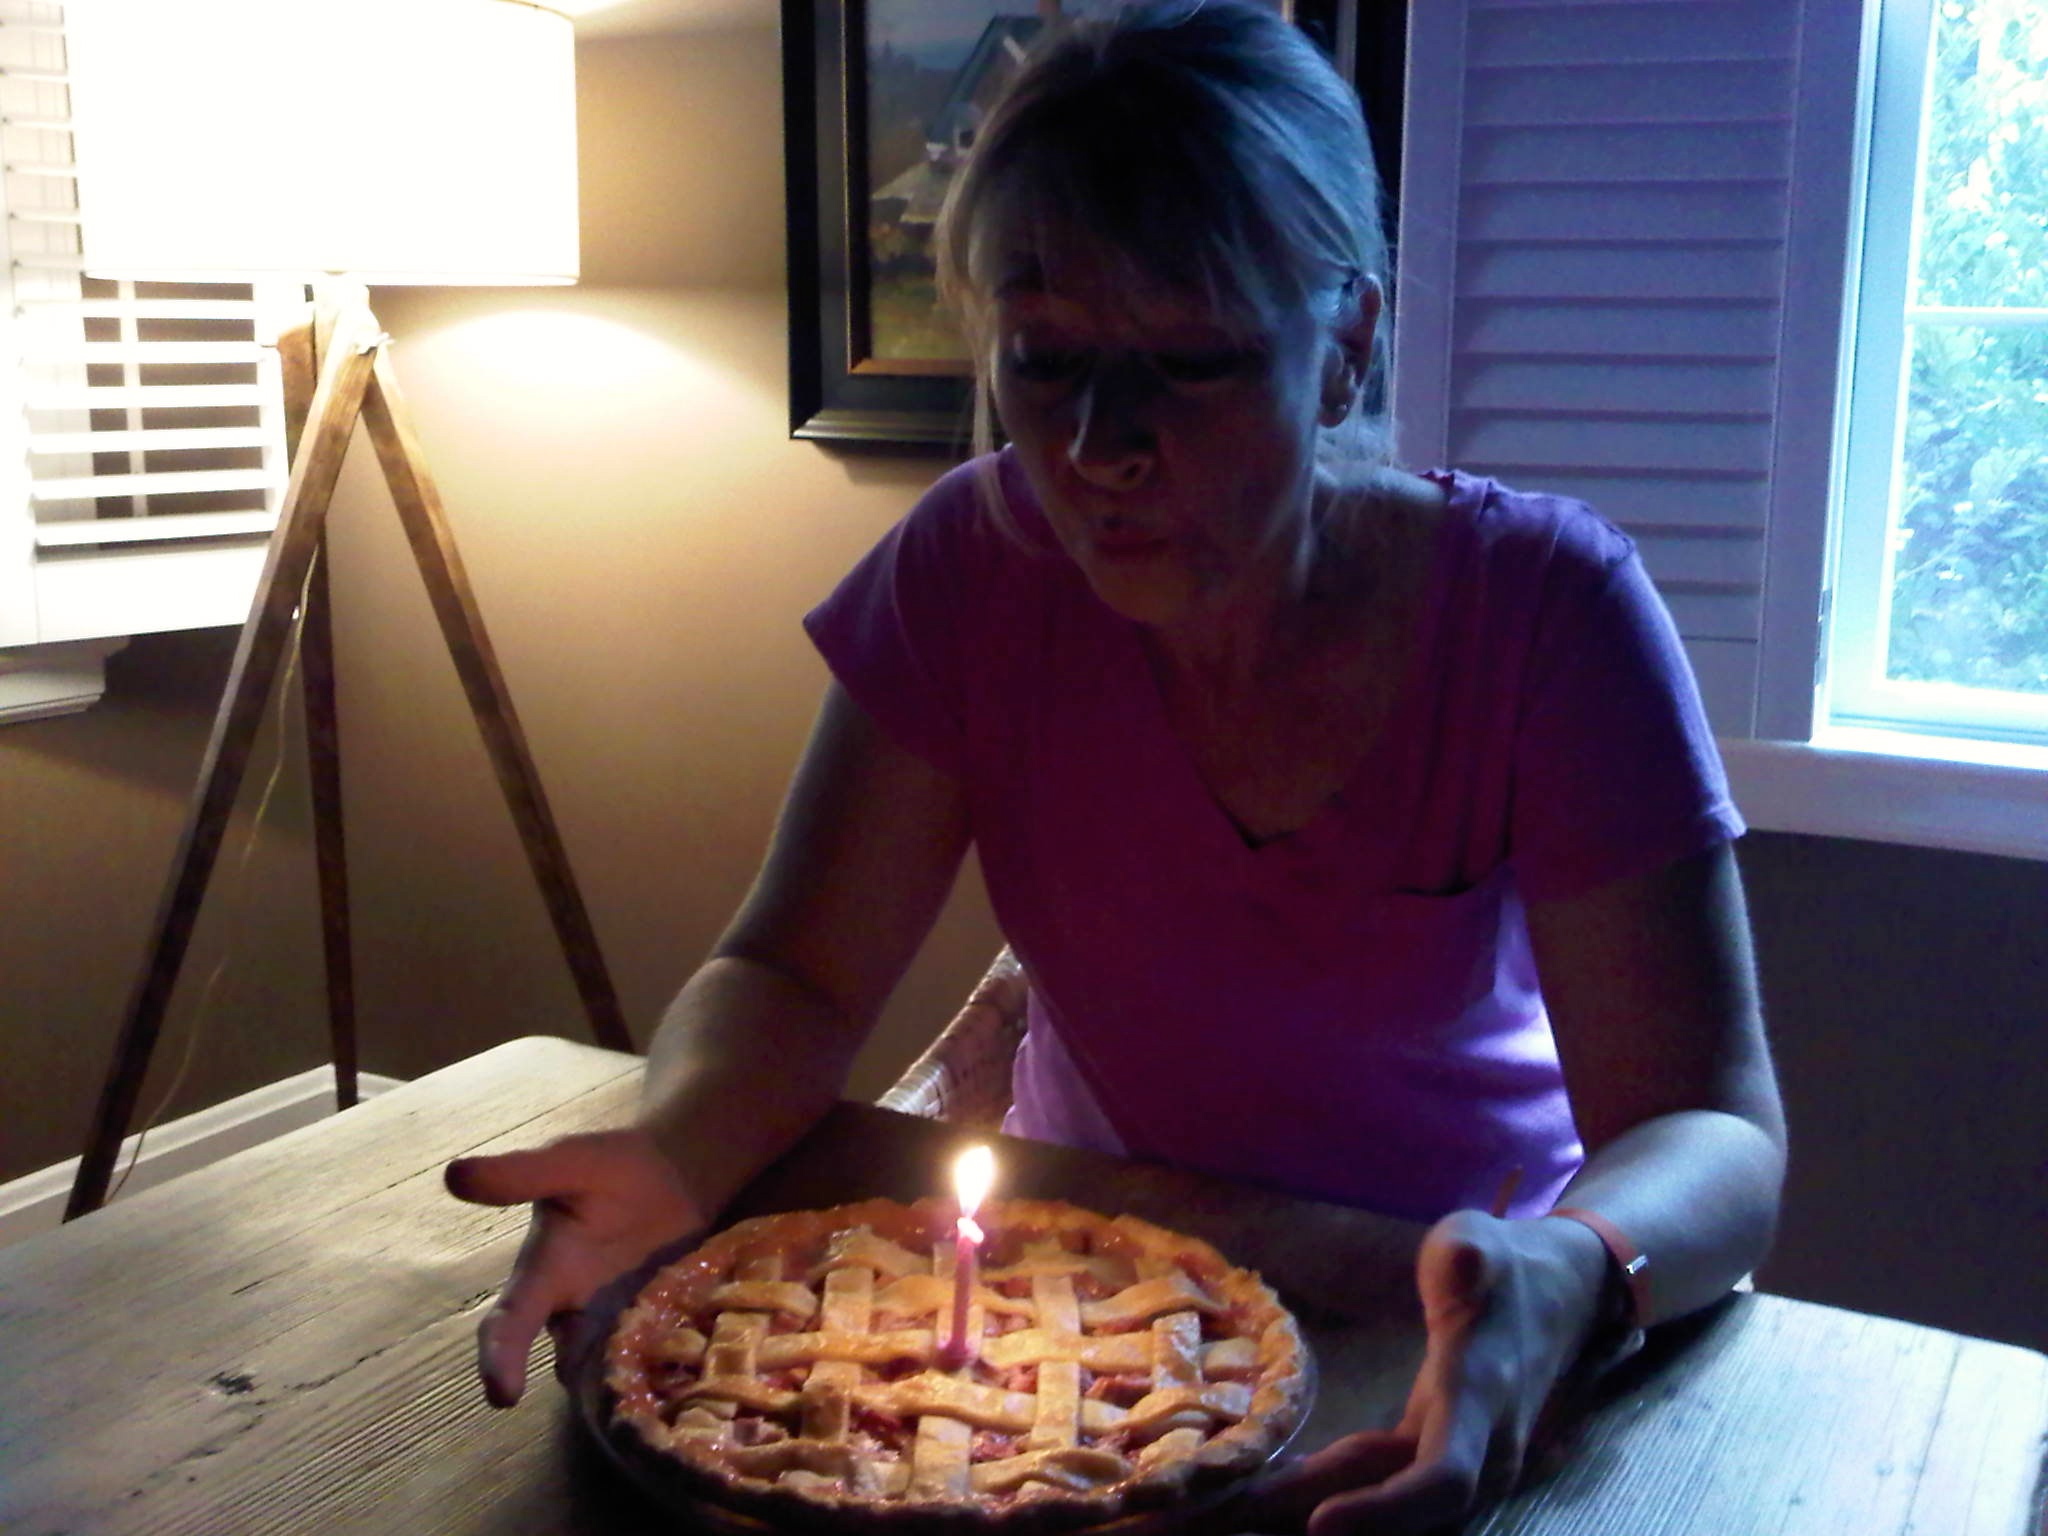
When done, take out of the oven and cool on a wire rack. And may I say… good luck with that part! The waiting is a killer, sometimes you just have to dive in with a fork to “see if it’s ok”… oh, so what if it’s runny until it cools. My secret trick for waiting for it to cool without eating it… LEAVE. THE. HOUSE. It’s foolproof!

Warm pie and vanilla ice cream is nice, but if you don’t make it too sweet you really don’t need the ice cream, and if you leave off the ice cream then this dessert is HALF THE FAT… ha… boy, can I justify a pie or what?! Enjoy!

Catch you back here tomorrow!

Paula Deen’s Chocolate Pound Cake… whoa Nelly!

I happened to catch Paula making her Chocolate Sour Cream Pound Cake on her television show. I’m not a big “cake” person… for me, the PIE takes the cake, so to speak… But… my husband LOVES cake, especially pound cake. He happened to see this segment and said that was what he would like for his birthday… Hmmm, I tried to talk him out of two sticks of butter, but as he said, it WAS his birthday (but wouldn’t you like ANOTHER birthday, was my response, hee). So I gave in. I made the cake. It was fabulous. Despite the 3 cups of sugar, it’s not sweet. The recipe isn’t super specific… I used SALTED butter (since there was no salt in the recipe), I used Large eggs, and I used all purpose flour (not cake flour). Depending where you pull this recipe from it will show different types of flour. I DID sift the flour first. It was fabulous. The cake was moist and perfect in almost every way. I kind of flunked the “pretty” factor… the cake didn’t come out of my pan in one piece… but, on the brighter side, it came out in TWO pieces which I just puzzled together. Apparently I didn’t grease/flour the pan well enough. NEXT TIME I will! So, that’s why there isn’t  a photo of the entire cake… If you’re looking for a cake recipe that is nothing short of perfection, give this one a whirl!

Paula’s recipe via FOODNETWORK.com

Chocolate Sour Cream Pound Cake

Ingredients

  • 8 ounces (2 sticks) butter, softened
  • 8 ounces sour cream
  • 3 cups sugar
  • 6 eggs
  • 1 teaspoon pure vanilla extract
  • 2 1/4 cups all-purpose flour
  • 1 teaspoon baking powder
  • 3/4 cup cocoa

Directions

Preheat the oven to 325 degrees F. Grease and flour a 10-inch Bundt pan.

Using an electric mixer, cream together the butter, sour cream, and sugar. Add the eggs, 2 at a time, beating well after each addition. Add the vanilla.

In another bowl, stir together the flour, baking powder, and cocoa. Add 1/2 the flour mixture to the creamed mixture, beat well, add the remaining 1/2 flour mixture, and continue to beat at medium speed for 2 minutes. Pour the batter into the prepared pan and bake for 1 hour 15 minutes. Continue to bake for an additional 15 minutes if necessary, but do not open the oven to check the cake for at least 1 hour.

Catch you back here tomorrow!

A quick and tasty dessert for a hot blistery day!

How is this for a nice tasty dessert on a day that is so hot and steamy? The temperatures are brutal throughout the country… so once in a while you need a little treat… something quick and easy, and SOOO good!

I bought some fabulous ice cream cones at EarthFare, they’re organic, I bought these because I didn’t want all the other unpronounceable ingredients… these had REAL ingredients, and they are C H E A P, no sugar and barely a calorie!

That along with some good ice cream and WELLA! A treat that can’t be beat! Sometimes a little cone just makes the day even better! This is a fast and fun dessert that will make your tastebuds smile!

Enjoy!  Catch you back here tomorrow!

A five star fall dessert… Cinnamon Apple Cake – from Cooking Light Magazine!

Cooling Cake – It’s not easy to wait!

Fall is in the air… or at least in Charleston, SC it will be soon! What do you think of when you think of fall? I think of apple cider, I think of Yate’s Cider Mill in Rochester, MI. One of my all time favorite places to grab some great crisp, sweet apples, a cup of apple cider, aaaaahhhhhh, and one of those sinful cider mill doughnuts rolled in granulated sugar and cinnamon. Ah, wish they were right around the corner, but its probably a good thing they are far away… VERY far away. If you want a dessert that isn’t too bad for you and has the bonus of making your house smell FAN-TAS-TIC! This is the recipe for you! It’s from Cooking Light magazine and you can click HERE to go to MyRecipes.com where you can quickly print the recipe, otherwise, see below! This recipe was featured in 1997, it was the reason I asked for a springform pan for Christmas that year. The recipe was updated in 2000, it’s fabulous and you know what’s good for you I think yout’ll absolutely love it! The only change I made was that I used low fat cream cheese, not fat free… fat free is chalky in my opinion. But I haven’t tried it in this recipe. I need to… I also used butter instead of margarine. ok, here goes…

UPDATE 2020: The cake seems very sweet to me, I changed a few things from the Cooking Light original (link above): I use low fat cream cheese, butter and less sugar. I also used Honey Crisp apples (fabulous!!) and more cinnamon that it calls for in the cake and topping, but that’s a personal preference. I edited my changes in the version below. 

I LOVE Cooking Light recipes! I have so many favorites and this is another one!

Cinnamon-Apple Cake

Yield: 12 servings

Ingredients

  • 1 cup sugar
  • 3/4 cup (6 ounces) low fat cream cheese, softened
  • 1/2 cup butter, softened
  • 1 teaspoon vanilla extract
  • 2 large eggs
  • 1 1/2 cups all-purpose flour
  • 1 1/2 teaspoons baking powder
  • 1/4 teaspoon salt
  • 2+ teaspoons ground cinnamon
  • 3 cups chopped peeled Honey Crisp apples (about 2 large)
  • Olive oil

Preparation

  • Preheat oven to 350°.
  • Beat 1 cup sugar, cream cheese, butter, and vanilla at medium speed of a mixer until well-blended (about 4 minutes). Add eggs, 1 at a time, beating well after each addition; set aside.
  • Lightly spoon flour into dry measuring cups; level with a knife. Combine the flour, baking powder, and salt. Add flour mixture to creamed mixture, and beat at low speed until blended. Combine 1/4 cup sugar and cinnamon. Combine 2 tablespoons of the cinnamon mixture and apple in a bowl; stir apple mixture into batter. Pour batter into an 8-inch springform pan coated with olive oil, and sprinkle with remaining cinnamon mixture.
  • Bake at 350° for 1 hour and 15 minutes or until cake pulls away from the sides of pan. Immediately run a knife around the edge of the cake and then cool cake completely on a wire rack, and cut using a serrated knife.
  • Cooking Light Note: You can also make this cake in a 9-inch square cake pan or a 9-inch springform pan; just reduce the baking time by 5 minutes.

🍎You won’t believe how good this will make the entire house smell!!

✍️ Until next time…

A cancer prevention tip that will make you smile!

Image: Prevention.com

Now this is a cancer prevention tip that makes me smile… it’s one that I don’t have to think about… one that I can do… one that I can OVER do, ha!

Dark chocolate (70%+) is more than a tasty morsel that you let melt in your mouth, it’s rich in so many ways…  uh, excuse me, had to jump up and grab a piece, don’t want to forget! (I heard you laugh… you’re right… like I would forget!)! Info from Prevention magazine . Click HERE for a fabulous article that has the list of foods we’ve been talking about over the past few months!

Cure It with Dessert

Enjoy antioxidant-rich dark chocolate

Chocolates containing over 70% cocoa provide a number of antioxidants, proanthocyanidins, and many polyphenols. In fact, a square of dark chocolate contains twice as many as a glass of red wine and almost as many as a cup of green tea properly steeped. These molecules slow the growth of cancer cells and limit the blood vessels that feed them.

How to Eat It: Enjoy about one-fifth of a dark chocolate bar a day guilt free. Milk chocolate isn’t a good alternative because dairy cancels out the cancer protection of the polyphenol compounds.

Next week is the last of this series…  but there will be more… I promise! Lets recap all the foods that can be fighting for our bodies to help prevent cancer, as long as we feed our bodies these nutritious warriors instead of say, those tart things you pop in the toaster (oh heavy sigh). It’s worth re-reading this list and adding as many to your day as you possibly can. Don’t ever stop!

BRUSSEL SPROUTS – BOK CHOY – CHINESE CABBAGE – BROCCOLI – CAULIFLOWER – GARLIC – ONION – LEEKS – SHALLOTS – CHIVES – WILD SALMON – ANCHOVIES – SMALL MACKEREL – SARDINES – ORANGES – TANGERINES – LEMONS – GRAPEFRUIT – STRAWBERRIES – RASPBERRIES – BLUEBERRIES – BLACKBERRIES – CRANBERRIES – DARK CHOCOLATE and next…. TOFU – MISO – TEMPEH – SOY MILK – SOY YOGURT, but that’s next week!

Catch you back here tomorrow!

Ok mom! This is chemo #11, two treatments to go, WOOHOO!!

Love you lady! me

Quick, easy and delicious! KEY LIME PIE, perfect for a hot summer day!

fullsizeoutput_2333

Nellie and Joe’s Key West Lime Juice… it makes a tasty and tart Key Lime pie. What’s more perfect for dessert when the weather makes you want to melt?? I was making dessert to take to some friends who were having us over for dinner… I needed something nice and cold and refreshing… Nellie and Joe’s Key Lime Pie recipe is a hit on all counts… It couldn’t be quicker to put together and toss in the oven for 15 minutes, let cool and refrigerate. Then serve topped with whipped cream (or meringue) which you need to cut some of the sweetness. It looks a little flat in the graham cracker crust, but it’s leaving room for the whipped cream, so before you serve it, pile it high, then add a little lime zest/lime slices! Ok, here’s the recipe, it’s also on the back of the Nellie & Joe’s Key Lime Juice bottle! You can find their key lime juice in most grocery stores, usually with the bottles of drink mixers (margarita mix, etc.) OR in the juice section… photo of pie served on friends pretty green plates is below the recipe…

Screen Shot 2017-07-18 at 7.44.12 AM.png

Oh and don’t do like I did… DO NOT USE THE EGG WHITES. I separated the eggs and tossed the yolks, that’s right… apparently I’m in a caffeine deficit right now, heavy sigh! Luckily I hadn’t yet poured it into the crust… so I just needed to go back to the store for another can of sweetened condensed milk…

Oh no, now I’ve got keylimepieonthebrain…ugh! Catch you back here tomorrow!

[Recipe]: Blueberry Pie… FULL of antioxidants, right??

Oh what a beautiful sight this is! Don’t you agree? I read an interesting article from the Blueberry Council (www. Blueberrycouncil.com) regarding all the good things that blueberries do for our bodies… after reading this and after walking through Whole Foods and seeing that blueberries were on sale I took it as a sign… A sign to make a nice “healthy” blueberry pie… ok, not sure about the healthy part, but I’m thinking it couldn’t have been too bad? First some blueberry facts, then a quick and easy blueberry pie recipe… Oh, I’m telling you that pie was so good… it’s almost time for another! I feel like my antioxidant level is low (hee hee)… unfortunately, I took a picture of the pie BEFORE I cut it, but never got around to snapping a photo afterwards… darnit! Live and learn… hmmm, a sign to make another pie?

First the facts:

Blueberries have only 80 calories/cup, and are virtually fat free.

They’re an excellent source of Vitamin C.

Blueberries are a great source of fiber.

Blueberries contain substances that have antioxidant properties… antioxidants help neutralize free radicals which are unstable molecules linked to the development of a number of diseases including cancer, cardiovascular disease and other age-related conditions such as Alzheimer’s Disease. According the USDA database of antioxidant activity of selected foods, blueberries rang among the highest on a per serving basis. Substances in blueberries called polyphenols, specifically anthocyanins that give blueberries their blue hue, are the major contributor to the antioxidant activity of blueberries! Thank you Blueberry Council for your information!

Now… on to the recipe. I tried a simple recipe out of Better Homes and Gardens cookbook. I used more blueberries than it called for which was why mine was a tad on the runny side. These were sweet blueberries, so I could have used even less sugar. I don’t care for cinnamon in my blueberry pie, it’s a deal breaker… so I used a tiny bit of lemon zest. I like it pure… just blueberries! I didn’t have time to make a pie crust, so I used a Pillsbury pie crust that you buy in the refrigerated section at the grocery store. It’s closest to homemade, I won’t use any other. HOWEVER, if you have a good crust recipe and the time… good crust always trumps store bought, even if it is close…

Because mine was a tad runny (and partially because I couldn’t wait for it to cool, hee hee) I went ahead and scooped out about ½ cup of juice, put it in a container and the next week we had a small scoop of vanilla ice cream with heated blueberry sauce on top… YUM!

Ok, ok… quit talking… now the recipe!

BLUEBERRY PIE

1 double crust pie crust (store bought or homemade)

5 cups blueberries (fresh or frozen)

2/3 – 3/4 cup sugar (depending upon how sweet the blueberries are)

3 tablespoons flour

2 teaspoons (I used maybe one if that) finely shredded lemon peel

Directions…

Prepare the pie crust. Line a 9” pie plate with half the pastry.

In a large bowl combine the sugar and flour. Stir in blueberries and lemon peel. Gently toss berries until coated. (If using frozen blueberries, let mixture stand for 45 minutes or until fruit is partially thawed but still icy.)

Transfer berry mixture to the pastry lined pie plate. Trim bottom pastry to edge of pie plate. Now place top crust on filling and seal. Crimp the edge together. Cut slits in the top to allow steam to escape.

To prevent overbrowning, cover edge of pie with foil. Bake in a 375˚oven for 25 minutes (or 50 minutes for frozen fruit). Remove foil. Bake another 25-30 minutes (watch it closely, mine doesn’t take this long), OR until filling is bubbly and pastry is golden brown. (Always a good idea to place it on a foil lined cookie sheet in case it bubbles over).

Cool on wire rack (good luck to ya!)

Hope you enjoy! Catch you back here tomorrow!

Katharine Hepburn’s Brownie recipe… yep, the real deal! (Updated 10.07.21)

 My mom sent me this recipe years ago… she had gotten it from the February 1992 issue of Gourmet magazine (still can’t believe that magazine isn’t still around). I didn’t eat fat, so I never made them. I filed it away in case I ever fell off the wagon. Then one day we were visiting Michigan, we arrived to a pan of piping hot brownies. Whoa… the best I ever tasted, with deep chocolate flavor, more fudgy than cakelike, I was in heaven! Then to read how simple these puppies were to make made my head spin (dramatic once again). Trust me, you won’t make these only once. You’ll NEED them, ha ha, and you’ll make them more often than you should (or perhaps I’m talking about my own problems here, hmmm).  They couldn’t be easier, using only 1 pot and 1 8″ pan!

Melt together 1 stick of butter (I know… ugh, but…) and 2 squares unsweetened chocolate*, then take the saucepan off the heat.  *See note regarding type of chocolate to use…

Stir in 1 cup sugar, add 2 eggs and 1/2 teaspoon vanilla, and beat the mixture well.

Stir in 1/4 cup flour and 1/4 teaspoon salt. (As Gourmet magazine Feb 1992 states, the original recipe added 1 cup chopped walnuts here… I prefer mine without, but that’s up to you)…

Butter an 8″ square pan (recipe says to flour as well, this time I forgot and they came out of the pan easier, so I leave that up to you… to flour or not to flour). Happy Hint: when I use a stick of butter, I put the wrapper in the freezer. When I need to butter a pan I pull the wrapper out and let it sit a minute to thaw, then use it to spread. It works perfectly every time!

NOTE: Update 10.07.21, this works great with an 11×7″ pan as shown below. It’s not pretty but I found it (thankfully) in the cupboard after the disappearance of my 8″ square pan.

Now bake these at 325 for about 40 minutes – When they smell done, they likely are (my oven doesn’t take the full 40 minutes)!

Someone got a little excited about the brownies coming out of the oven, so this is the best photo I can do at this moment, ha ha…

IMG_8117

Note 10.07.21: I deleted a blip about substituting cocoa and butter for the unsweet baking chocolate. After trying it, I truly wasn’t happy with the substitution, too greasy. These brownies are good just like they are. Use the best chocolate for best results. I made it with Guittard Unsweet Chocolate Baking Bar, and it was a night and day difference. It was truly amazing!

Another way to take it over the top when serving, sprinkle (VERY LIGHTLY) with a good flaky sea salt like SALTVERK! Oooooo, Mmmmmm, Geeeeee! You just need a teeny bit!

IMG_8116

Catch you back here tomorrow… I have to go walk, for about 14 hours as I calculate it! Worth every bite!

Everyday Chocolate Cake…

Happy Friday everyone! I have to tell you about this amazing chocolate cake recipe that I found on the Smitten Kitchen blog. If you’ve never heard of The Smitten Kitchen, ohmygosh, check it out, seriously. Excellent recipes, hilarious writing, AMAZING PHOTOGRAPHY and just a good time overall! You may consume a bit more butter than you should, but hey, it’s a treat! I wish I could make this cake every day!

I have made this cake a few times, Deb Perelman has this recipe down to using only one bowl… easy clean up… YAY! The fresh whipped cream and raspberries that I rolled around in sugar were a nice addition… It’s the weekend, INDULGE!

Check out the Smitten Kitchen blog if you get a chance!

Here is the recipe as shown on the Smitten Kitchen blog, I didn’t change a thing:

Everyday Chocolate Cake from the Smitten Kitchen blog…
Adapted from Magnolia Bakery At Home

1/2 cup (1 stick or 4 ounces) unsalted butter, softened
1 cup (6 7/8 ounces) firmly packed light brown sugar
1/2 cup (4 ounces) granulated sugar
1 large egg, at room temperature
1 cup buttermilk
1 teaspoon vanilla extract
1 1/2 cups (6 3/4 ounces) all-purpose flour
3/4 cup (2 5/8 ounces) Dutch cocoa powder (see Smittenkitchen.com for a natural cocoa adjustment)
1/4 teaspoon baking soda
1/2 teaspoon baking powder
1/4 teaspoon salt

Preheat the oven to 325°F. Butter and lightly flour a 9×5×3-inch loaf pan, or spray it with a butter-flour spray. In a large bowl, on the medium speed of an electric mixer, cream the butter until smooth. Add the sugars and beat until fluffy, about 3 minutes. Add the egg and beat well, then the buttermilk and vanilla. Don’t worry if the batter looks a little uneven. Sift the flour, cocoa, baking soda, baking powder and salt together right into your wet ingredients. Stir together with a spoon until well-blended but do not over mix. Scrape down the batter in the bowl, making sure the ingredients are well blended.

Pour the batter into the prepared loaf pan. Bake for 60 to 70 minutes, or until a cake tester inserted into the center of the loaf comes out clean. Cool in pan on a rack for about 10 to 15 minutes, at which point you can cool it the rest of the way out of the pan. Serve with whipped cream and fresh berries, if you’re feeling fancy

Black Bottom Banana Cream Pie… oh my!

This is a Cooking Light recipe, and it’s TO. DIE. FOR. I’m not kidding you! My husband says “It’s so good it’ll make your tongue beat your brains out!” or something like that. I have to admit, I haven’t heard that saying before, the images that flash before my eyes give me the willies, BUT, it’s a GOOD thing… means it’s soooo gooood!

Oh yeah, the BLACK BOTTOM BANANA CREAM PIE (click on that for direct link to My Recipes where it’s easily printed) is delish! It’s not difficult, bake a pie crust, melt some chocolate, make the banana cream custard filling, slap the sliced bananas on top of the chocolate, smear on the custard, then they top with “whipped topping” EEEEK, which just doesn’t happen to be in my vocabulary. Instead mine isn’t pretty until served, I make whipped cream or if in a time pinch use the canned REAL whipped cream, then using a microplane shred a little chocolate on top and whoooaaaa! Have you got yourself a masterpiece! But don’t take my word for it. Really. Ohhhh, please tell me I didn’t toss those overripe bananas!

Black Bottom Banana Cream Pie

Yield: 8 servings (serving size: 1 wedge)

Ingredients:

  • (9-inch) Pastry Crust
  • 3  tablespoons  cornstarch, divided
  • 2  tablespoons  sugar
  • 2  tablespoons  unsweetened cocoa
  • Dash of salt
  • 1 1/3  cups  1% low-fat milk, divided
  • 1  ounce  semisweet chocolate, chopped
  • 1/2  cup  sugar
  • 1/4  teaspoon  salt
  • 2  large eggs
  • 1  tablespoon  stick margarine or butter
  • 2  teaspoons  vanilla extract
  • 2  ounces  block-style fat-free cream cheese, softened
  • 2  cups  sliced ripe banana (about 2 large bananas)
  • 1 1/2  cups  frozen fat-free whipped topping, thawed
  • Chocolate curls (optional)

Preparation

Prepare and bake Pastry Crust in a 9-inch pie plate. Cool completely on a wire rack.

Combine 1 tablespoon cornstarch, 2 tablespoons sugar, cocoa, and dash of salt in a small, heavy saucepan; gradually add 1/3 cup milk, stirring with a whisk. Cook 2 minutes over medium-low heat. Stir in chocolate; bring to a boil over medium heat. Reduce heat to low; cook 1 minute, stirring constantly. Spread chocolate mixture into bottom of prepared crust.

Combine 2 tablespoons cornstarch, 1/2 cup sugar, 1/4 teaspoon salt, eggs, 1 cup milk, and margarine in a heavy saucepan over medium heat, stirring constantly with a whisk. Bring to a boil. Reduce heat to low, and cook 30 seconds or until thick. Remove from heat. Add vanilla. Beat cream cheese until light (about 30 seconds). Add 1/4 cup hot custard to cream cheese, and beat just until blended. Stir in remaining custard.

Arrange banana slices on top of chocolate layer; spoon custard over bananas. Press plastic wrap onto surface of custard; chill 4 hours. Remove plastic wrap. Spread whipped topping evenly over custard. Garnish with chocolate curls, if desired. Chill until ready to serve.

Nutritional Information

Calories:

315 (29% from fat)
Fat:
10.1g (sat 4.8g,mono 3.4g,poly 2.4g)
Protein:
6.9g
Carbohydrate:
49.6g
Fiber:
1.6g
Cholesterol:
58mg
Iron:
1.4mg
Sodium:
253mg
Calcium:
94mg

Greg Patent, Cooking Light, NOVEMBER 1998

Visit my photo blog at http://almostdailypic.wordpress.com !

Image via www.myrecipes.com – Becky Luigart-Stayner

Death by lemon squares…

Image via http://www.myrecipes.com Oxmoor House photo - Cooking Light

Everyone loves a good lemon square. Normally when I post a recipe I post it as I’ve made it with some changes, additions or subtractions. But this my friends is PERFECT JUST AS IT IS. It’s a Cooking Light recipe, click on this EASY LEMON SQUARES link to get the direct link to the recipe on the MyRecipes website, you have a variety of options for printing and saving. Or you can copy and paste the recipe below… Beware, this is “16 servings” which is really like “4 servings” in my book, so the calories, etc. do go up… but it’s worth every bite! Really…

EASY LEMON SQUARES – Cooking Light

 For the crust:

¼ cup sugar

3 tablespoons butter

1 cup flour

In a mixing bowl, beat the sugar and butter at medium speed until creamy. Gradually add flour to sugar mixture, mix on low until resembles fine crumbs. Gently press into the bottom of an 8” square baking pan. Bake at 350˚ for 15 minutes; cool pan on wire rack.

 For the topping:

3 large eggs

¾ cup sugar

2 teaspoons grated lemon rind

1/3 cup FRESH lemon juice

3 tablespoons flour

½ teaspoon baking powder

1/8 teaspoon salt

In a mixing bowl, beat eggs at medium speed until foamy. Add sugar, lemon rind, lemon juice, flour, baking powder and salt. Beat until well blended. Pour mixture of partially baked crust. Bake at 350˚ for 20-25 minutes or until topping is set. Cool on wire rack.

 Before serving:

Sift 2 teaspoons of powdered sugar evenly over the top once it has cooled.

Nutritional Information:

Calories 118, Fat 3.2g (sat 1.7g, mono 1g, poly 0.3g), Protein 2.2g, Carbs 20.5g, Fiber 0.3g, Cholesterol 47mg, Iron 68mg, Sodium 68mg, Calcium 16mg