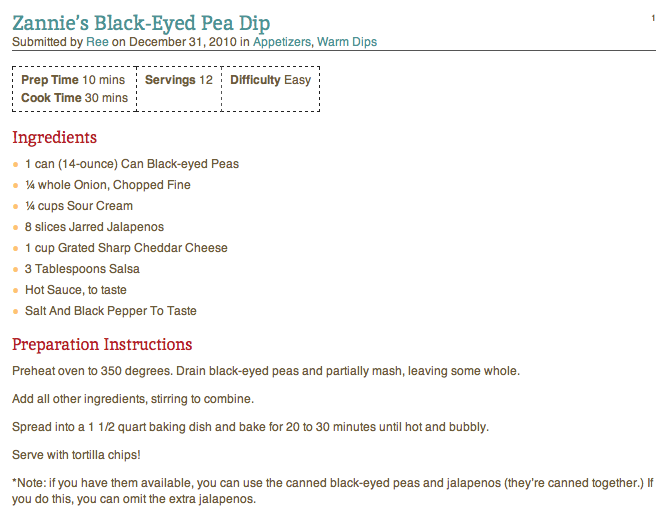
Skillet Tortilla Casserole. All made in the same pan. Too good!!
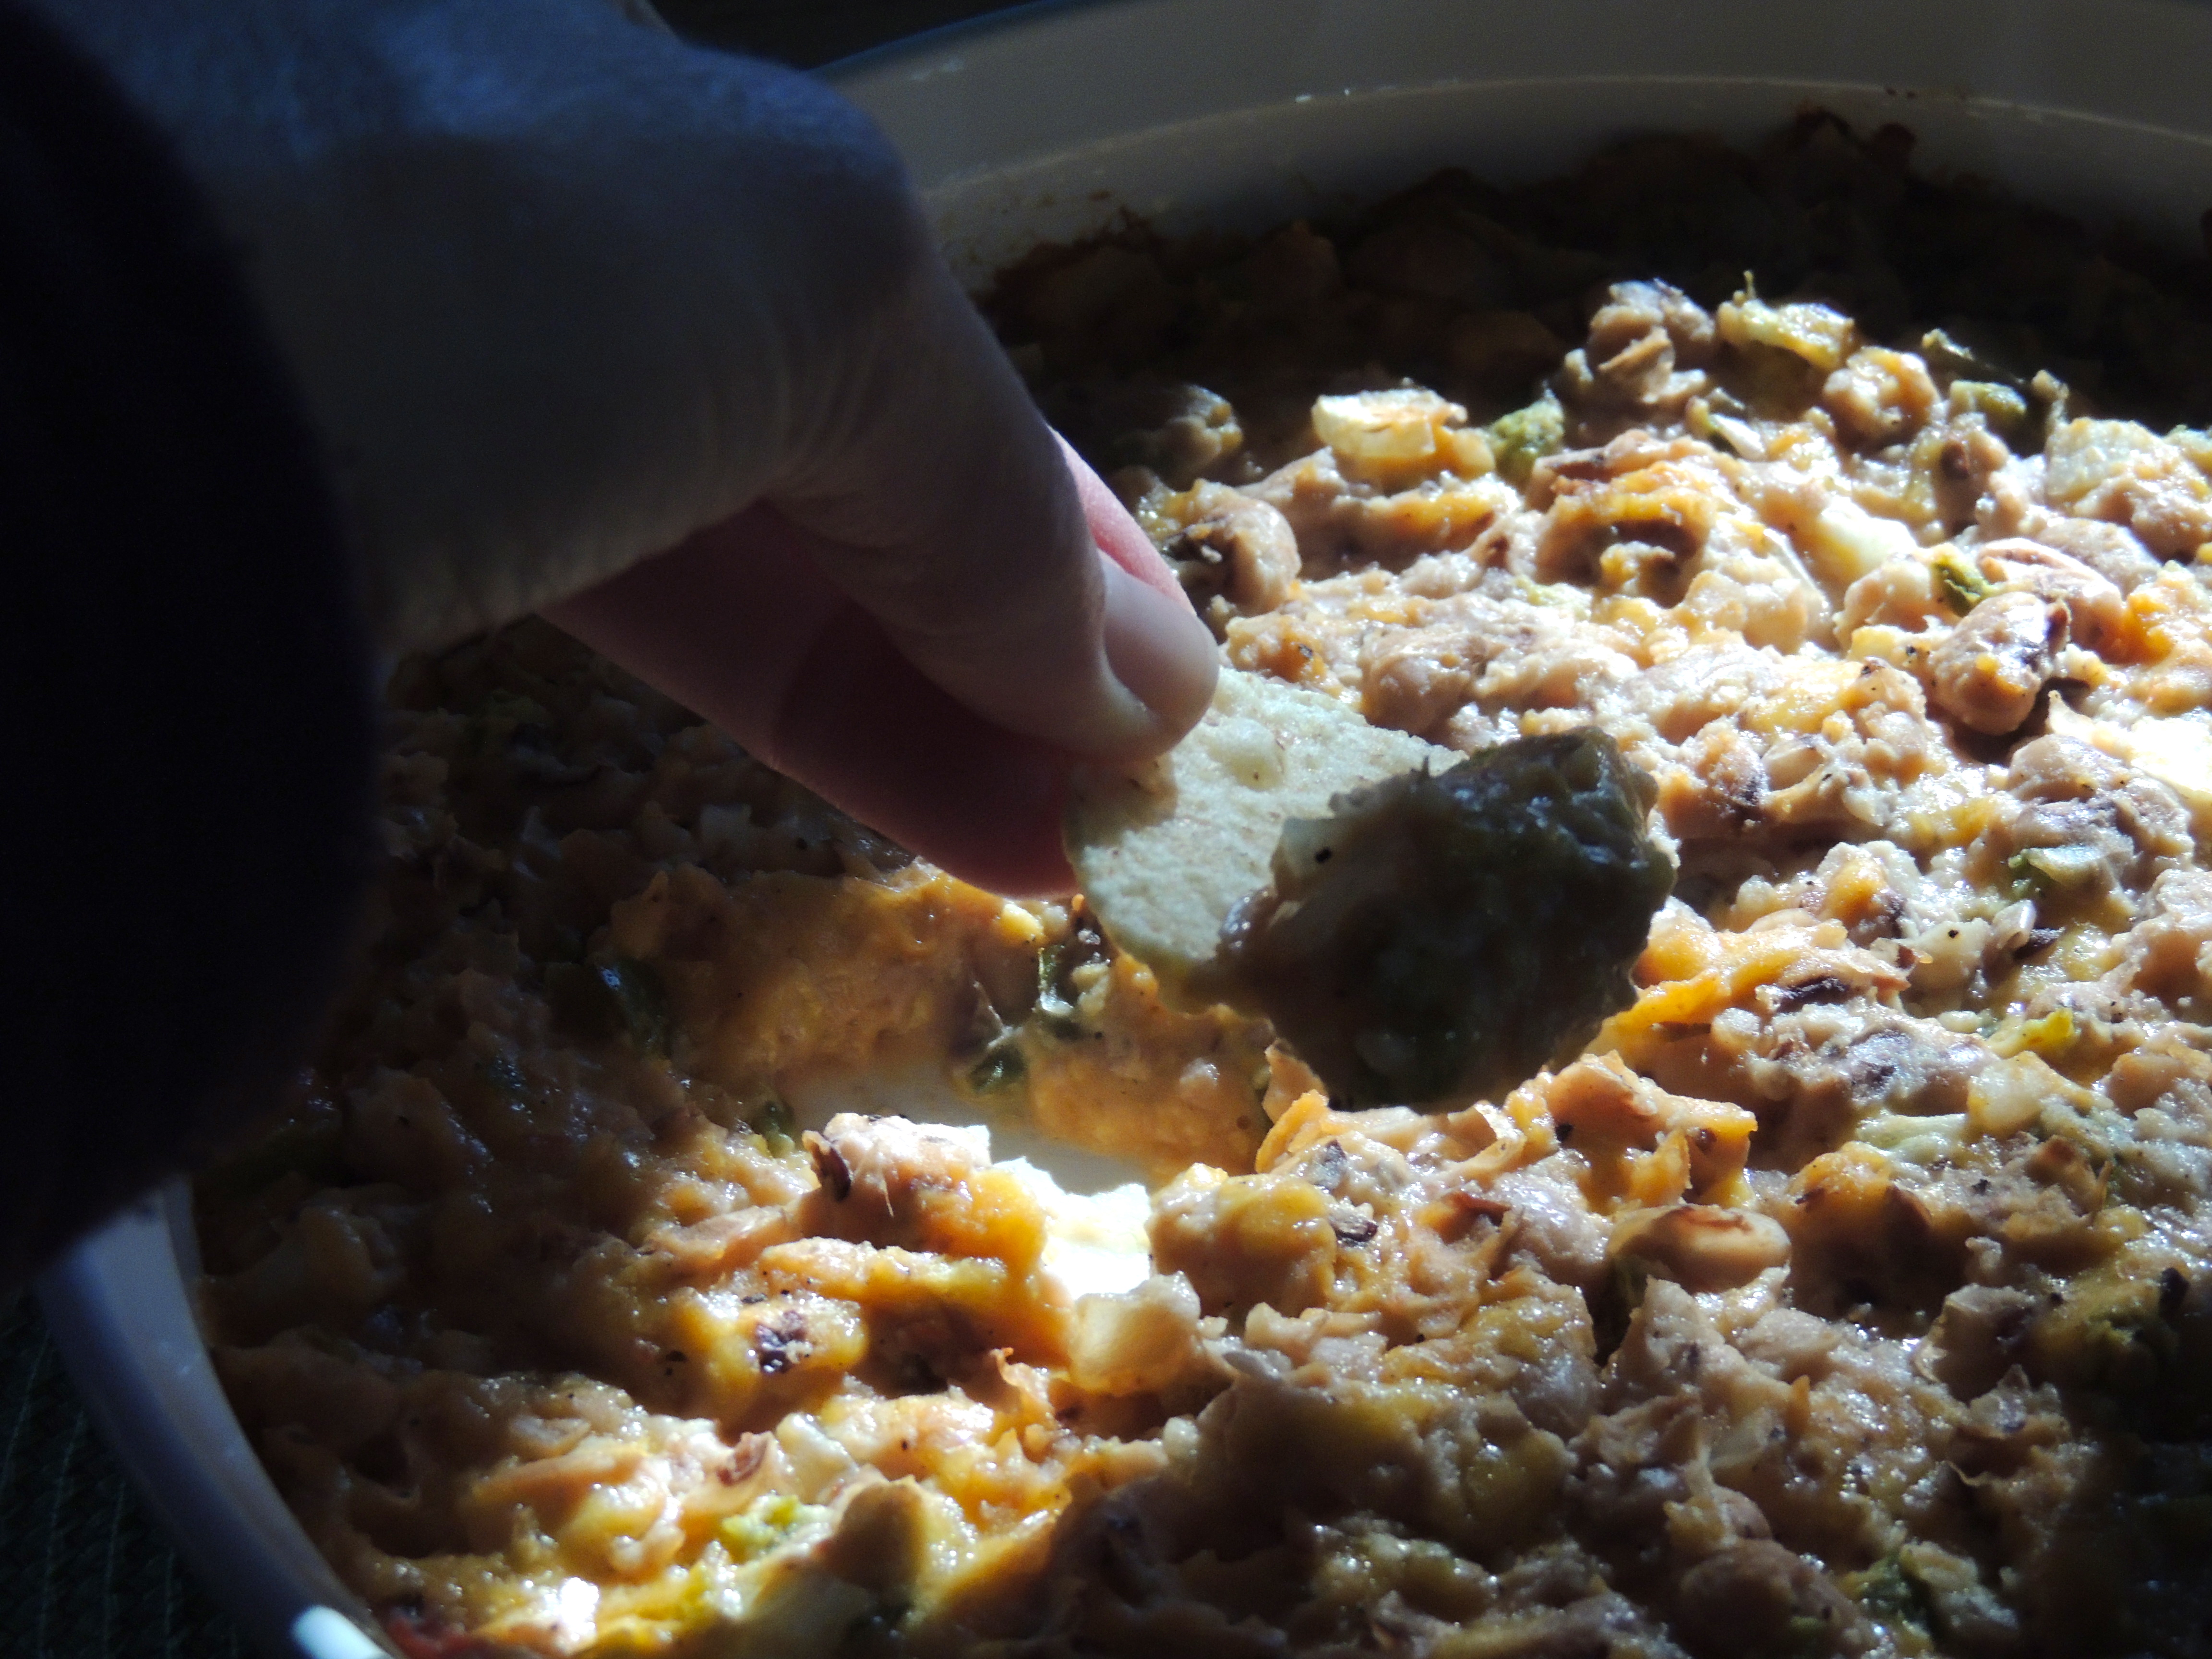
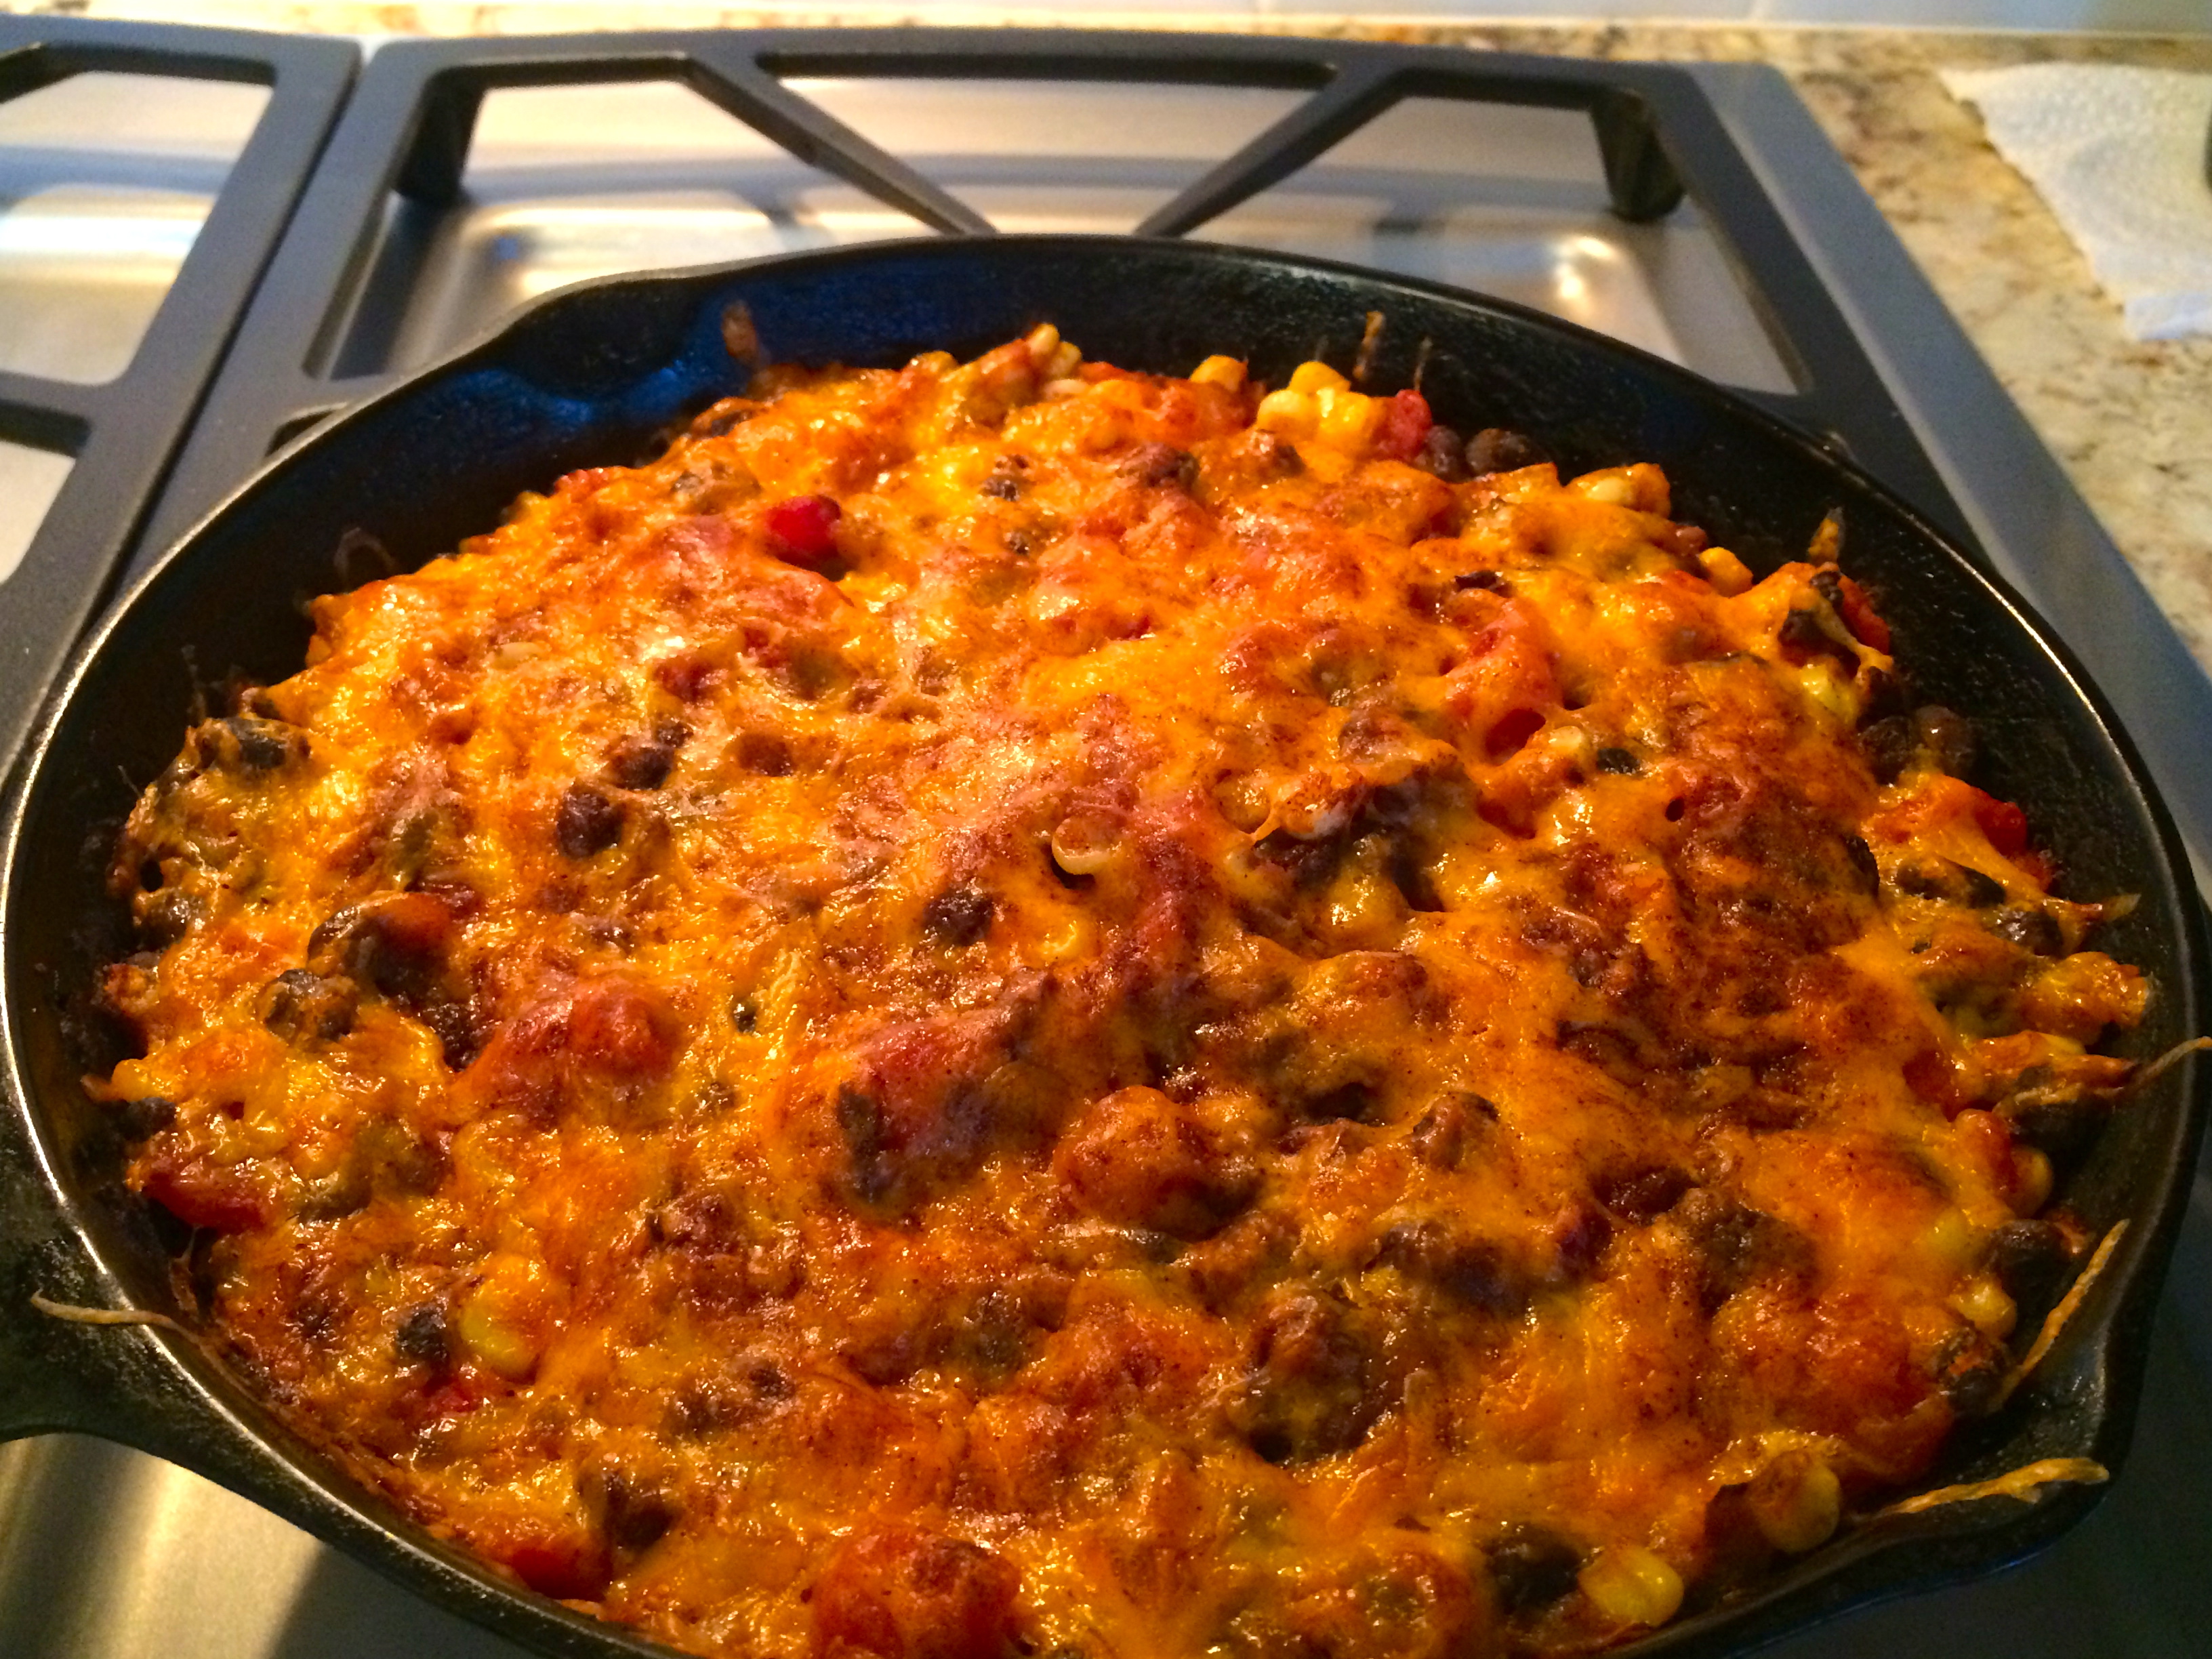
Let me start off by saying this is a horrible photo… almost didn’t post it because it’s not appetizing at all by the looks of this. But this is so tasty you won’t believe it! A great meatless meal. Fills you up, easy to make, tastes great! And… all made it one pan!
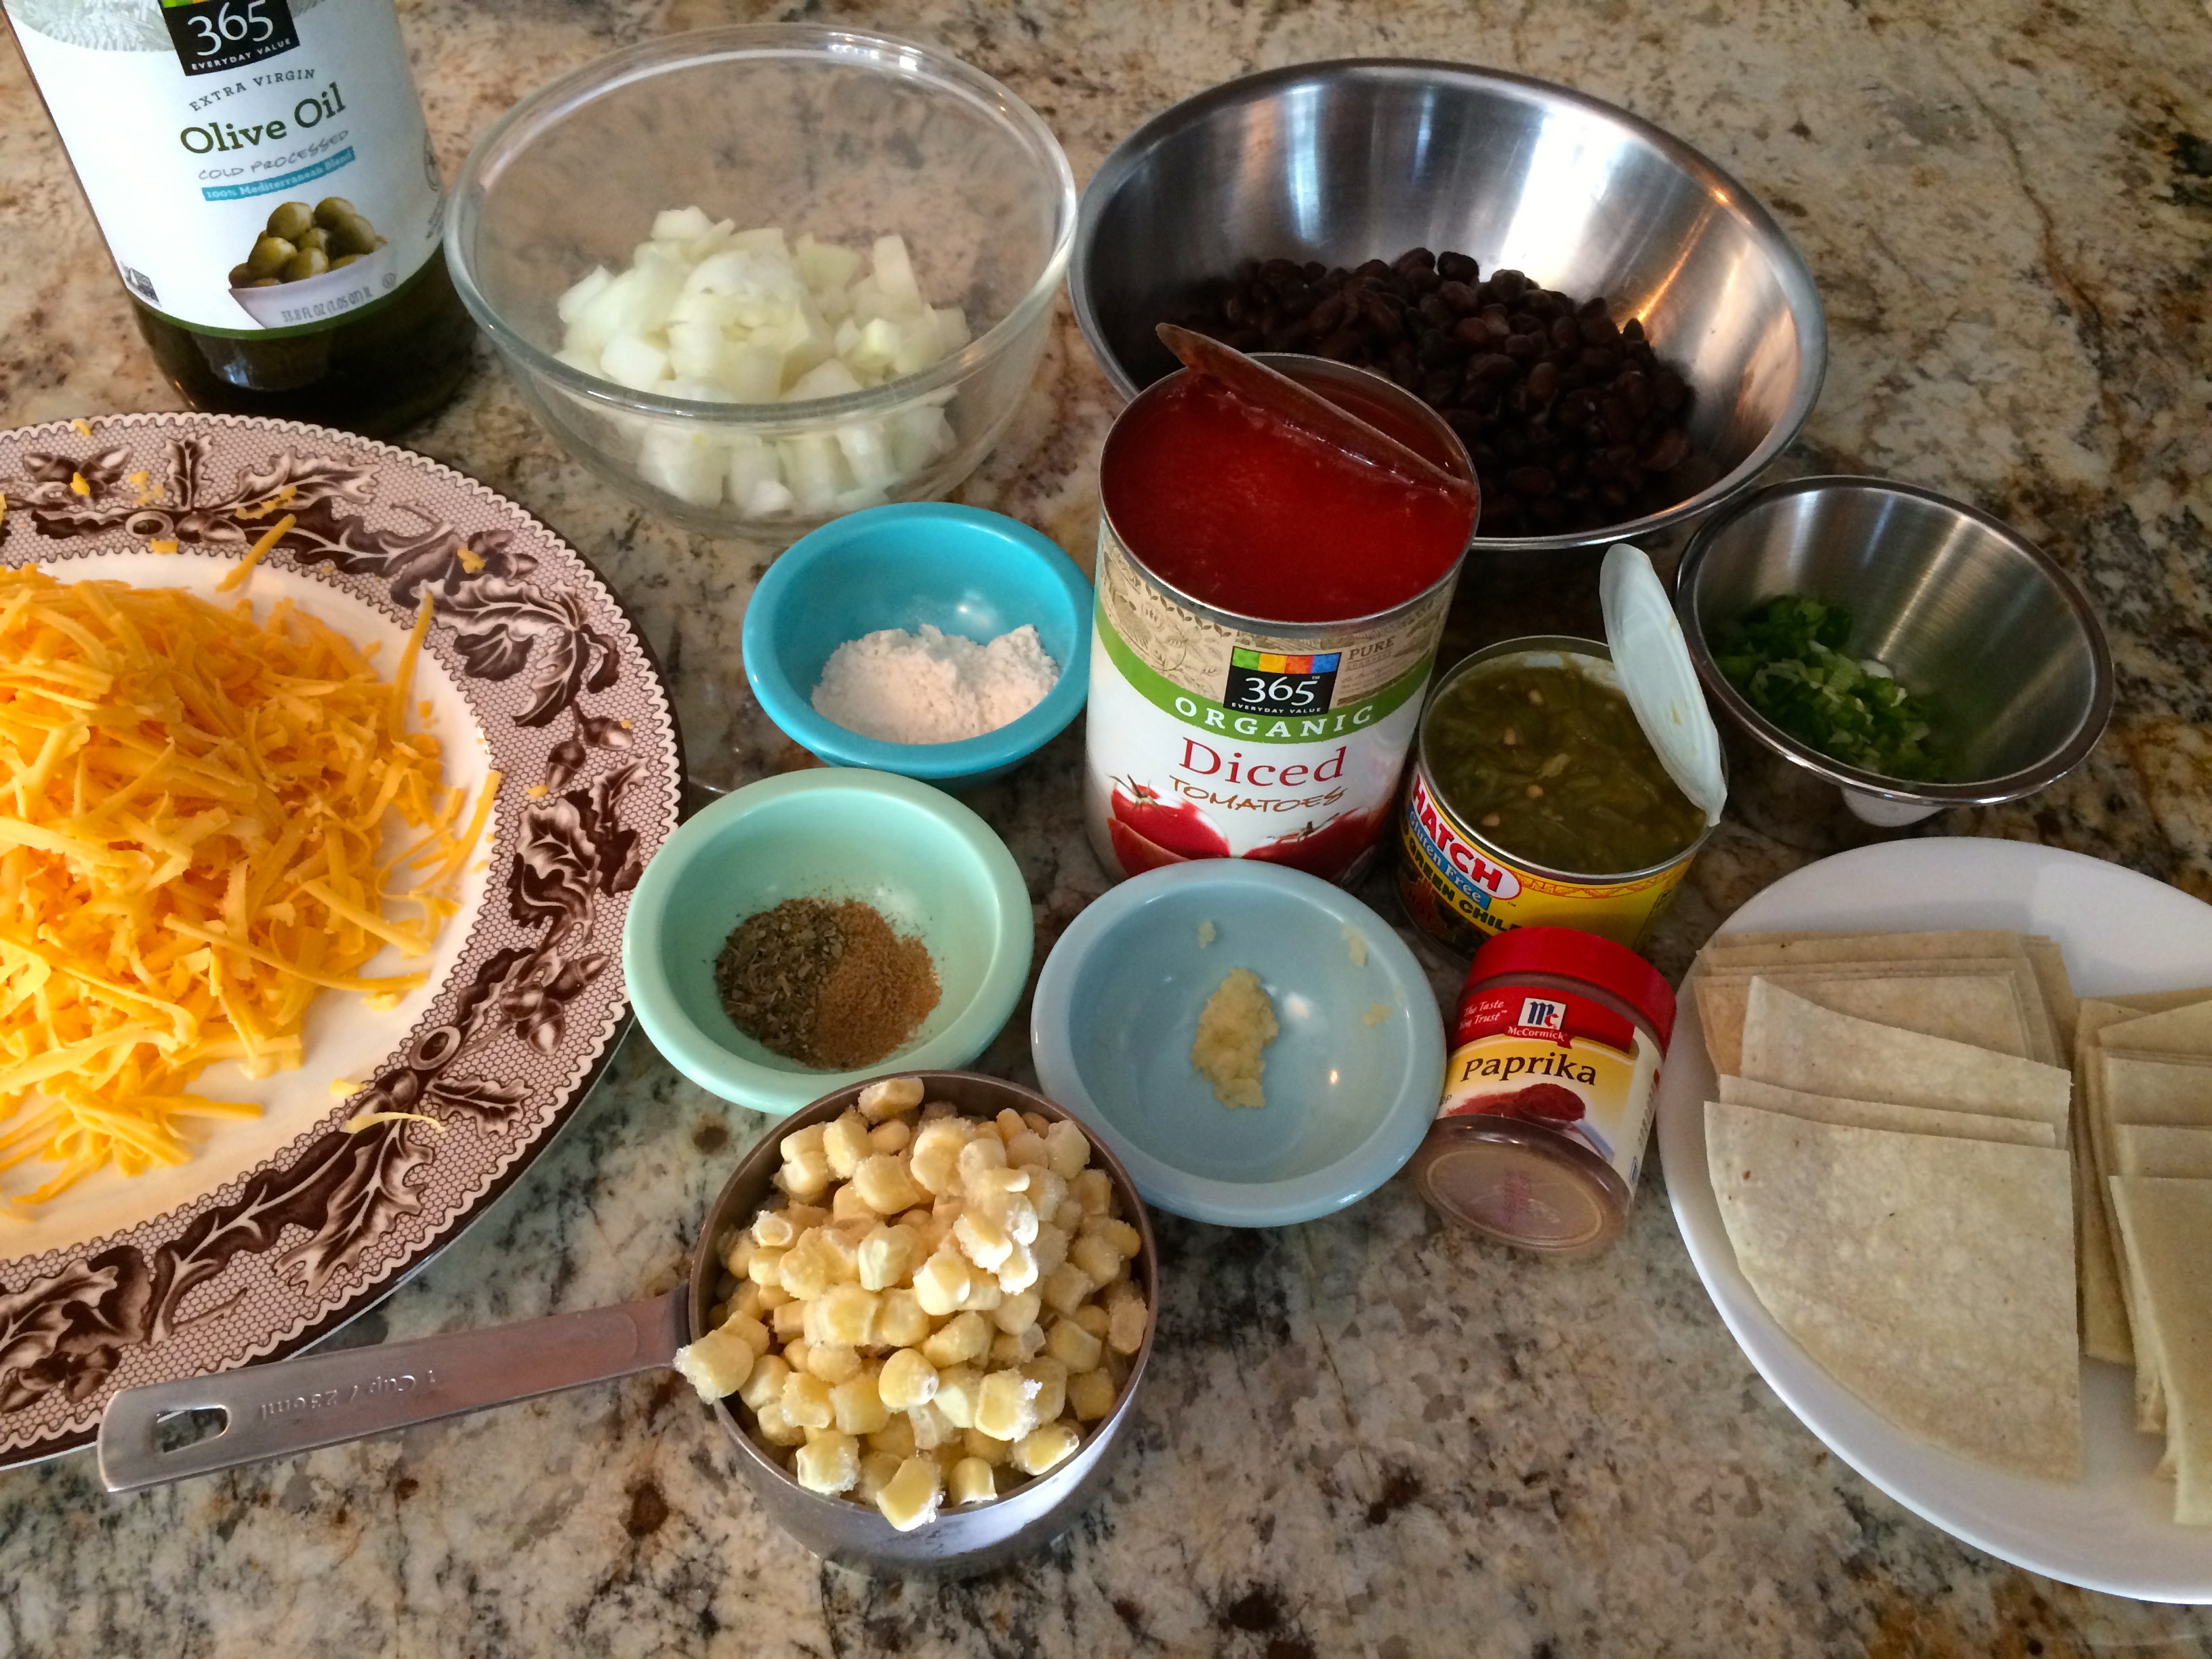
Here are the ingredients… the only thing missing is the sour cream (we used Greek yogurt, tasted fabulous)… Olive oil, onion, frozen whole kernel corn, oregano, cumin, garlic, flour, can of tomatoes, black beans, chopped green chiles, corn tortillas, green onions, cilantro (WHICH I FORGOT!), sharp cheddar cheese, paprika (optional: radishes).
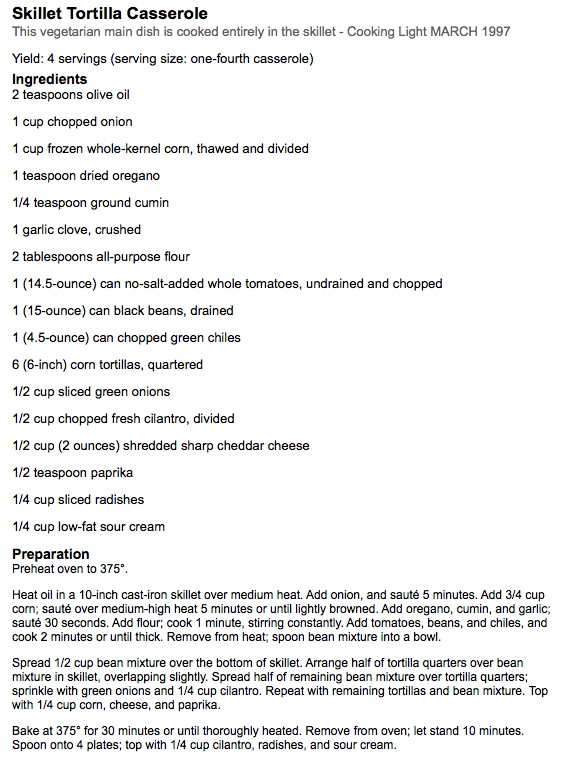
This is a recipe by Cooking Light magazine. It’s one that I’ve been making since 1997 – Here is a link to the recipe from the MYRECIPES.COM website (Cooking Light and several other magazines).
Here is the recipe from that website:
To recap:
It’s easiest if you prep your ingredients first. Chop, measure and get it all ready to go!

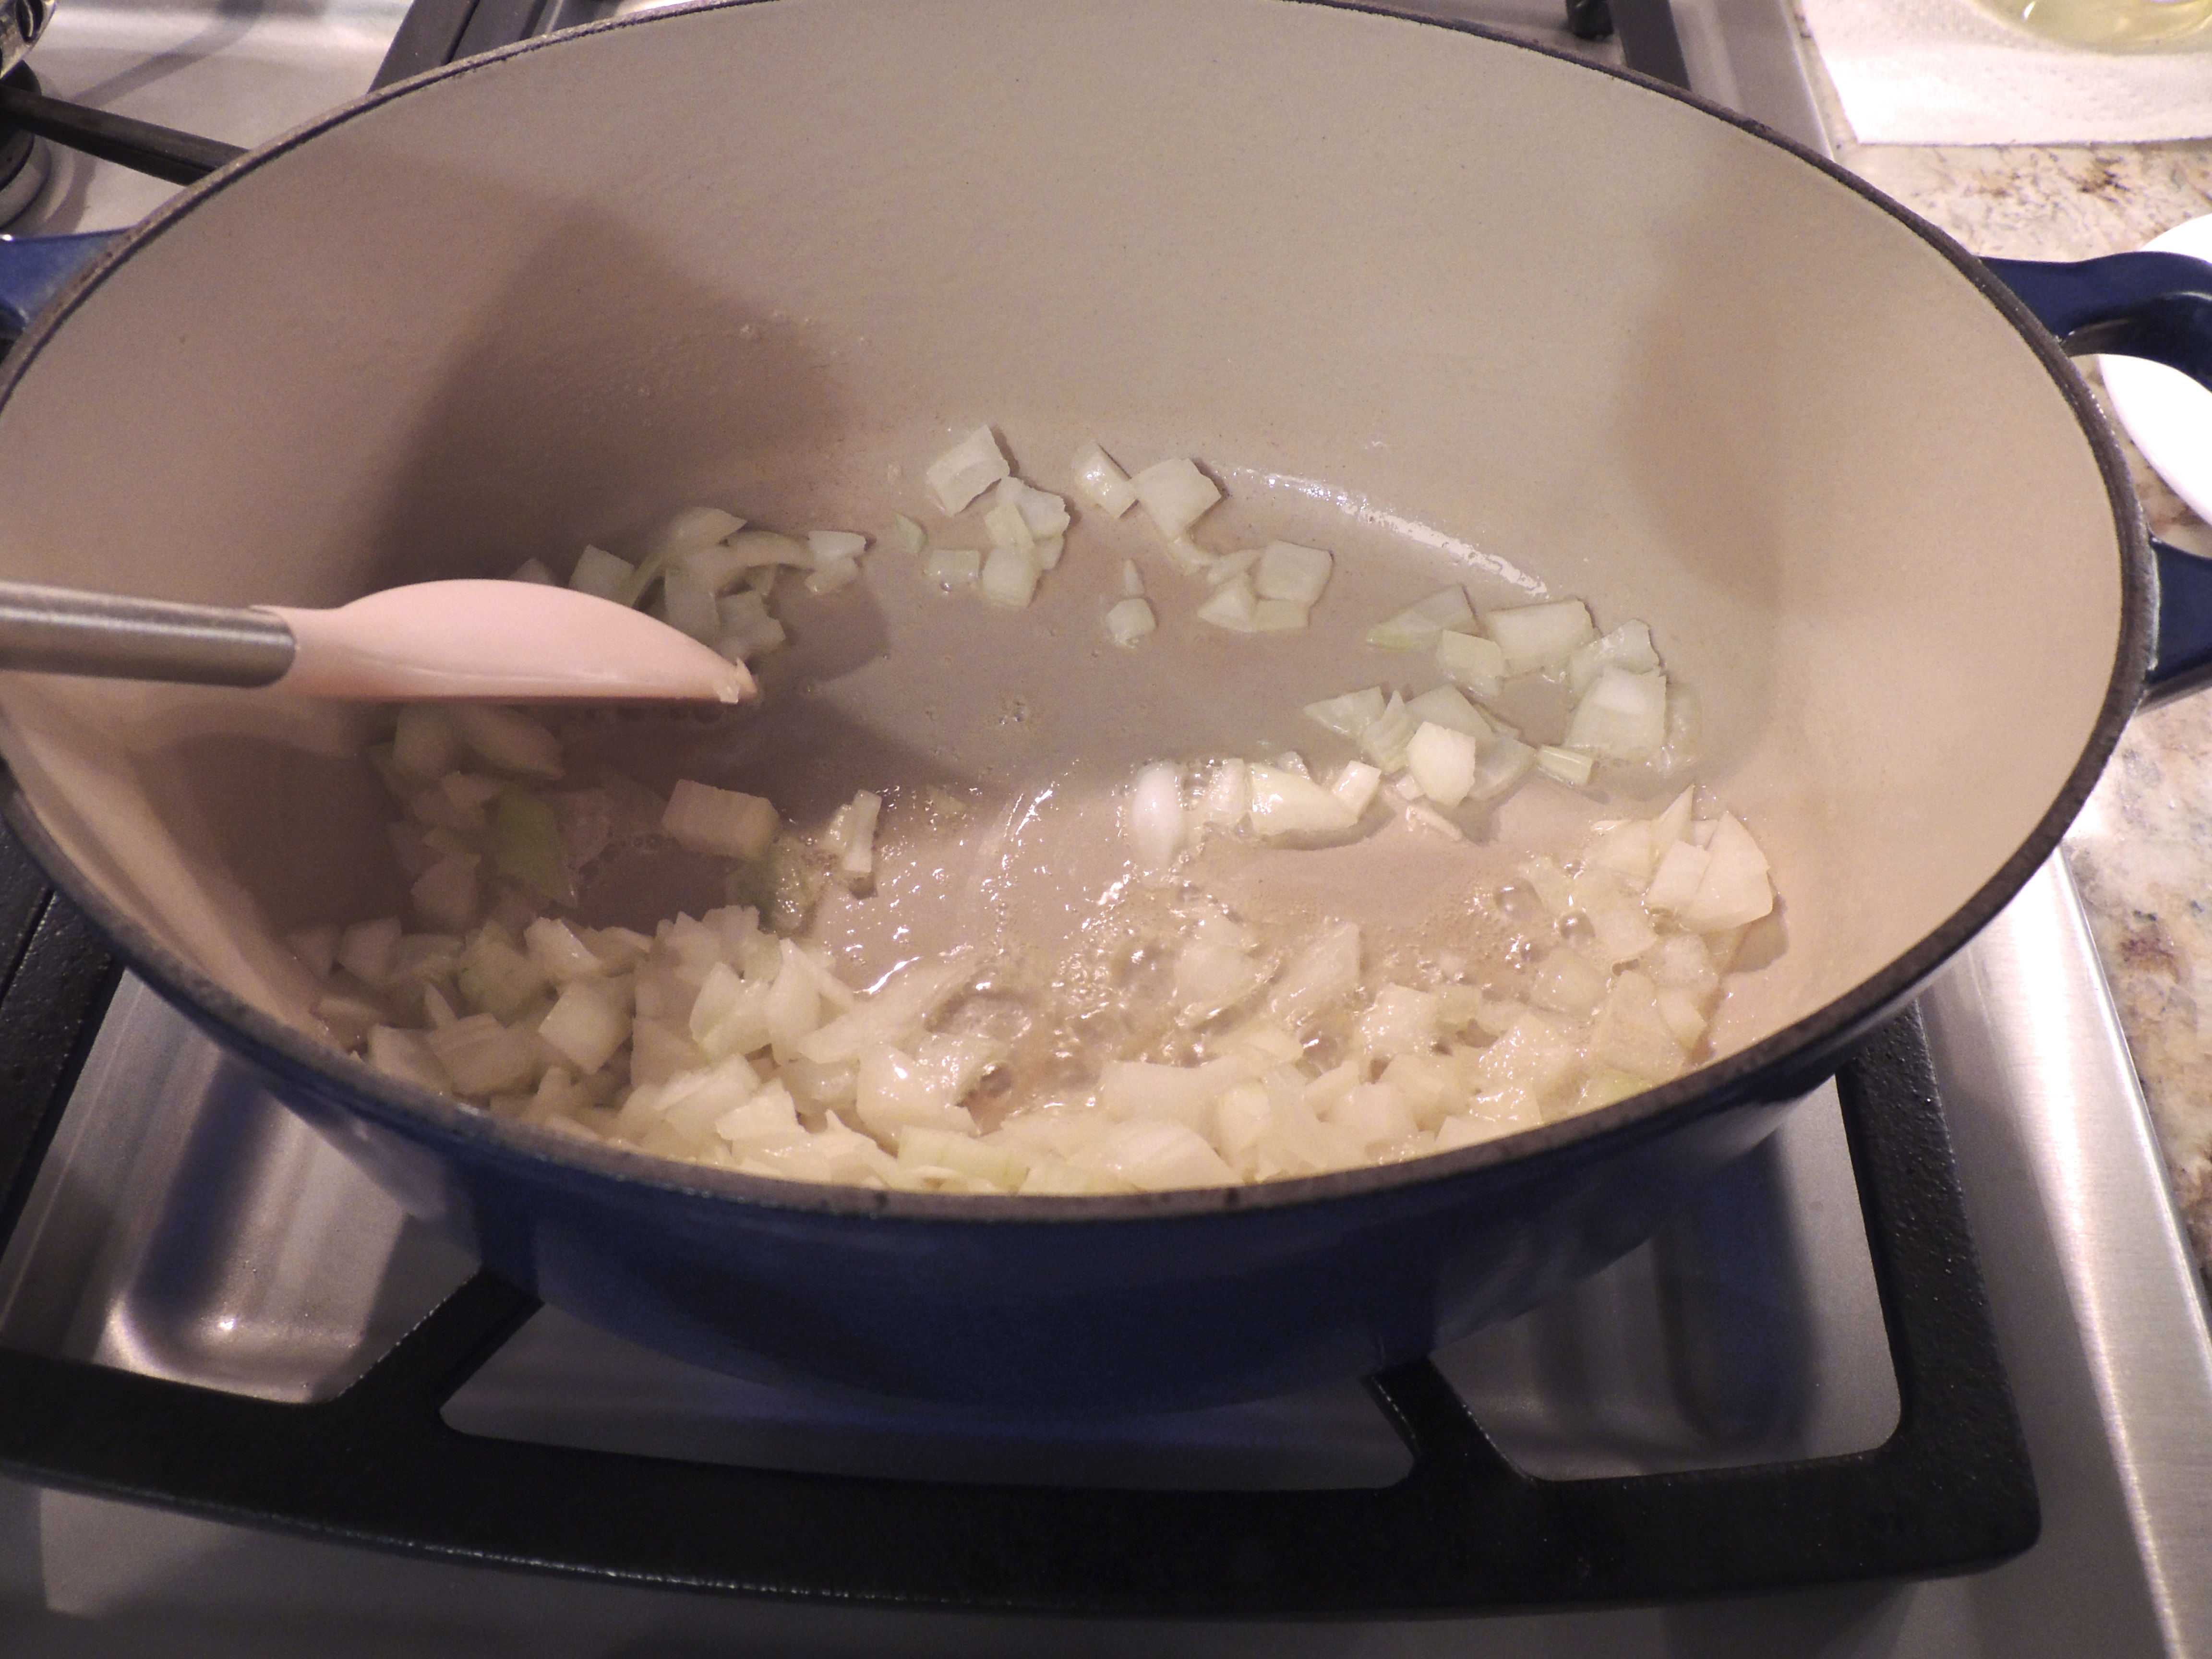
Heat oil in a 10-inch cast iron skillet over medium heat. Add the onion and saute 5 minutes.

Add the corn (to the onions), and saute another 5 minutes or until corn begins to get lightly browned.
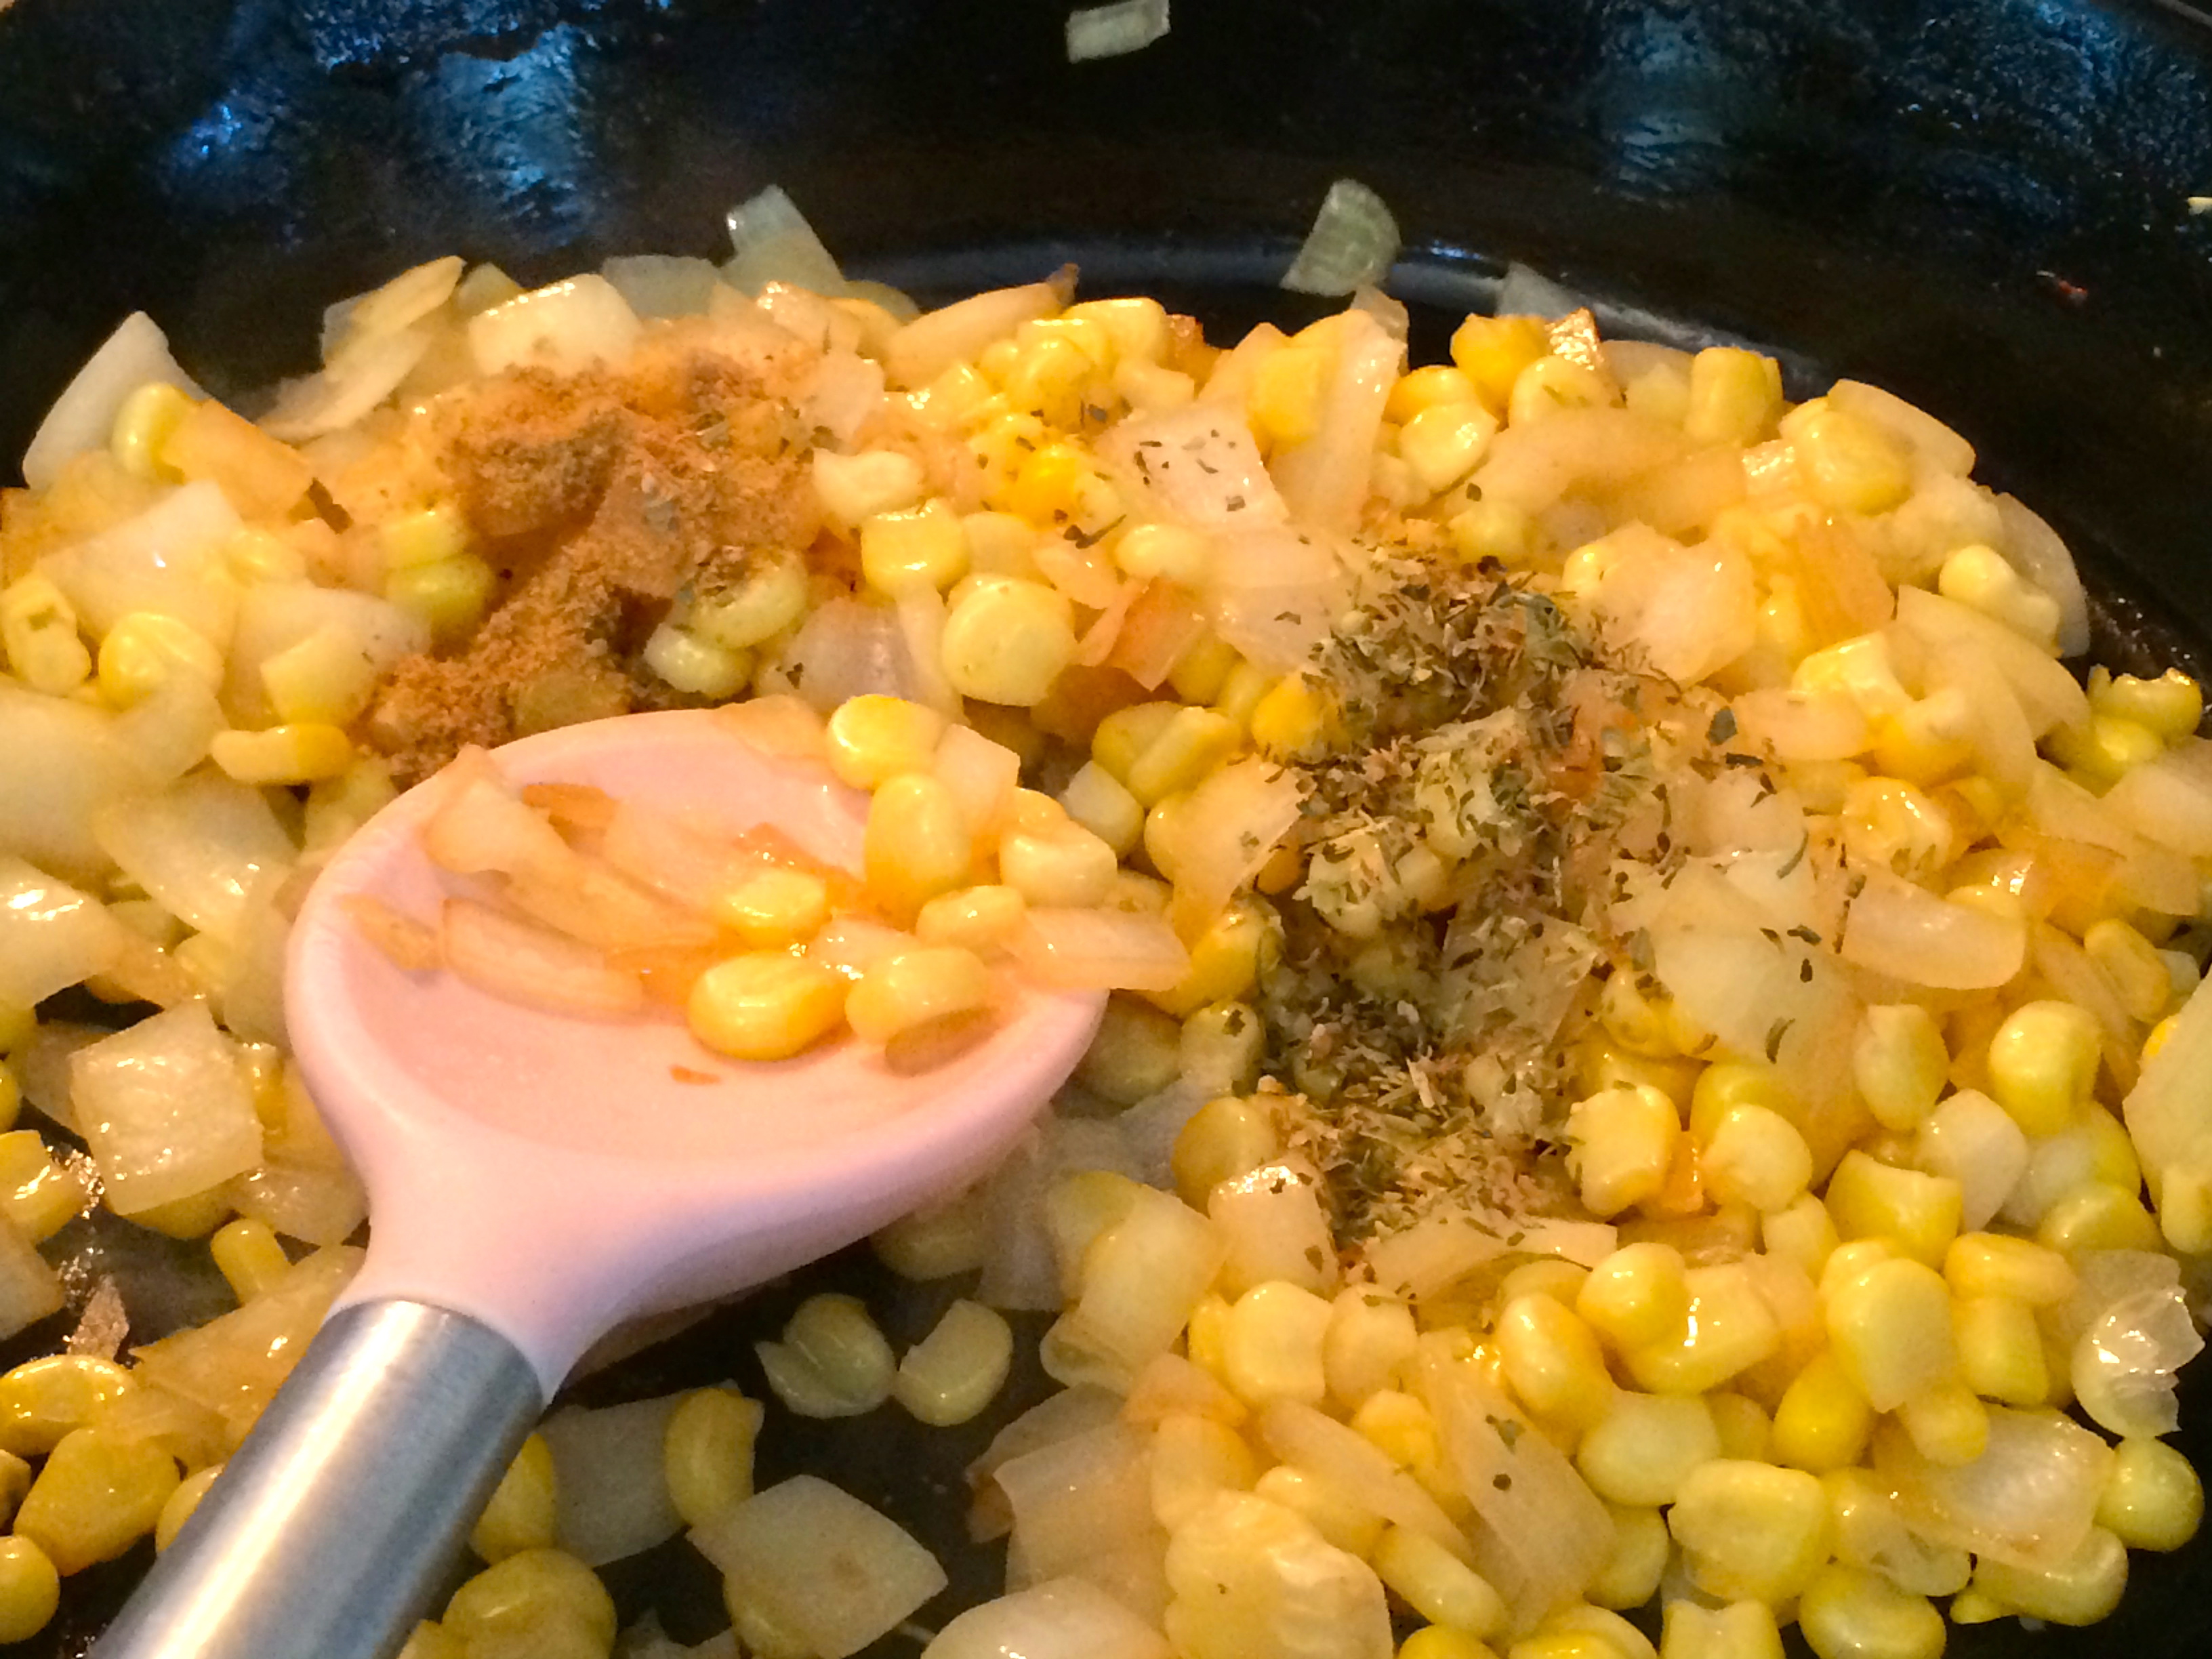
Add oregano, cumin and garlic… saute 30 seconds.
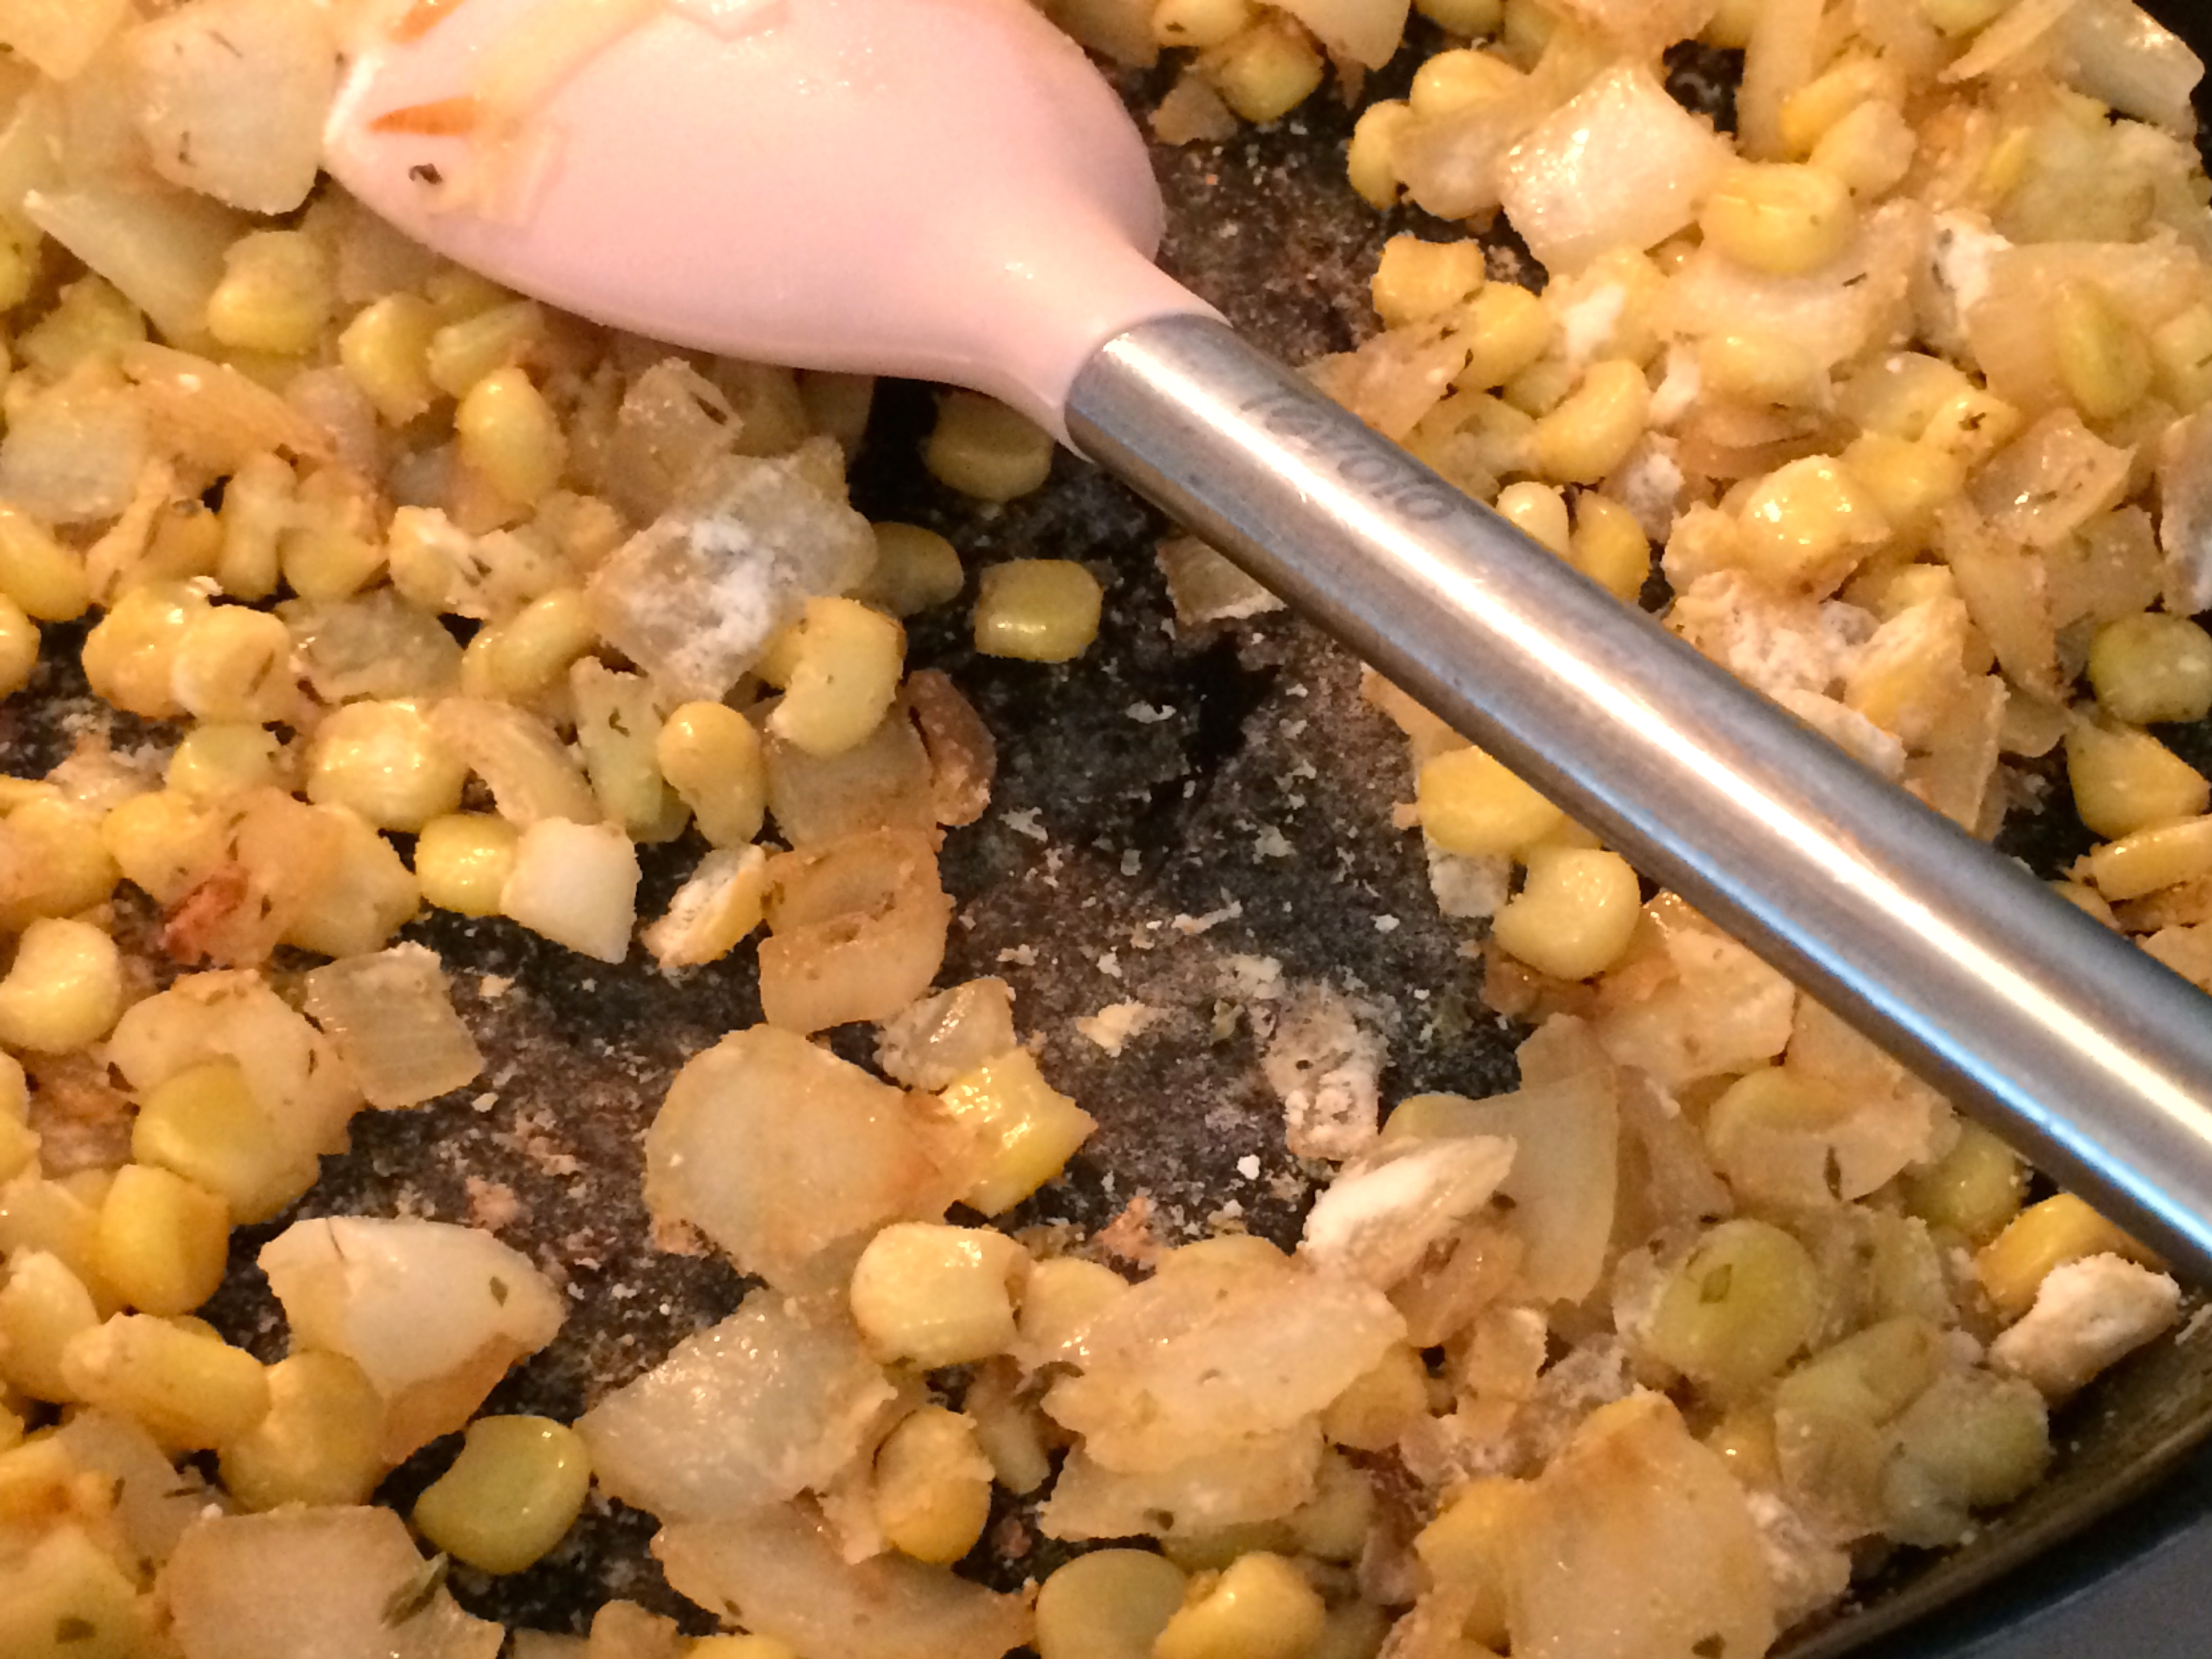
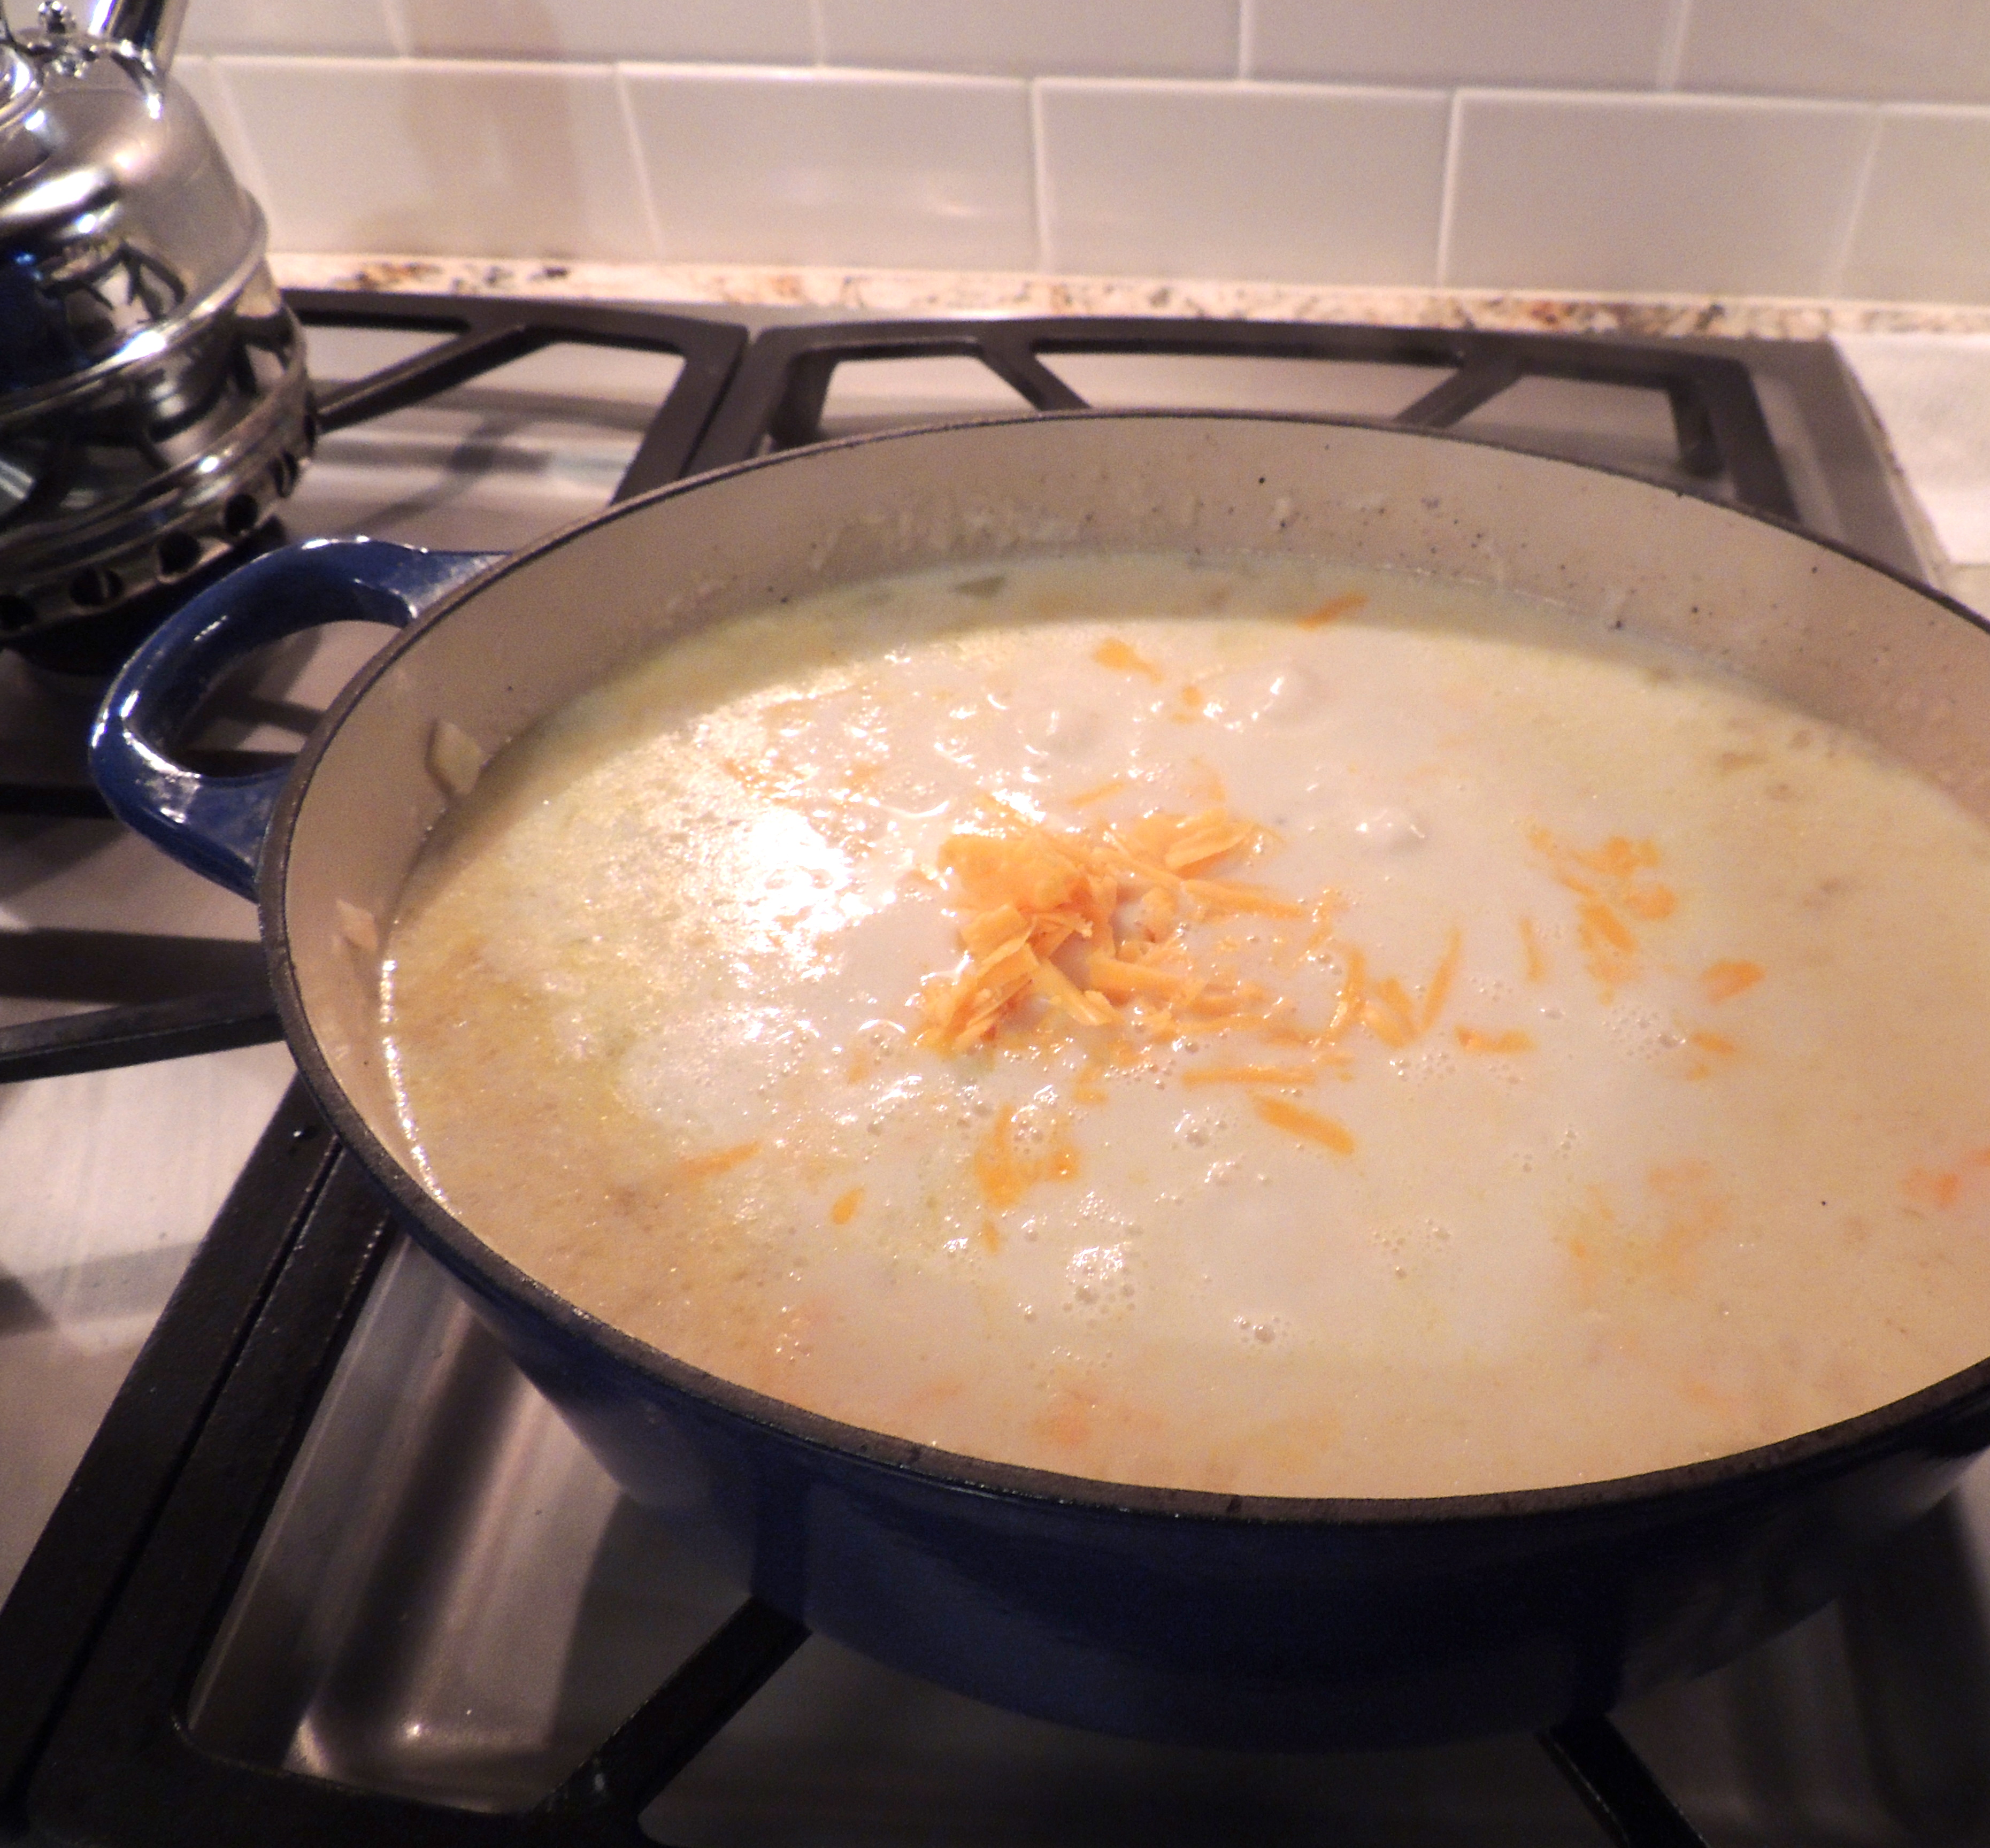
Add flour, and cook one minute, stirring constantly!
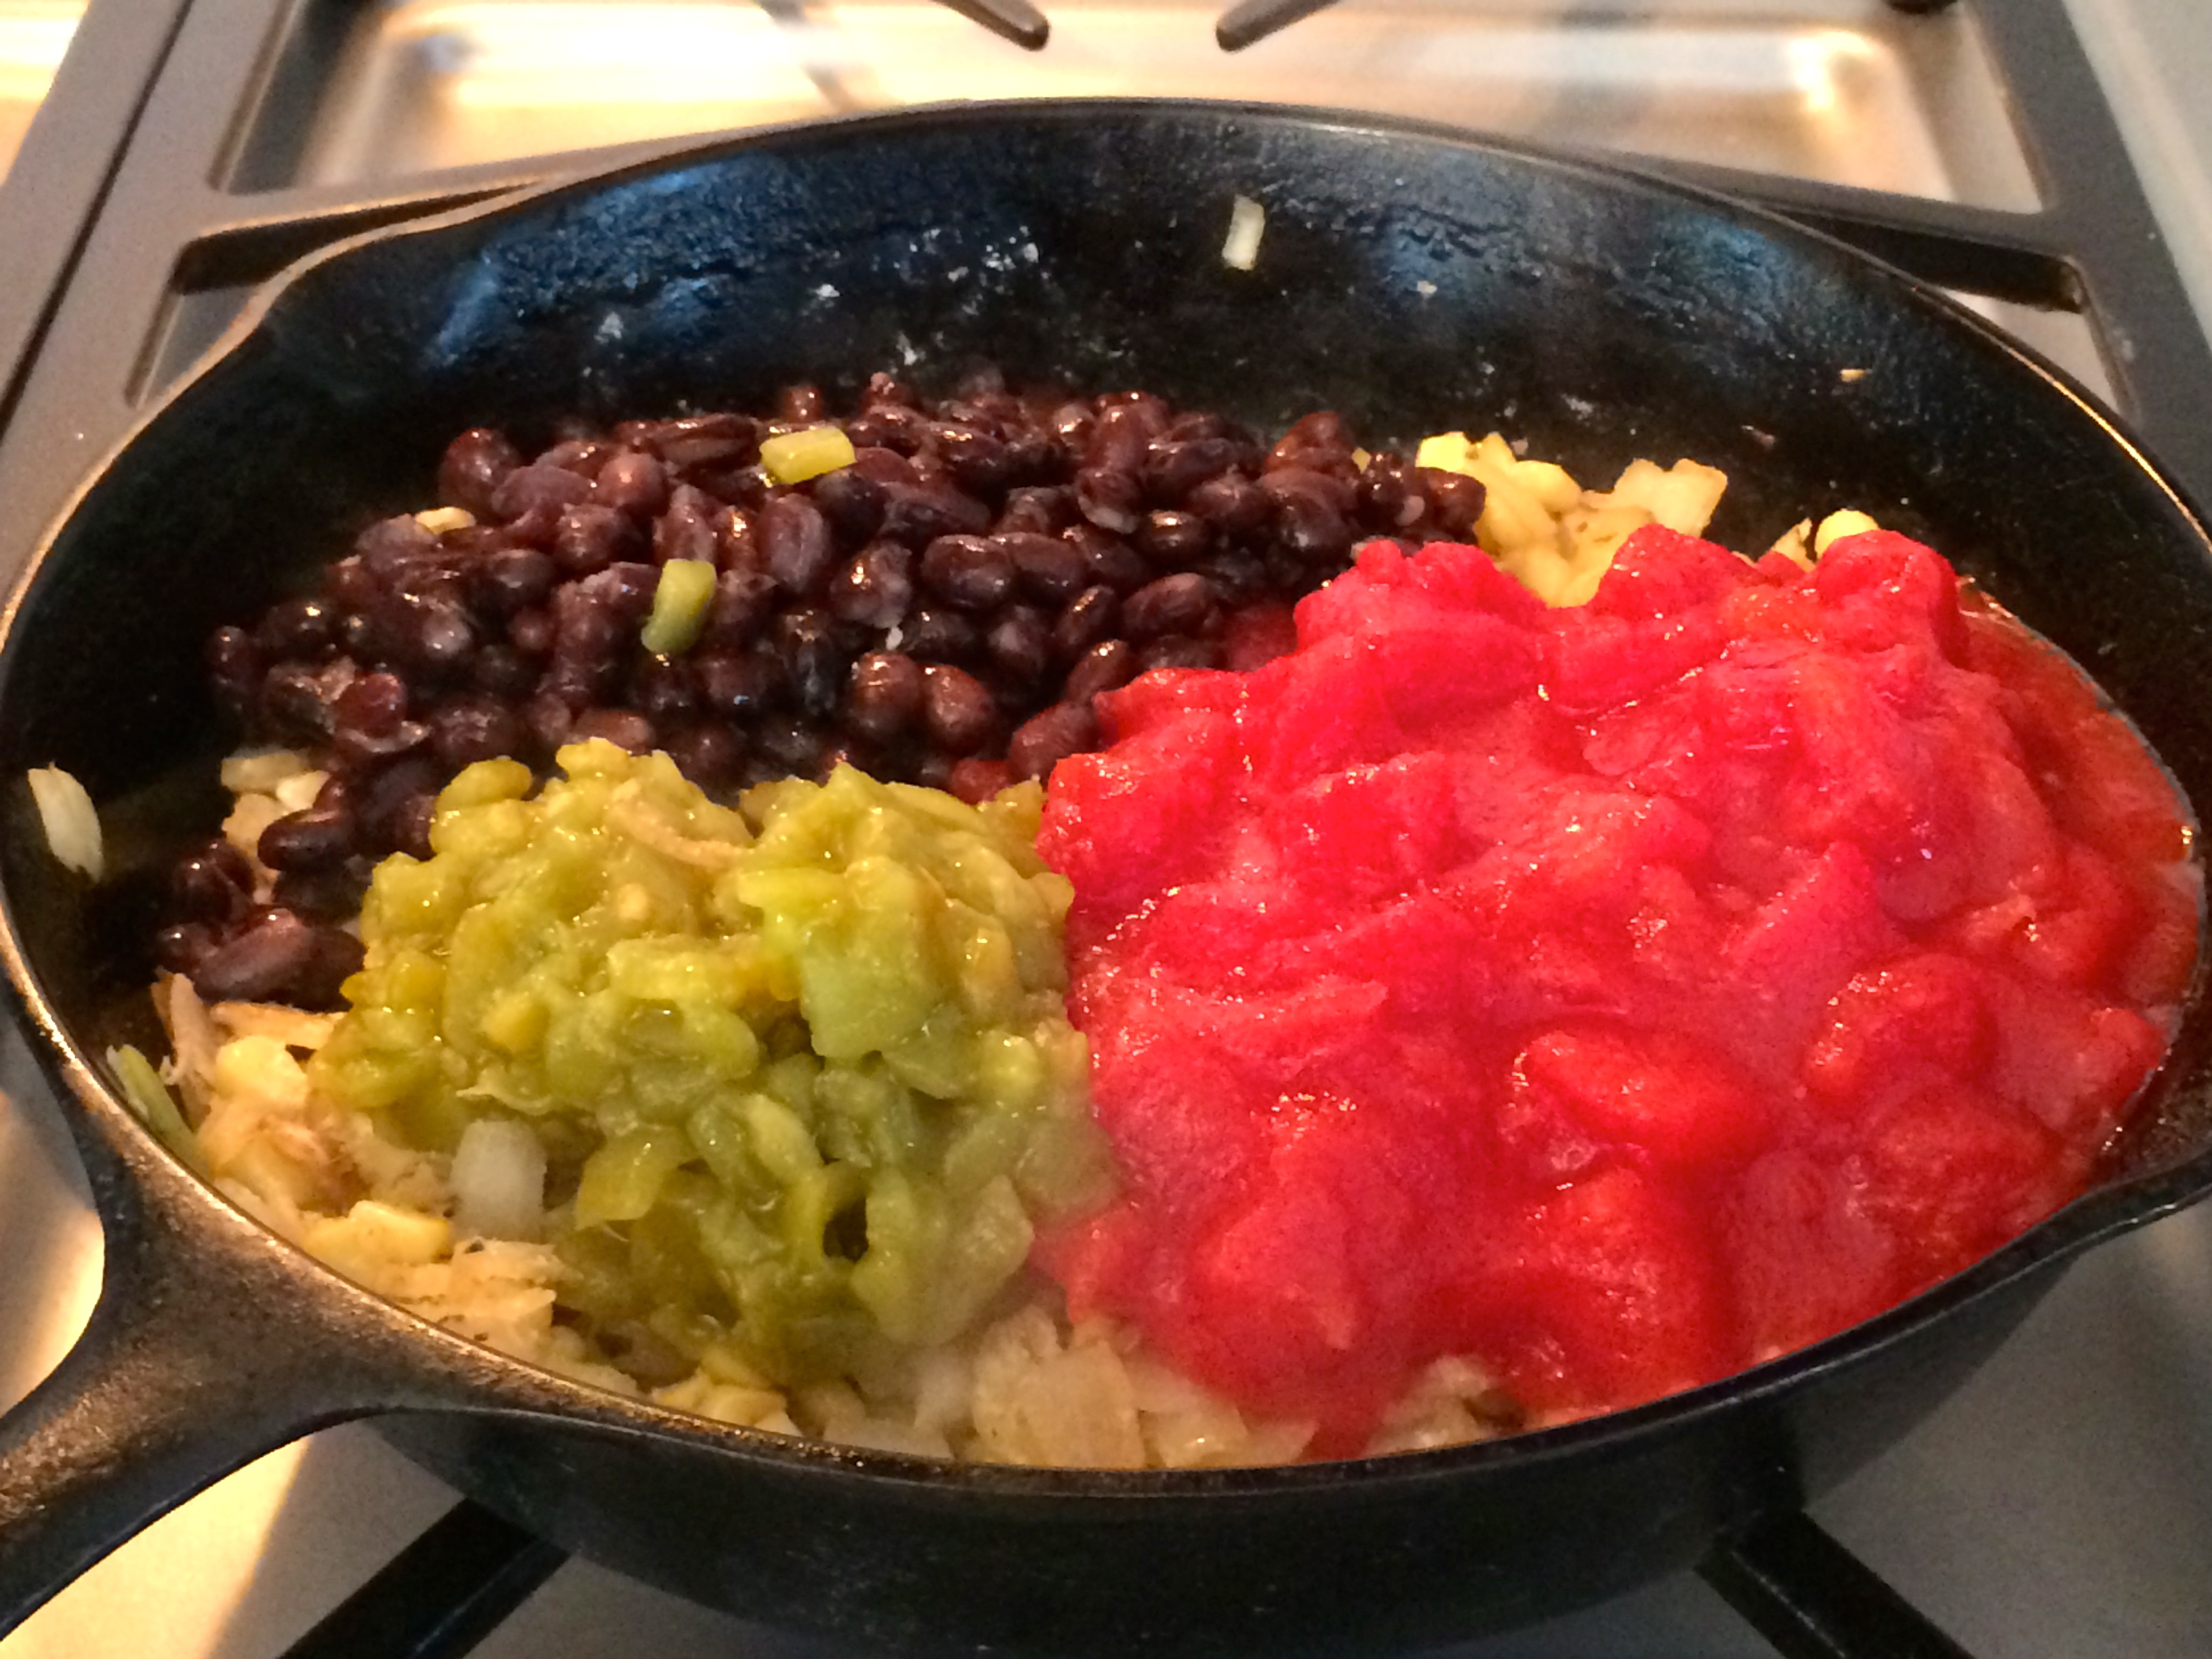
Next… add the tomatoes, beans, chiles, and cook 2 minutes or until thick.
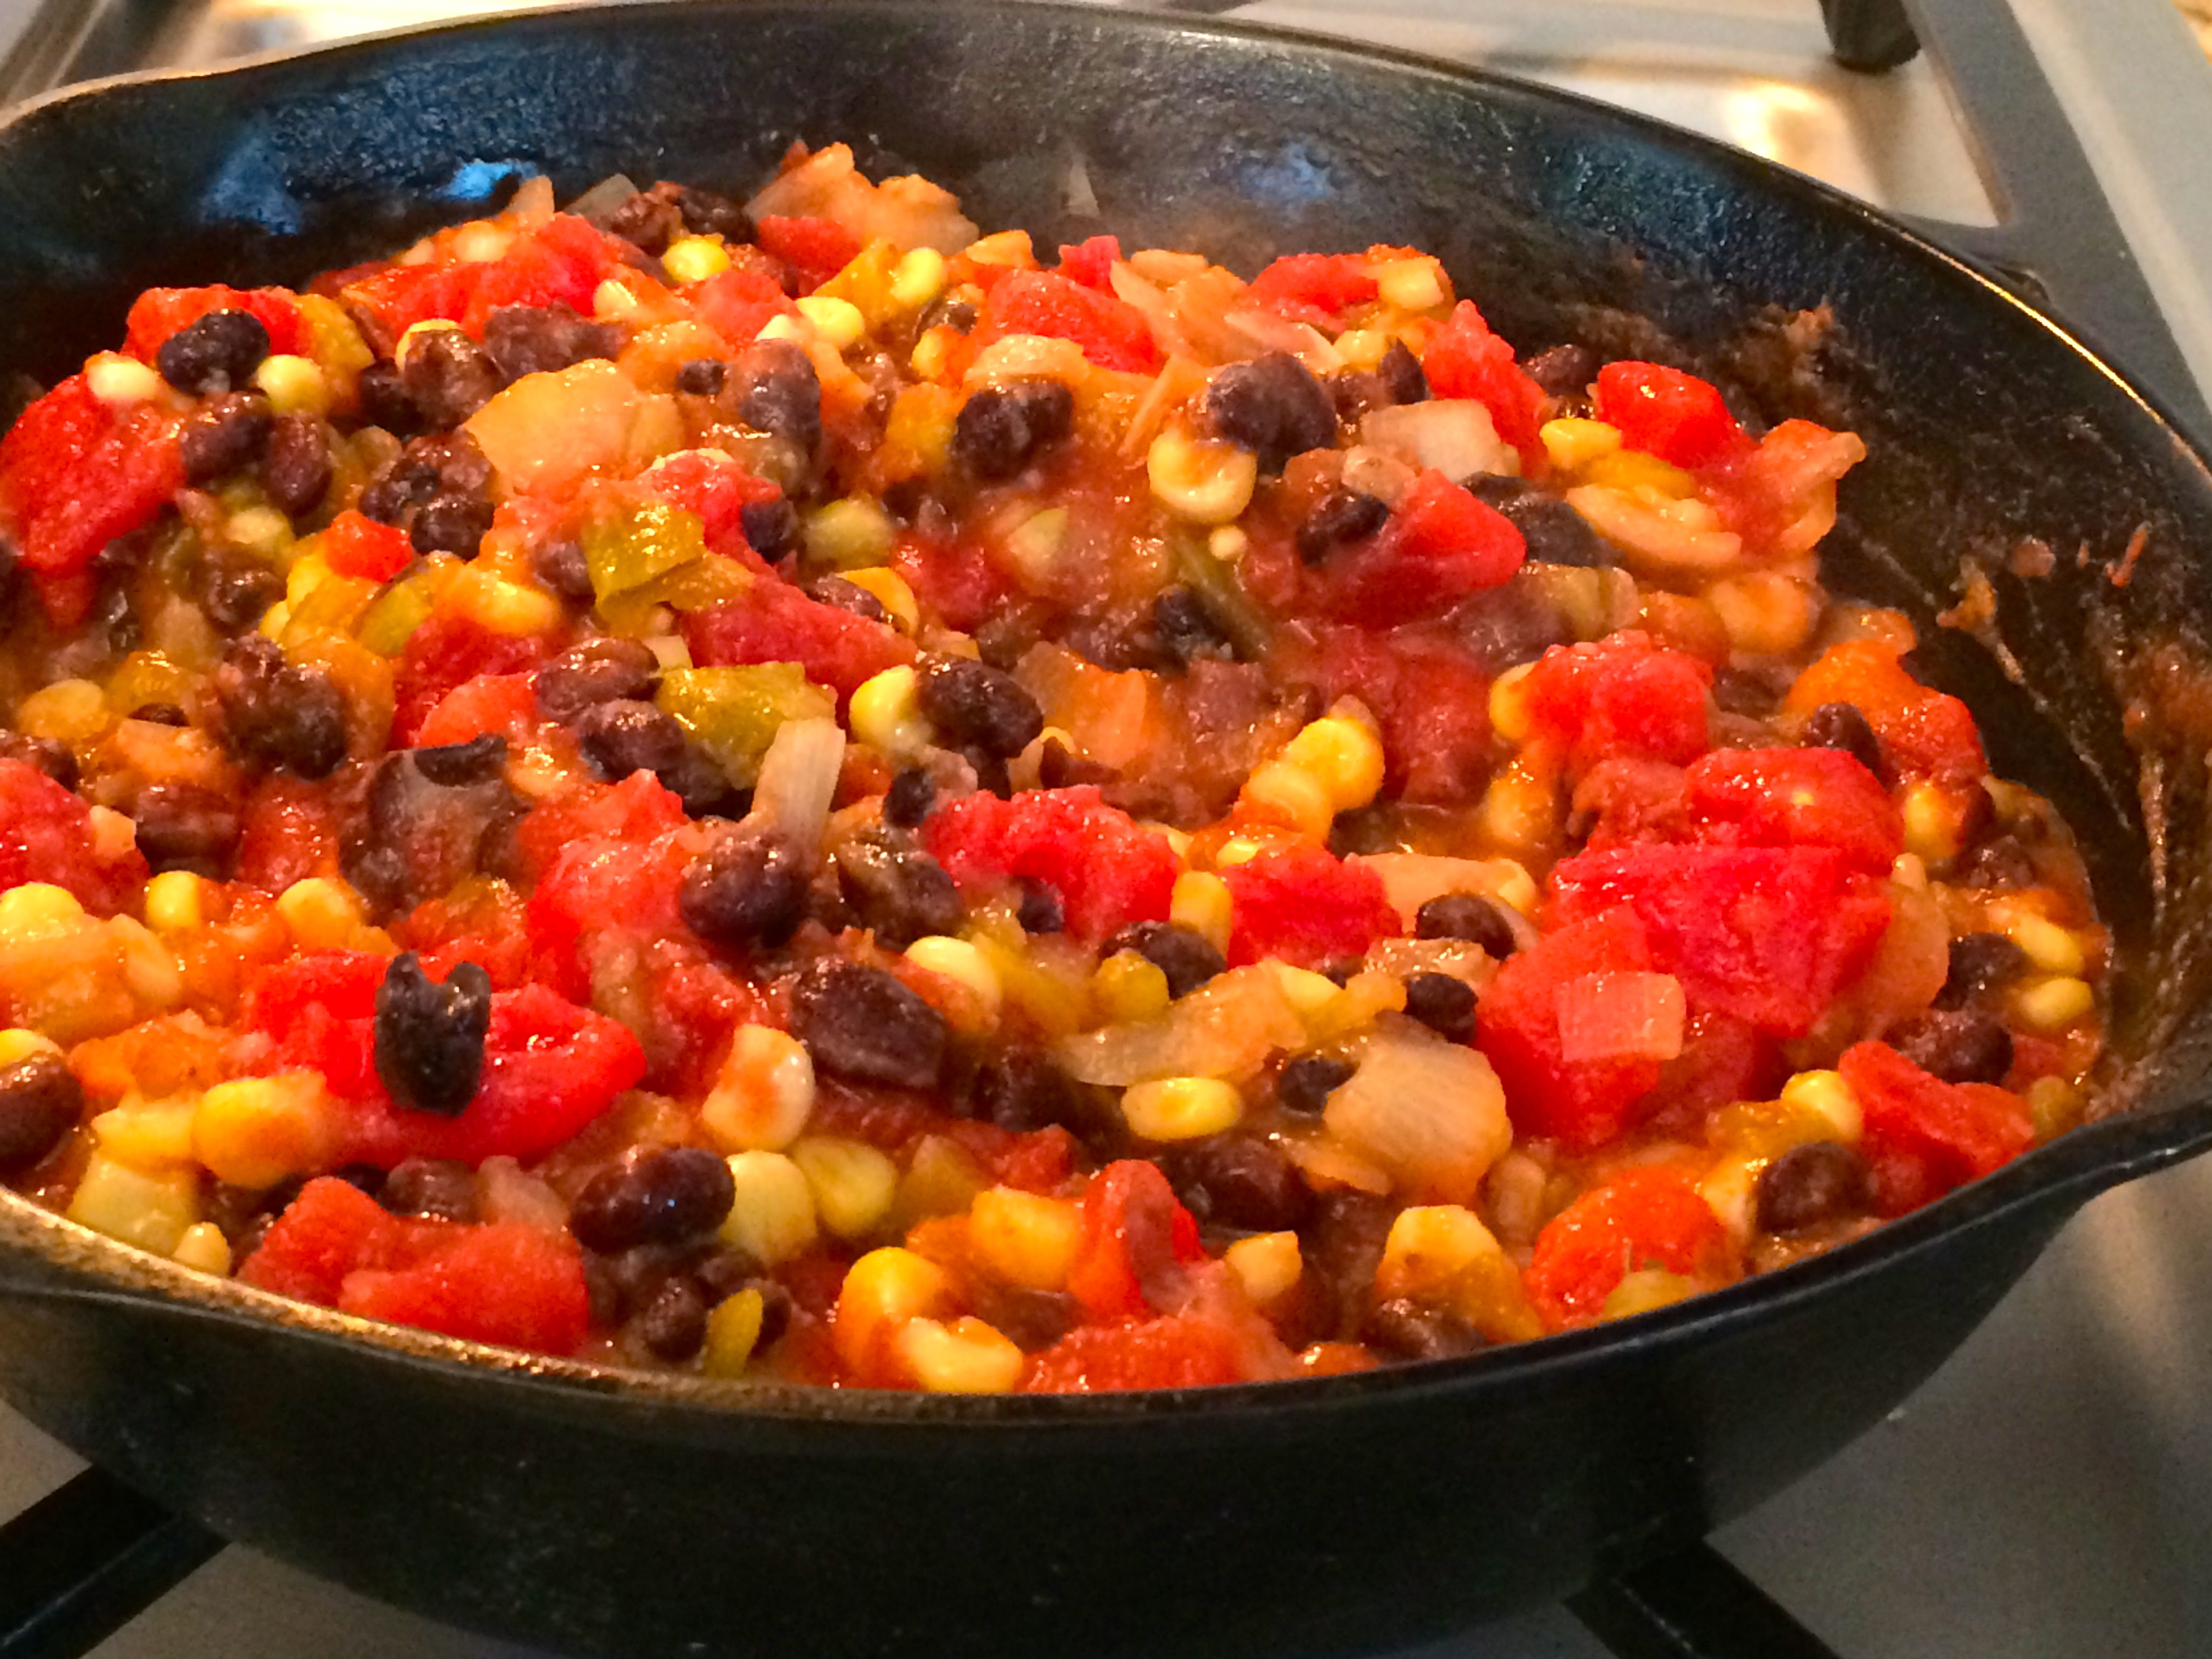
Once you’ve cooked this and it starts to thicken, remove from heat…
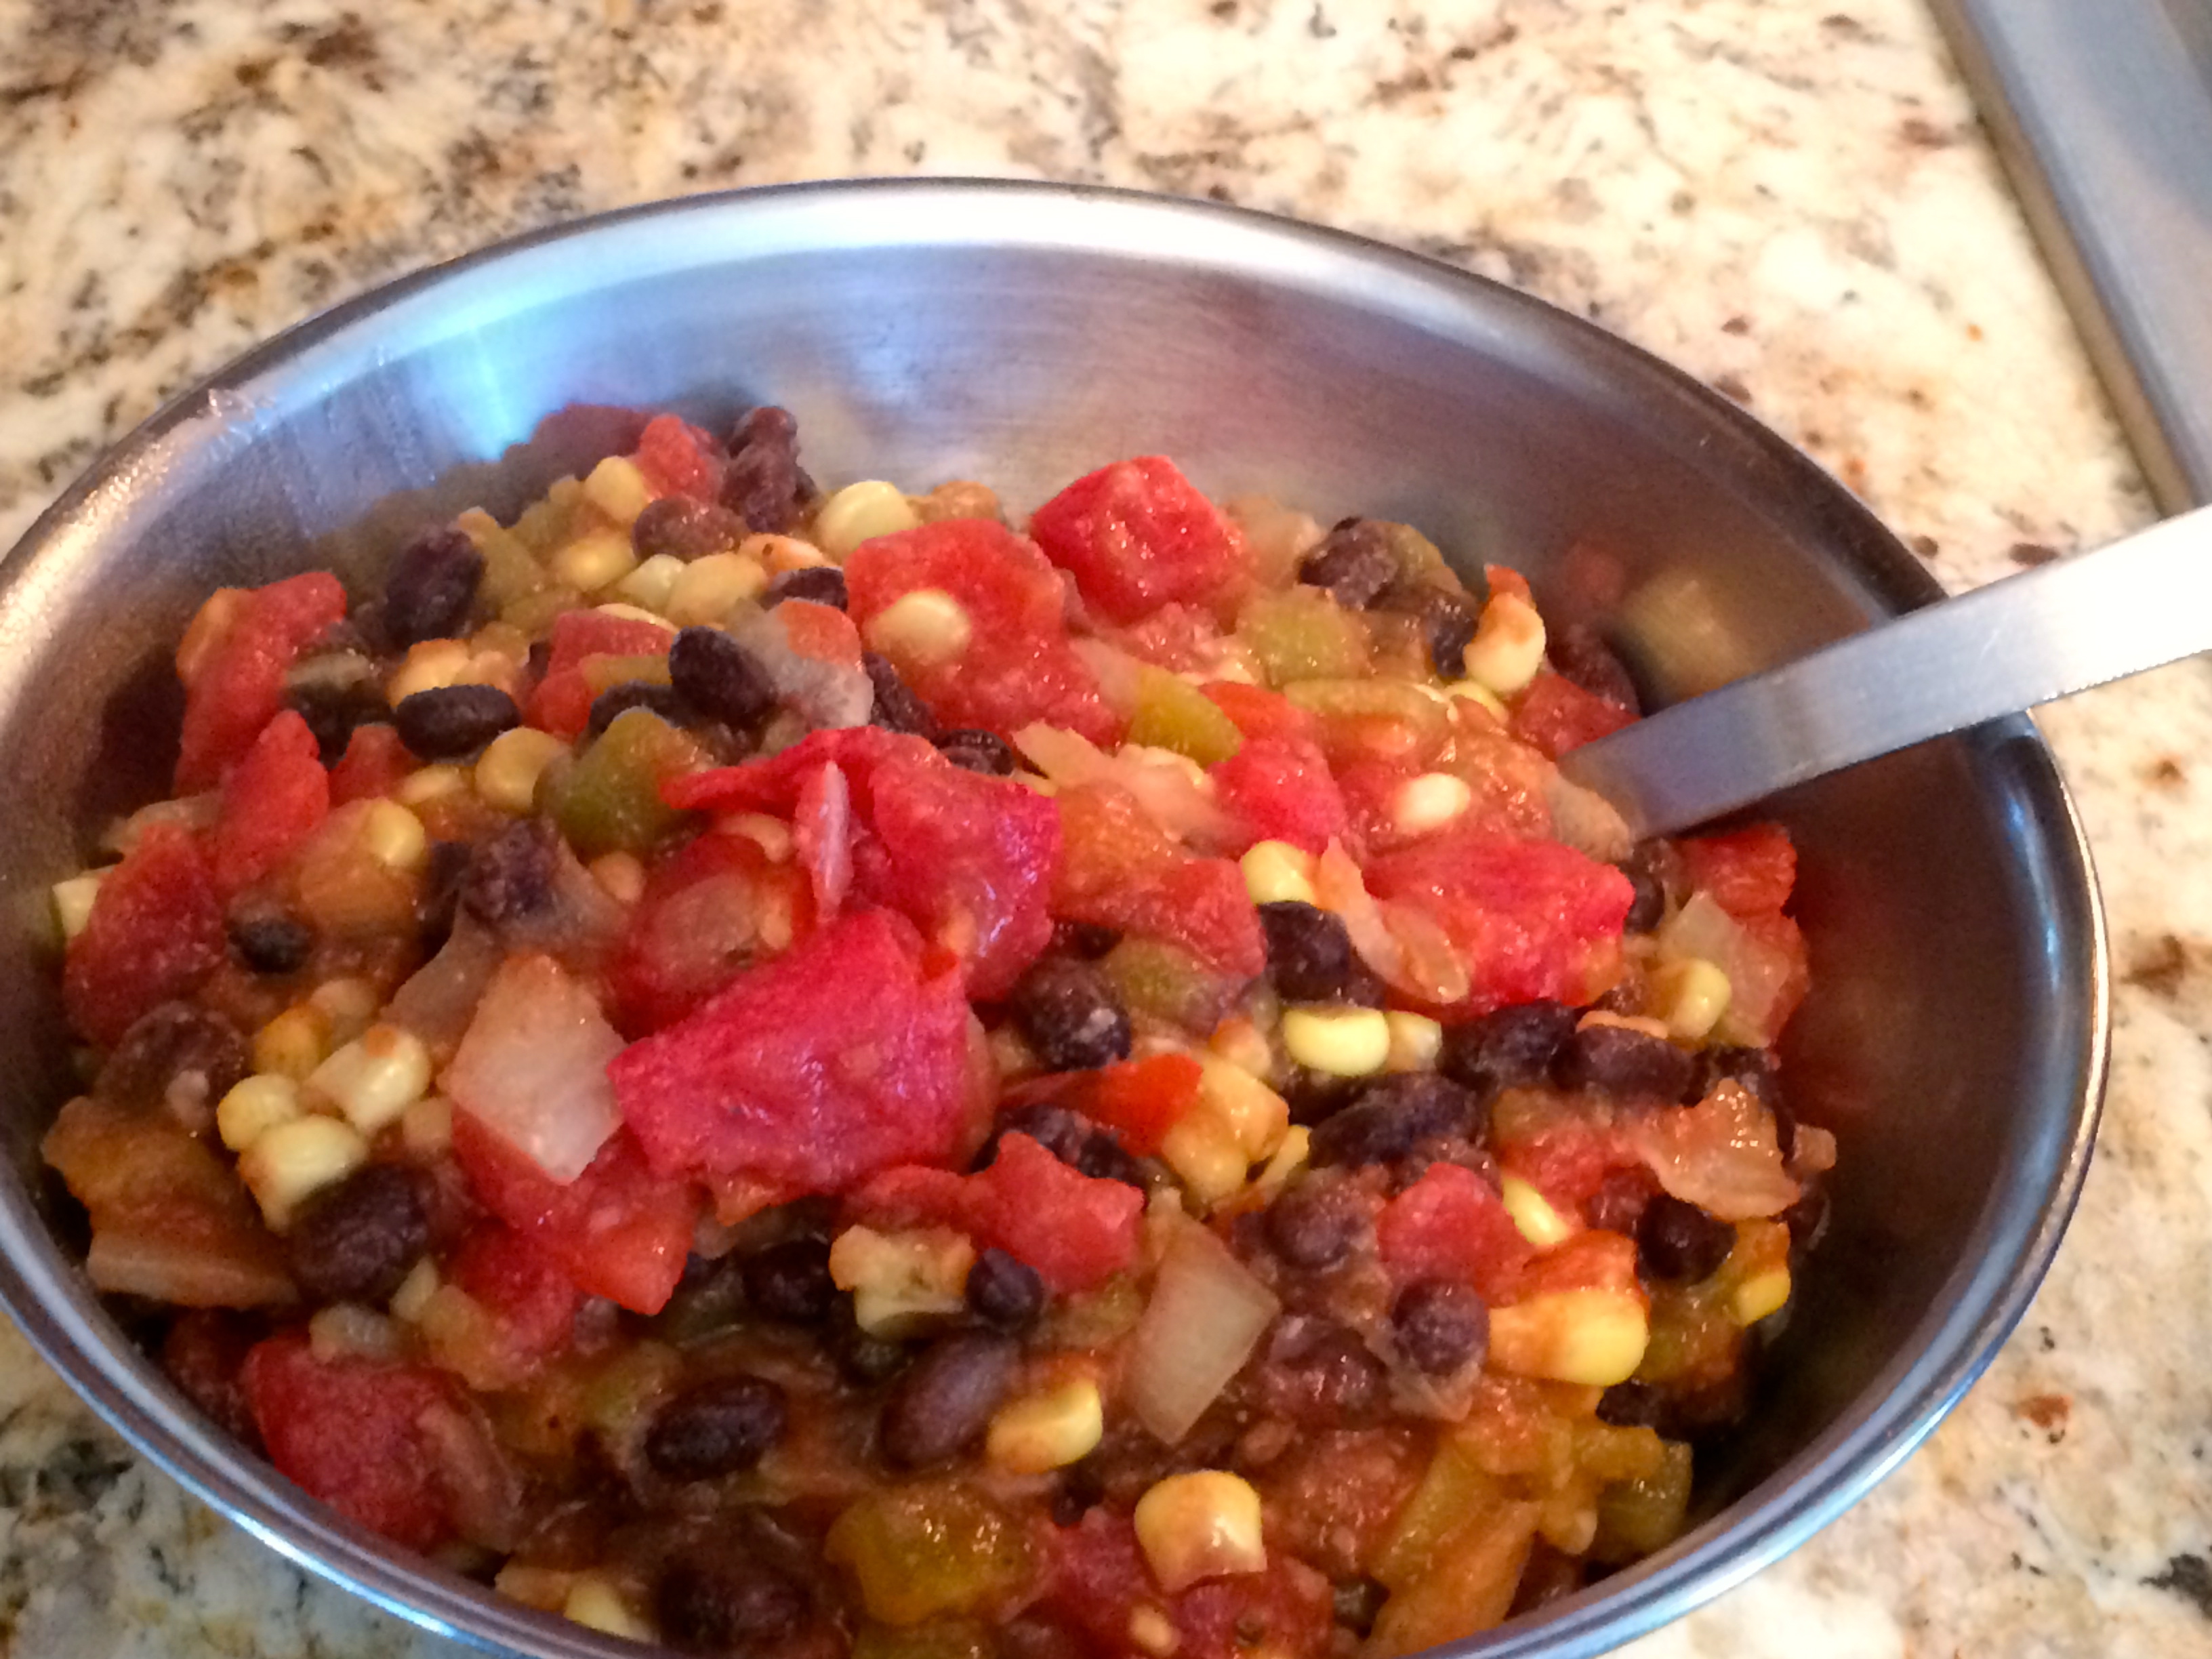
Spoon mixture into a bowl…

Spread 1/2 cup of the bean mixture over the bottom of the skillet.
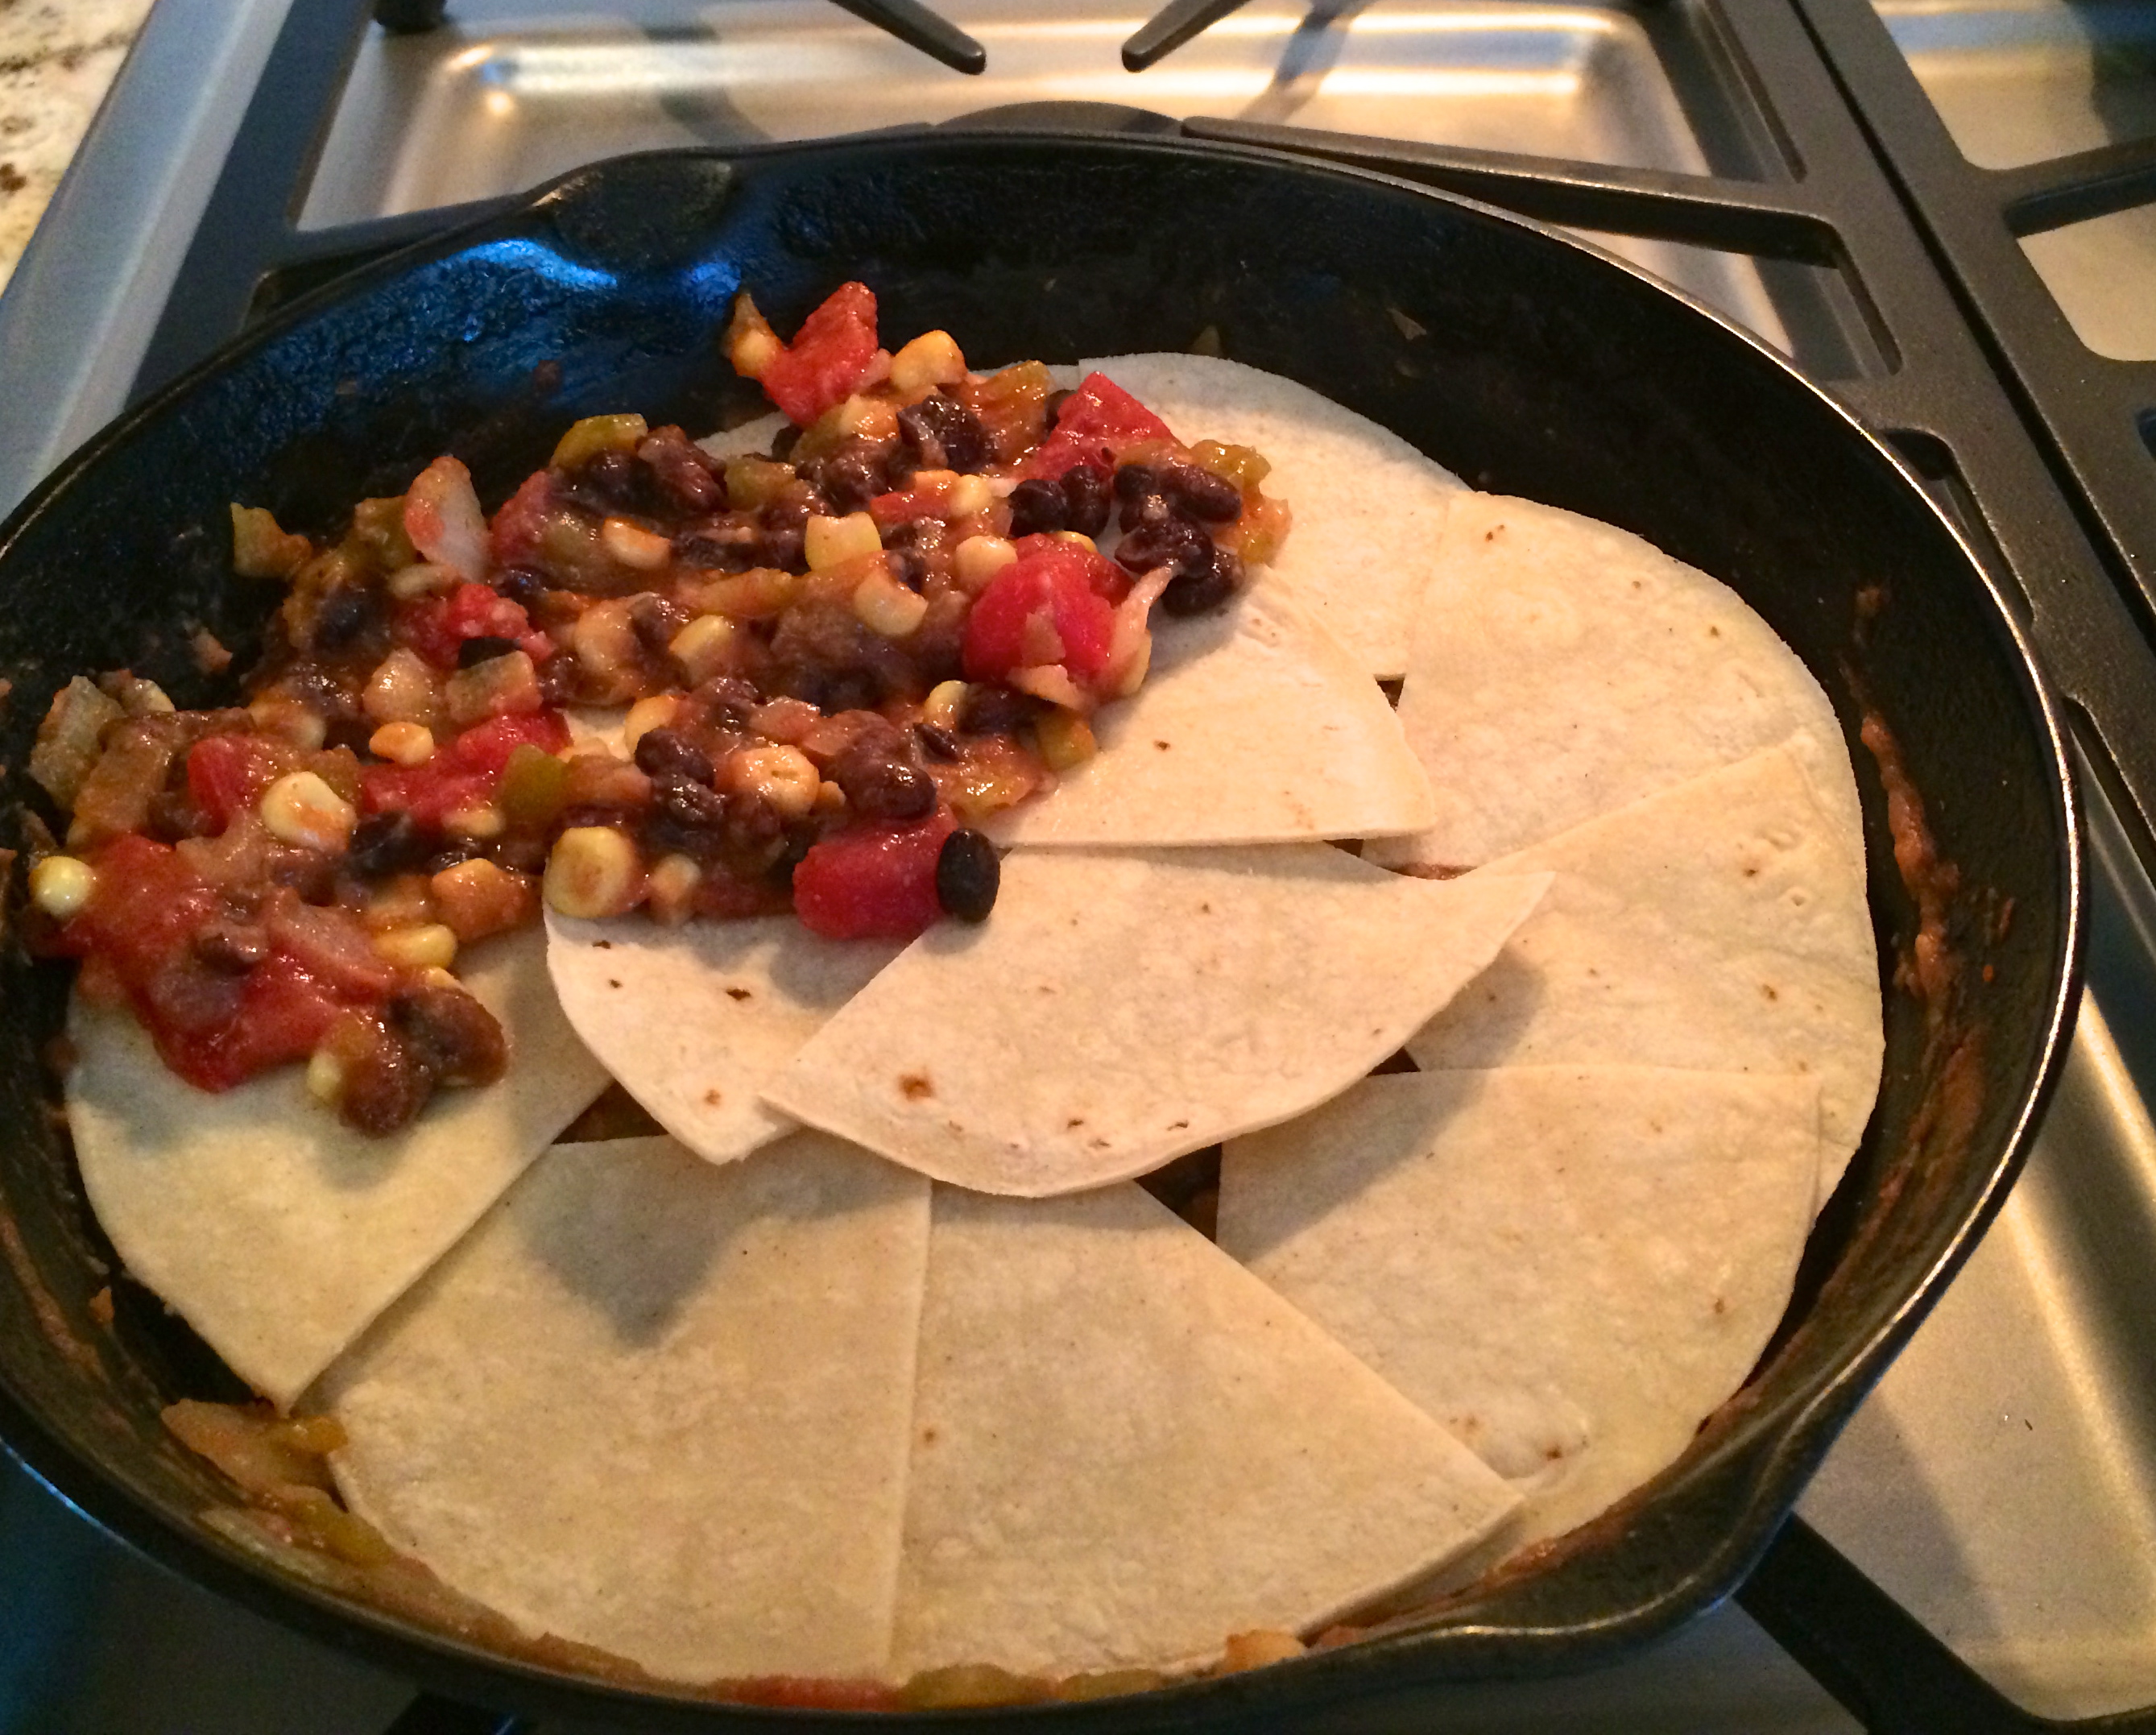
Then arrange half of those tortilla’s that you cut in quarters to cover the bean mixture, overlapping slightly…
Spread half of the remaining bean mixture on top…
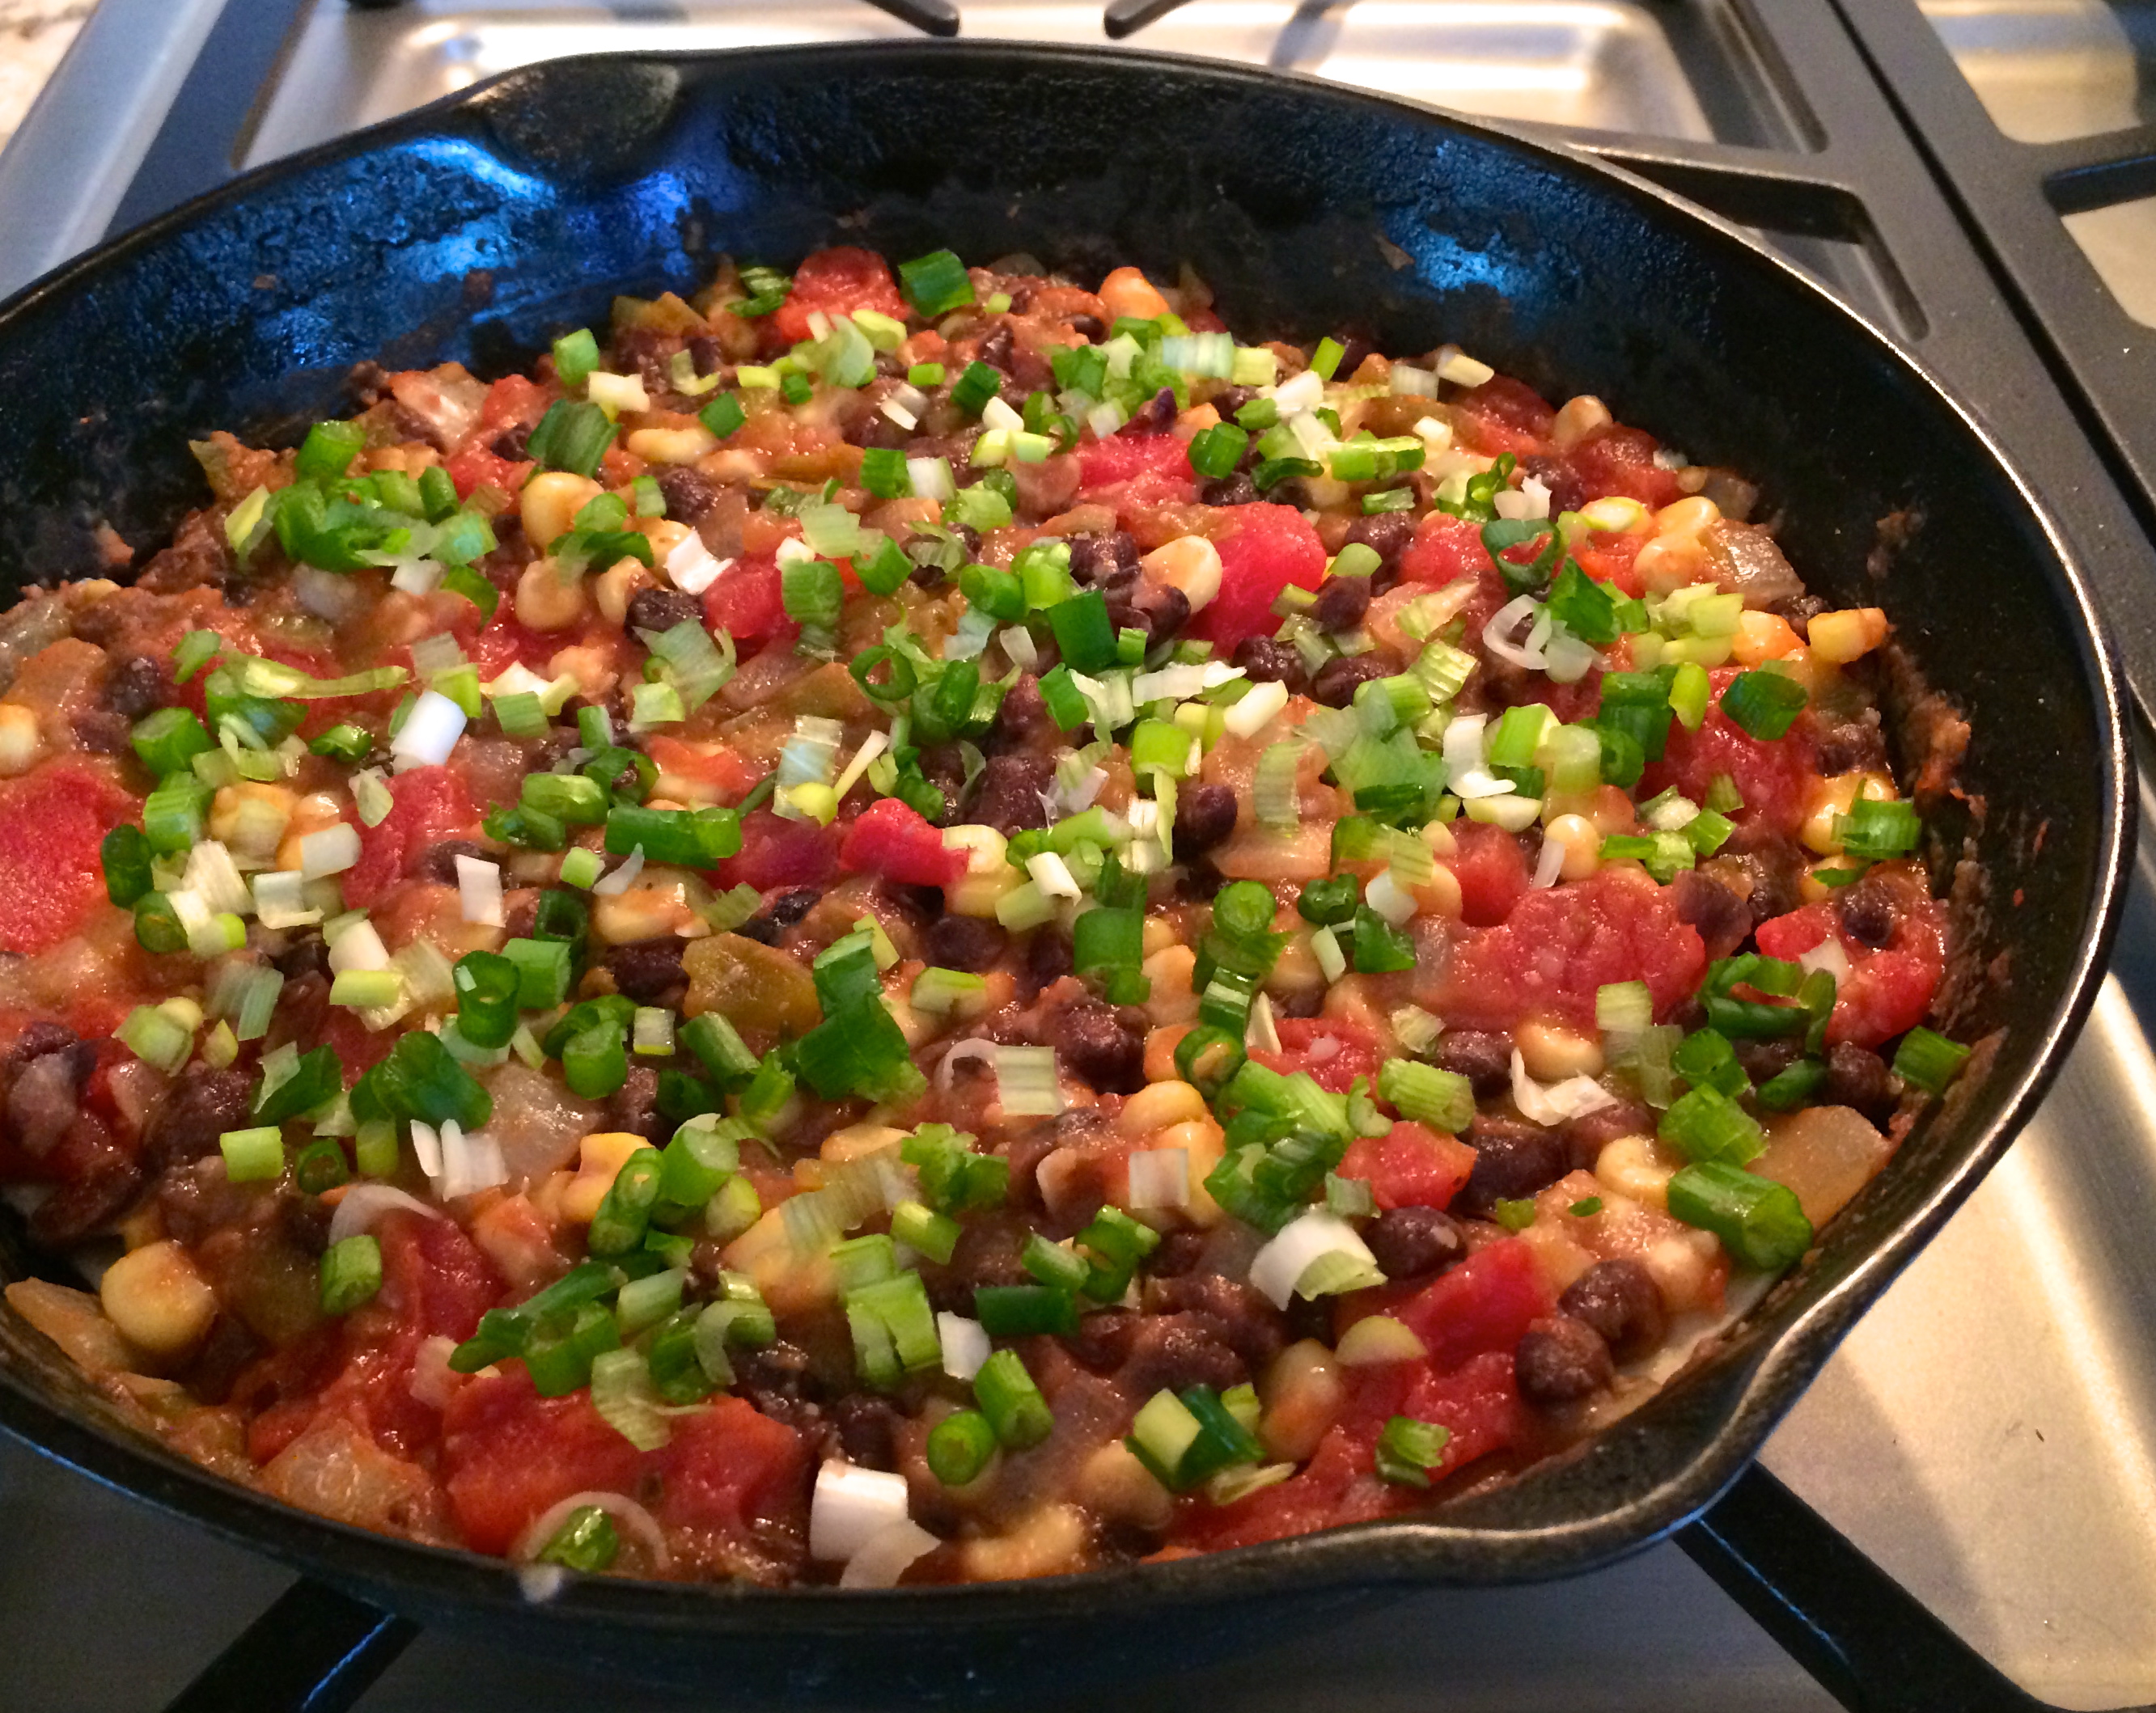
Sprinkle your green onions (all of them)… this seems like a lot of green onions, but its not!

The final layer of tortilla’s…
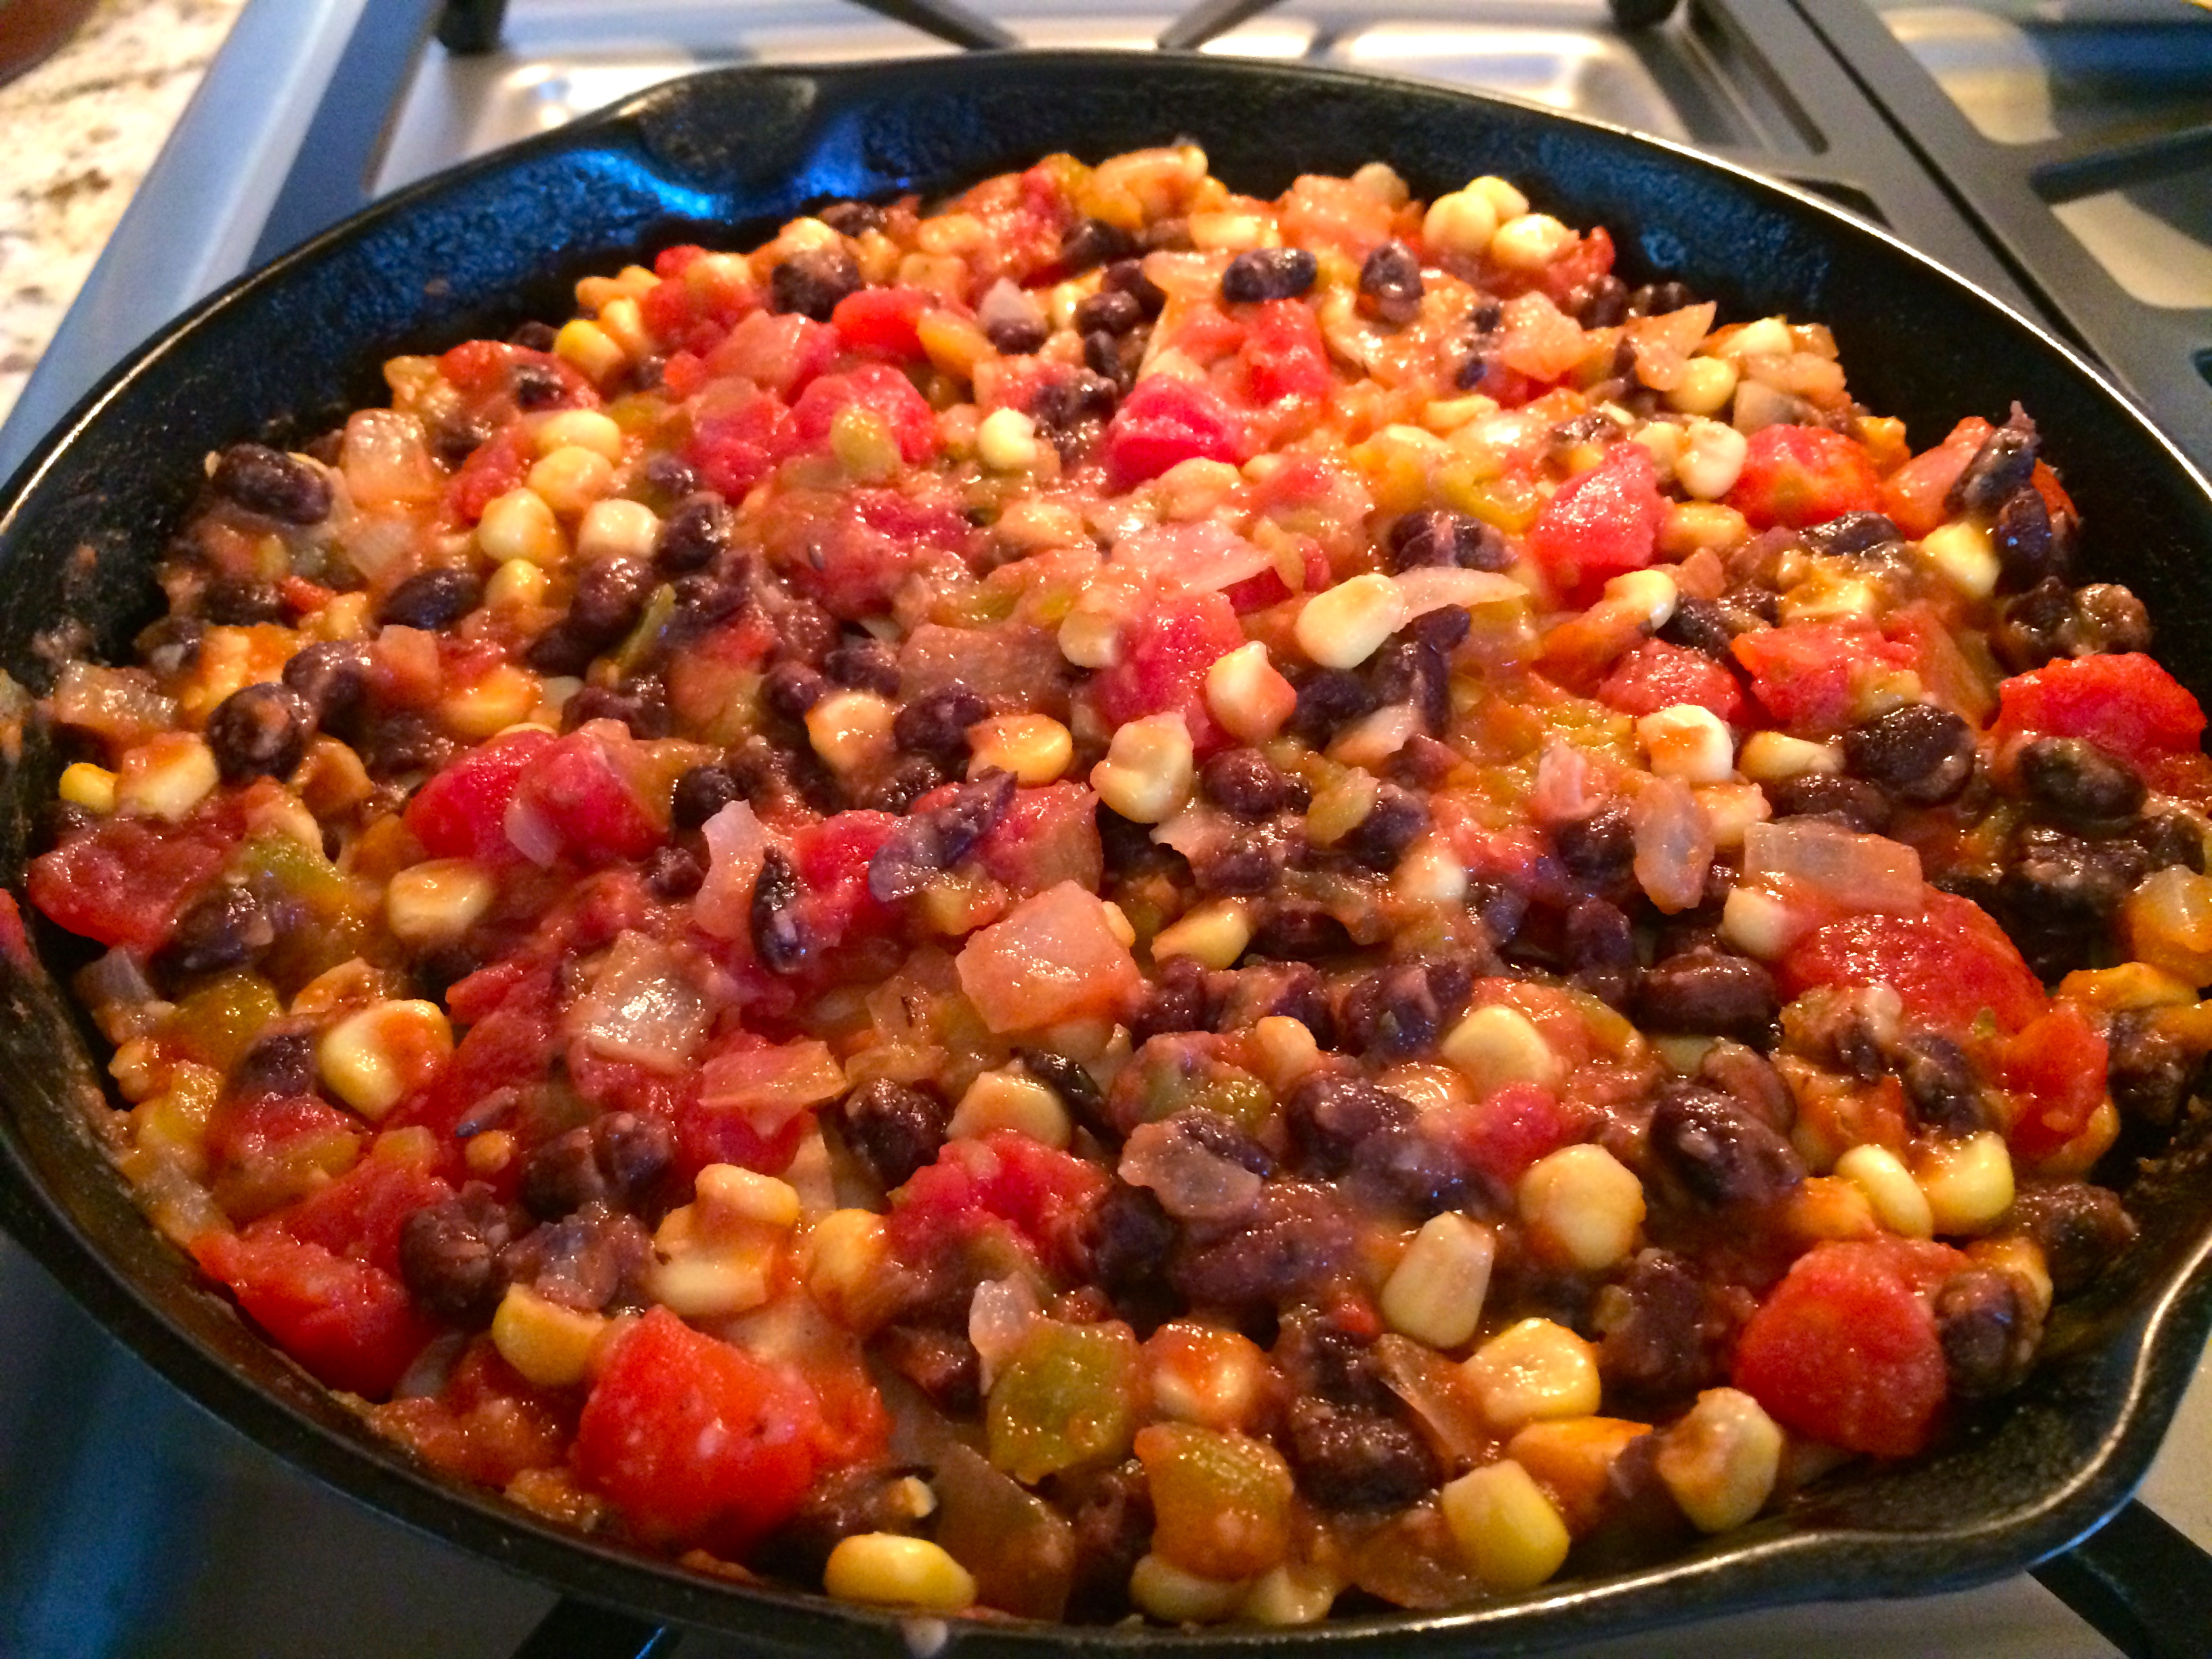
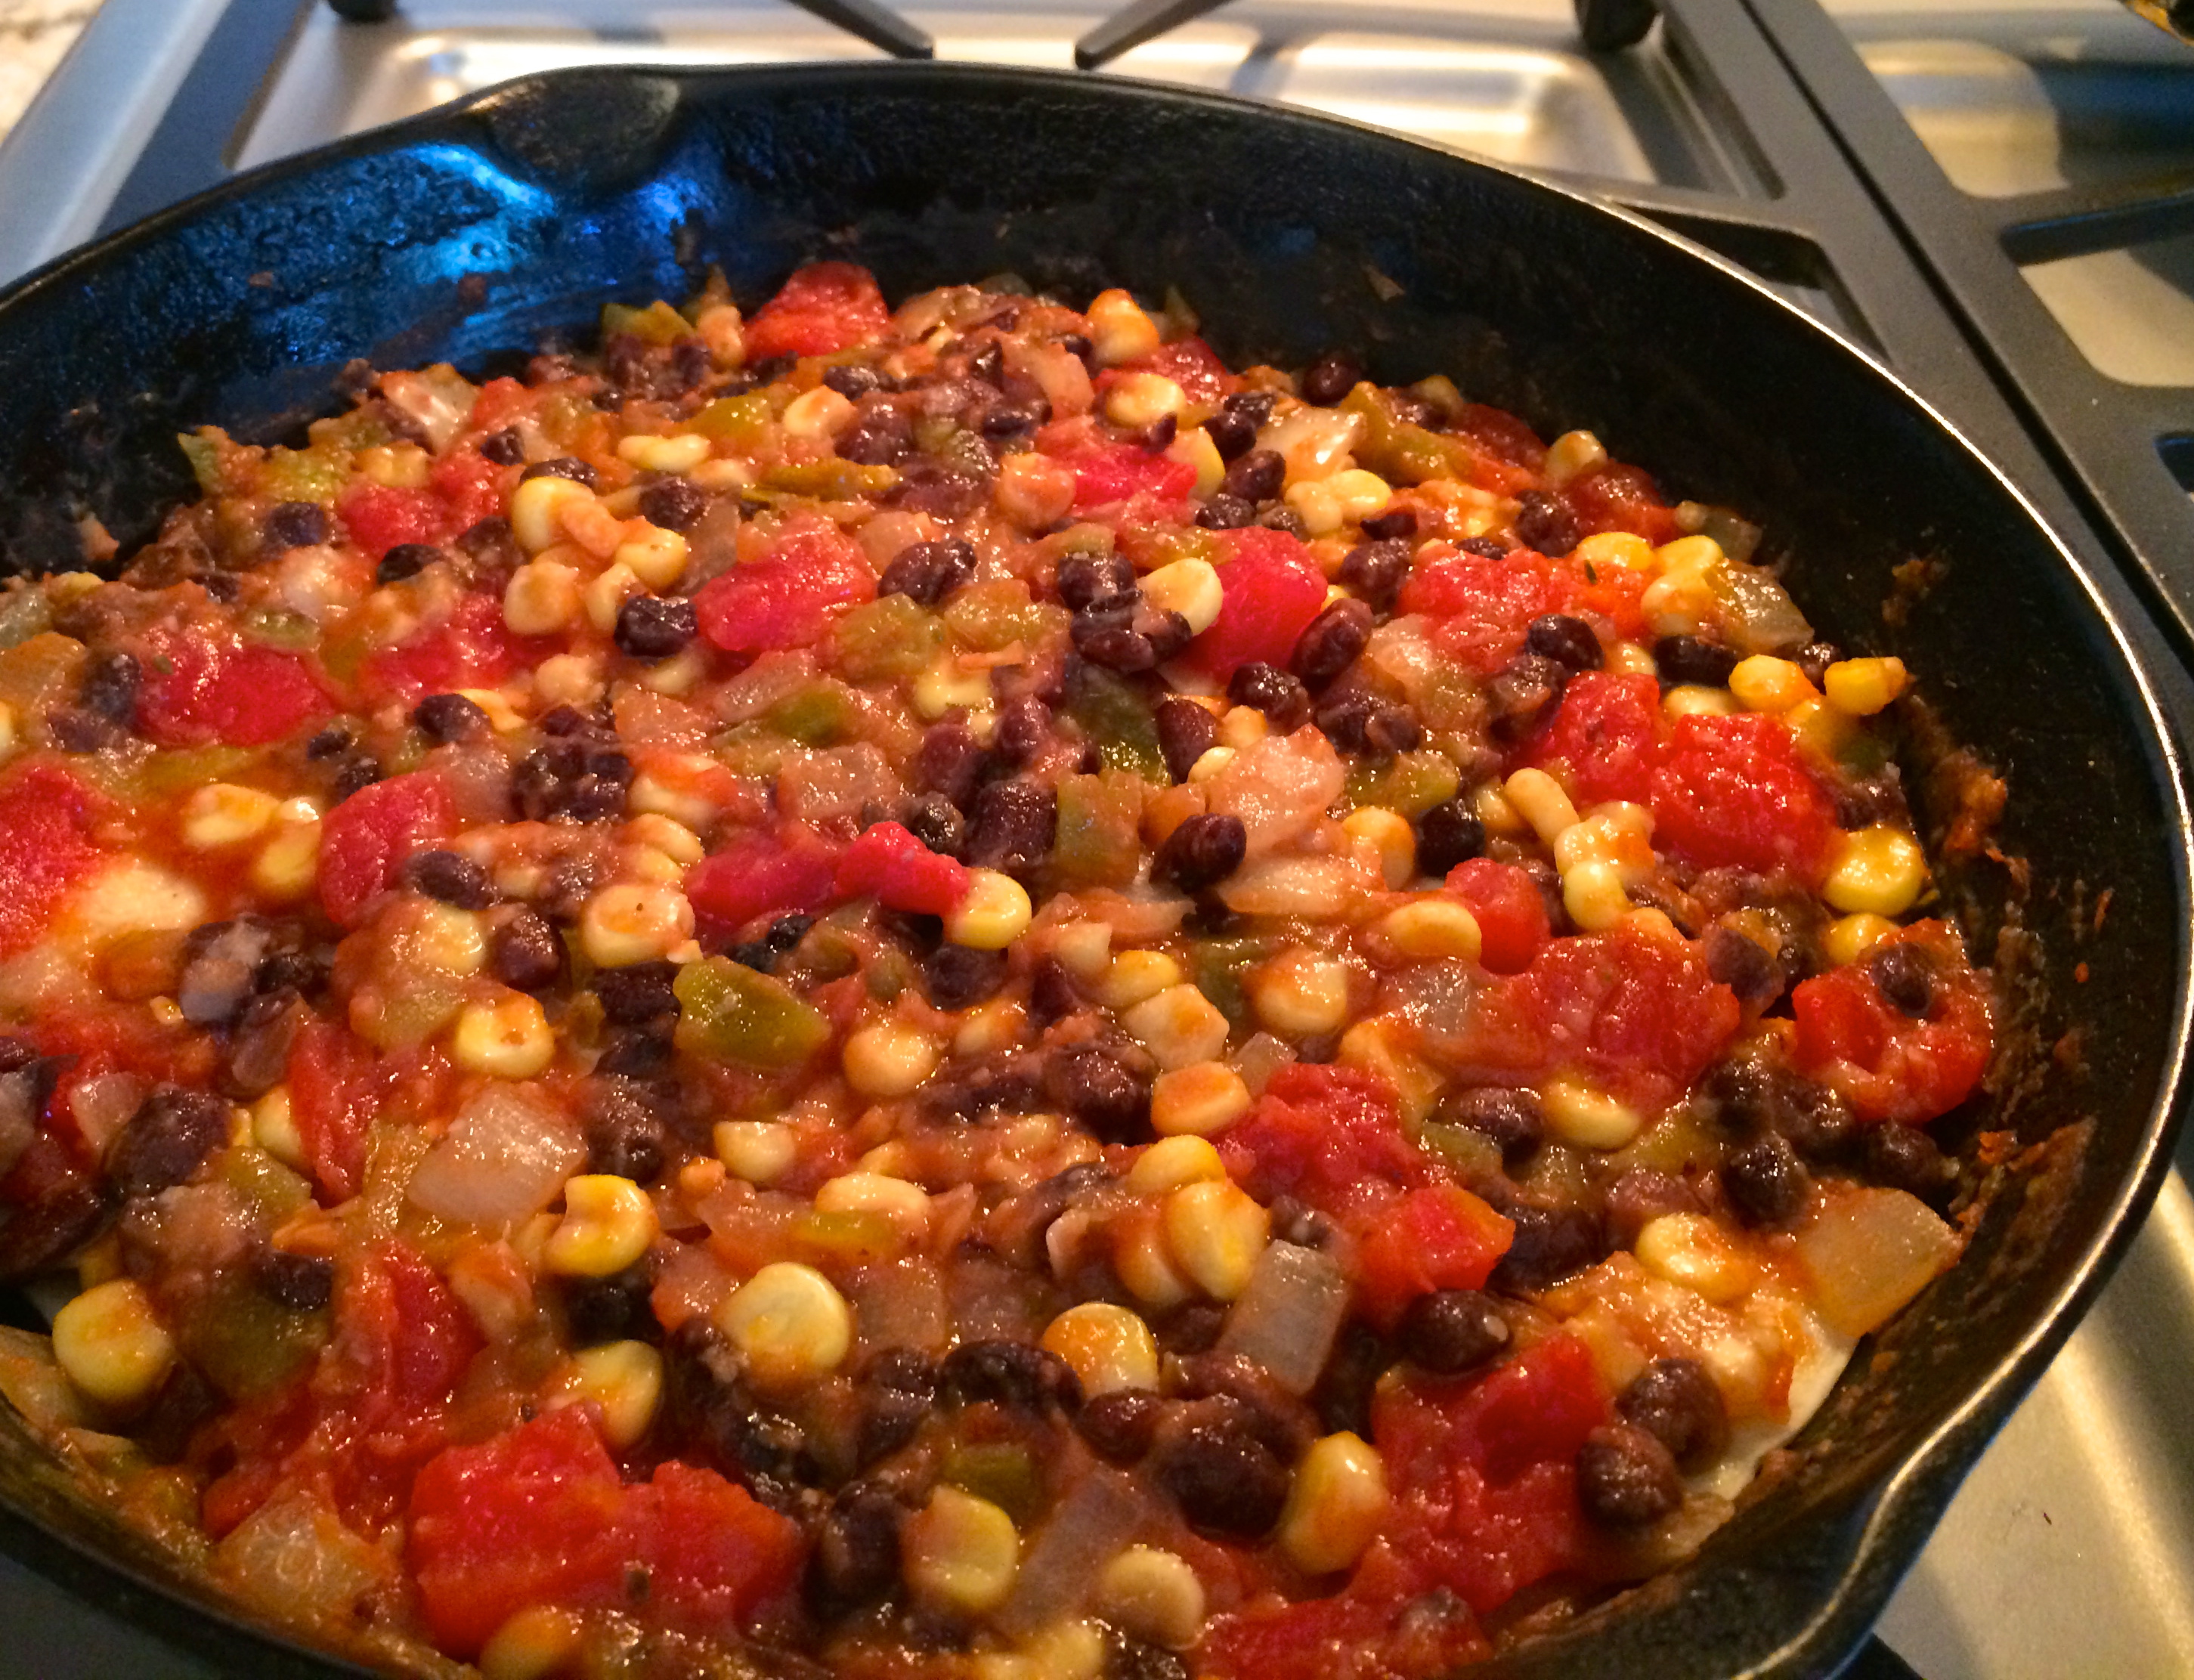
The rest of the bean mixture…
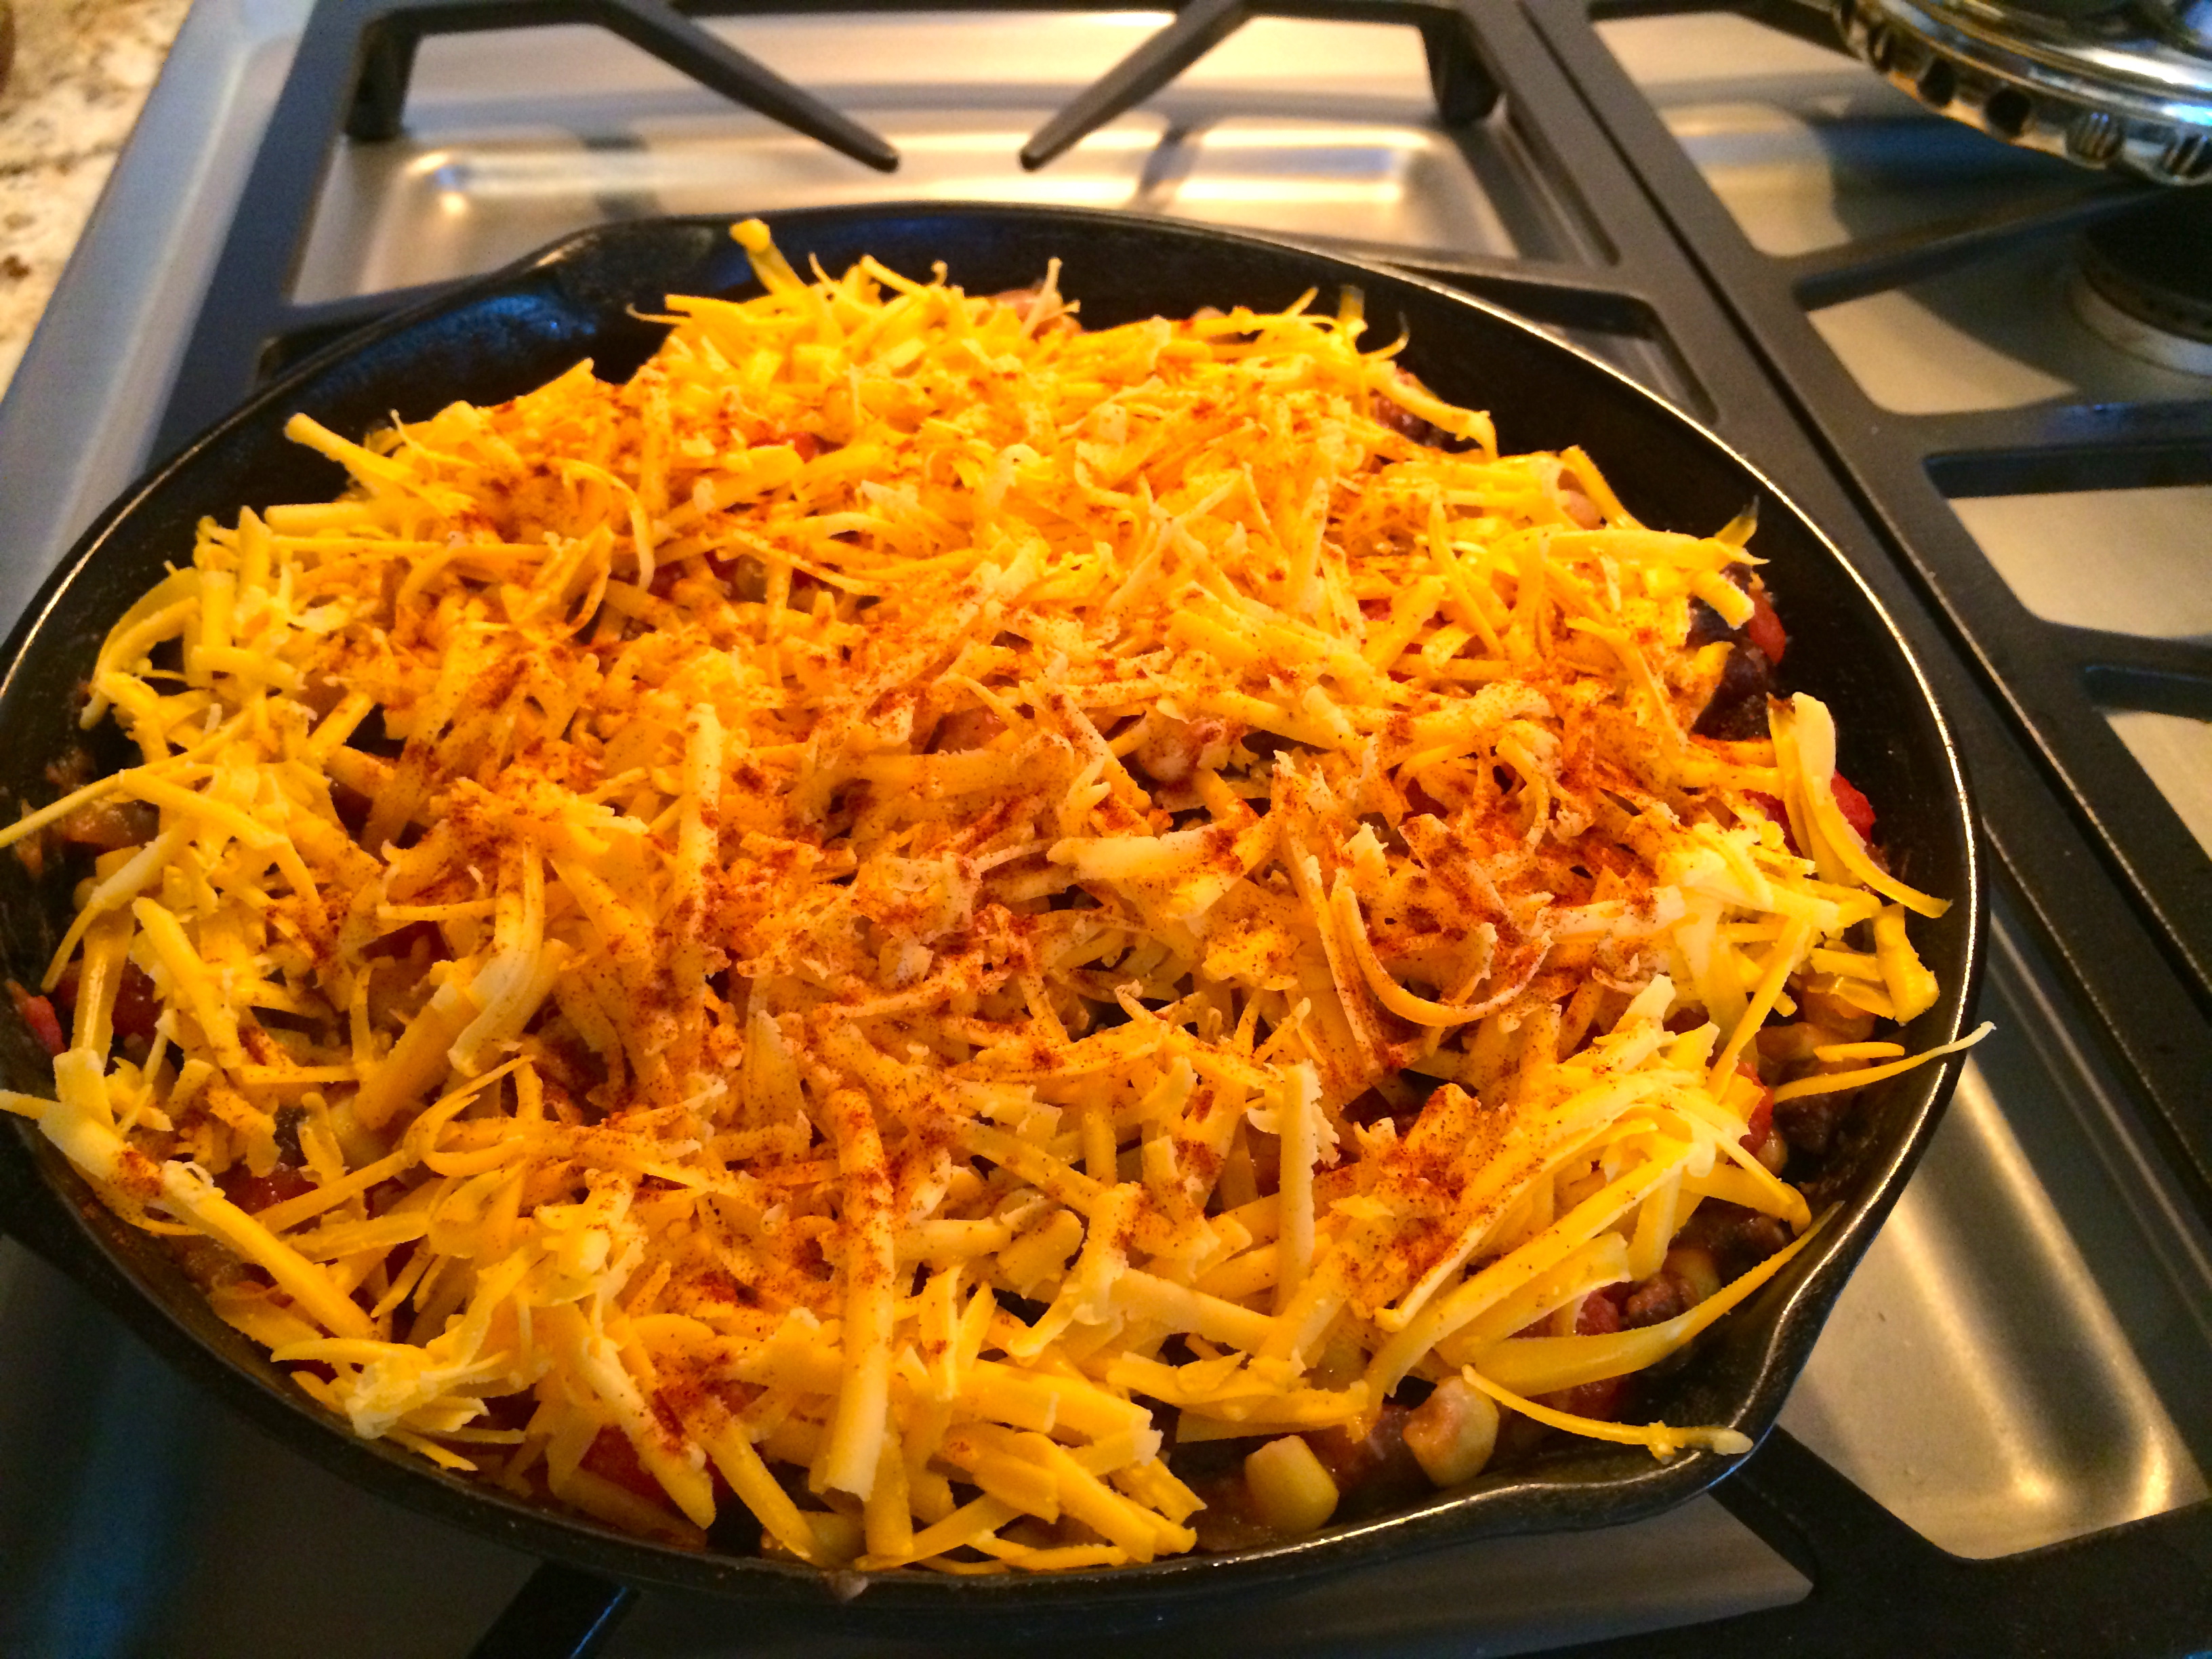
Sprinkle the cheese… whoa? Is this 1/2 cup? Oops ;) Sprinkle with paprika.
Bake at 375 for 30 minutes or until throughly heated. Remove from oven and LET STAND 10 MINUTES.
Notice what photo is missing?? Sigh… when will I learn? I’m so excited when it comes out of the oven. I dish it up, make it look beautiful… and then… EAT IT!
Next time… ;)
Catch you back here tomorrow!
F L A S H B A C K !
O n e Y e a r A g o: Featured Artist… Tom Hughes!
T w o Y e a r s A g o: Meggett Sunset
T h r e e Y e a r s A g o: Taco Boy – Charleston, SC