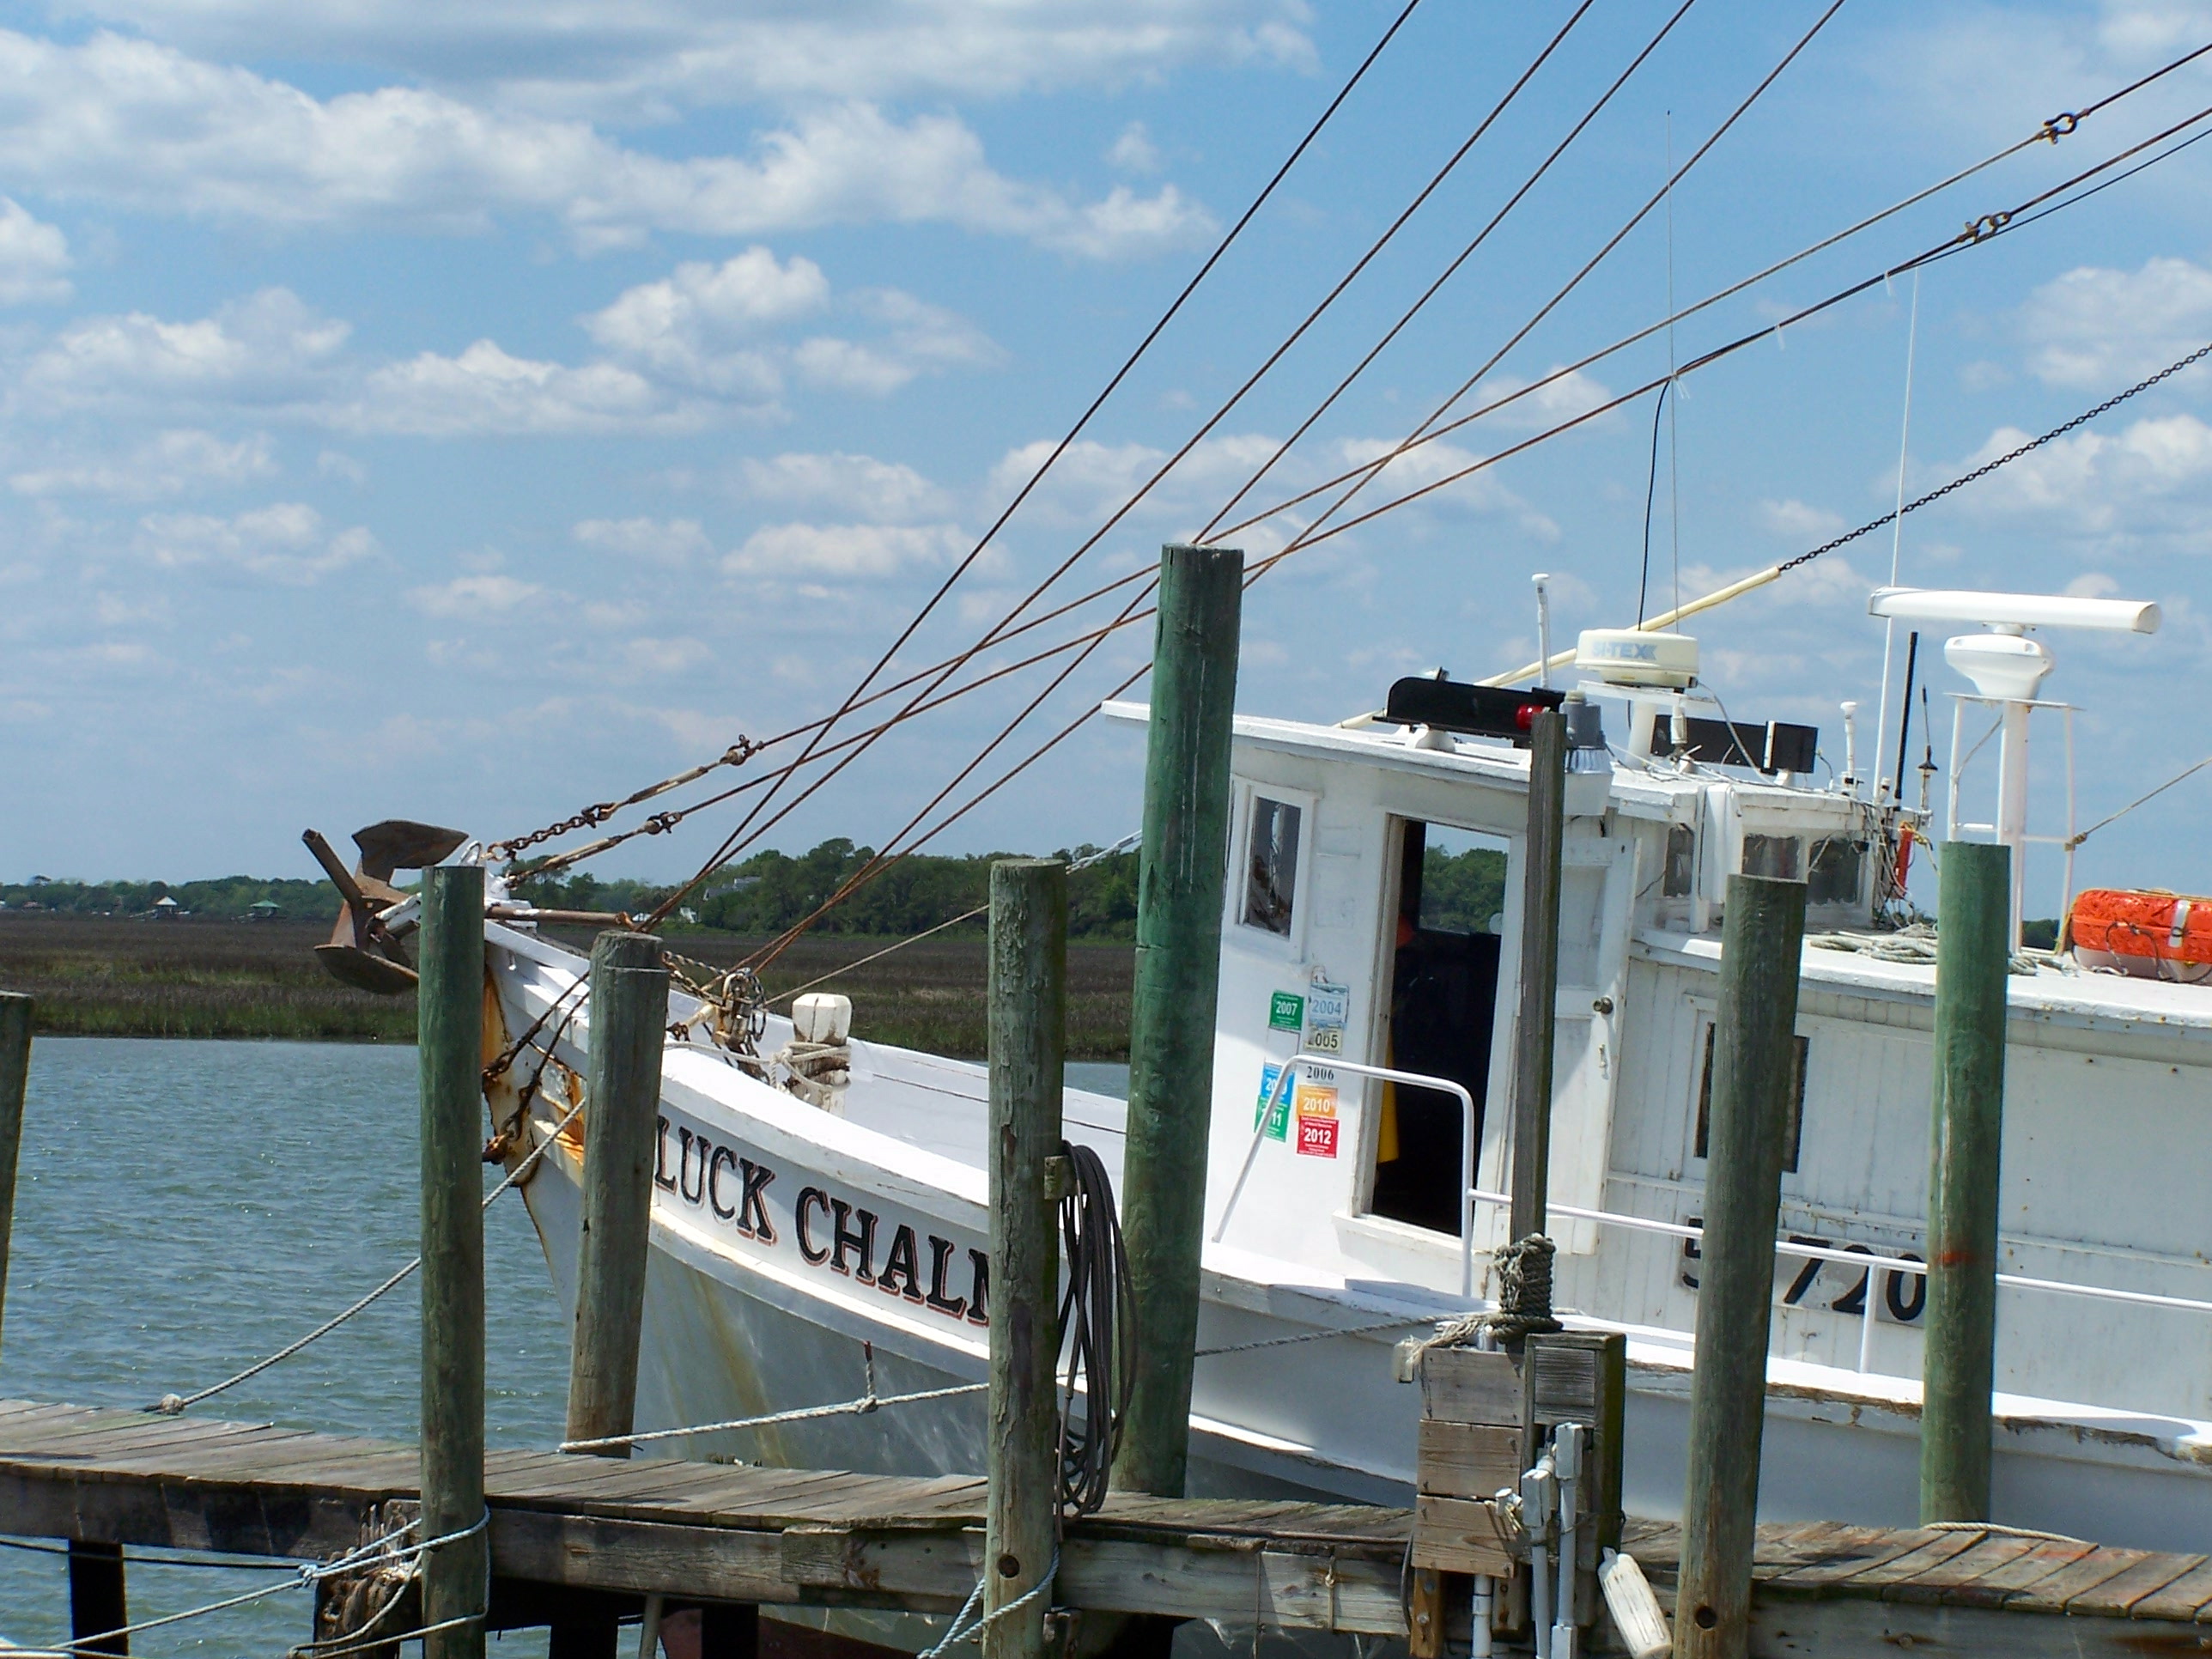
There is nothing better than the deck party at Crosby’s Seafood… where you can grab a plate of fried shrimp and sit on the dock… its a great time especially around the time of sunset when you can get some amazing photographs! This photo happened to be taken earlier in the day… Crosby’s has fresh shrimp, fish and oysters as well as bait, beer and ice! Check it out if you’re in the area!
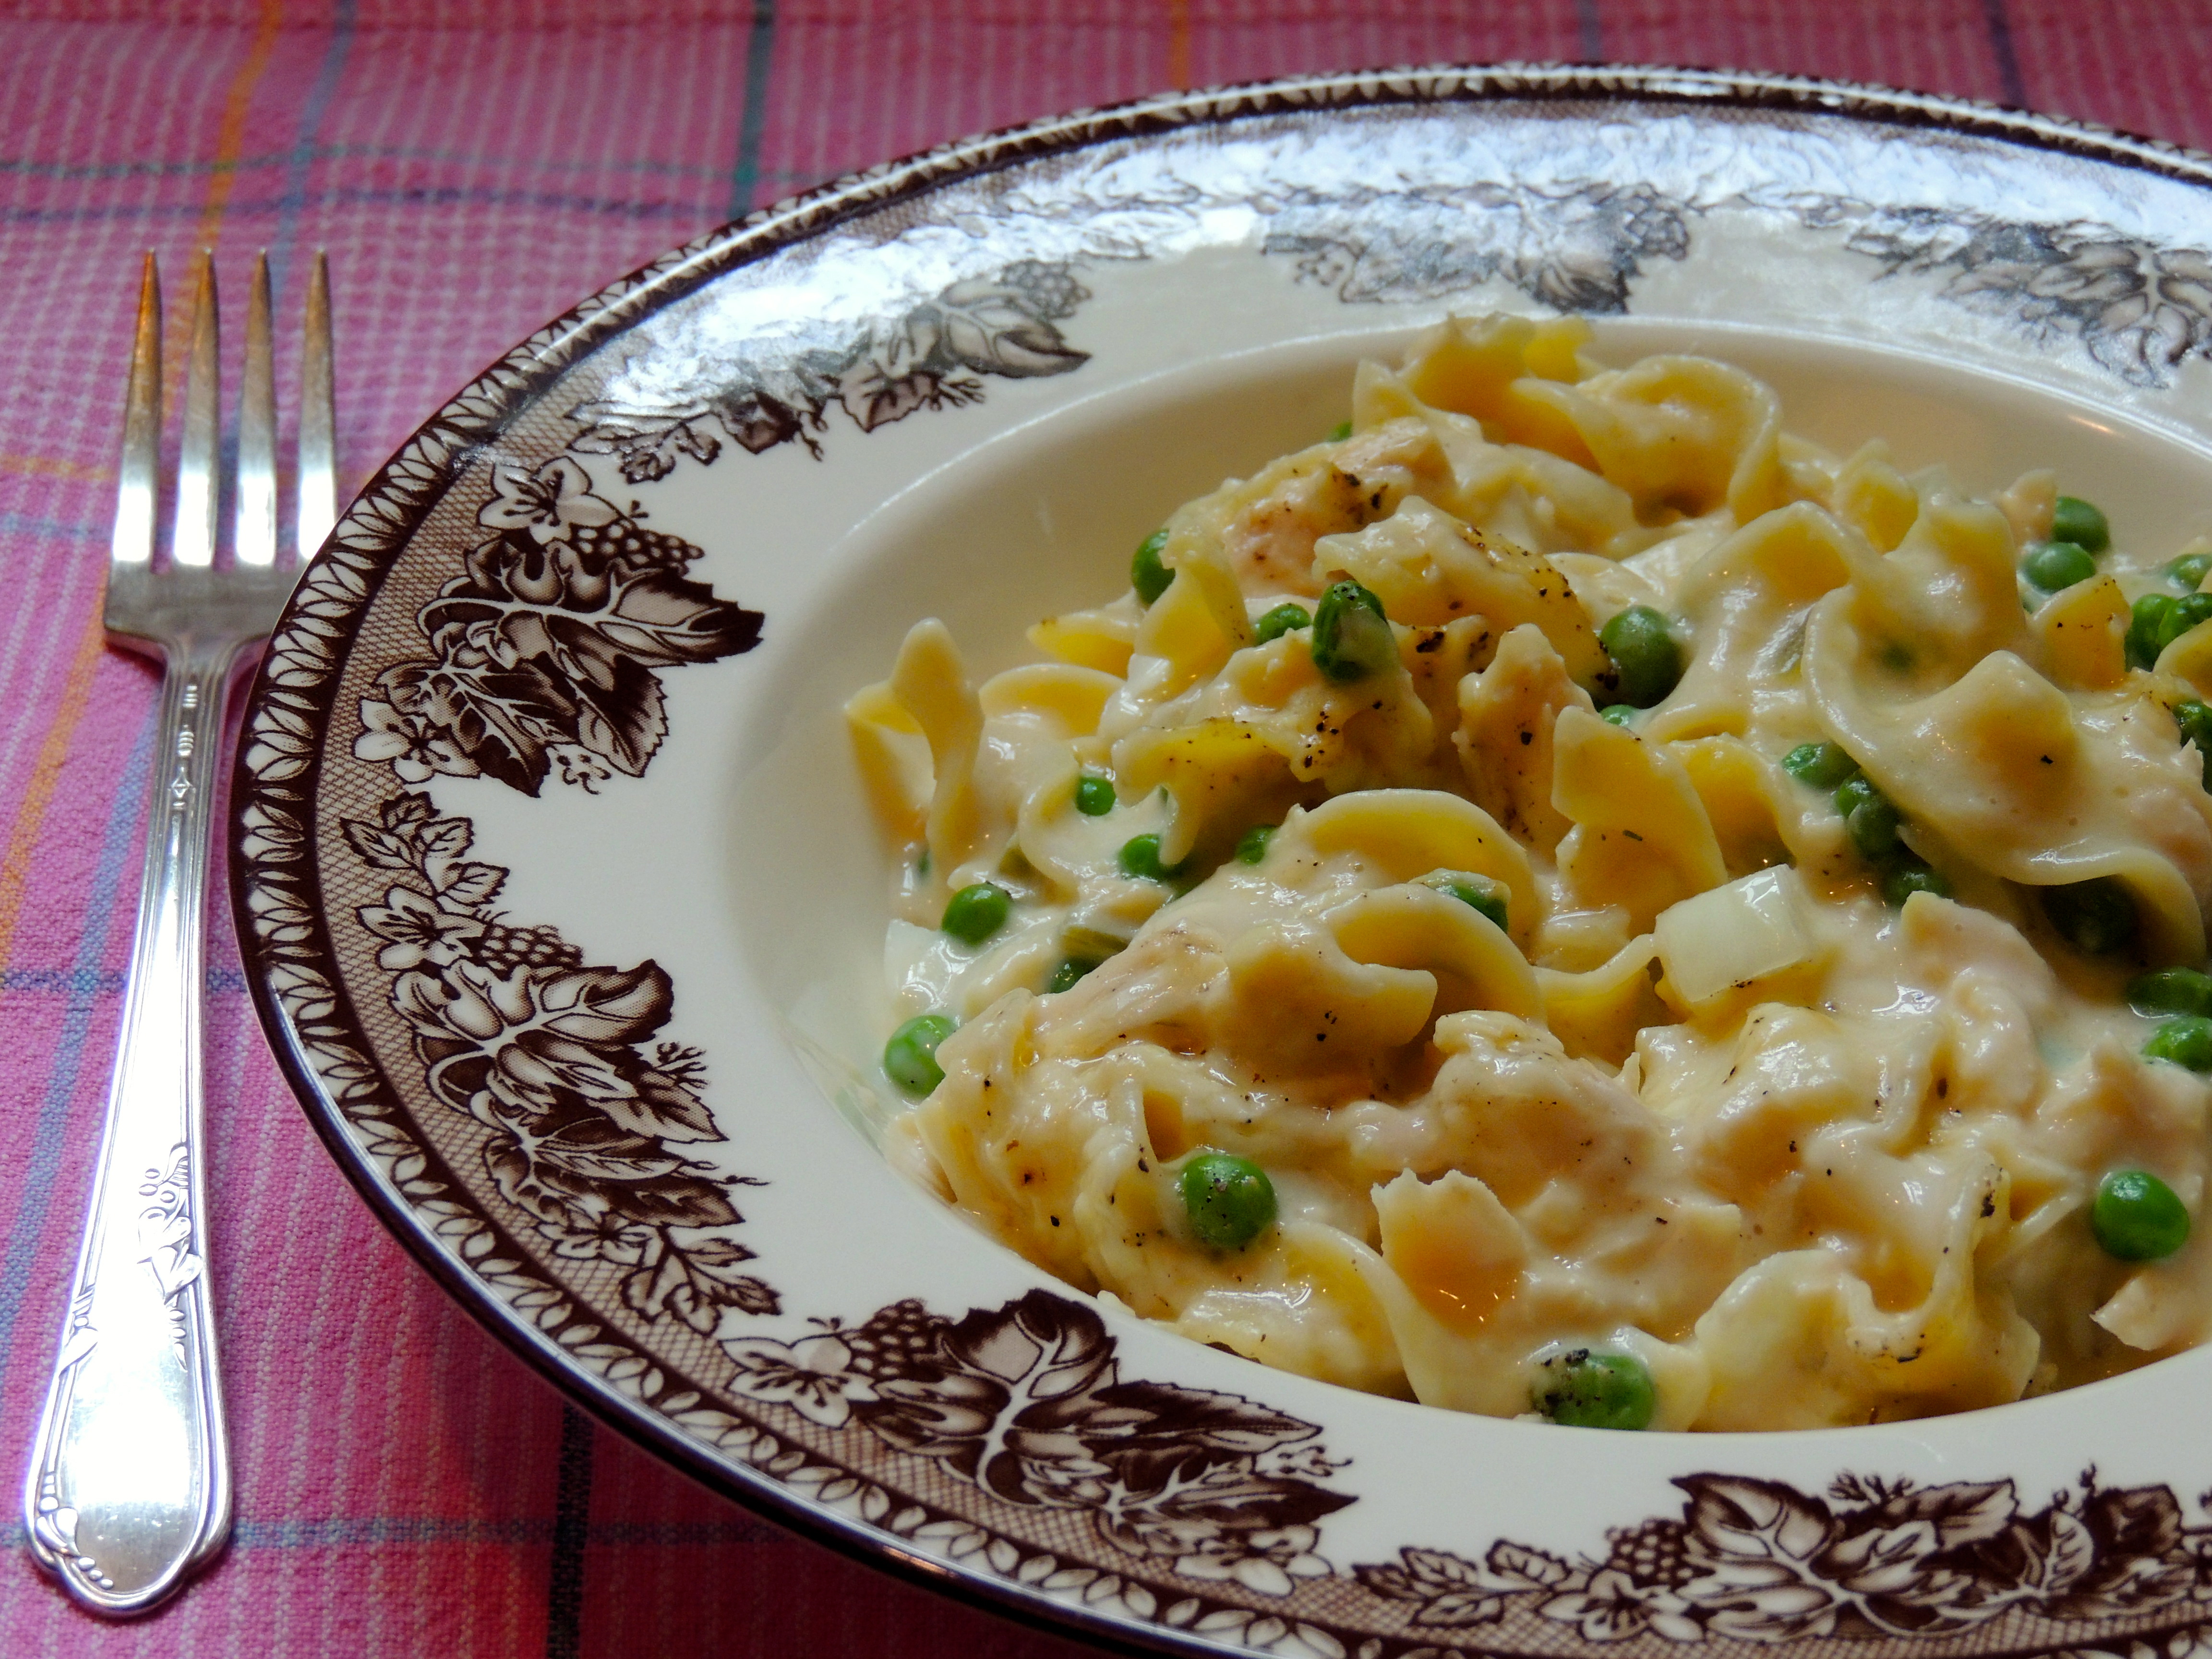
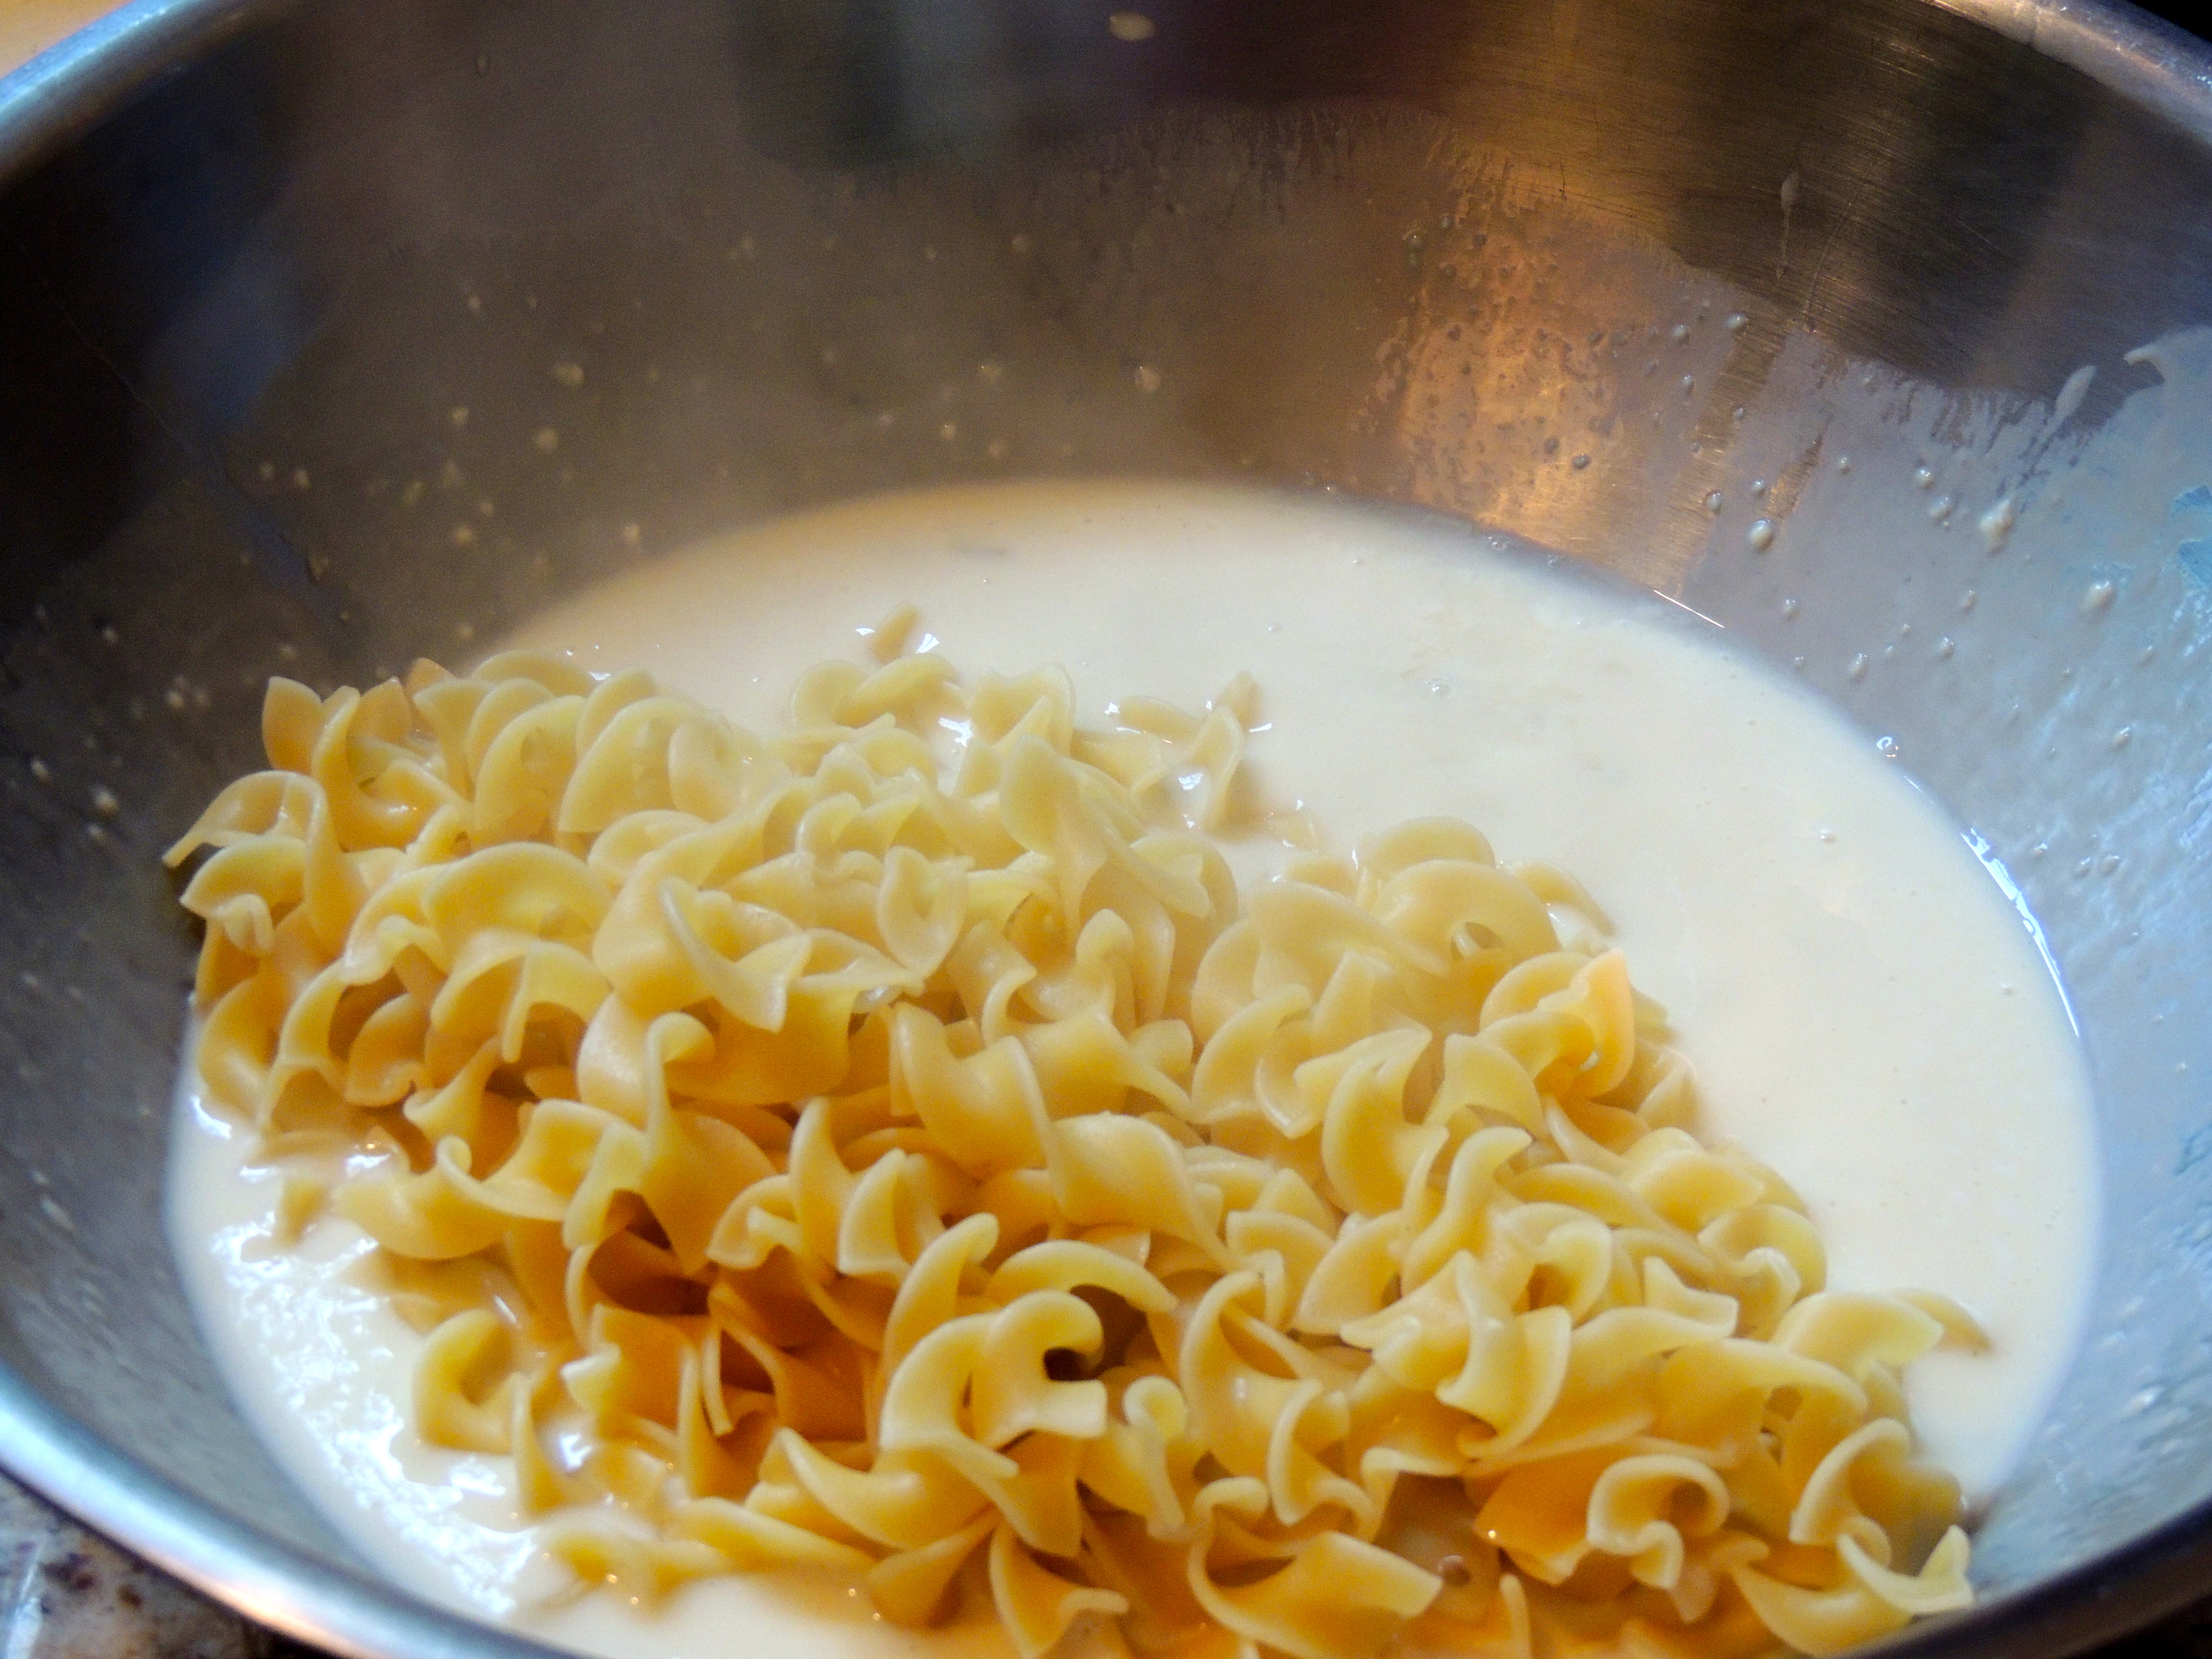
Tuna Casserole! Creamy (above) bake with lid, or bake without the lid for less creamy…
Don’t laugh! This is the ultimate in comfort food and sometimes its just what you need! I remember this from when I was a kid and I still love it to this day! One weekend Fred and I were brainstorming what to make for the week for dinner… I said TUNA CASSEROLE… Ick, pew, nasty and a bunch of other words popped out of his mouth… What? That’s when I realized the entire world did not love this as much as I did. How could that be? I looked up recipes for tuna casserole and the majority do not have cheese. Well… ick, pew, nasty comes to mind! NOW I know why people don’t like it… trust me on this… this will make you smile, it is delicious beyond belief… you can add the peas (or not)… I prefer them on the side… Fred likes them all mixed in… so we make it both ways. Its quick, easy and very good… even better heated up the next day… have this and a salad and you will be happy camper!
6 oz. (½ package) Egg Noodles (I use Manischewitz or Publix brand)
1- 10 ¾ oz can Cream of Celery Soup
1 soup can of Milk (I use 2%)
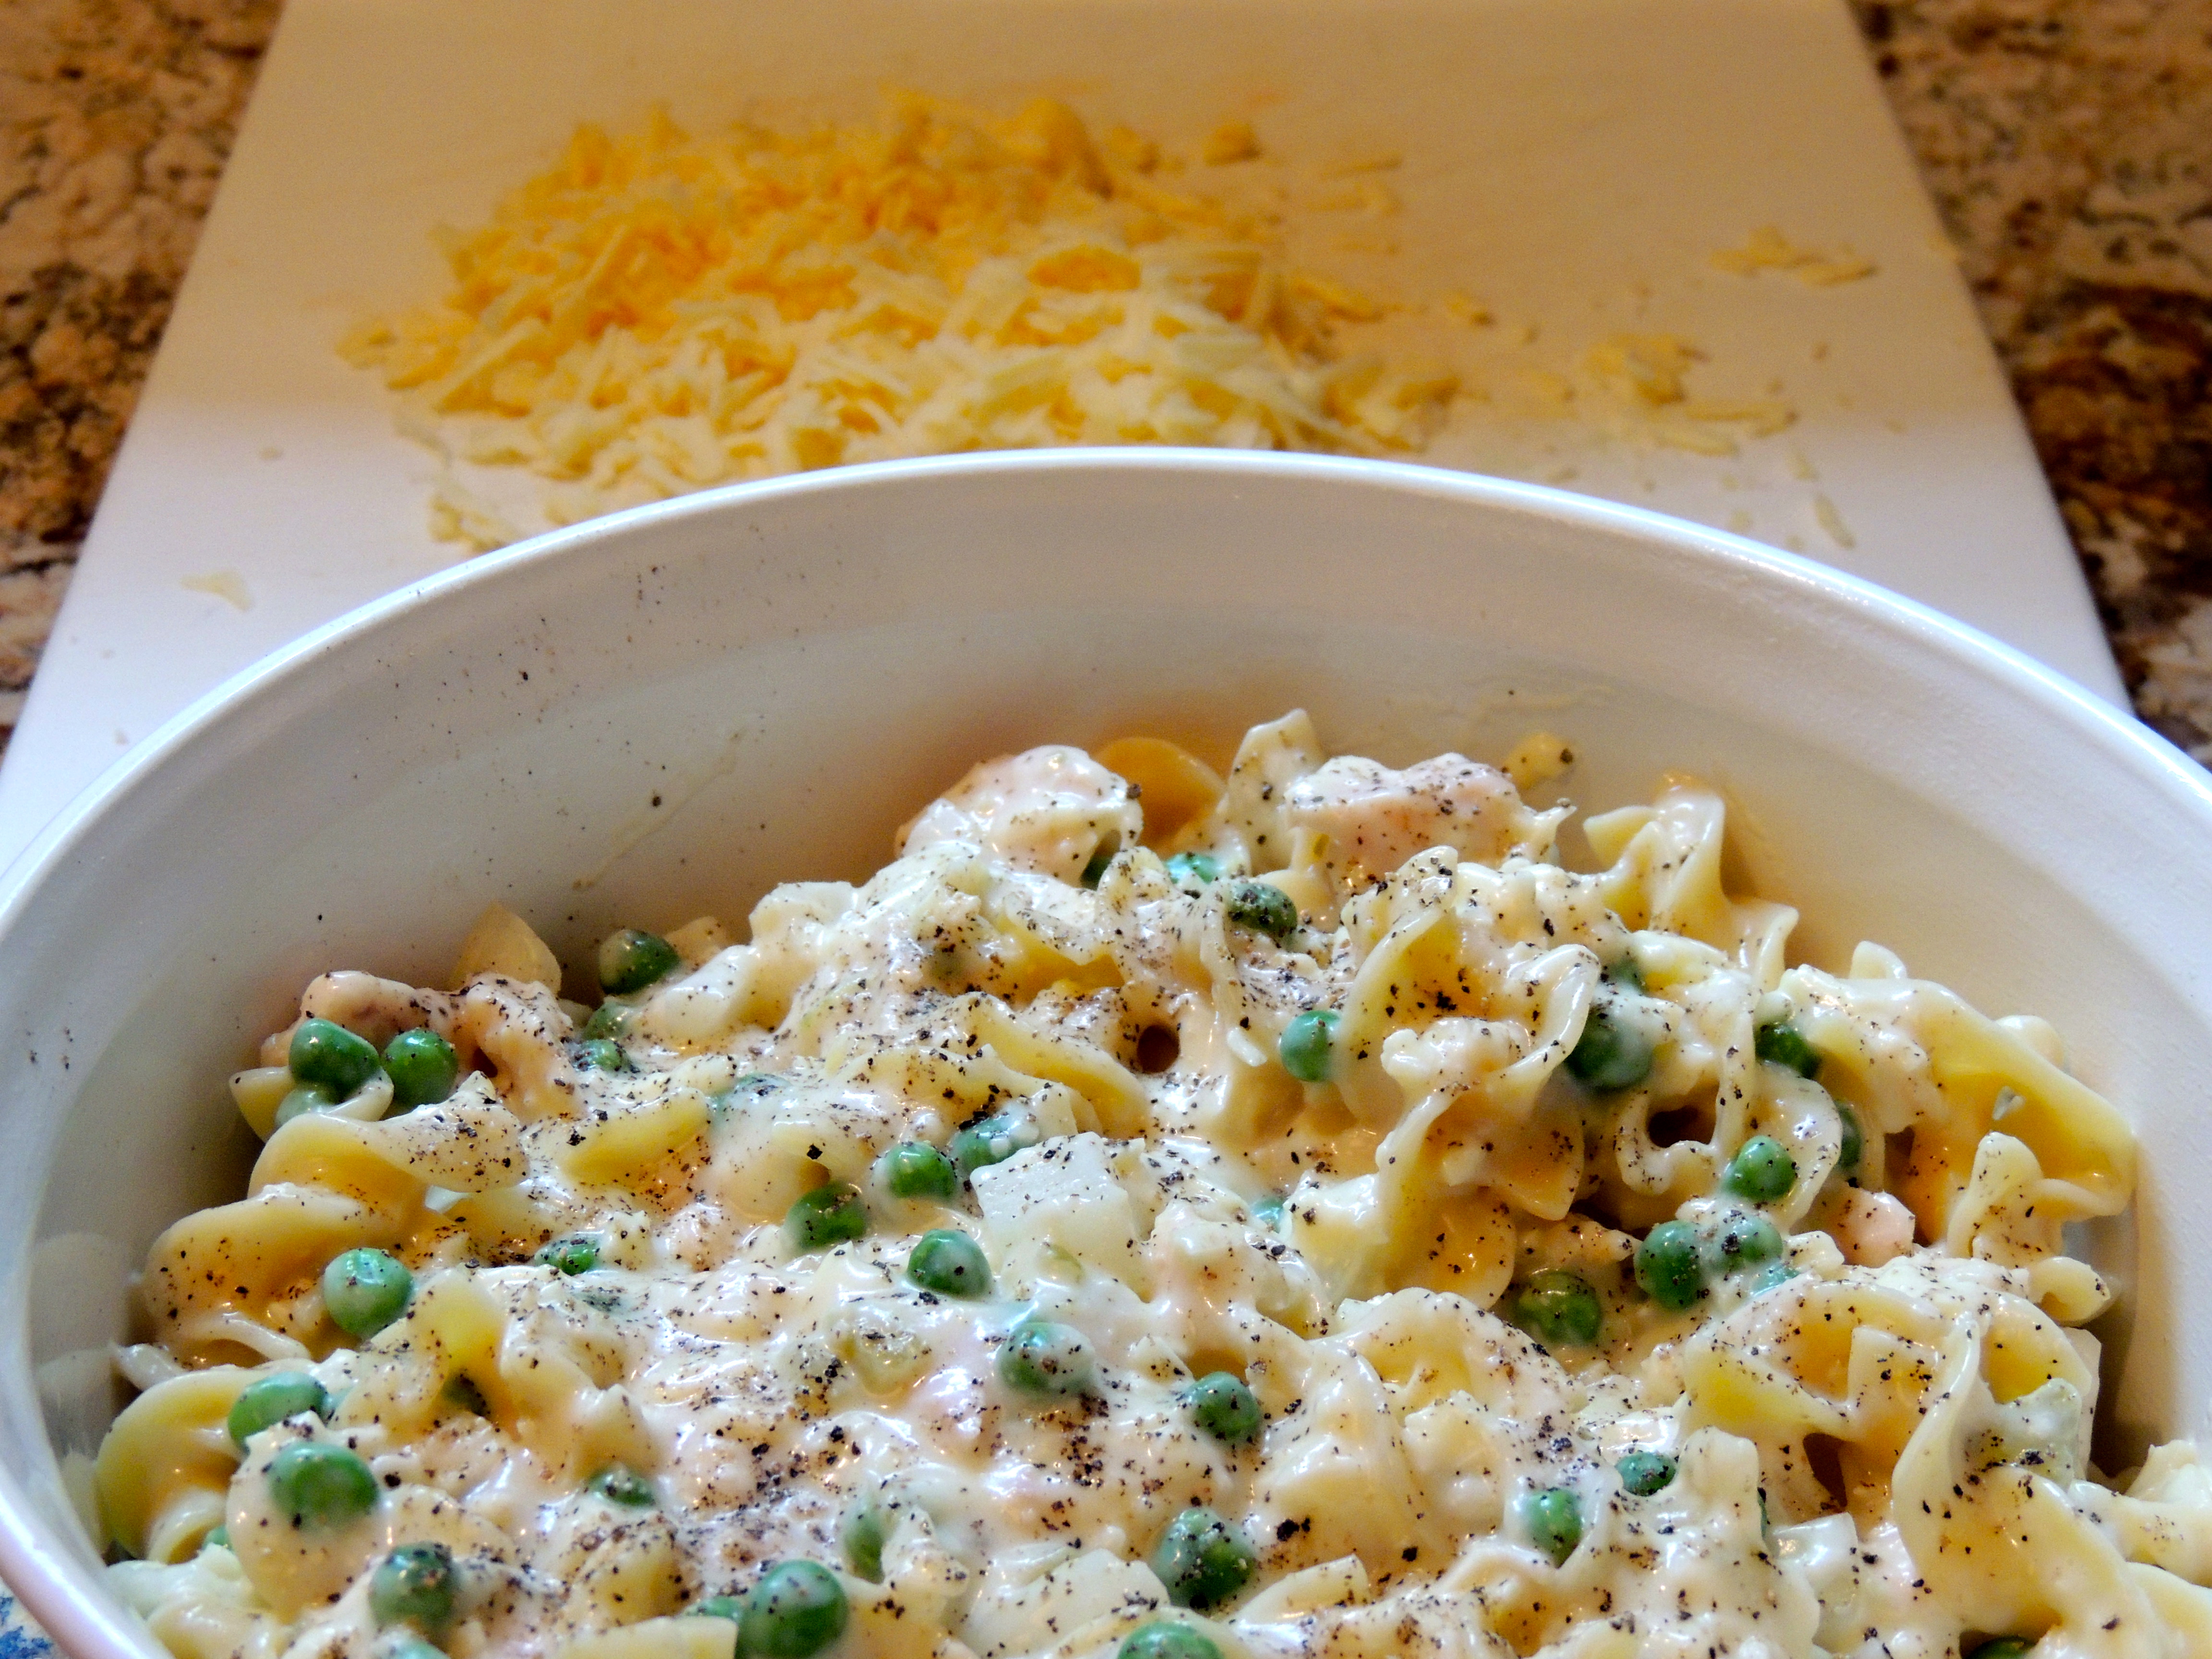
8 oz Cheddar Cheese, shredded (I use Cracker Barrel Extra Sharp 2%)
1 Small Onion, chopped
1 – 7 oz can tuna, drained
Pepper
Baby Peas (optional) – a handful or two
Preheat oven to 350 degrees F.
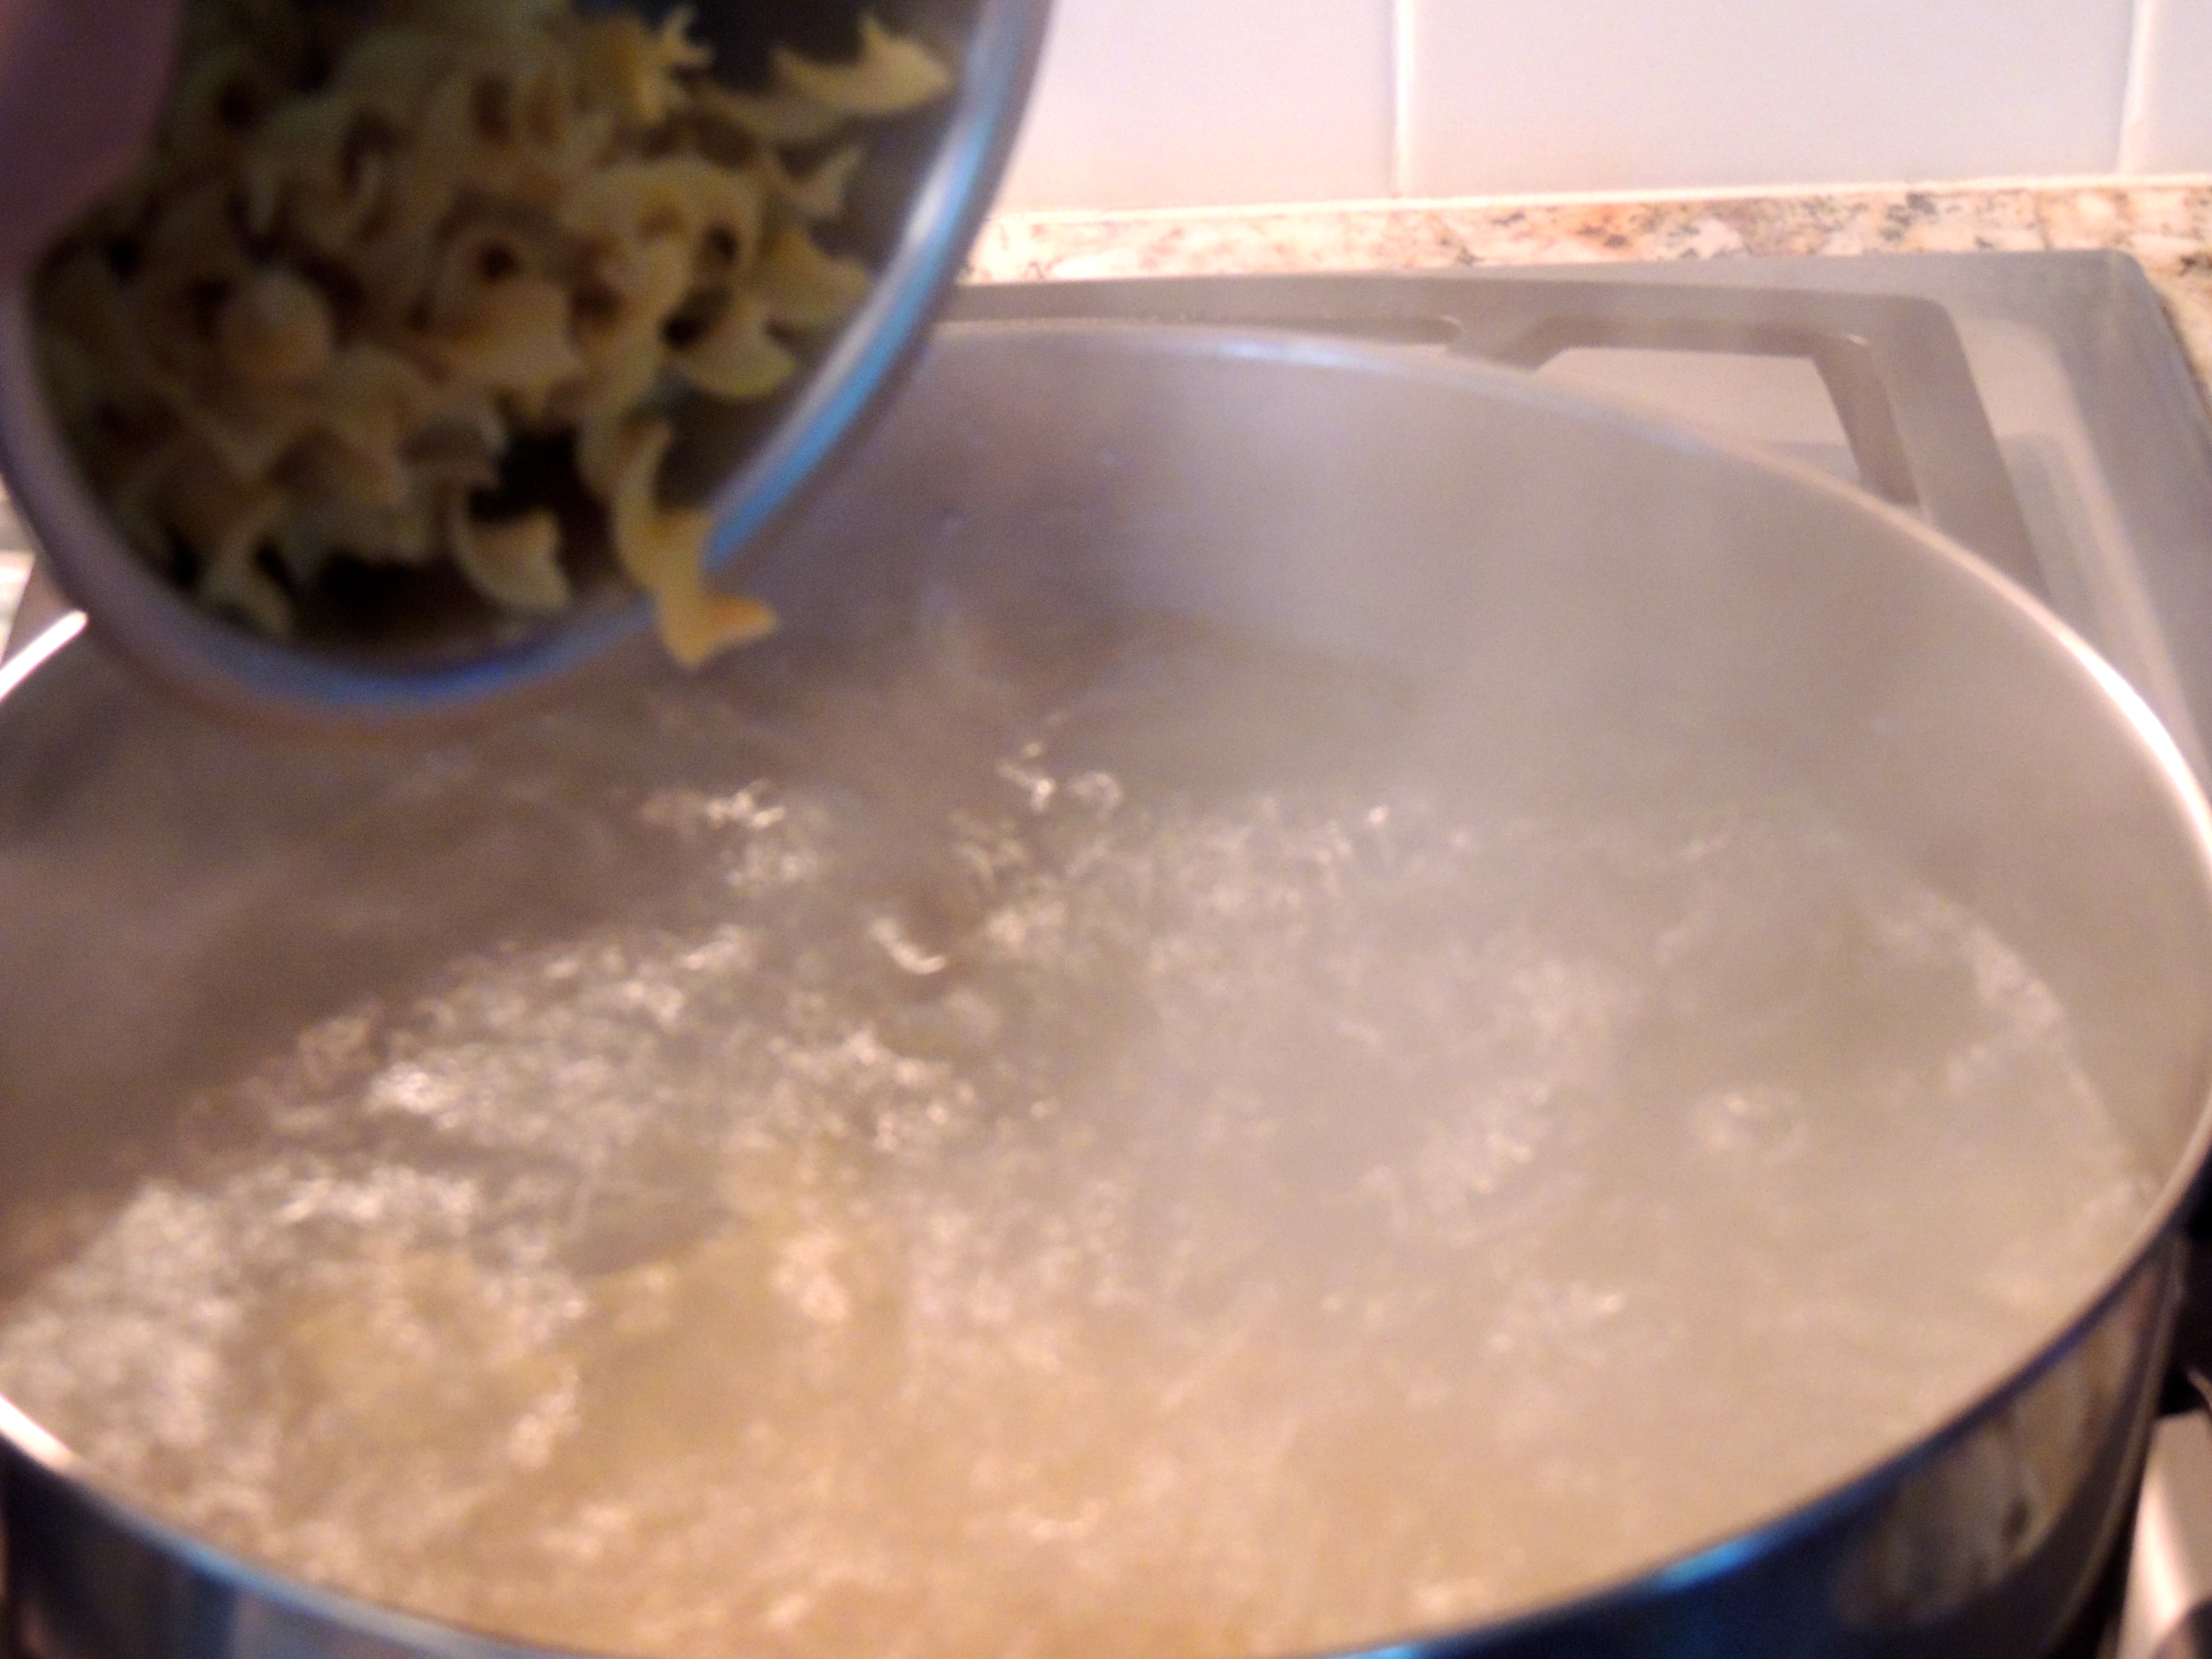
Bring a large pot of water to a boil for the egg noodles…
Boil the noodles…
While the water is getting hot…
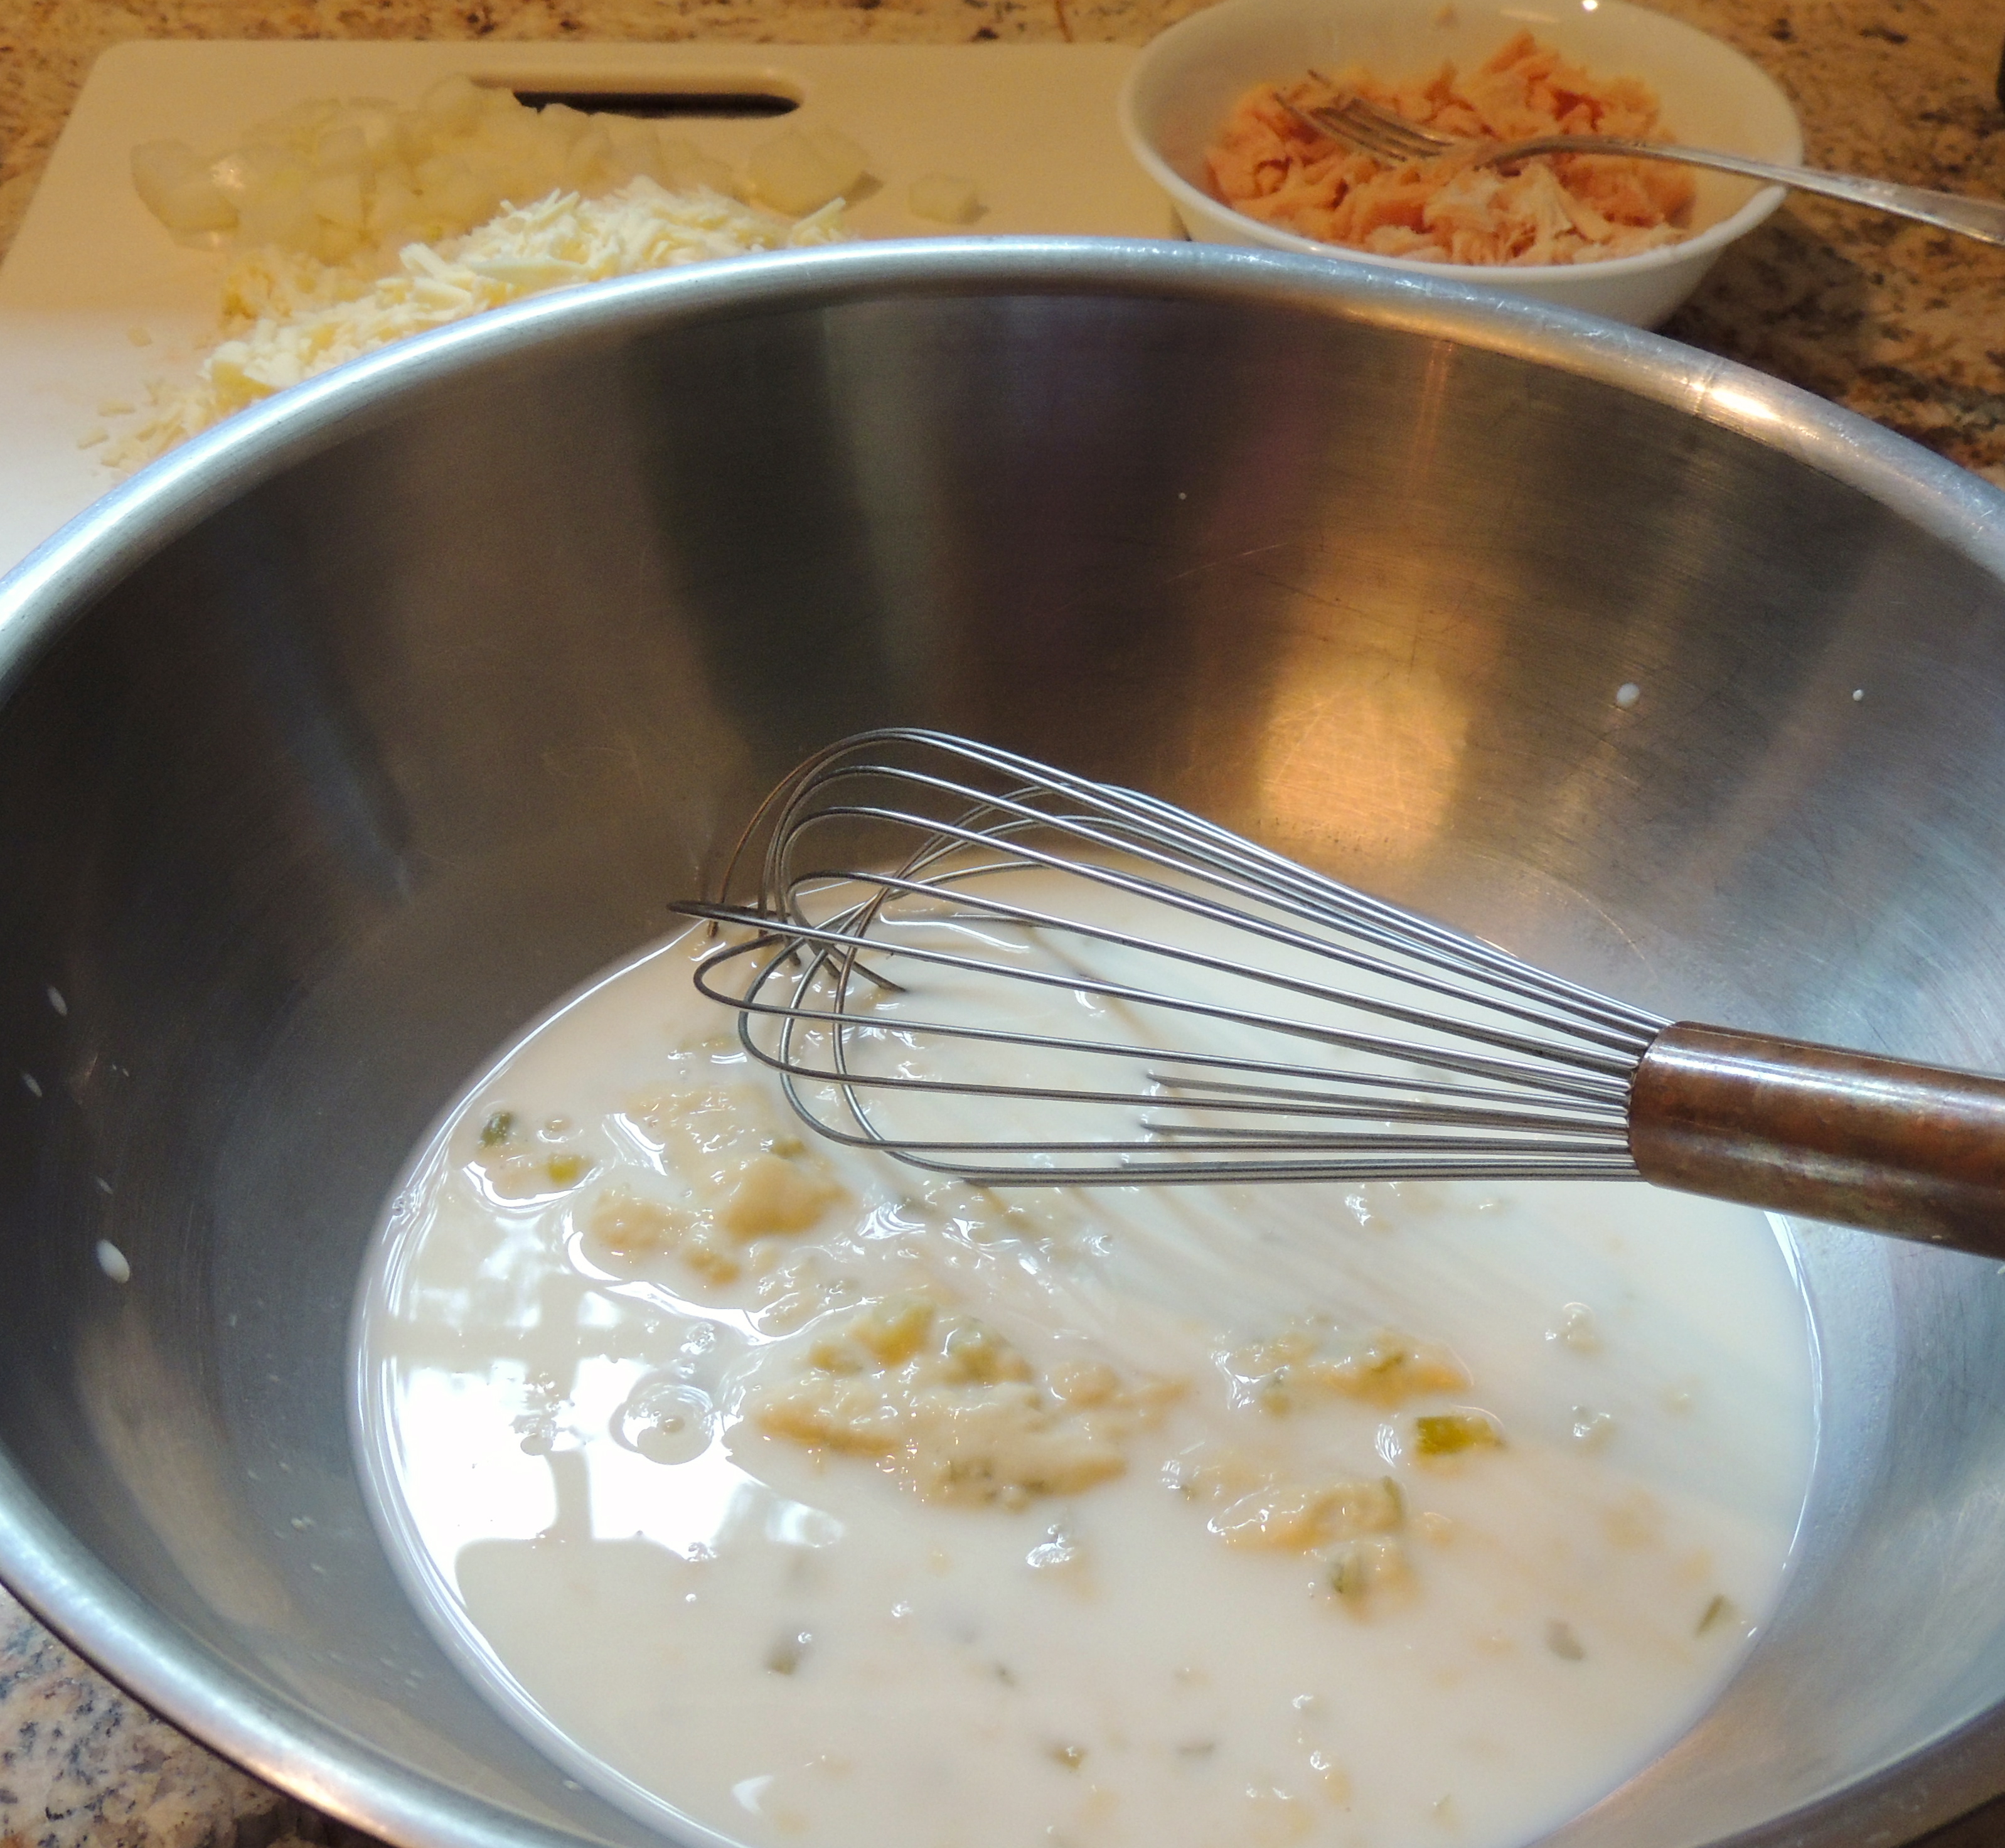
In a large bowl, add the cream of celery soup, milk, chopped onion, tuna, pepper and peas (optional).
Stir or whisk ingredients together in large bowl…
Once the pasta finishes cooking, drain it in a colander, and then add the noodles to the large bowl with ingredients. Give it a stir.
Add hot noodles to soup/milk mixture…
Add the cheese and stir to mix, reserving a handful or two to sprinkle on top. Sprinkle with pepper and top with the remaining cheese.
Stir together, save a little cheese for the top!
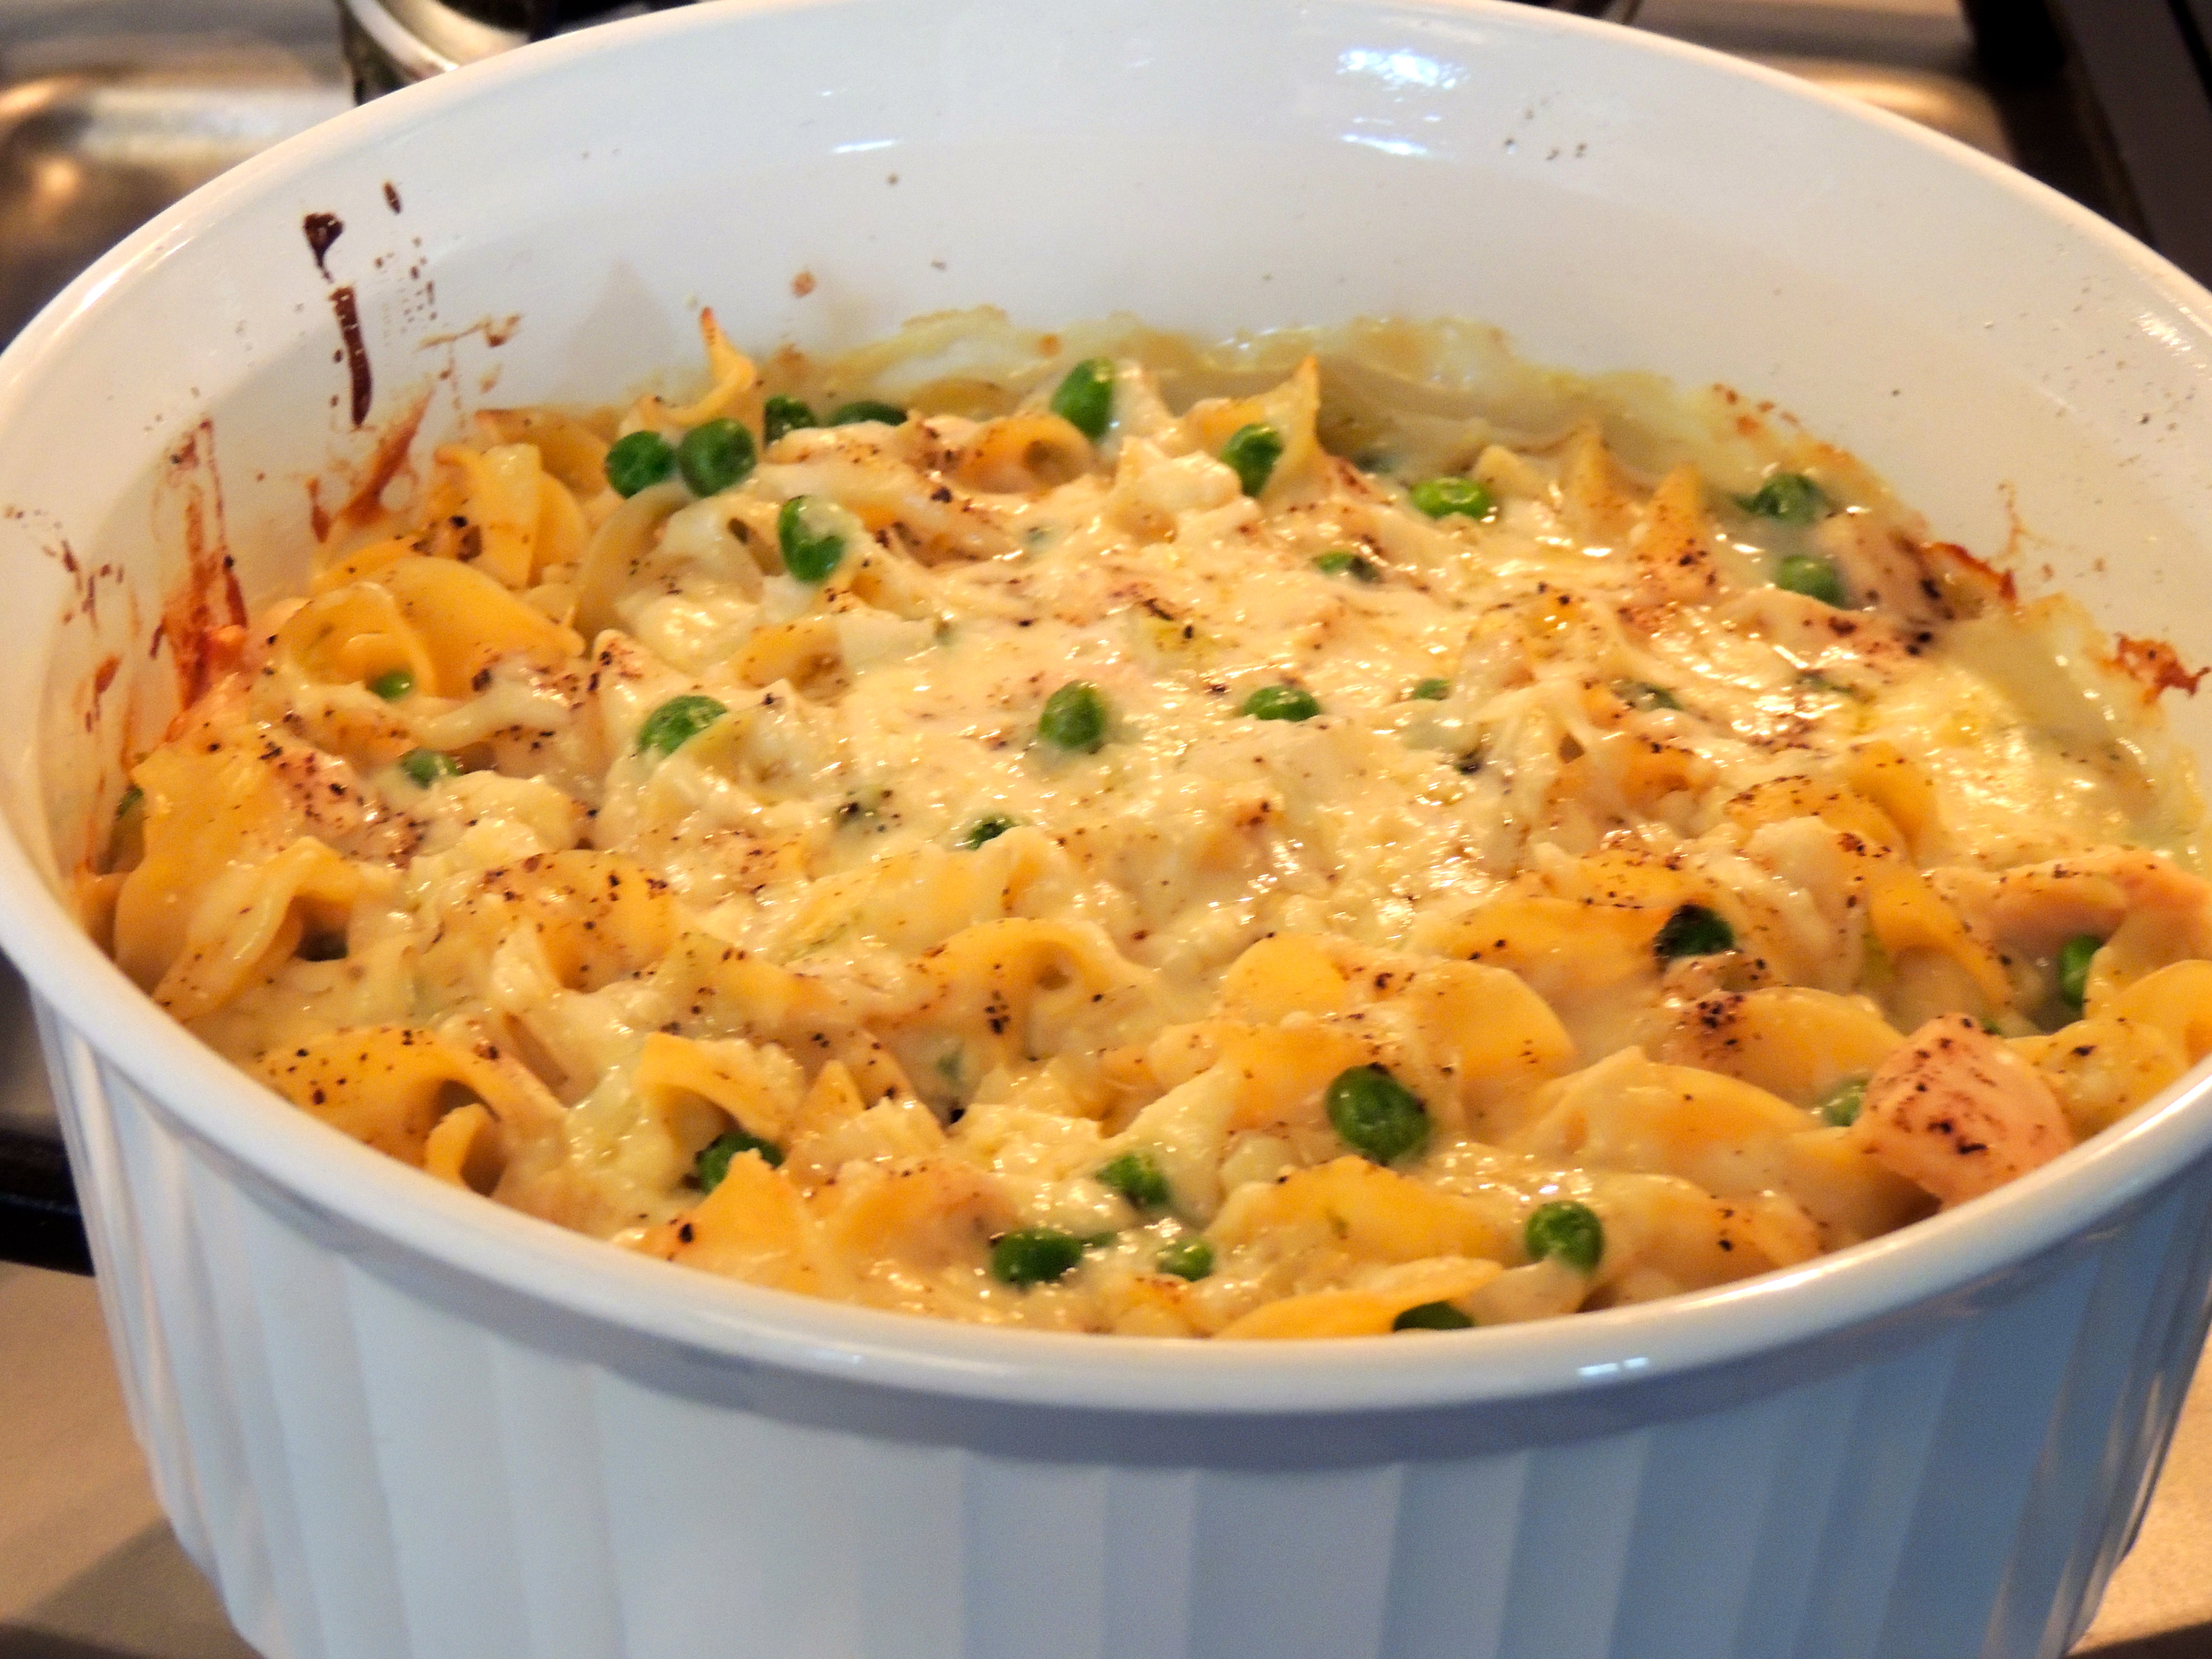
Bake for 20-30 minutes or until bubbly. I usually keep the lid on because I like mine creamy. If you like a crunchy texture on top, you can bake it without the lid.
I wish I could give credit to whoever snapped this photo, pretty darn cool, huh? EVO Pizzeria Facebook
WHAT A COOL PLACE! If you haven’t been to EVO Pizza (Extra Virgin Oven), you must go! I cannot wait to go back! We went with some friends and had the absolute best pizza and salad ever! Everything was top notch… The Farmer’s salad was so fresh, the roasted corn was delightful and the dressing was out of this world… We split the Margherita pizza and I have to say it’s the best we’ve ever had. Does TO DIE FOR explain how wonderful? I was so excited when the food came that I forgot to take a photo… that’s too sad, but it’s also a good reason to go back! Even the tea was remarkably good… No bitter taste, just pure delight!
We also went to the EVO bakery located behind the restaurant… the best looking breads you’ve ever seen! We bought a loaf of bread and a few chocolate chip cookies that were the best… just like the kind you make without all the mess! That night I made a pot of soup and had a slice of bread… heavenly!! Not expensive… better than any store bought bread could ever be!
Here is a little blip about the restaurant from their website:
About Extra Virgin Oven, LLC:
In 2005, Ricky Hacker and Matt McIntosh wheeled a cart into the Charleston Farmer’s Market, built a fire, assembled an array of ingredients: handmade dough, homemade sauce, hand-pulled mozzarella and the freshest local produce. The result seemed simple enough: Extra Virgin Oven: fresh, honest, uncomplicated Neapolitan pizza. The line in front of the pizza cart grew longer…and longer. What was happening was delicious – and different.
EVO began as a family business in 2005 baking pizzas on a mobile wood-fired oven for farmers’ markets and catering. In 2007, we opened our restaurant in lovely Park Circle to further pursue our passion with fresh, local, house-made, uncomplicated food. We’ve been passionate about supporting local farmers and visiting farms since 2005 and continue to work closely with our local producers.
In addition to pizza, Extra Virgin Oven serves an array of homemade soups, salads, cured meats and paninis on artisan breads, fresh from our wood-fired oven. Artisan beers and distinctive wines are the perfect complement to our honest food.
We make our own quality ingredients in house with the freshest local produce and meat available. We prepare and pull our own mozzarella twice daily, as well as make our pizza dough twice a day; we bake our own breads in our wood-fired oven; we slowly cook our sauces and soups daily; we make our house-made sweet sausage daily; our aioli is hand-made each day; our dressings our house-made, not from a jar. We believe it’s our job to let the essence of each ingredient speak for itself and know you will taste the difference.
Wow… after reading that you see that their food is REAL… it’s homemade and I swear you can tell the difference! EVO is located in the Park Circle area of North Charleston, SC, a very cool spot! – Check out their MENU!
There has been a lot of great press about this restaurant! I’m telling you, if you haven’t been… I would high tail it over there!!
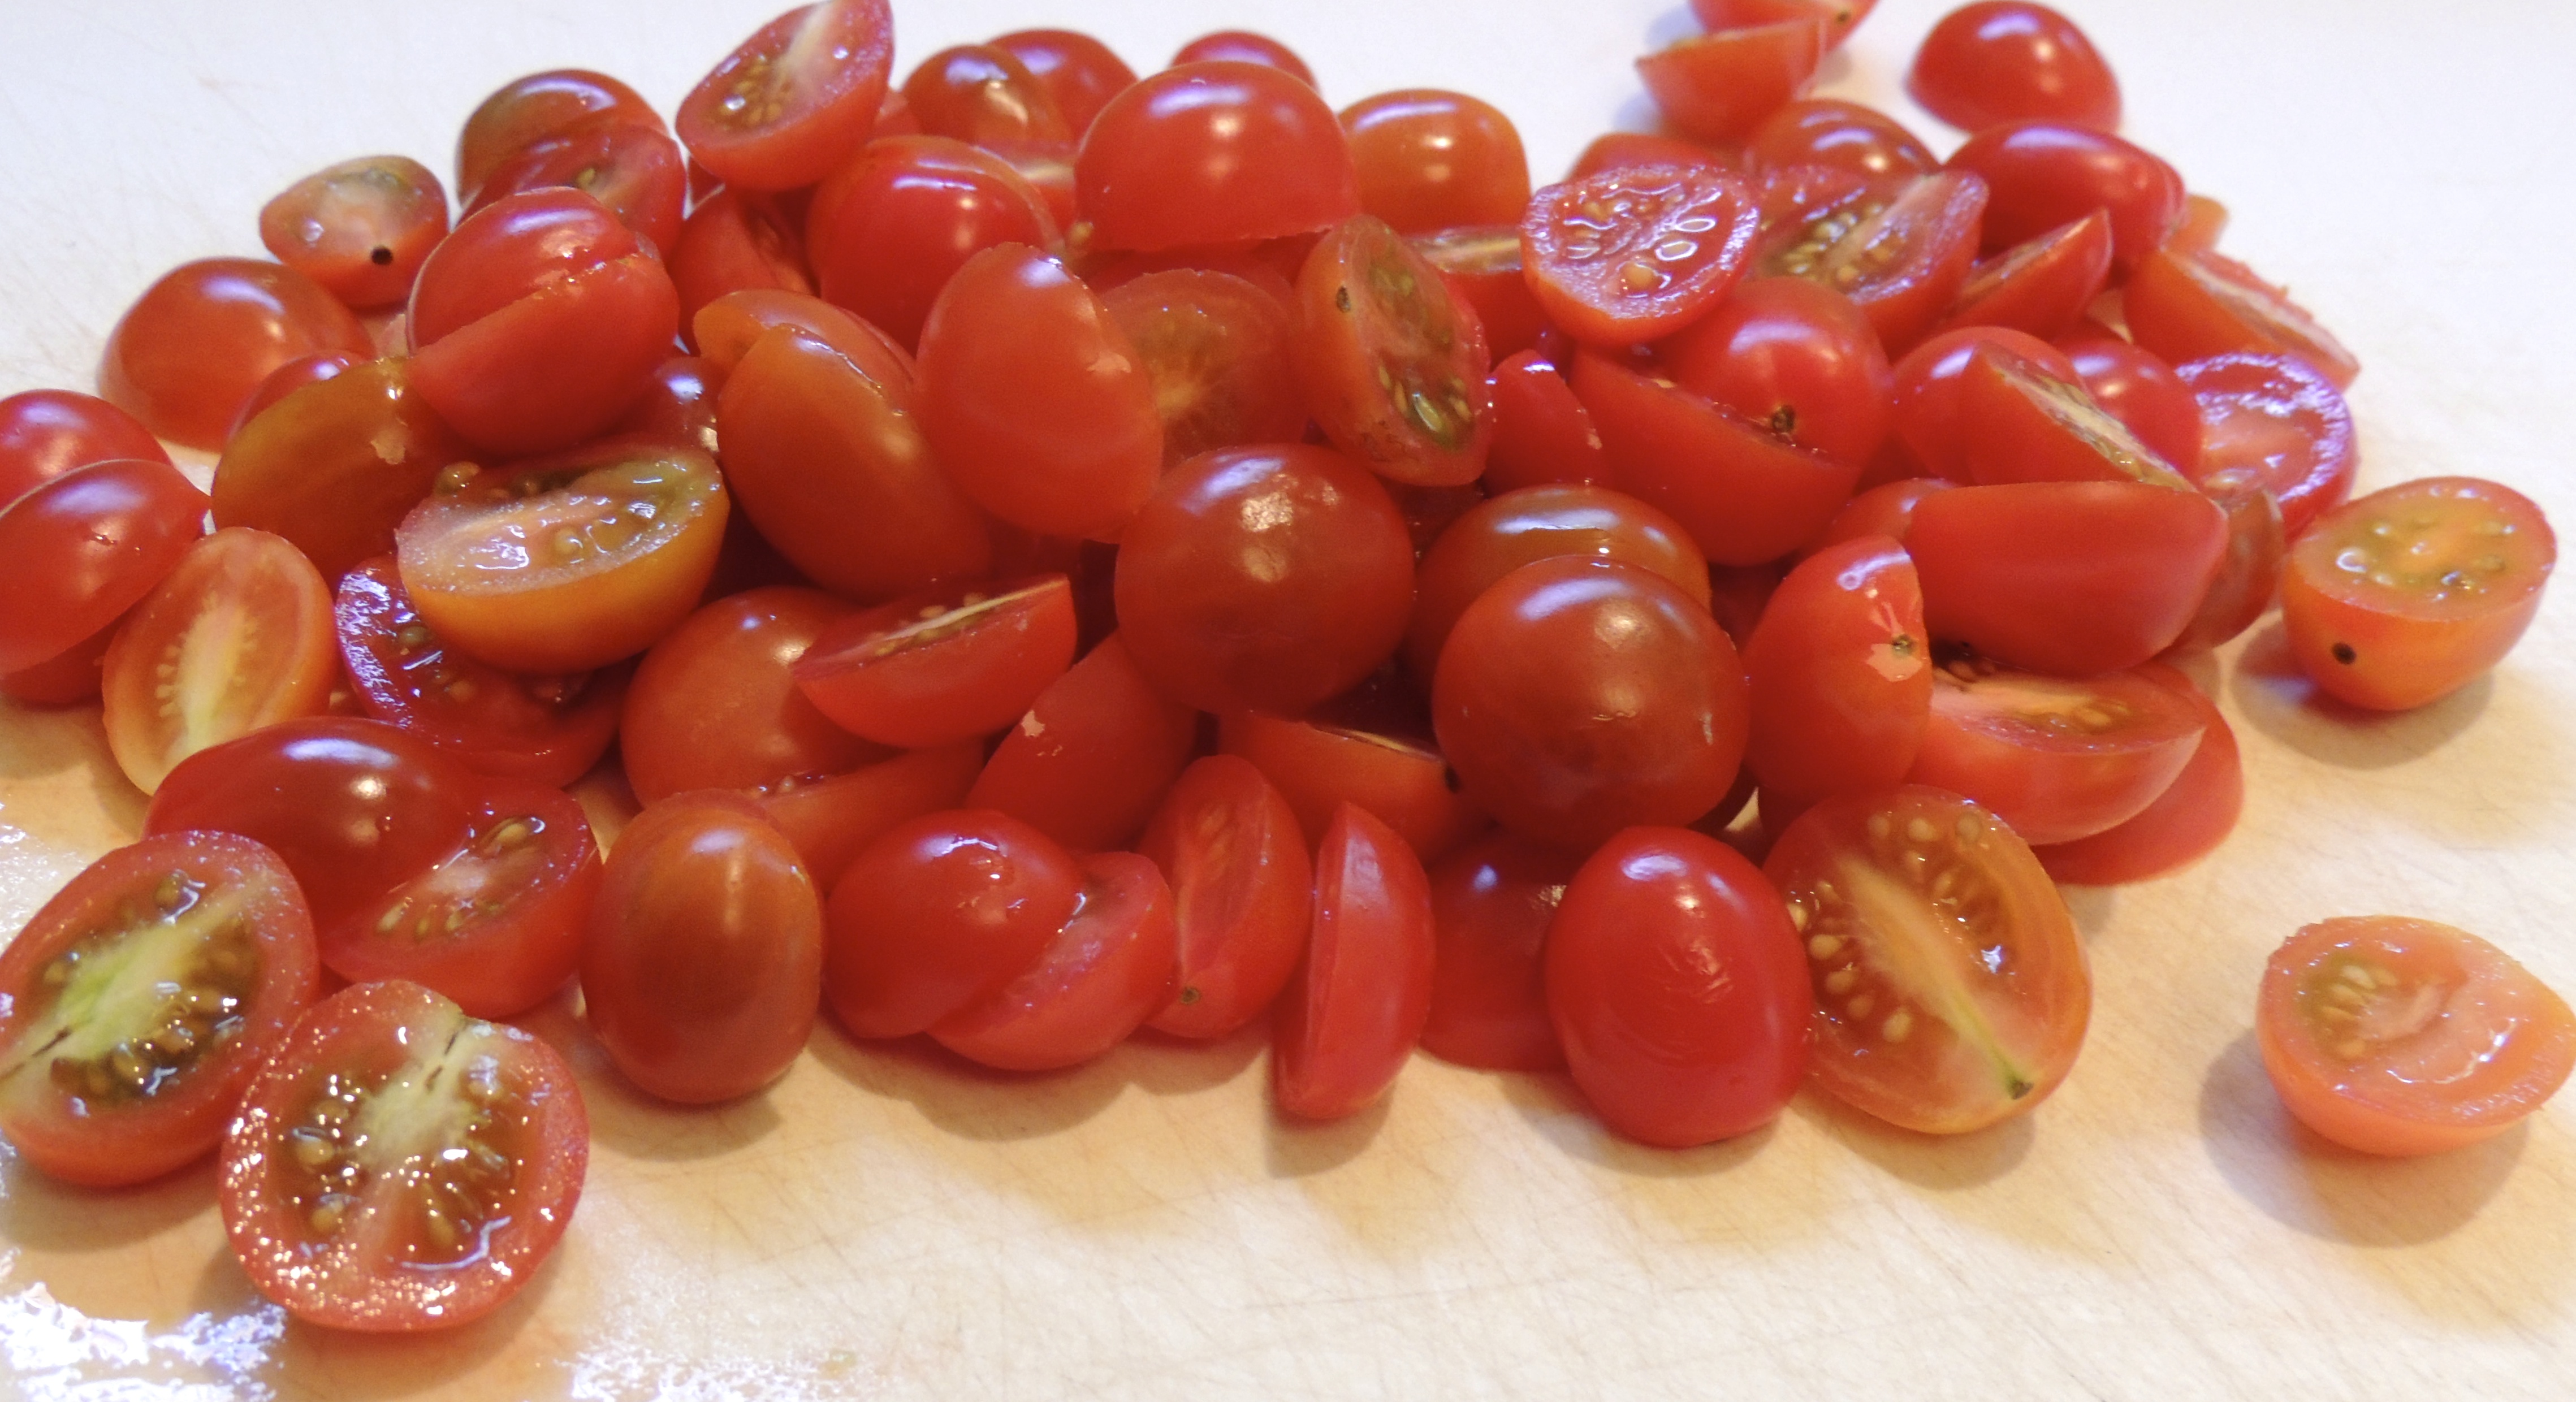
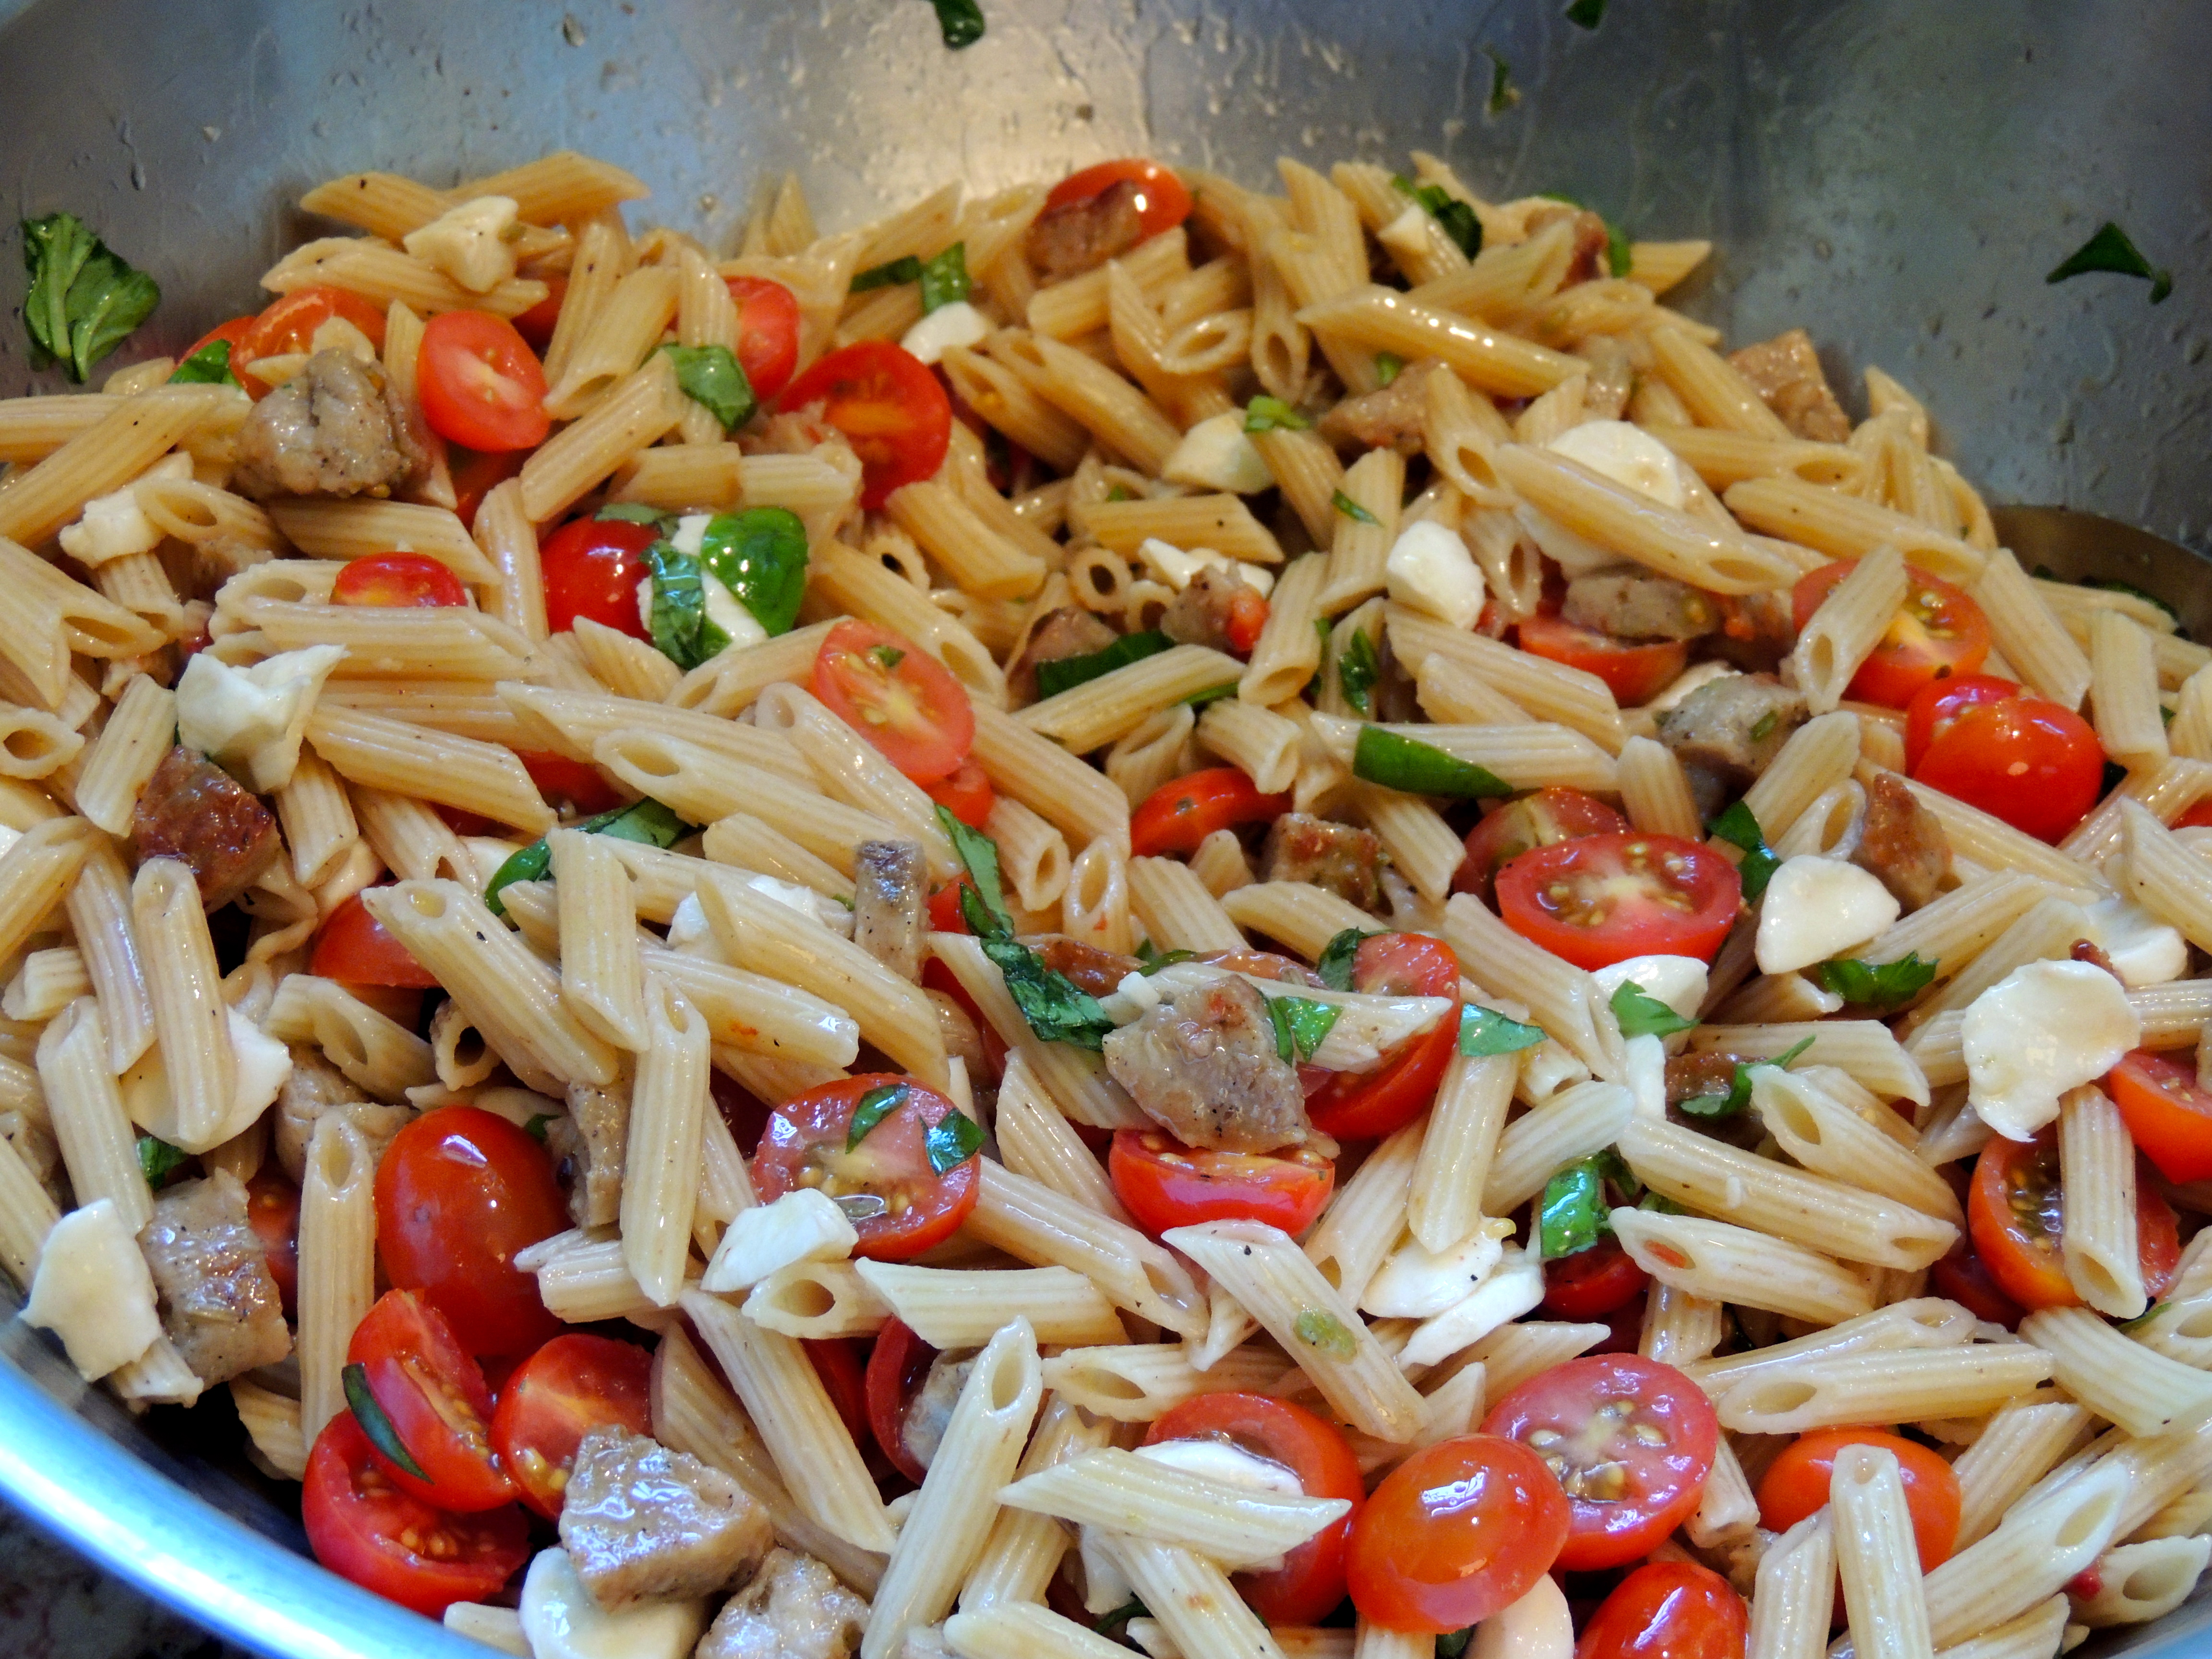
This recipe is too good to be true! A perfect combination of healthy ingredients, chicken sweet Italian sausage, fresh spinach, fresh mozzarella, grape tomatoes, fresh basil and white wheat pasta… these ingredients together with a dressing of olive oil and balsamic vinegar will make you so happy… W A R N I N G : You may crave this after you’ve made it once. Don’t say I didn’t warn ya!
Pasta with Italian Sausage, Tomatoes, Fresh Mozzarella and Basil
1 – 12 oz pkg white wheat pasta (like Barilla)
1 pkg Chicken Sweet Italian Sausage (like Al Fresco), skins removed, cut into small pieces
1 container of FRESH Mozarella, cut into fairly small pieces
1 large container (or 2 small) Grape Tomatoes, cut in half
Fresh Basil (to taste)
⅓ – ½ cup Olive Oil
⅛ – ¼ cup Balsamic Vinegar
Pepper
Spinach
In a large nonstick frying pan add a small amount of olive oil. Cook cut up sausage until browned. Remove from pan and place on a plate that has a few paper towels on it.
Start a large pot of water to boil the pasta, while you’re waiting for it to boil,…
Cut the grape tomatoes in half, set aside.
Wash the basil and chop it up, set aside.
Cut the mozzarella into small bite sized pieces, set aside.
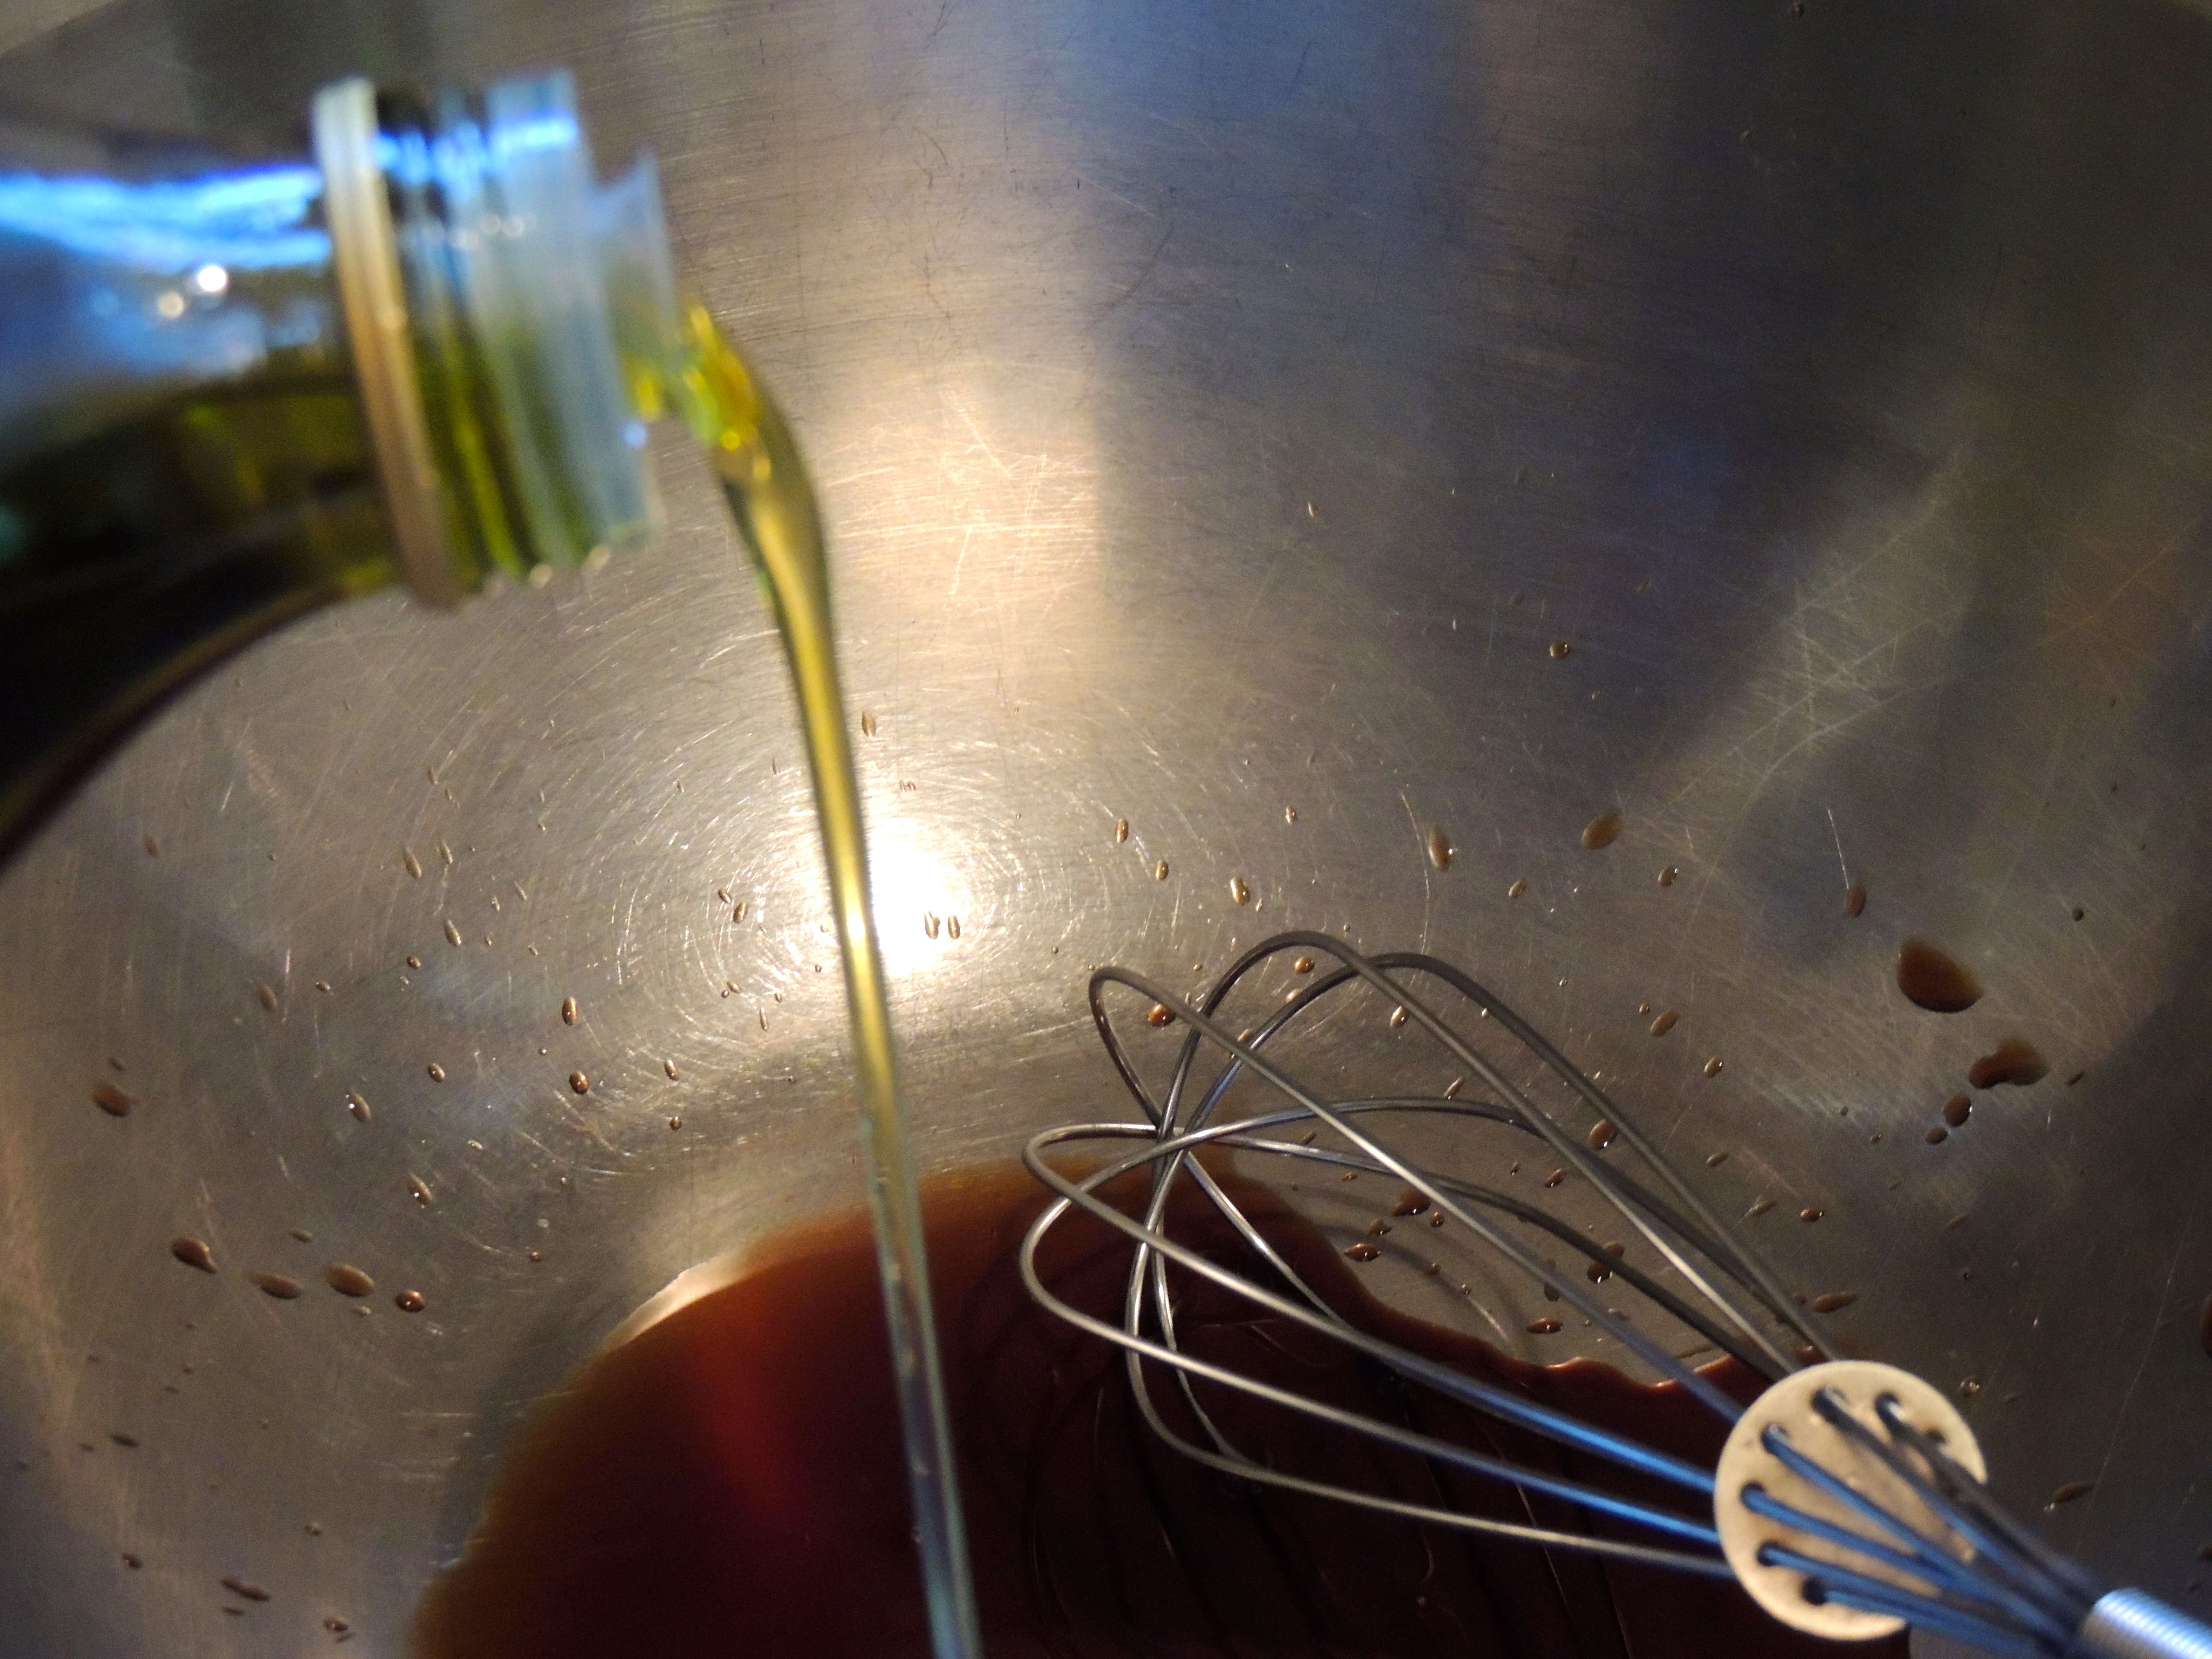
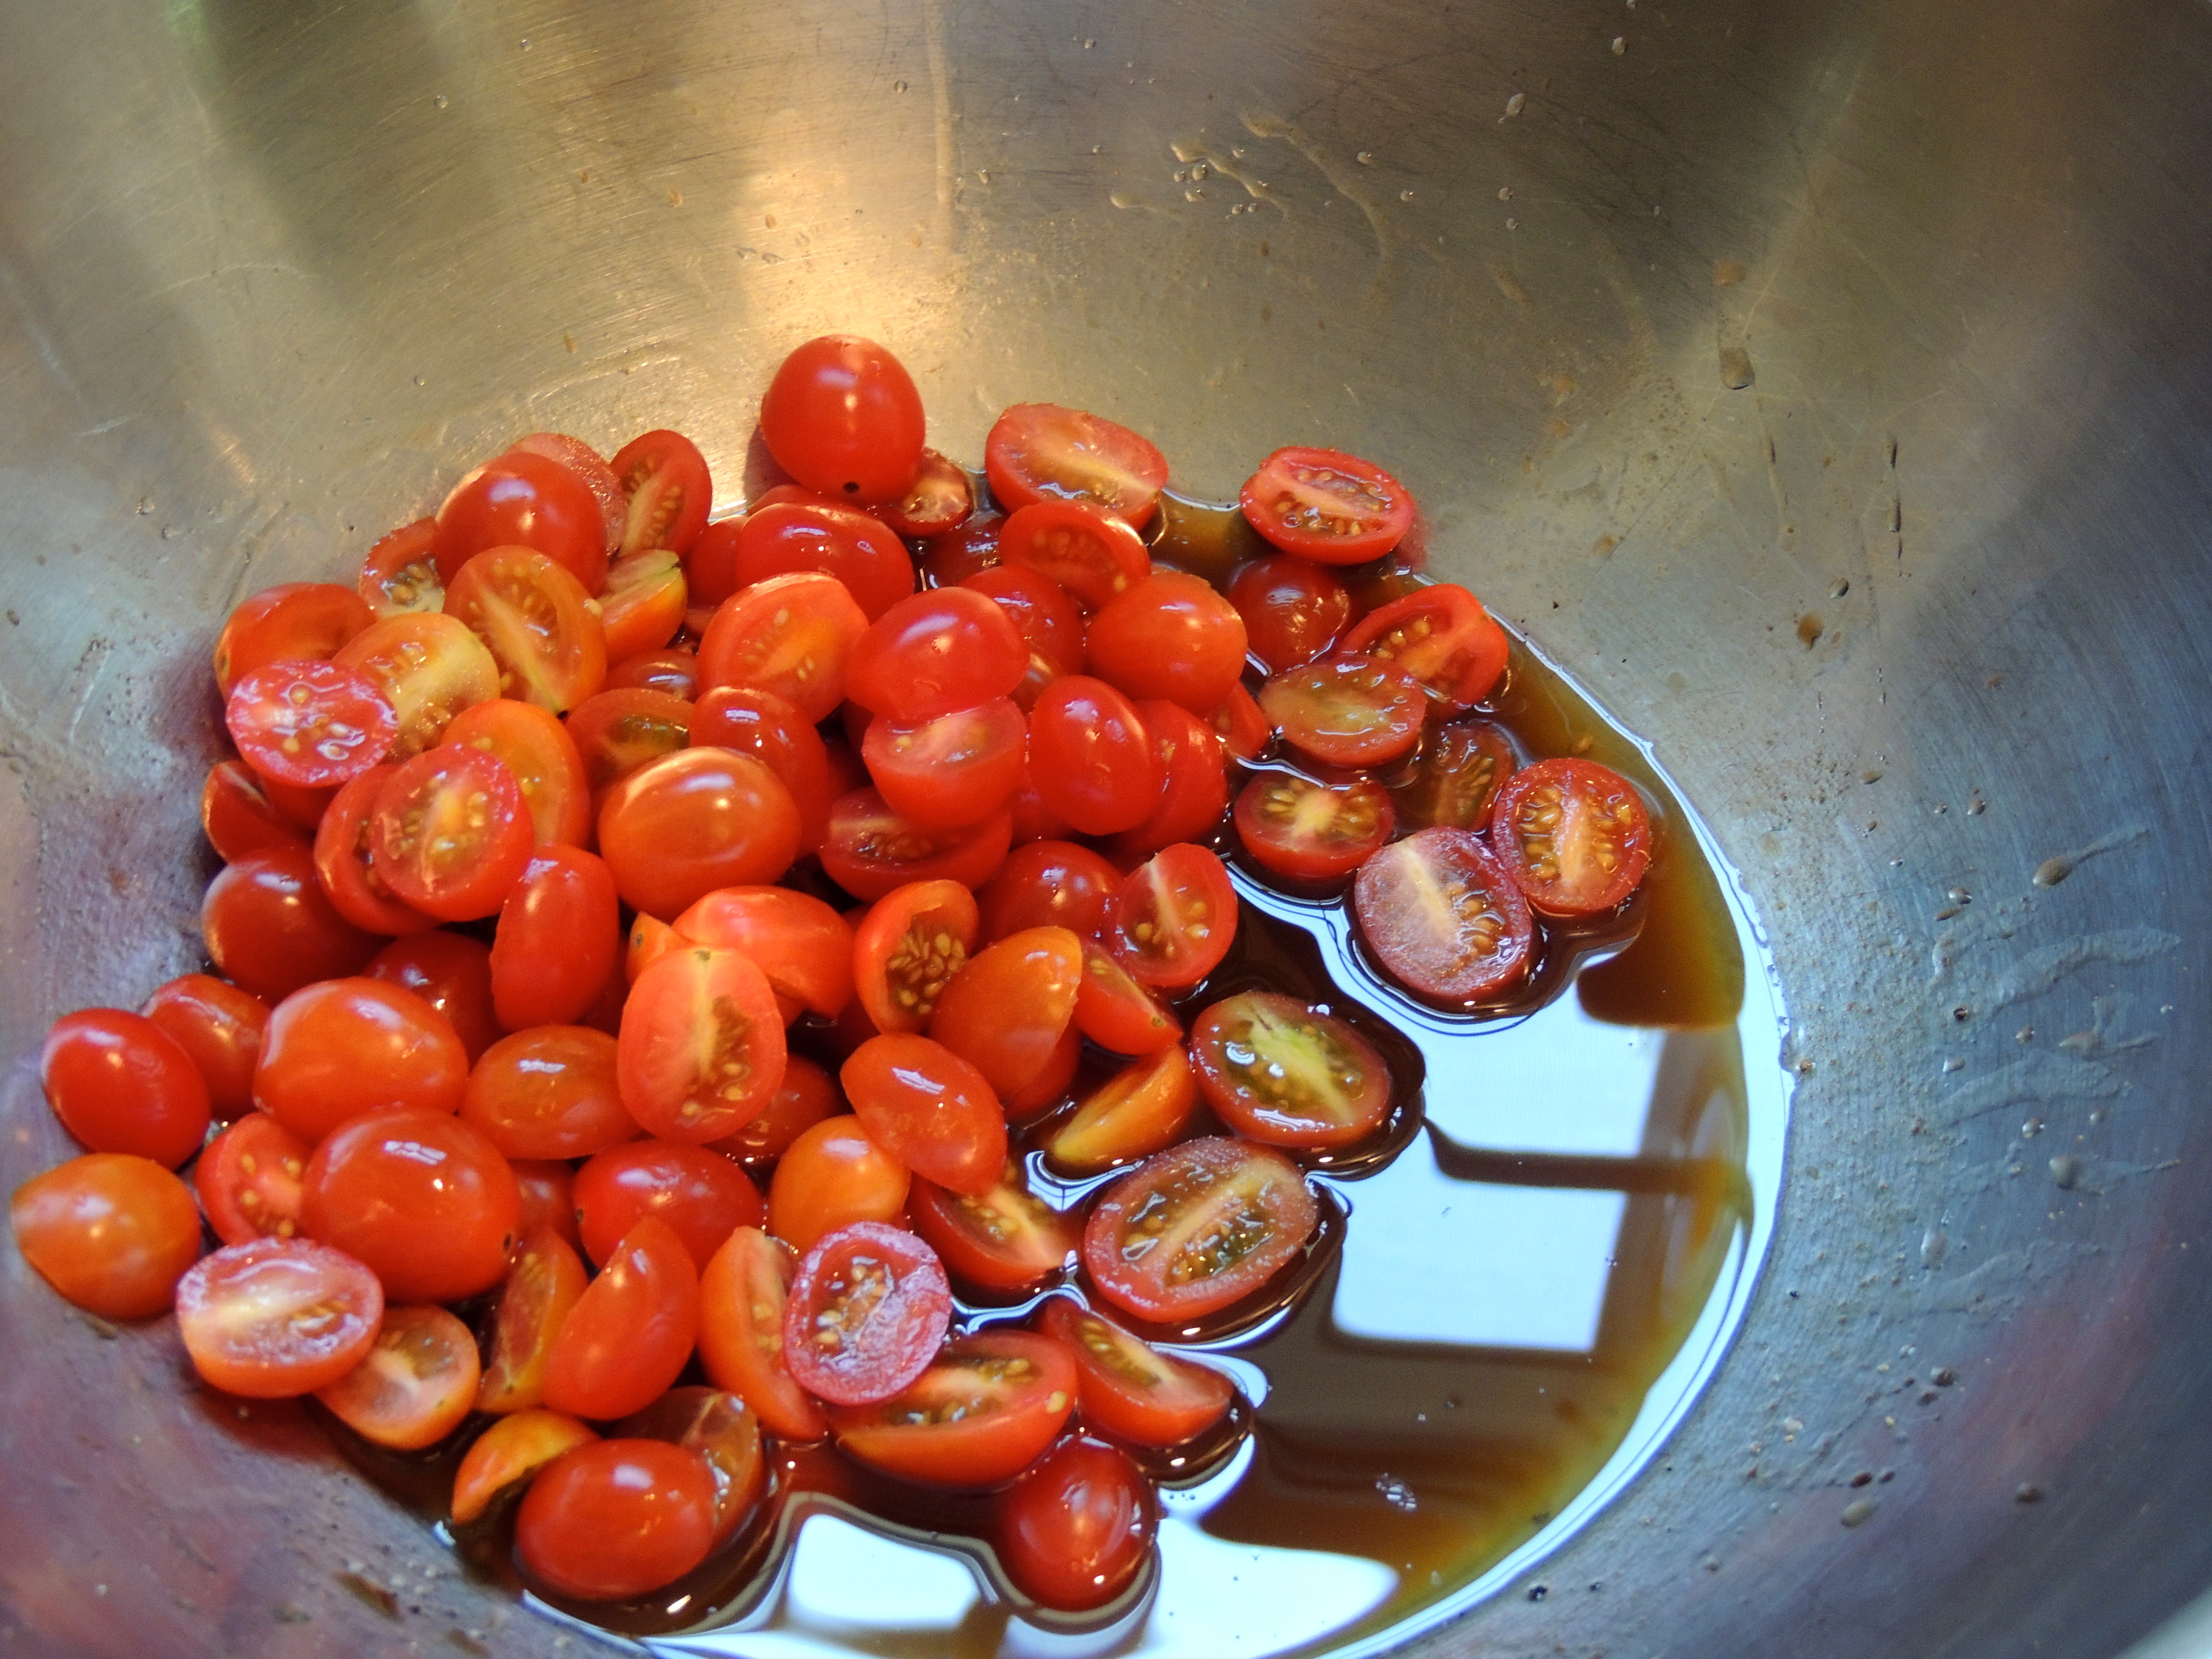
In a large bowl, add the balsamic vinegar. I never measure, I just eyeball it to see what I will need to coat the pasta well, it’s ok if it’s more on the heavy olive oil side, you’re going to put this salad on top of fresh spinach, so you will need it! Slowly whisk in ⅓ – ½ cup of olive oil. If you whisk it slowly it will emulsify (become one where it won’t separate). Add some pepper. Go ahead and toss in your cut up tomatoes into the olive oil/balsamic mixture so they can be absorbing those wonderful flavors!
Once your pasta has finished cooking to the al dente stage (firm to the bite), drain it well, and place it in the large bowl with the oil/vinegar. I give it a quick stir to coat the pasta well and then I cover the grape tomatoes with the hot pasta and let it sit for a few minutes.
After a few minutes add the fresh mozzarella, the cooked sausage and the fresh basil. Stir to coat.
You can eat it like it is, or wait until it’s chilled. I usually will take it out of the fridge for 5-10 minutes so that the olive oil will have a change to un-congeal… Place several large handfuls of fresh spinach and then a few large scoops of pasta salad… it melds together wonderfully! Enjoy!
Ahhh, the Carina… it’s so much more than a grocery store, it’s more of an institution… it’s a place to run into old friends after a year has gone by, a place to catch up like no time has passed. A great place to grab lunch, a snack, or groceries… End of October will be then end of the Carina as we know it… A big thumbs up to Tara Hire for making it as fabulous as she has all these years! She is moving on and following her passion… Monhegan Wellness! So check it out!!
Another thumbs up to Lisa Brackett, who will be running the new store on the island called L. Brackett & Son… A store and a diner… there has been some major fundraising going on, this is a creative, hard working bunch!
We wish them both the best in their new endevours!
WOOT! WOOT!Confetti falls from the sky, the music is blaring… this is my 1,000th post on this blog! A daily post for nearly three years… I can’t believe I’ve made it this far! A big thank you to all of you who read it!
This was a thrilling find on FINECOOKING.COM! I like a sure thing… a recipe where the cooking time is fairly consistent… this has worked for EVERY pork tenderloin that we have grilled this summer. I guess if you had a large one or a tiny one, the results might vary a bit, but use a meat thermometer if you have one, and you’ll be fine!
I didn’t brine our pork tenderloin, I took a ziplock and micro planed a few cloves of garlic (or mince), poured in some olive oil (enough to coat the pork) and some pepper… mush it around and add the pork tenderloin. Seal the bag, move it around to get it nice and coated. [Note: something you might not know about me… I’m weird about meat… 1) it can only go on the bottom shelf in the fridge per dr. oz… so no meat drips (*GASP*) to prevent contamination of any other food 2) I put the sealed bag inside another bag (told ya… weird) 3) I put that bag inside a plastic container (see… weird! when that container comes out of the fridge it goes directly to the dishwasher… it does not pass GO, it does not collect $200… straight to the DW!)… I drive Fred crazy… enough said…]
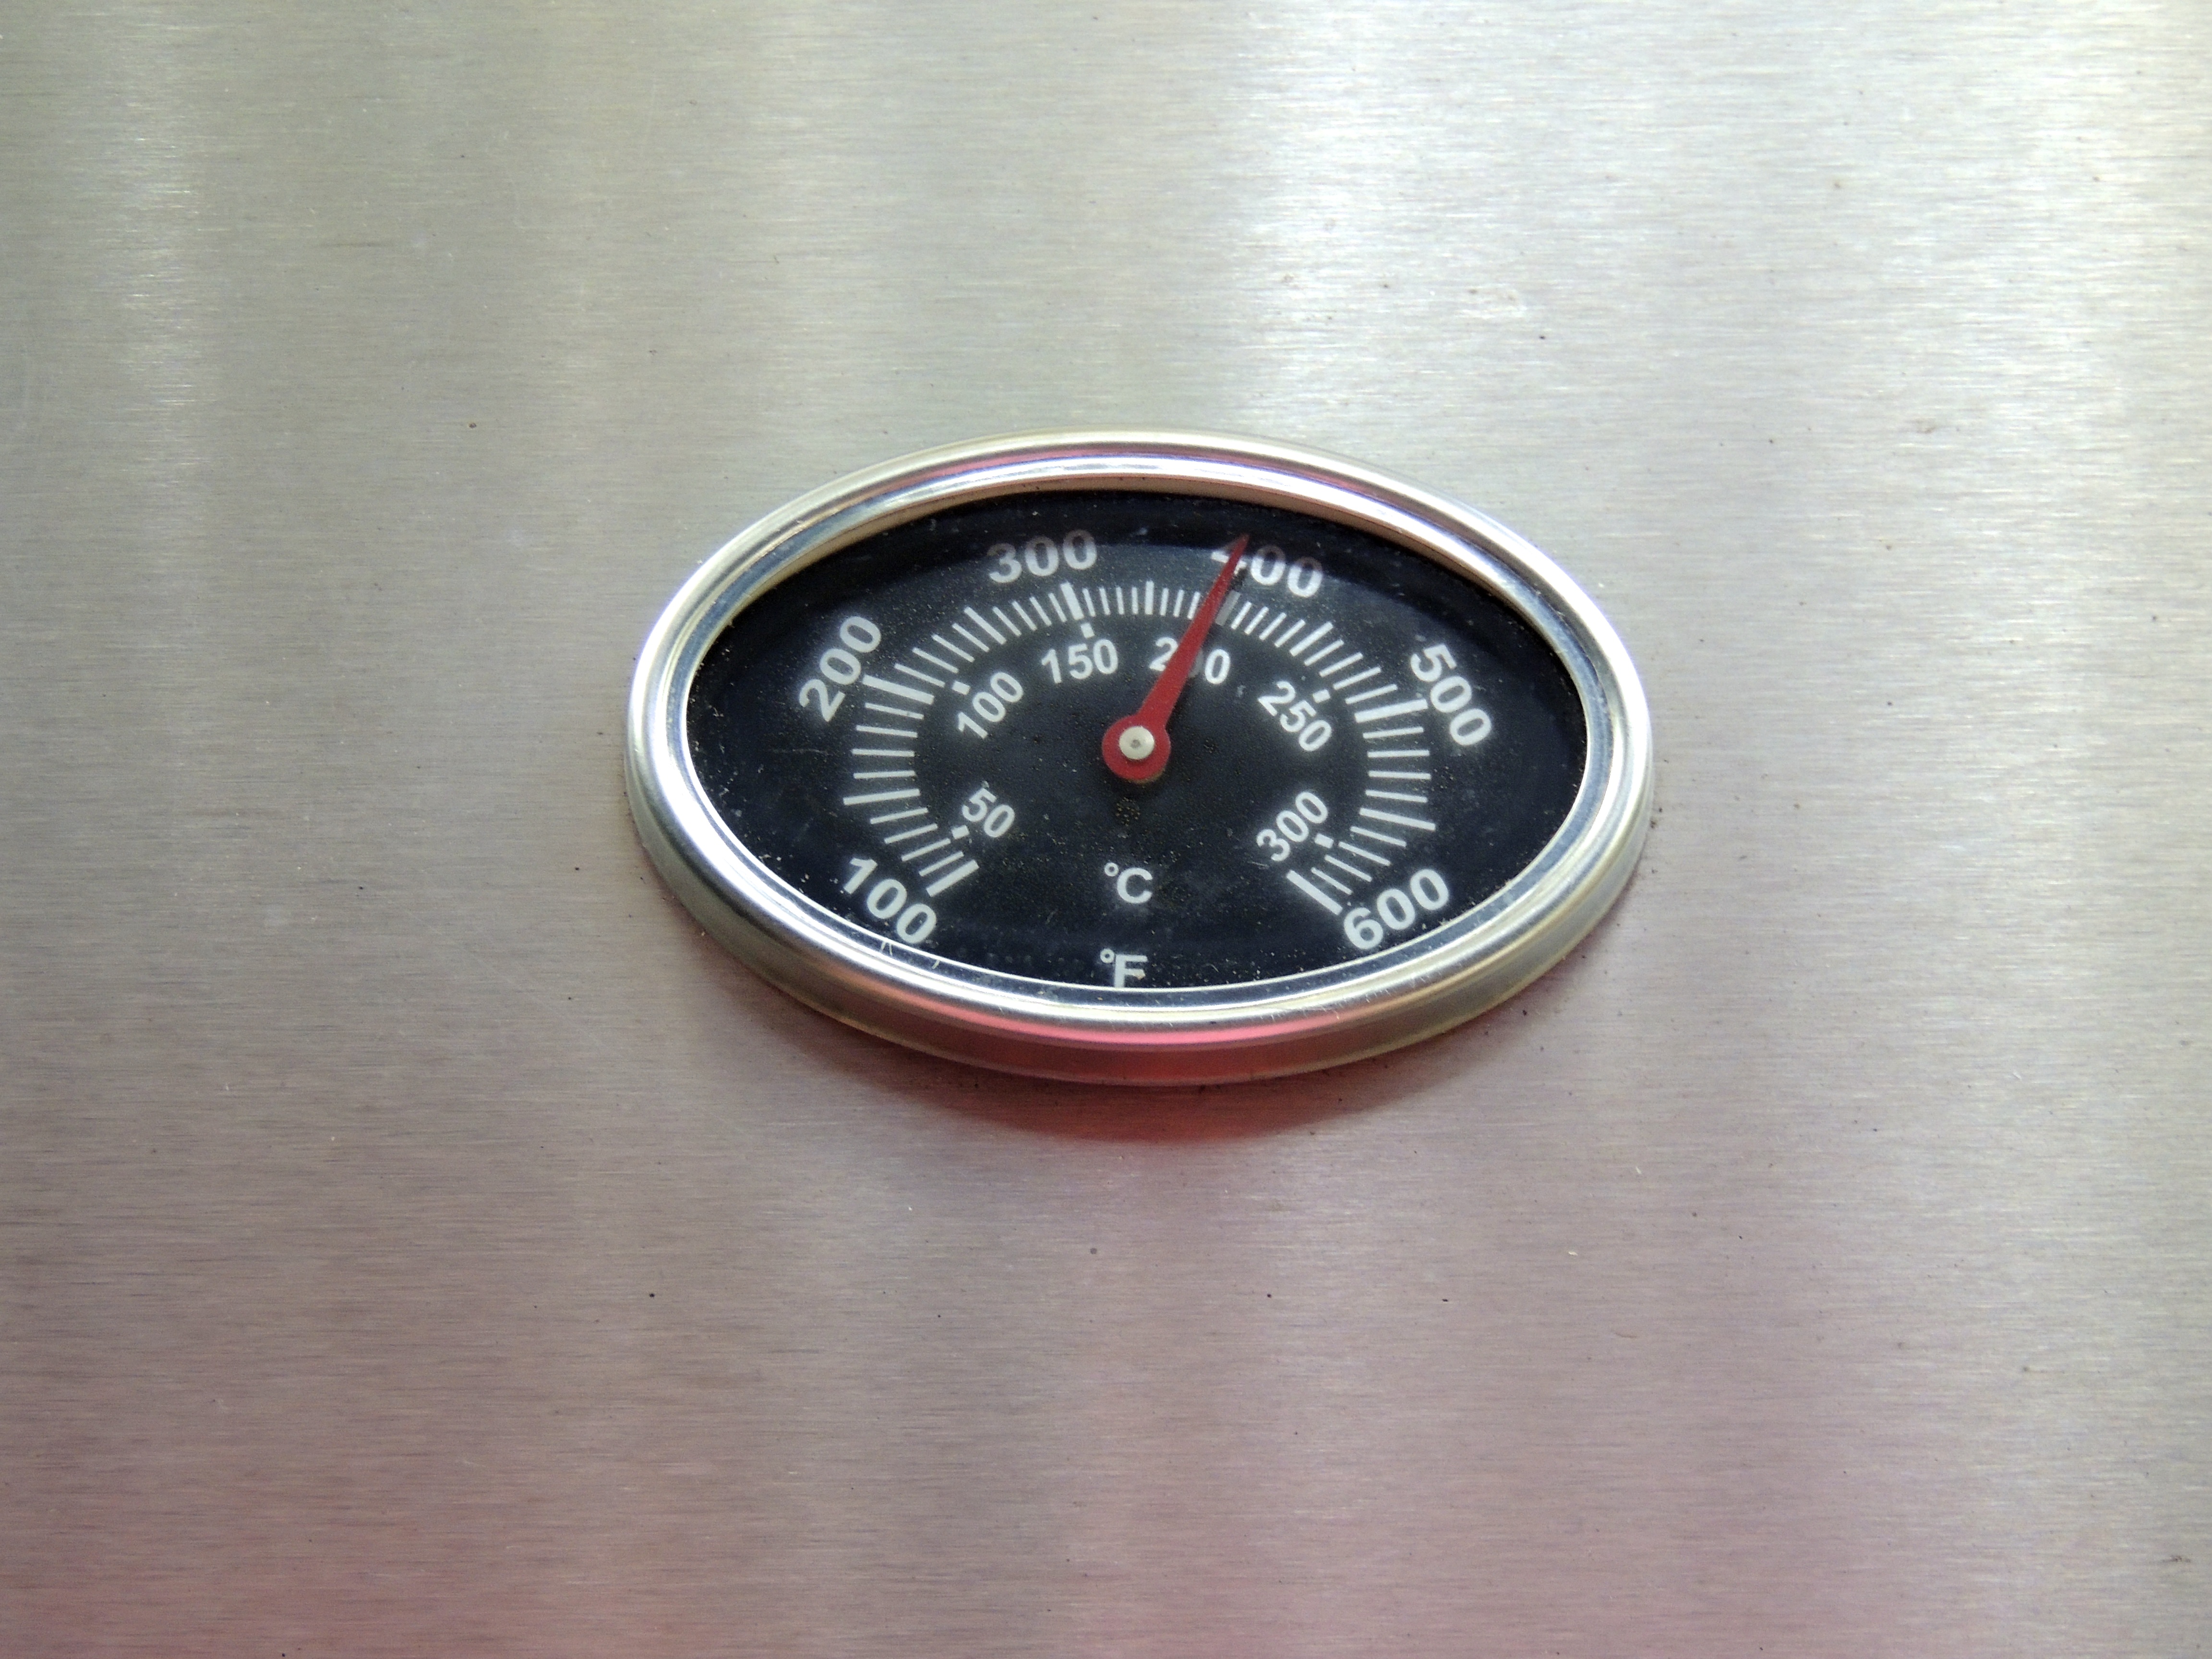
Grill burners all on high… Fred puts the pork on at 400 degrees… temp continues to rise… or you can wait until it reaches a higher temp… either way yields great results!
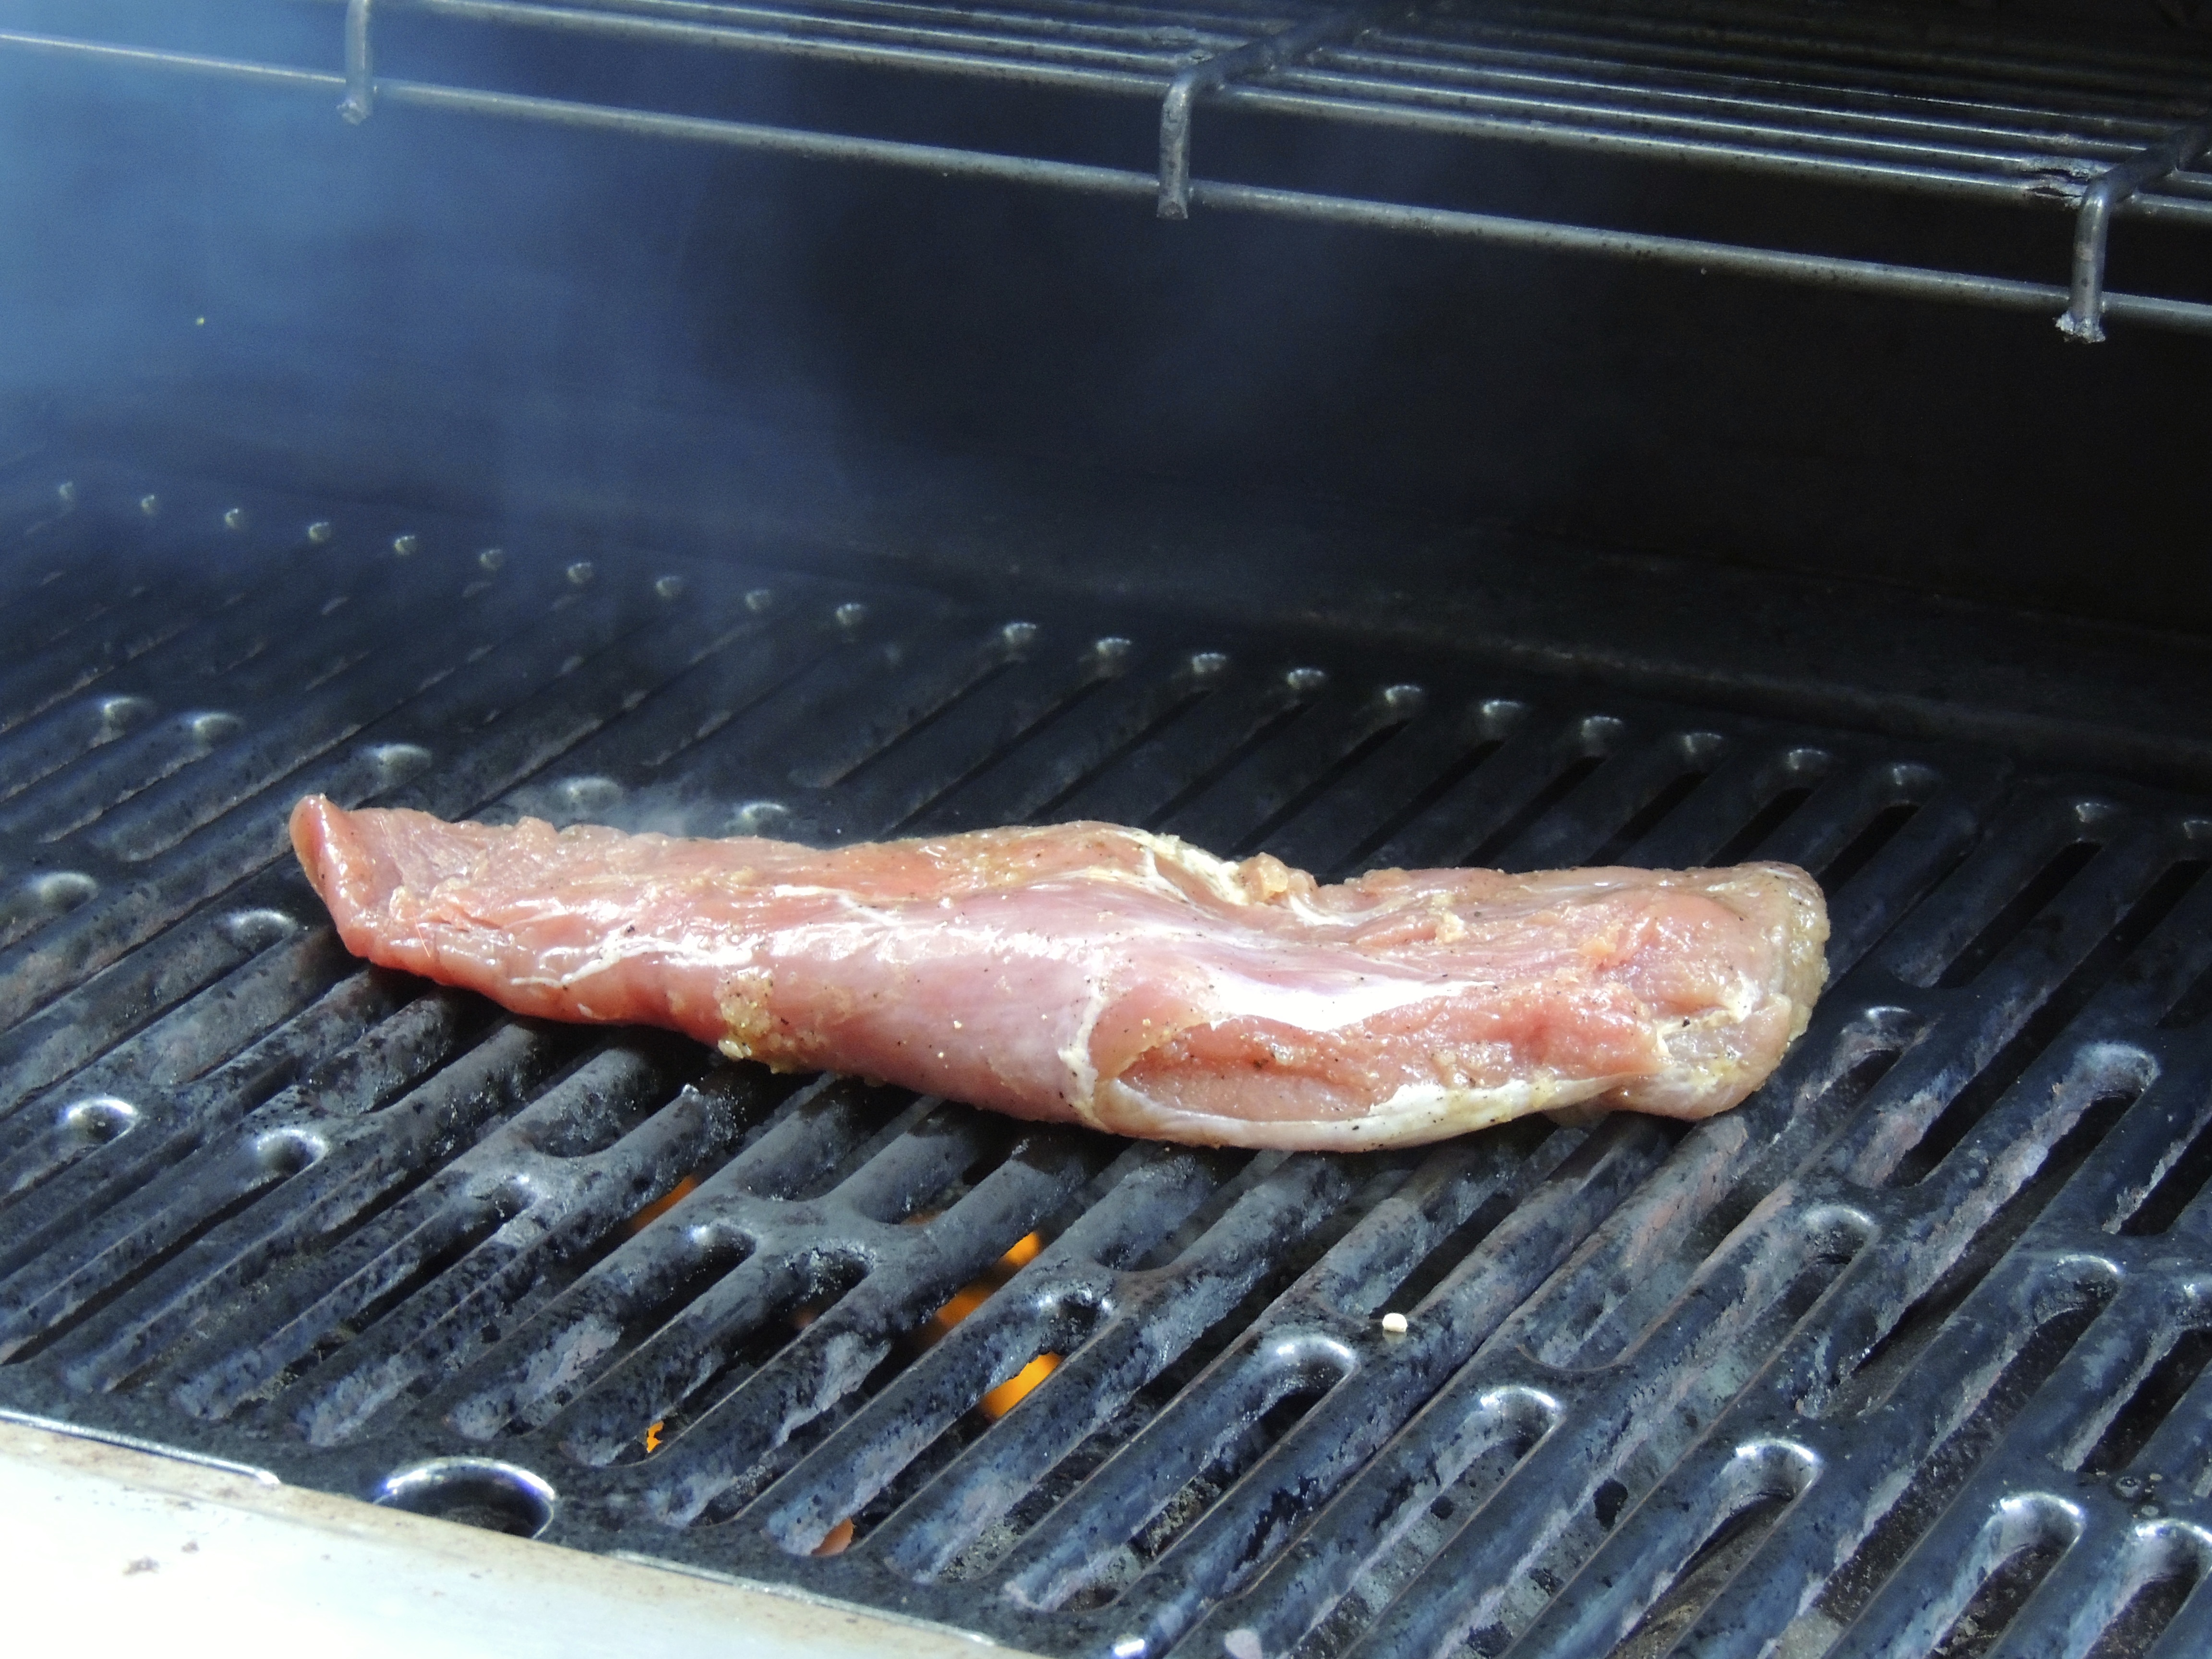
Place the oiled pork tenderloin onto a hot grill and CLOSE THE LID. NO PEEKING!
Set timer for 7 MINUTES… yep, use a timer for each step, you don’t want to forget… because if you’re like me, you’ll have good intentions, you’ll keep your eye on the grill for 6 minutes and 50 seconds and then something will capture your attention and off you go… then you think to yourself… what’s burning?? Ugh, that would be dinner… that scenario hasn’t happened yet because I use a timer, but I guarantee you that it would… if I didn’t…
When timer goes off, FLIP the pork tenderloin… (note the action shot, thankyouverymuch!)… CLOSE THE LID! NO PEEKING.
Set the timer for 6 minutes! (Did I say no peeking?) – it’s really important that the grill is closed… so I wonder why I didn’t take a photo of that? Hmmm…
When the timer goes off… TURN THE GRILL OFF… DO NOT OPEN THE LID!!!
Set the timer for 5 minutes!
Then… just to be sure it’s done, insert an instant read thermometer (thickest part of the meat), it should read 145-150 degrees. If it doesn’t just close the lid and check on it in a few more minutes. Ours always has registered perfectly!
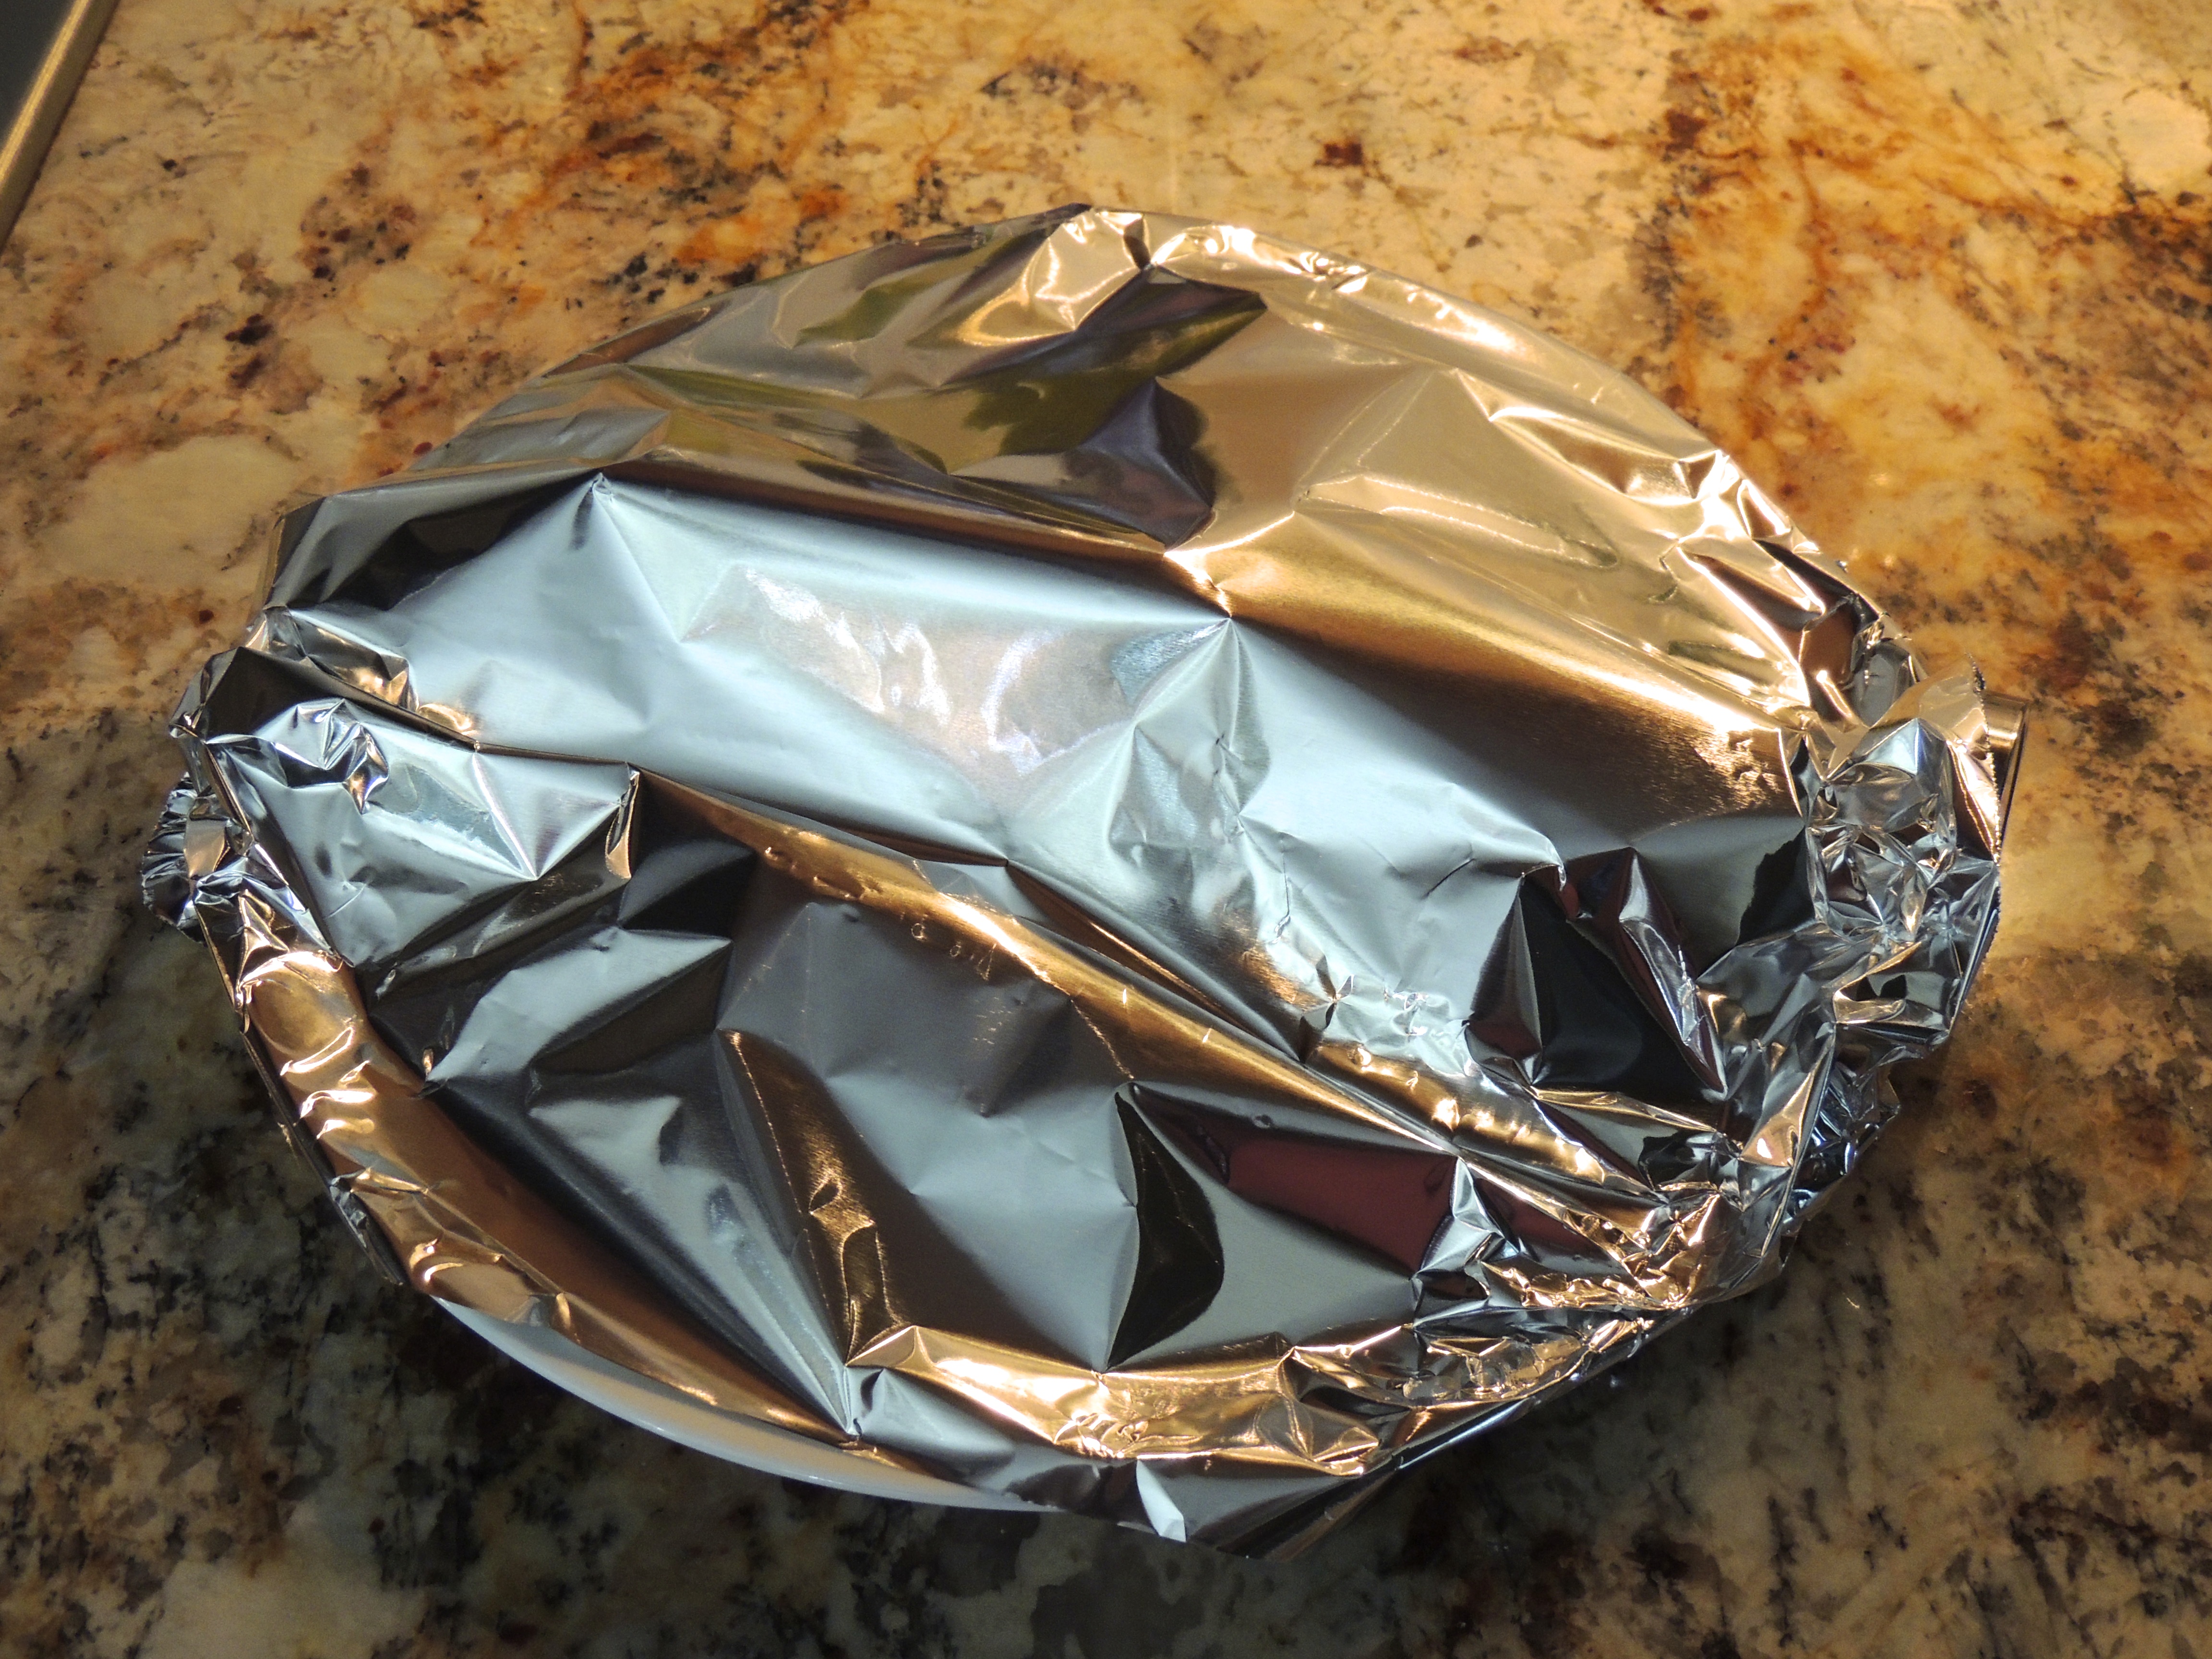
Then remove the pork from the grill, place a piece of foil over the top and let it rest for 5 minutes… it’s worked hard, it needs a break!
To recap this 7-6-5 method: Grill on high, place oiled pork tenderloin on grill, close lid – 7 minutes.
Flip to other side, close lid… 6 minutes
Turn grill off… (keep lid closed) 5 minutes
Take temp… let rest 5 minutes if it’s reached 145-150
From FineCooking.com (Use this link to see their entire recipe, I did not brine my, however, they show you how… I need to try it some time! This link also gives details for charcoal grills)
Season and grill
Rub the brined tenderloins all over with the glaze and then season with the pepper. Or, season to taste with another flavoring of your choice.
Heat a gas grill, turning all the burners to high until the grill is fully heated, 10 to 15 minutes.
Put the pork on the hot grill grate. Close the lid and grill for 7 minutes.
Turn the pork over, close the lid, and grill for another 6 minutes.
Turn off the heat (keep the lid closed) and continue to cook the pork for another 5 minutes. At this point, an instant-read thermometer inserted into the middle of the thickest end of the tenderloin should read 145° to 150°F. (If not, close the lid and let the pork continue to roast in the residual grill heat.)
Remove the pork from the grill and let rest for 5 minutes before carving. Cut across the grain into 1/2-inch slices and serve immediately, with the sauce of your choice.
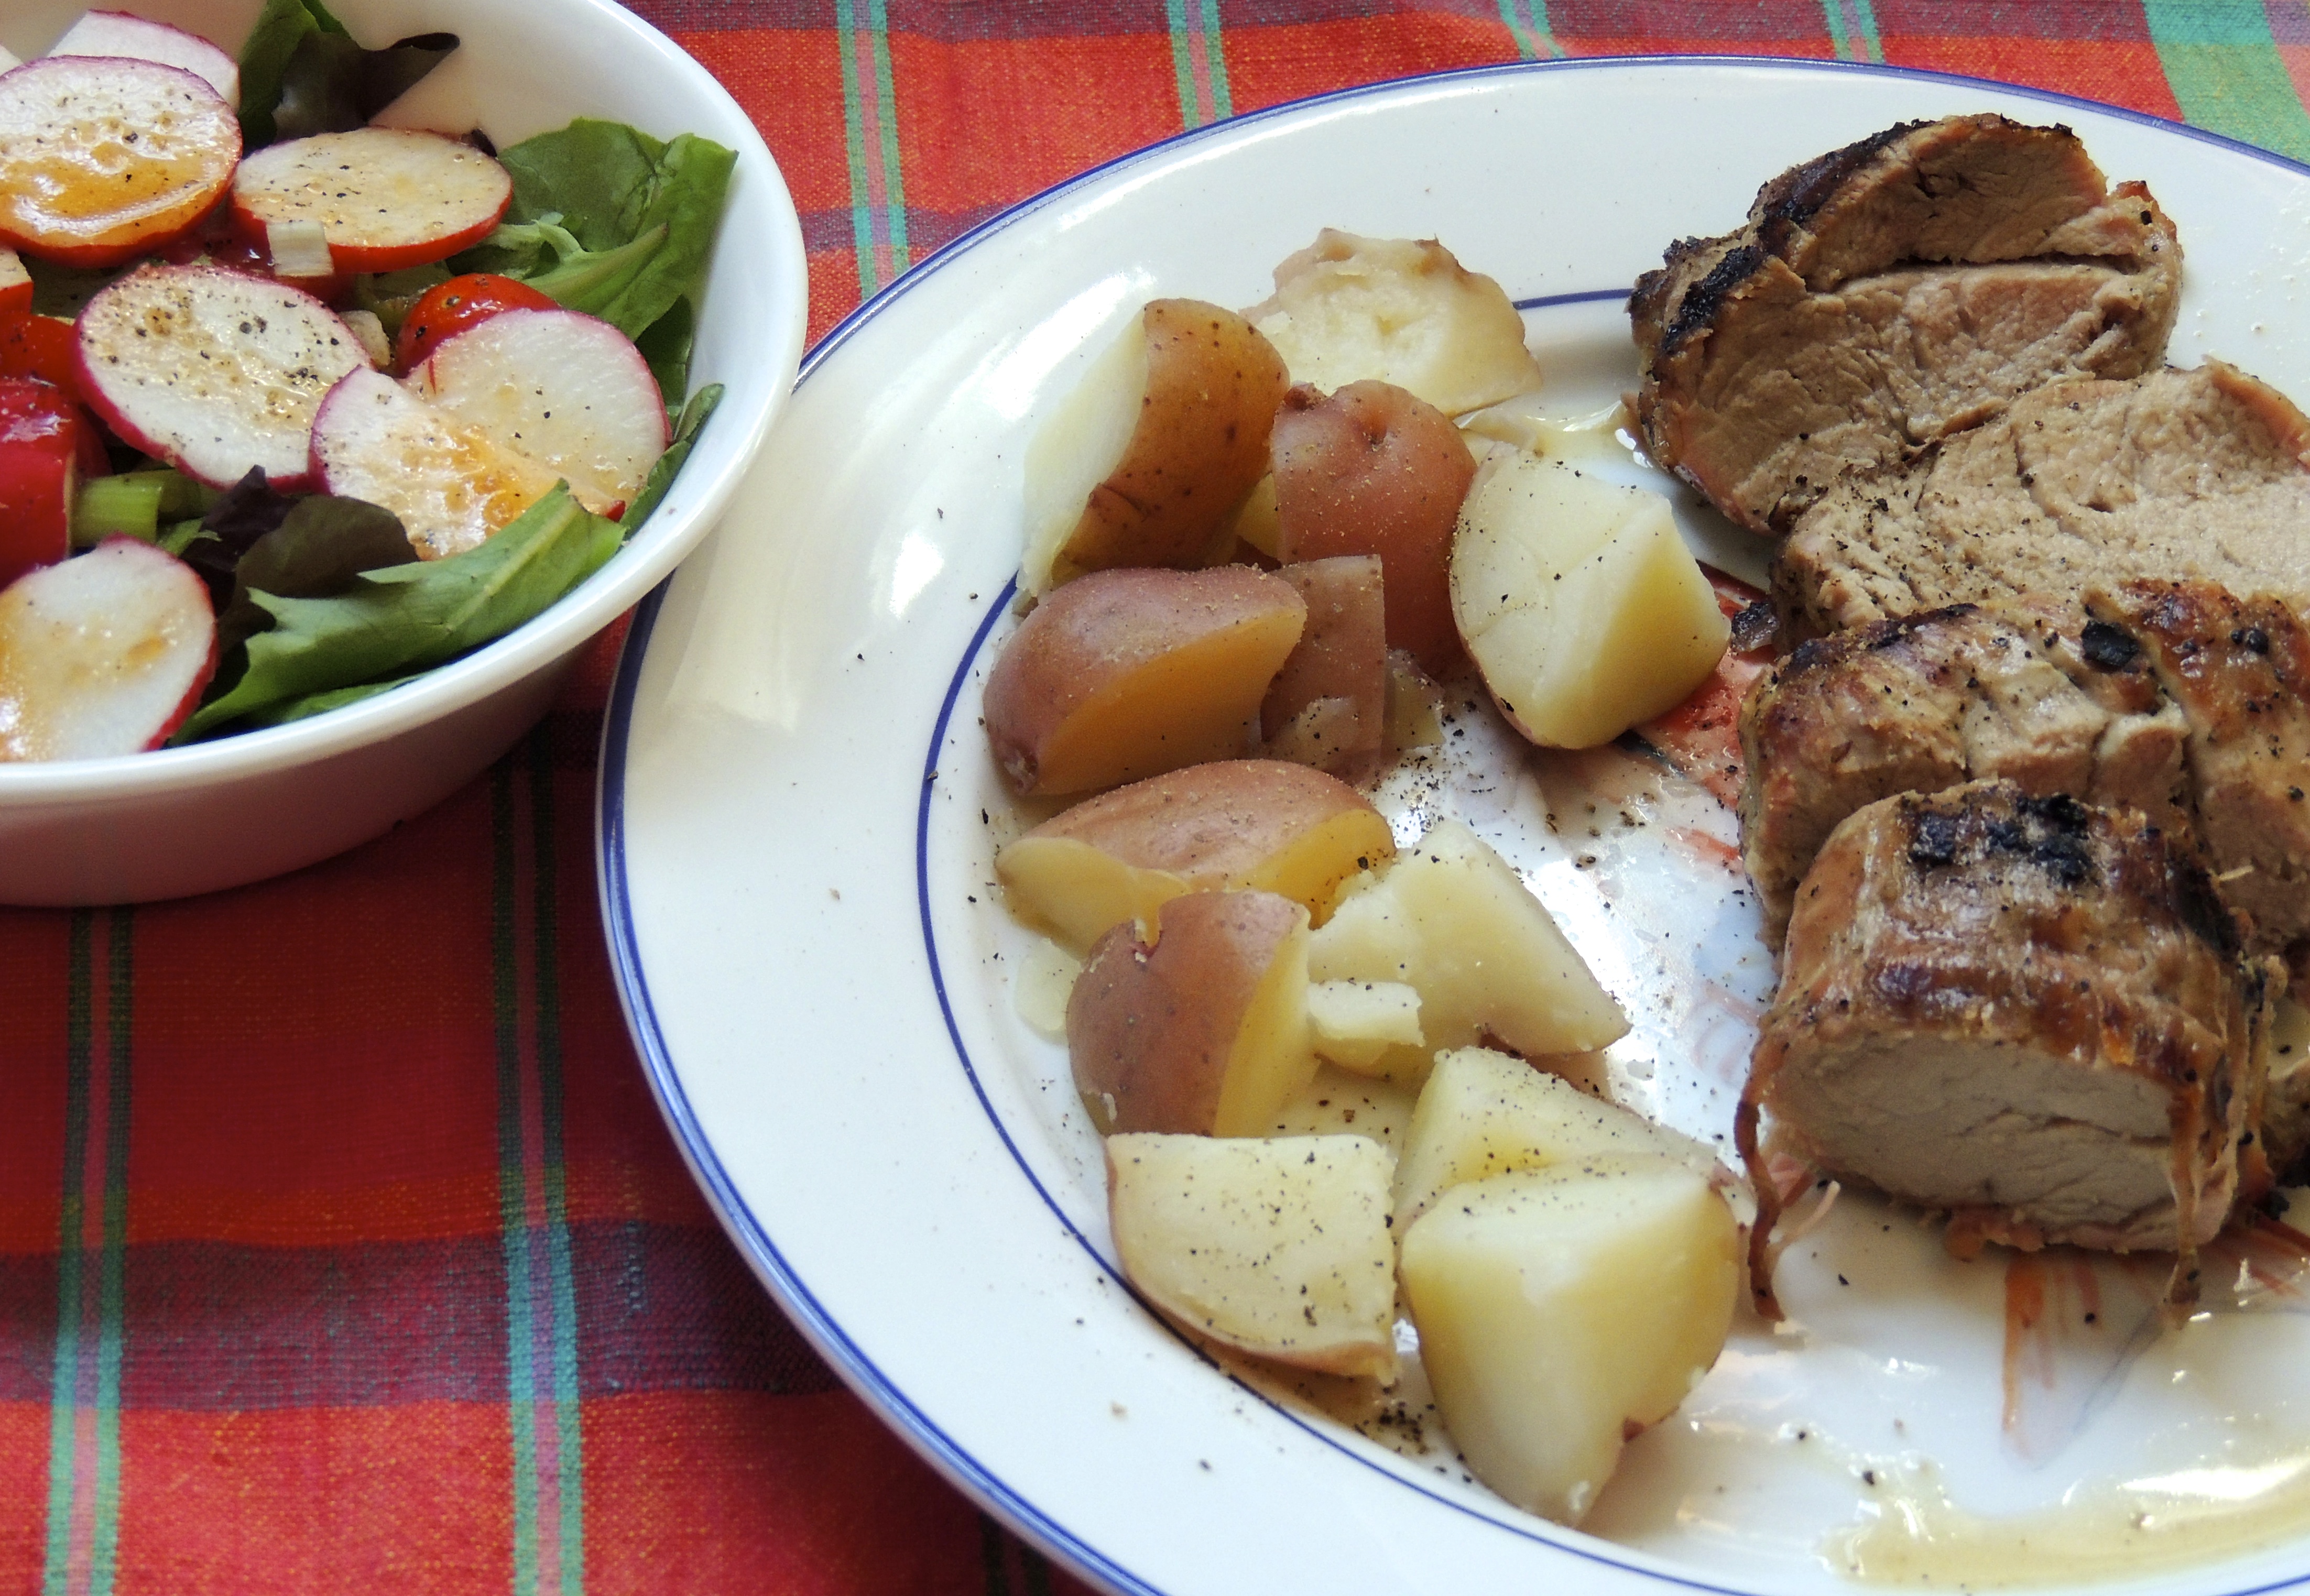
It’s nice to have this recipe isn’t it? Pork tenderloin is a lean cut of meat, although it is considered “red meat” for those of you who limit your red meat intake… it goes great with little red potatoes, a salad, or rice and blackbeans… yum!
I was thrilled to find this recipe on FineCooking.com… woohoo! Happy to share my good finds with you!
We try to plan a few meat free days throughout the week… this recipe for Black Beans and Saffron Rice is a perfect substitute for meat. High in protein and fiber it fills you up and keeps you full! With that being said… I also make this as a side dish to accompany a nice grilled pork tenderloin! It’s a great combination of flavors!
BLACK BEANS AND SAFFRON RICE
I N G R E D I E N T S
Mahatma Yellow Saffron Rice (or made from scratch… which is an upcoming post!)
1 container of Black Beans (my favorite brand is FIG, Food Is Good, they are so tasty! But any brand will do!)
1 onion, chopped
Little olive oil (1 Tablespoon or less)
Jalapeño’s (I buy the already diced in the jar, near the pickles at the grocery store) 1 Tablespoon, more or less to taste
D I R E C T I O N S
Cook rice according to package directions.
Drizzle a little olive oil in saucepan, sauté the chopped onion until soft.
Add a tablespoon (more or less depending upon how hot you like it) of chopped jalapeño , stir for a few seconds
Add container of Black Beans (I buy black beans that have water only or water and sea salt)
Bring to a simmer… add a little water if necessary, put a lid and leave it just cracked.
I cook about 15-20 minutes… test a few, are they wonderful? Or are they a little crunchy? If they aren’t done, let them cook a little longer…
Scoop some rice into a dish, top with the black beans.
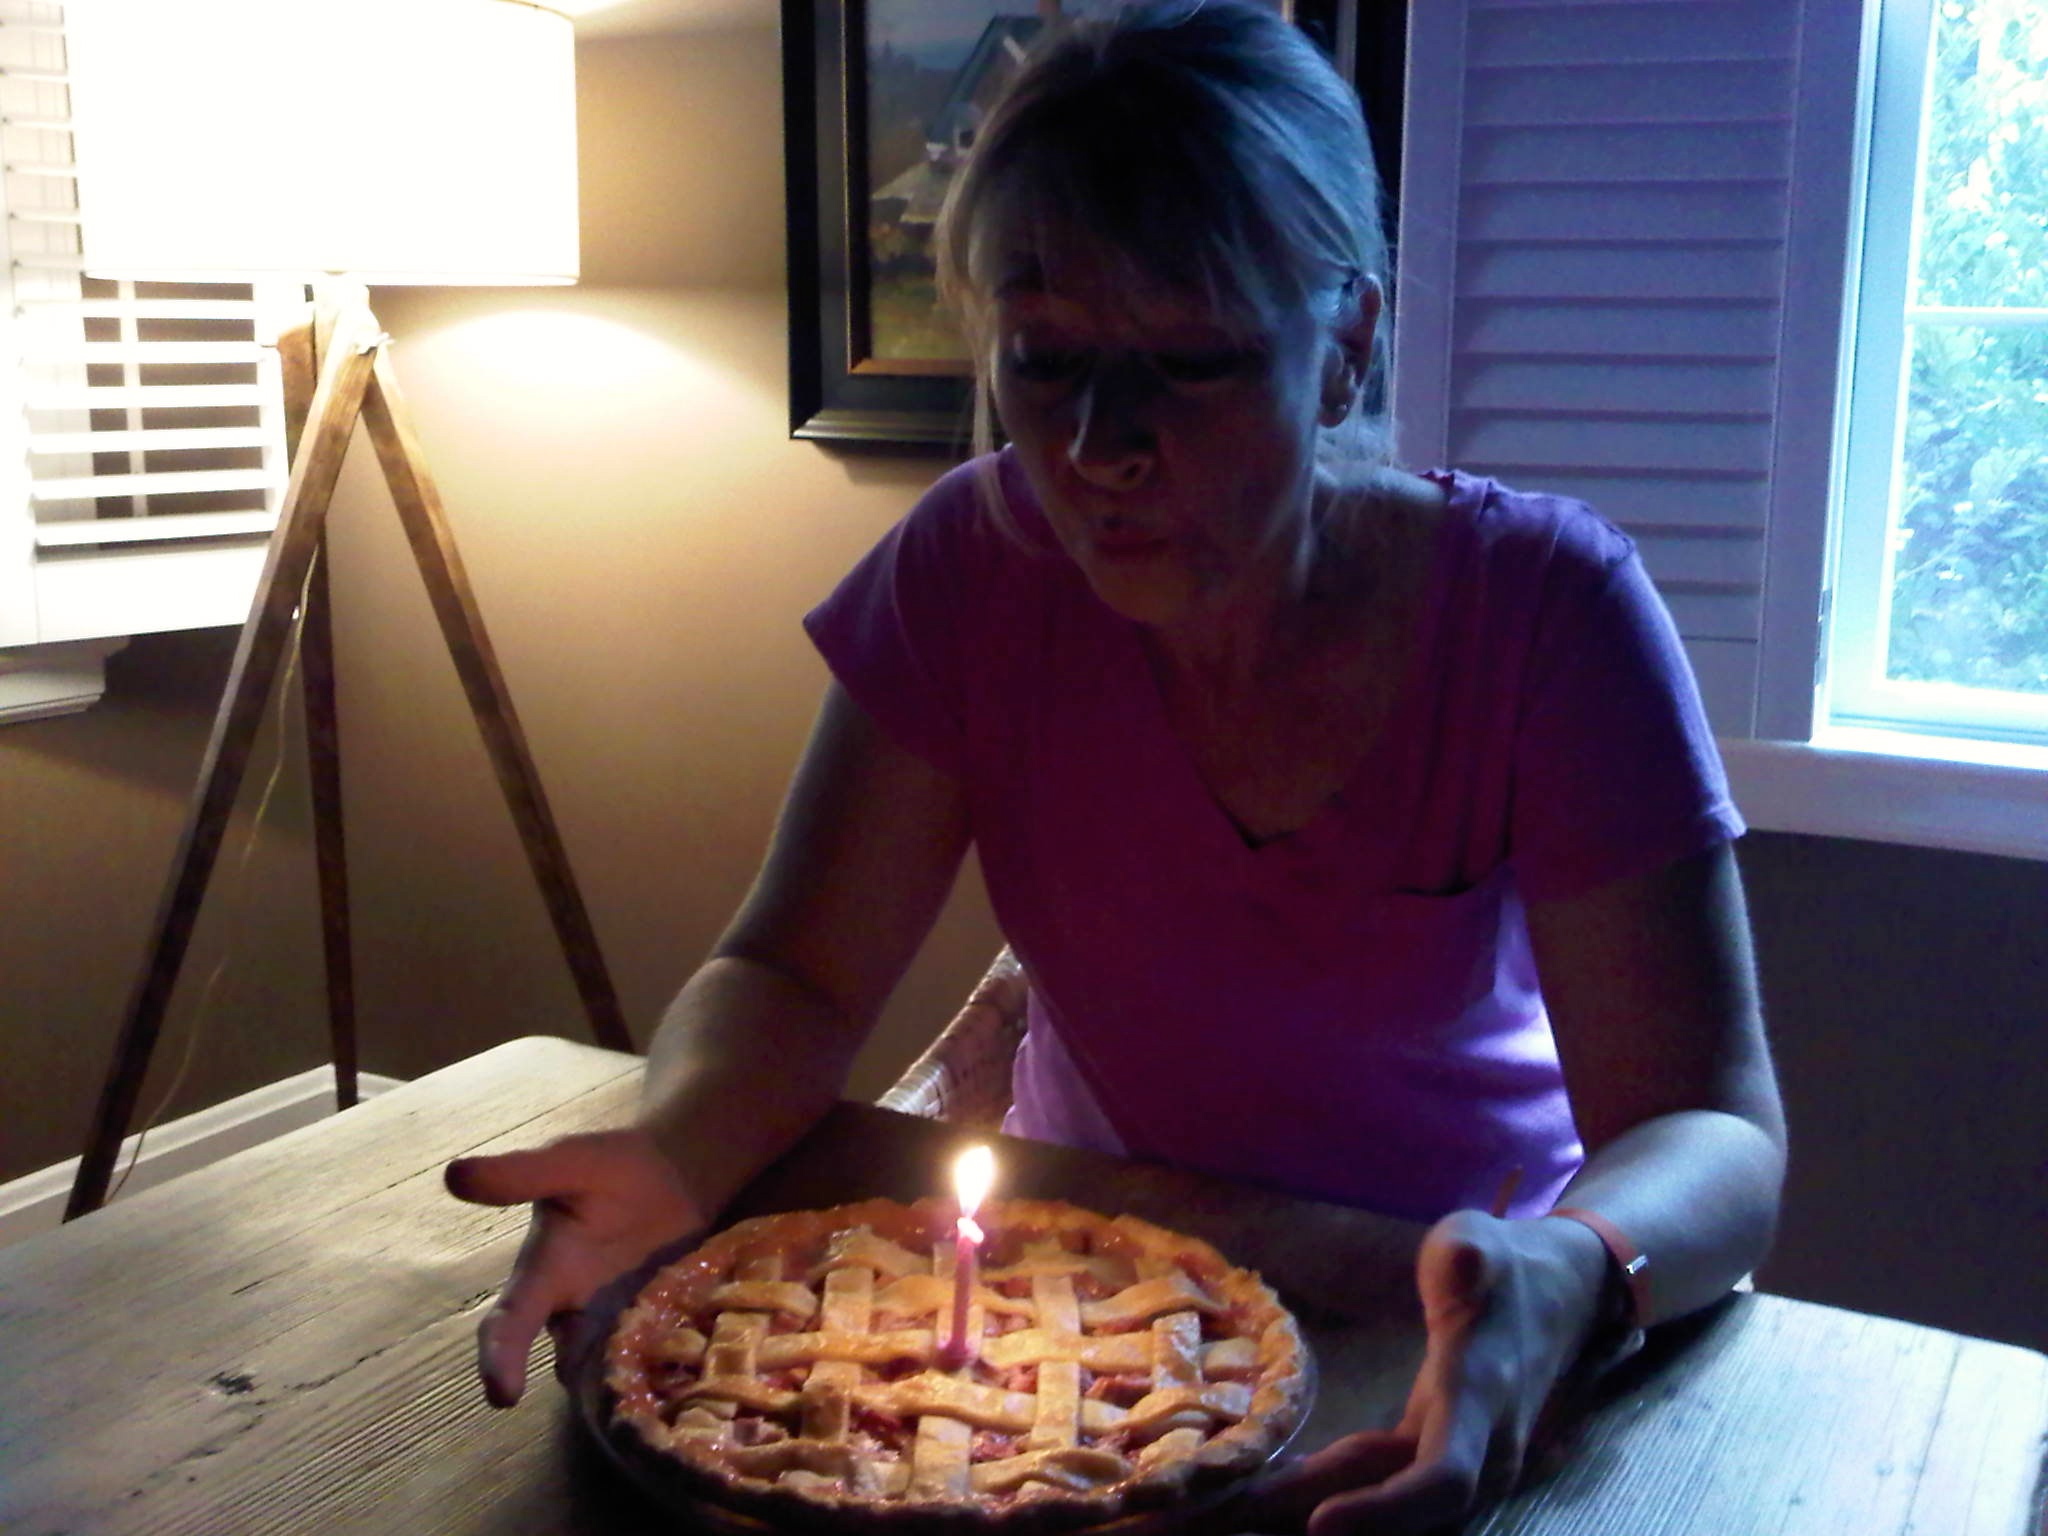
Rhubarb. You either love it or you hate it. I happen to love it. Rhubarb makes the best pie ever. Some people mix it with strawberries… hmmmm, not me, I like it with just rhubarb. I’m funny that way…
Last month was my birthday, and my mother-in-law surprised me with a rhubarb pie, and it was delicious! I swore I was going to freeze some of it, but it was gone before I got around to doing it… Oops!
I was a weird kid… never wanted cake for my birthday, always wanted pie. So my mom would bake me a pie. I love a good pie! I showed you how to make an APPLE PIE on an earlier post… Easy as… you guessed it! Fruit pies are easy as pie to make. Sometimes they may be a bit juicy and make the bottom crust soggy, other times they won’t. Go with it, don’t worry about it, it’s good no matter how it ends up! My favorite are fruit pies (I refer to blueberry pie as ‘antioxidant pie’, hee… hmmm, sounding good right now!).
As I mentioned, I didn’t make the pie above… but I have made this pie before. I don’t usually put a lattice crust, just because it’s quicker to have a top crust and make a pretty design with a knife to let the steam escape. But if you have the time, the lattice really makes it pretty!
I use Pillsbury pie crust (red box in the refrigerator section of the grocery store). I never use any other. I’ve picked up a well known brand and it was horrible… that’s a lot of money down the drain if the crust is bad. So unless you know for a fact that the crust is good, either make one, or buy Pillsbury pie crust…
Here is the link to the RHUBARB PIE recipe on the AllRecipe.com website, from that location you can click to print!
Best Rhubarb Pie Ever!
FRESH RHUBARB PIE(recipe by Carol via AllRecipes.com)
INGREDIENTS
4 cups cut rhubarb
1 1/3 cups sugar (recipe says 1 1/3-2 cups sugar… I’ve never needed more than 1 1/3 cups, and it could probably be lowered to 1 cup)
6 Tablespoons flour
1 Tablespoon butter
1 recipe pastry for 2 pie crusts (or Pillsbury pie crust in the red package located in the refrigerated section of your grocery store).
Preheat the oven to 450 degrees.
Open the pie crust package, it contains two crusts (follow directions on box).
Place one crust in the pie dish (roll it out if you need to). A regular pie dish works great, you don’t have to use a deep dish pie dish (like for an apple pie), although you can… I don’t have a regular pie dish, so I use a deep dish for everything…
Then mix up the filling… this takes a lot of skill… kidding! I said it’s easy as pie, right? Here’s what you do…
Combine the sugar and flour. Sprinkle 1/4 of it over the pastry in the pie plate. Then add the rhubarb to the pie dish, even it out with your hands. Sprinkle the remaining sugar/flour mixture over the rhubarb. Dot the rhubarb with small pieces of butter. Cover with a top crust and seal. Cut a few small vents in the center of the crust to allow steam to escape.
Place pie dish on cookie sheet and put in the oven. Bake at 450 for 15 MINUTES. Then REDUCE OVEN TEMPERATURE to 350 degrees, and continue to bake for 40-45 minutes.
This pie is fabulous warm or cold. It’s best served with vanilla ice cream!
Let me know how you like it! I’ve had this recipe since 2008… my dad found it online… good going dad!
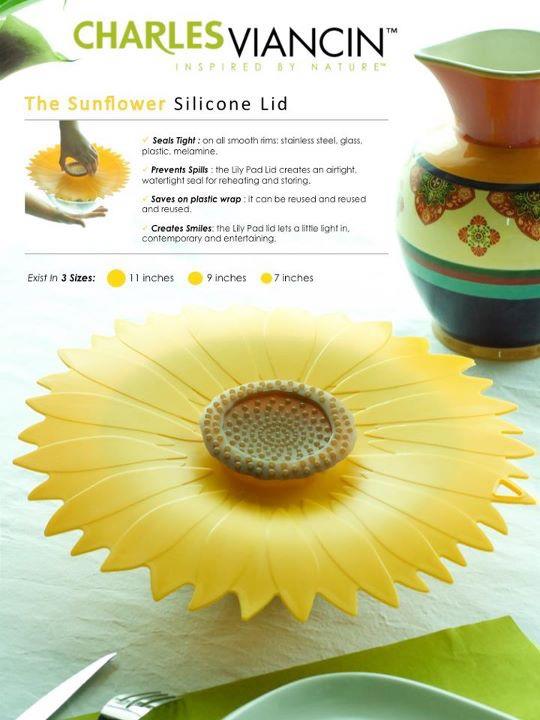
[featured product] is something that I really like… in this case its something that is so useful, cuts down on foil and plastic in landfills and is a treat to the eye… whatever could it be??
One of the gifts I received for my birthday from my mom and dad were a few of these Charles Viancin silicon lids. I was thrilled! They know I LOVE THIS STUFF! I’ve had my eye on silicone lids for a while, but haven’t bought any… Why am I so excited about silicone lids you wonder? NO PLASTIC WRAP (can you imagine?) or FOIL to cover bowls with! Sweet! Everyone loves dealing with plastic wrap, right? Ugh. And foil… the price keeps going up like crazy (what’s up with that??)…
As you can see these silicone lids are good for many reasons, they’re BPA free, the may you eco friendly but reducing waste, they seal tightly, I tried it on a cereal bowl (the small size, 6″), I just set it on top, and I could pick the bowl up by the center stem that sticks up…. the suction is unbelievable. To get it off, set it down, and lift it off… comes off easier than you can imagine. The lid creates an airtight/waterproof seal keeping your food fresh! You can even use it while cooking to retain steam… you can use it in the dishwasher and the microwave!
As you can see they make all sizes, even small lids for glasses, stoppers for wine bottles (how cool is that?), cutting boards, etc. All different flower patterns, and I saw on their Facebook page that they have a snowflake design coming out soon for the holidays! Check out their STORE LOCATOR to see where you can purchase them near you… if there isn’t a place, you can find them on Amazon.com!
I love smart things! Catch you back here tomorrow!
In my 50+ years I have yet to see a double yolked egg… until the other day! I was making scrambled eggs with spinach and cheese (an all time favorite)… I tossed the eggs in the pan (I scramble them in the pan)… and out of one of the eggs a double yolk appeared! I think it might be time to go buy a lottery ticket, ha ha… weird, eh? I read that a woman in the UK bought a half dozen eggs and every one was a double yolker! Interesting, huh??
I found this recipe while searching for a couscous recipe that had cranberries and nuts in it, I had an idea what to use for dressing, but ran across this recipe on Epicurious – it used spices that I definitely would not have used, but am so glad that I did. This recipe is one that was apparently created at Whole Foods. I checked their site for the recipe, but it wasn’t there. I did find it on Epicurious. This is a great side dish/salad that goes well with pretty much everything! It can be served warm or cold. This is a quick and easy recipe that will put a smile on your face! I added fresh orange wedges to it, and that makes all the difference, it takes it from a really good recipe to a blow your mind recipe. Yep, just with a few oranges!
Note: This recipe calls for Israeli couscous. I always thought of couscous as the tiny grain like pasta, which I never cared for, but after reading about it on Cookthink.com I saw that it was entirely diffferent. It’s puffier, this is what it looks like (the other couscous looks a bit like sand)…
Like couscous, so-called Israeli couscous are small, round, pasta-like granules made from semolina and wheat flour.
While the Israeli company Osem claims to have “invented” Israeli couscous in the 1950s, it is simply a marketing term for what was known previously as North African berkukes or Palestinian matfoul and popular in Jordan, Syria and Lebanon.
Unlike familiar small, yellow semolina-based North African couscous, Israeli couscous (which is sometimes called pearl couscous) is twice as big and is toasted rather than dried. This gives it a nutty flavor and a sturdy composition that gives it a chewy bite and makes it stand up to sauce.
Israeli couscous can be used in salads, soups or as a base for chicken or fish. It works well when prepared like a rice pilaf.
Here’s the recipe – Click to print this recipe from Epicurious
Salad:
2 cups Israeli couscous, uncooked
1 cup dried cranberries
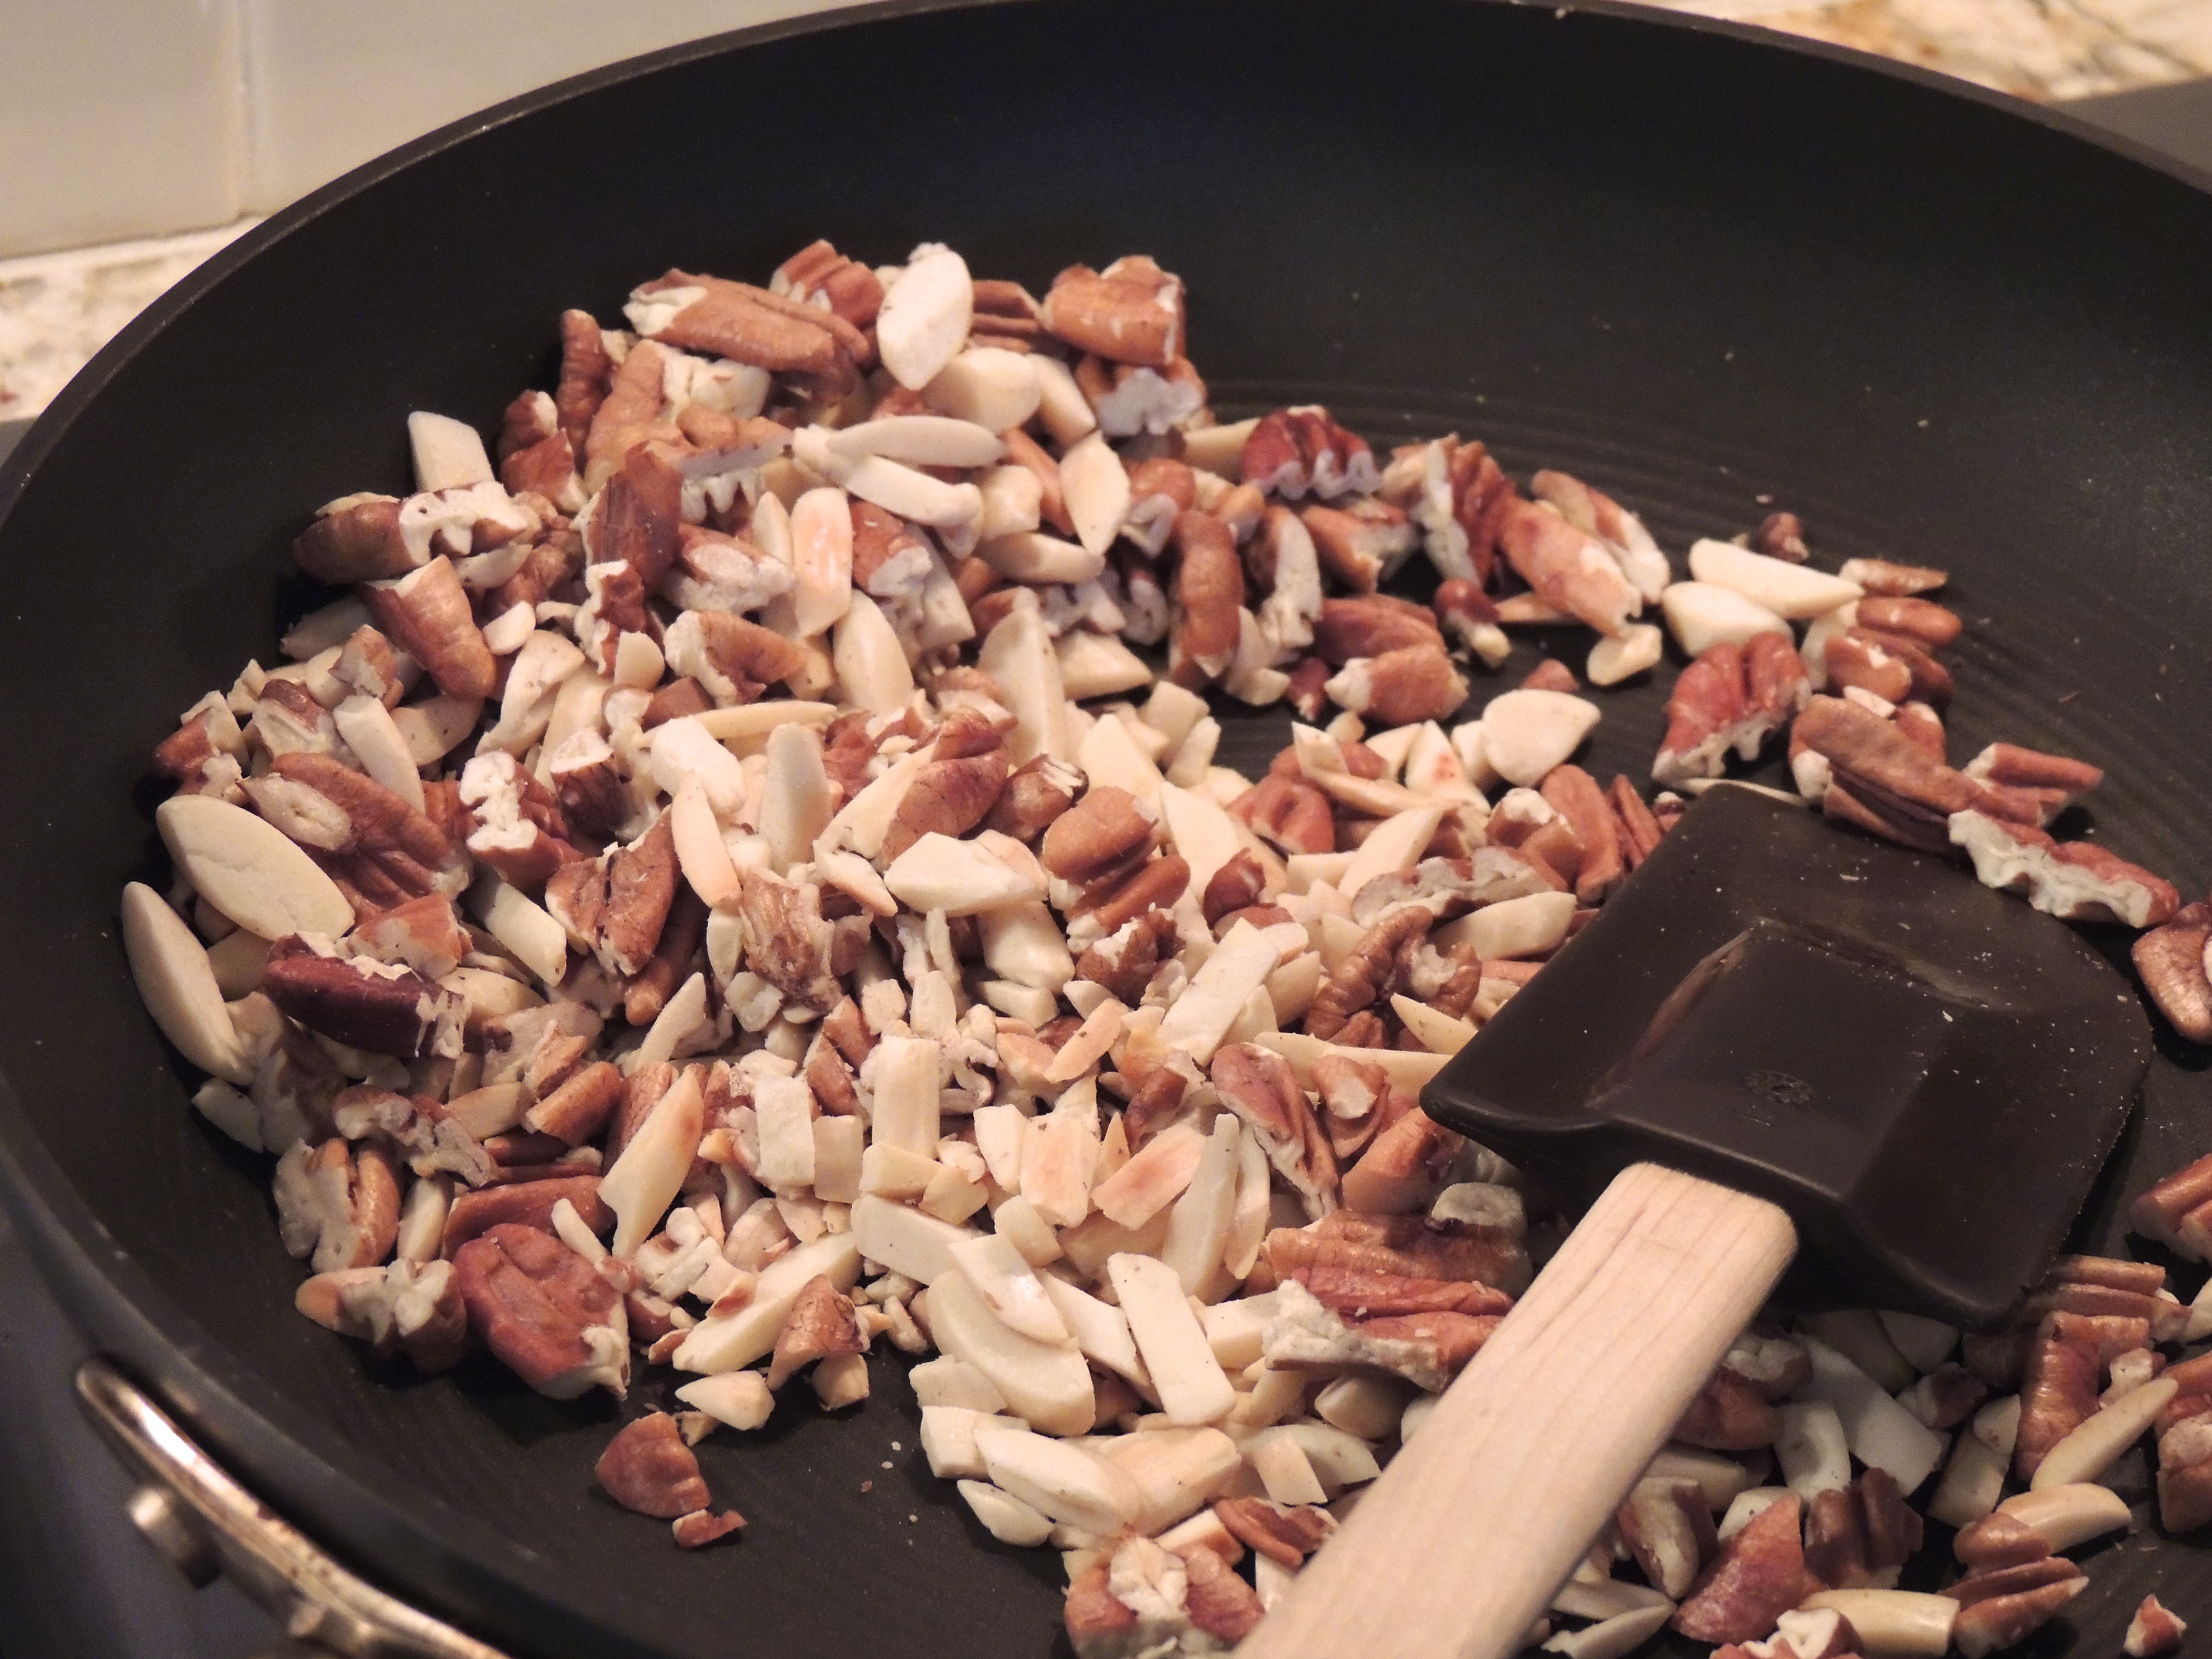
1 cup toasted pecans, quartered
2 scallions, minced
Dressing:
3 tbsp canola oil (I used olive oil)
1.5 tbsp champagne vinegar (I used white wine vinegar)
1 orange, zest
1/2 orange, juiced
1/2 tsp turmeric
1/2 tsp dried thyme
1/2 tsp dried tarragon
Salt and pepper to taste
NOTE: I added 2 1/2 oranges, cut into wedges (the other half is juiced in the above steps) – this made the recipe over the top good!
preparation
Bring a pot of salted water to a boil, and add the couscous. When it’s done (roughly 8-10 mins, or when it’s al dente), drain it but do not rinse. Set aside and let cool while you mince the scallions, toast and chop the pecans, and make the dressing.
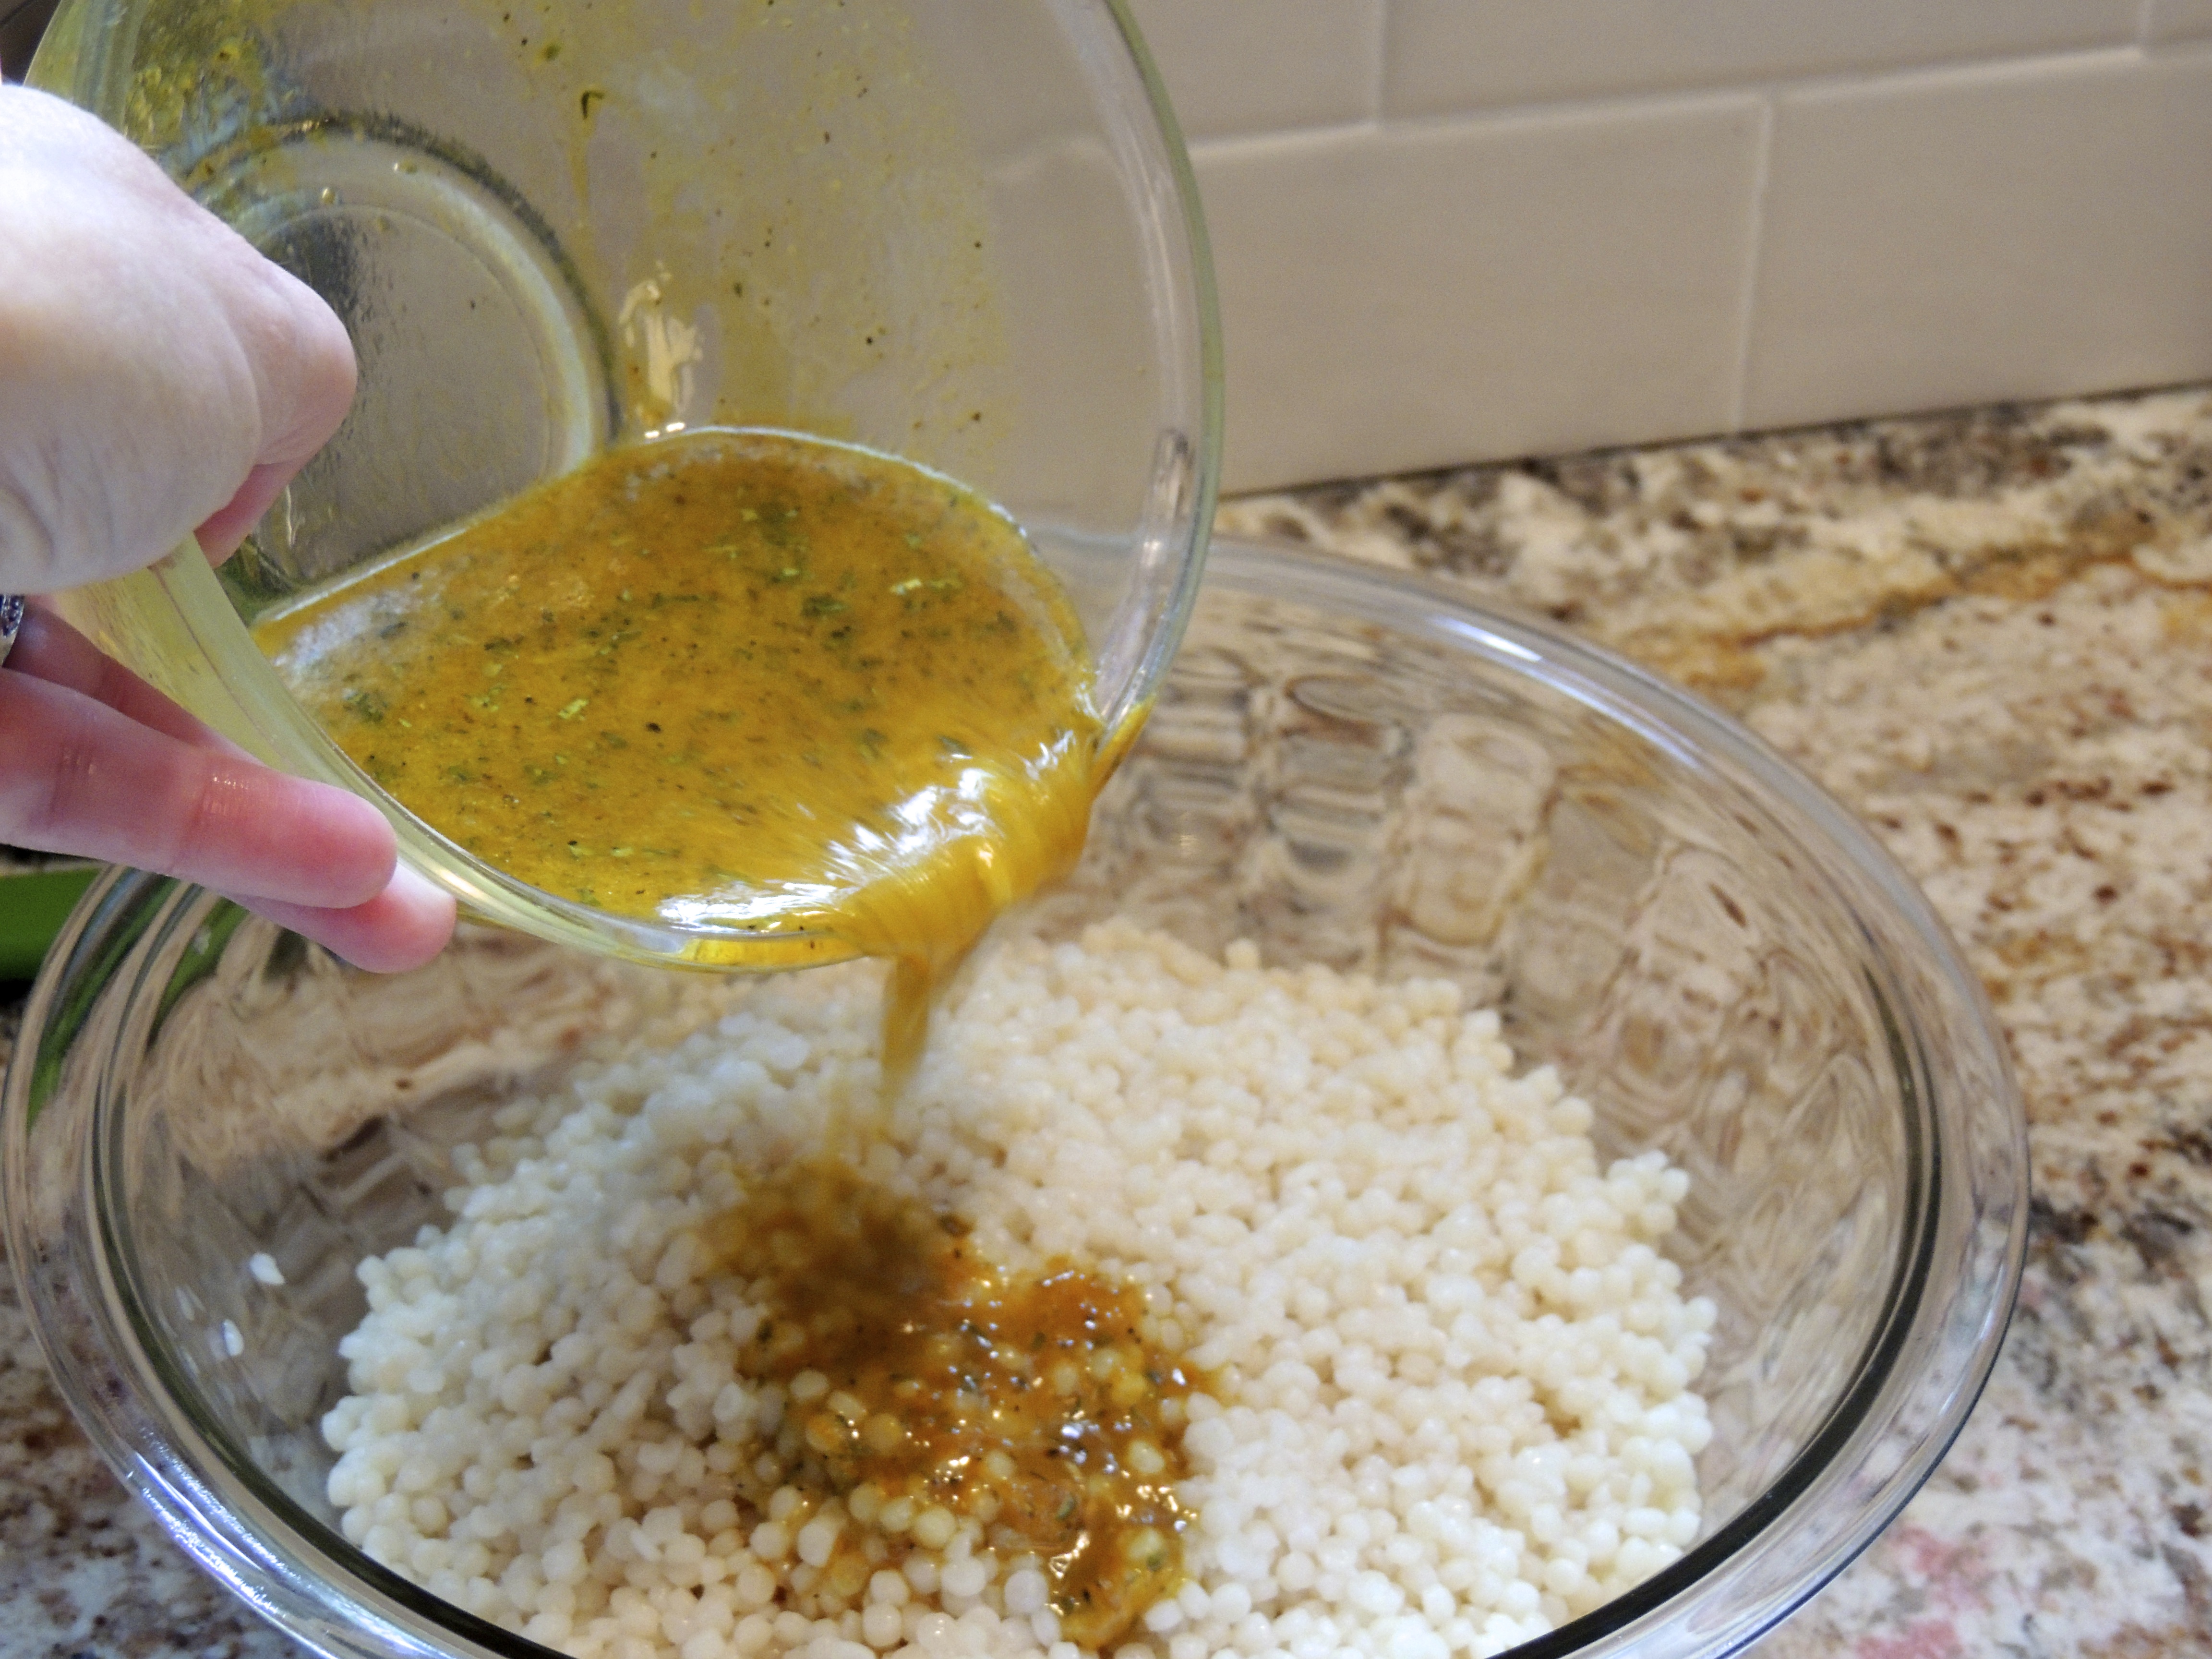
In a small bowl, whisk together the canola oil, vinegar, orange zest and juice, spices and salt and pepper.
In a large bowl, combine the couscous, cranberries, pecans and scallions. Pour the well-whisked dressing over it and toss to combine.
Serve immediately, or chill in the fridge for a few hours to blend the flavors.
This is what I did:
Set out ingredients…
Toast nuts in a dry non stick pan just until they start to turn a light brown and you can begin to smell them; beware, this step can go from good to bad quickly, so get the pan off the stove once you start to smell them roasting.
Zest your orange (not the white part) – In a bowl mix the olive oil, vinegar, fresh squeezed orange juice, zest and spices…
Cut oranges into wedges or smaller pieces, however you like it… this will add a nice sweet burst of flavor- I don’t think you can have too many!
After you cook the couscous in boiling water, as you would pasta (I did mine 6 minutes and it was perfect), drain it and put it into a bowl. Then, chop your green onions…
Pour the dressing over the cooked couscous – oooowie, smells good, doesn’t it?
Add the dried cranberries and orange segments…
Add the green onions that you chopped a few minutes ago…
Then add the toasted nuts…
T A D A ! !
Now you would think that I would put a serving in a pretty little dish and take a photo… but did I? Nope… I was hungry and I totally missed this step! It would have been pretty too! We had grilled chicken, couscous and sautéed spinach – close your eyes a picture it… on a pretty plate… smell the wonderful combination of orange, roasted nuts, mmmmm… you know you want it… now go get busy! ENJOY!
Who remembers the Orange Julius drink? Do you remember that wonderful orange flavored iced drink? I remember certain things about my childhood… like when my dad would go to Sears and look at tools… as a little girl… I can still remember the tiles on the floor at Sears in Macomb Mall (St. Clair Shores, MI). A beigy colored tile… HOW do I remember that?
Recently a great little Mexican restaurant opened up in South Windermere shopping center… it’s a short walk away, which is the ultimate in convenience! If you haven’t ventured to YoBo Cantina Fresca yet, peruse theirmenu, then head on over!
The interior is very cool too… dress however you like…
They’re a friendly group over there… we’ve tried several items on the menu. My favorite at the moment are the chicken tacos… Next I’m trying the fish tacos… also want to try the salad… great salsa’s that are really different, and oh so fresh!
Yobo uses fresh ingredients!
Don’t miss their specials… Monday night all tacos are $2.50 starting at 4PM…
Every time we hear Nora Jones sing, we think of the Island Inn on Monhegan Island, Maine. Every. Single. Time. One of us will say “the dining room is open”. One year, they played the same Nora Roberts CD, over and over. Not complaining. We rather enjoyed it. Matter-of-fact we looked forward to it the following year, and I’m guessing someone who worked each night couldn’t take it anymore! This dining room holds lots of special memories for us. We’ve met some wonderful people over the years. We’ve had wonderful breakfasts with some and long dinner’s with others. You know that comfortable interesting conversation that lasts long into the night? It’s rare to run into cool people like that. Monhegan, ME allows you to spend time with others because there isn’t a lot to distract you… no TV, radio, spotty cell coverage. All are blessings.
Special memories indeed! This photo was taken in 2008. The paintings in the dining room that year were by Alison Hill…


![Israeli CousCous [Cookthink.com]](https://artfoodhome.com/wp-content/uploads/2013/08/israelicouscous-cookthink-com.jpg)