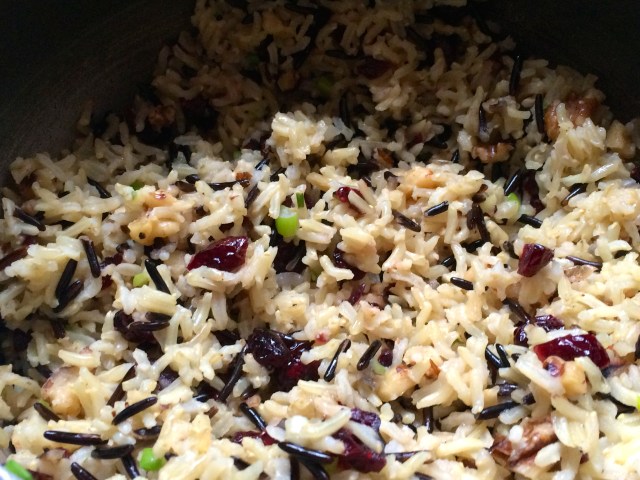
Continue reading “Quick and Easy Wild Rice with Cranberries and Walnuts in a Citrus Dressing!”

Continue reading “Quick and Easy Wild Rice with Cranberries and Walnuts in a Citrus Dressing!”

Chocolate Biscotti… this is such a wonderful recipe. Truly your eyes will roll back into your head with delight! This is a great recipe to make and leave a few out and freeze the rest. Then when you need that chocolate treat pull out a few. You will be so glad you did! Wonderful depth of chocolate flavor from the cocoa powder, white chocolate baking bar, and semi sweet chocolate.
One BIG change. In the recipe below where it says Butter or MARGARINE… BUTTER! BUTTER! BUTTER! NO MARGARINE!
Another hot tip (thanks Mom!) is to use mini semisweet chocolate chips and mini white chocolate chips, doing so eliminates the chopping of the baking bar. Quick and easy!
This recipe came from Better Homes and Gardens Magazine years ago. Click HERE to print the recipe from their website – it’s one to file away to keep forever and ever! (Note: I do not add the optional glaze (omitted from the recipe as shown below) – it doesn’t need it, and freezes better without it!

Directions look long, but really it’s not that time consuming. Biscotti dough is thick, so if you have a heavy duty mixer, that will help immensely… When I first started making this recipe I didn’t have a Kitchen Aid mixer. So you have to use some major elbow grease to get things mixed up. The Kitchen Aid does it with no effort at all… love that mixer!

Can you imagine a more fitting treat for your day? Can you believe this recipe has been reviewed 21,000 times? Amazing. A definite favorite!
Catch you back here tomorrow!

Roasted Cauliflower. I love it! It gets nice and sweet and the flavor profile changes completely when you roast it. It’s so quick and easy to do.
Did you realize there are different colors of cauliflower? Green, purple and plain white. I chose a purple cauliflower this time (they all taste the same) – it was fun! I break into fairly small florets, they take less time to roast. If you have the time you can leave them in larger pieces. We were having this with grilled chicken, so I didn’t have a lot of time, therefore the small pieces.
Break the cauliflower into florets and drizzle with a little olive oil in a large bowl. Swirl the cauliflower around with your hands to coat it thoroughly. Then lightly grease (I always use olive oil or organic canola oil) a cookie sheet (this one I use for roasting). Turn the oven on 400 degrees F. Once the oven has preheated, place the cauliflower on the cookie sheet and space the florets out a bit, a little sprinkle of S&P. This will roast for 25-45 minutes (depending upon thickness). Flip about halfway through, you will see that the cauliflower is browning, this is GOOD, this is TASTY STUFF! Once it passes the fork test (fork easily goes through a thicker piece of cauliflower), it’s ready to eat! You can eat just like it is, or a quick little sprinkle of parmesan.
Speaking of parmesan… not the brands that apparently have wood filler in them, sigh…
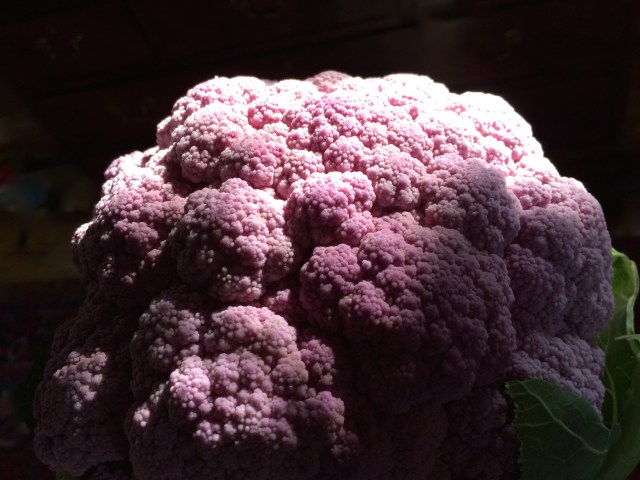
Portrait of my cauliflower – Hee.
Catch you back here tomorrow!
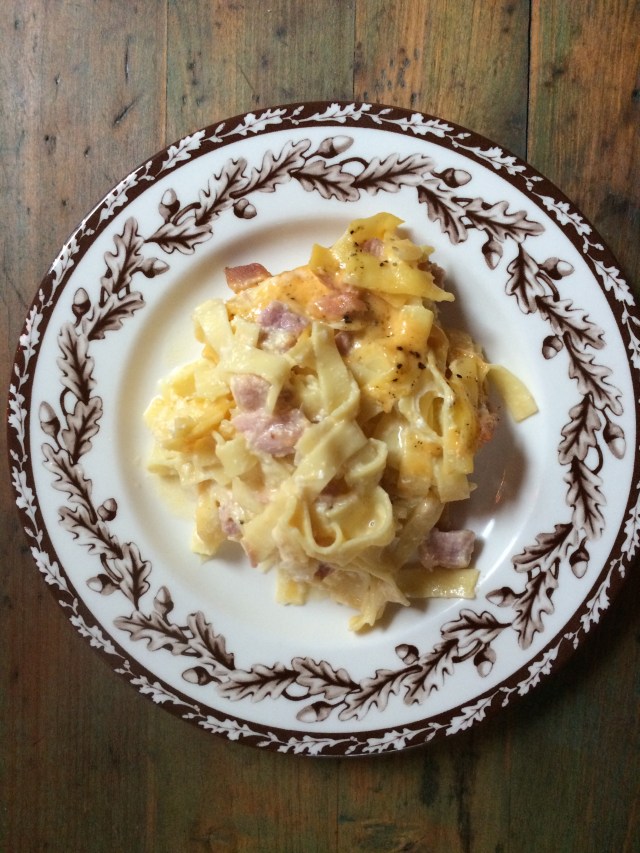
A friend sent me this recipe. Oh. My. Word! I changed up only a few things, I used less butter, substituted low-fat sour cream, used a little more cheese, and a wonderful noodle I found, I also thinned with milk because Fred likes a thinner sauce – I included the original recipe, and then my version below. This casserole is comfort food at its very finest. There are no cream soups with unknown ingredients, good ingredients = a healthier meal for sure!
You can make this as healthy as you like. Less cheese, no problem, I think I’m going to try using Greek yogurt in place of sour cream. One day. So afraid to mess it up. But I have substituted Greek yogurt in recipes in the past with good results. I will update this post if I do!
Click to print (both) the recipes (minus all my words)!
The original recipe (from a friend, thank you Heather Locke!!):
4 Tablespoons butter
1 small onion, chopped fine
2 eggs, slightly beaten
1 cup sour cream
1/2 cup grated Gruyere or Swiss cheese
1 ½ cups finely chopped cooked ham
Salt
½ pound noodles, ¼ inch wide, cooked.
Preheat the oven to 350°F. Butter a 2 quart casserole dish. Melt the butter in a skillet and cook onion over medium heat until soft.
In a small bowl: Mix the eggs and sour cream together, then add onion, cheese and ham. Add salt to taste. Put the noodles in the casserole dish, then add the sauce and toss gently. Bake for 45 minutes or until a straw inserted in the middle comes out clean.
_________________________________________________________
1-2 Tablespoons butter
1 small onion, chopped
2 eggs, slightly beaten
1 cup low fat sour cream
~1 cup sharp cheddar cheese
1 ½ cups cooked finely chopped ham
8 oz (½#) egg noodles (I used Amish Country), cooked and drained
Milk to your taste – I thinned it a bit using probably ⅓ – ½ cup 2% milk.
Follow above directions, I also topped mine with a little cheese. I baked it covered for 30 minutes and uncovered for 15.
Catch you back here tomorrow!

Trying to come up with different menu items for dinner can sometimes be a challenge. I wanted to make the Garden Chowder recipe, minus the chicken, and make a slightly larger batch. To go along with it I thought corn muffins sounded good. I grew up with Jiffy corn muffins. You can’t beat them! Until you read the list of ingredients. I’m trying really hard to limit ingredients, and to make everything from scratch. You wouldn’t believe how easy it can be. This is the perfect example. This recipe (from Food.com) is so fabulous. You’ve got to try it. I mistakenly bought WHITE cornmeal. It calls for YELLOW cornmeal. The only difference is the type of corn it comes from, and obviously, yellow cornmeal will result in better looking muffins, but they taste just as good!
Click HERE to print the recipe from Food.com!
This recipe has flour, yellow cornmeal, sugar, baking powder, salt, canola oil, egg, and milk. That’s it. Nothing you cannot pronounce!
INGREDIENTS in the Jiffy mix: WHEAT FLOUR, DEGERMINATED YELLOW CORN MEAL, SUGAR, ANIMAL SHORTENING (CONTAINS ONE OR MORE OF THE FOLLOWING: LARD, HYDROGENATED LARD, PARTIALLY HYDROGENATED LARD), CONTAINS LESS THAN 2% OF EACH OF THE FOLLOWING: BAKING SODA, SODIUM ACID PYROPHOSPHATE, MONOCALCIUM PHOSPHATE, SALT, WHEAT STARCH, NIACIN, REDUCED IRON, BHT PRESERVATIVE, TOCOPHEROL PRESERVATIVE, CITRIC ACID PRESERVATIVE, BHA PRESERVATIVE, TRICALCIUM PHOSPHATE, THIAMINE MONONITRATE, RIBOFLAVIN, FOLIC ACID, SILICON DIOXIDE.
Jiffy-Like Corn Muffins from Food.com
Preheat oven to 400 degrees F. Spray muffin tin (makes 6 muffins) with cooking spray (I just used olive oil).
In medium bowl mix 2/3 cup flour, 1/2 cup yellow cornmeal, 3 tablespoons sugar, 1 tablespoon baking powder, 1/4 teaspoon salt, 2 tablespoons canola oil.
Whisk together, then add:
1 egg
1/3 cup milk
Fill muffin tin 1/2 full. Bake 15-20 minutes at 400 degrees F.
I know, I know! What a treasure!
Catch you back here tomorrow!

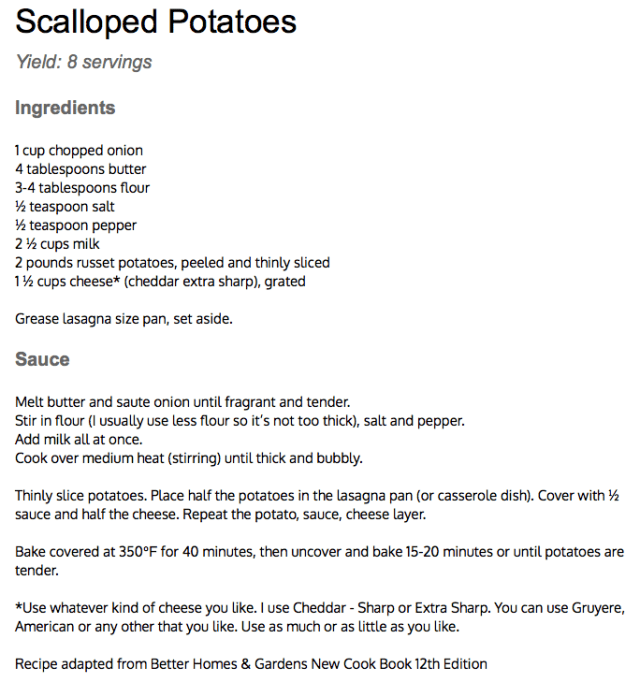
This recipe is adapted from the Scalloped Potato recipe in Better Homes & Gardens New Cook Book 12th Edition – I’ve made a few changes, but the basic recipe is fabulous as well!
This is also a great dish to make if you have leftover ham… sprinkle diced ham pieces into the casserole and it’s a full meal – can’t beat that!
Hmmm, why is this photo only showing half of the scalloped potato dish? It came out of the oven… we dug in… OOPS! P H O T O ! ! I’m only human, ha ha.
Click HERE to print the recipe without the extra babble.
Catch you back here tomorrow!
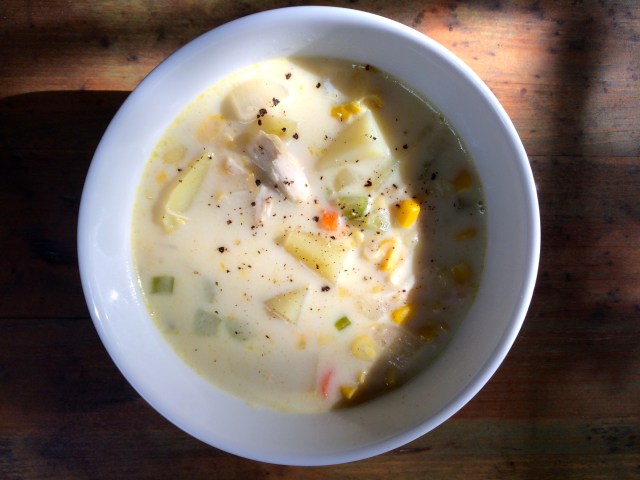
Two versions of chowder below. One with chicken, and one a bit different, with no meat. I served both with the Jiffy-Like Corn Muffins.
OUT. OF. THIS. WORLD.
Recipes from a friend, is there anything better? It’s so nice to hear of other things to make for dinner rather than being in a rut with the same old thing.
I was excited to try this, it sounded delicious to me. I found the perfect time when we had a bit of rotisserie chicken left over. That worked perfectly! These are guidelines, but use what you like! I happened to use 4 cups of chicken broth, so mine may have been more “brothy” than what is normal, but I had two very large potatoes, and I also supplemented with frozen sweet white corn.
What I forgot… the bacon crumbled on top! We had it the next day, when we heated up what was left (be sure to heat on low and DO NOT LET IT COME TO A BOIL or it will curdle). So DAY 2 had crumbled bacon, which I was so excited about I forgot to take a photo. Story of my life!
This recipe was heavenly! Give it a whirl!
Click HERE to print just the recipe!
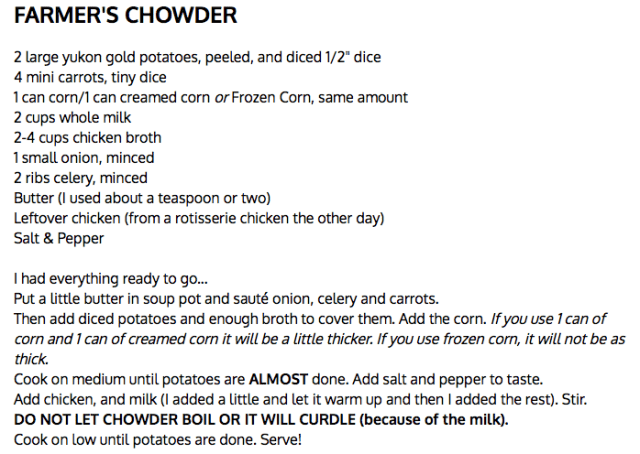
Version two, I like to call Garden Chowder, click HERE to print the recipe! One hint is to warm the thawed corn in the microwave just a bit, just so it’s not cold when adding to the soup…

Catch you back here tomorrow!

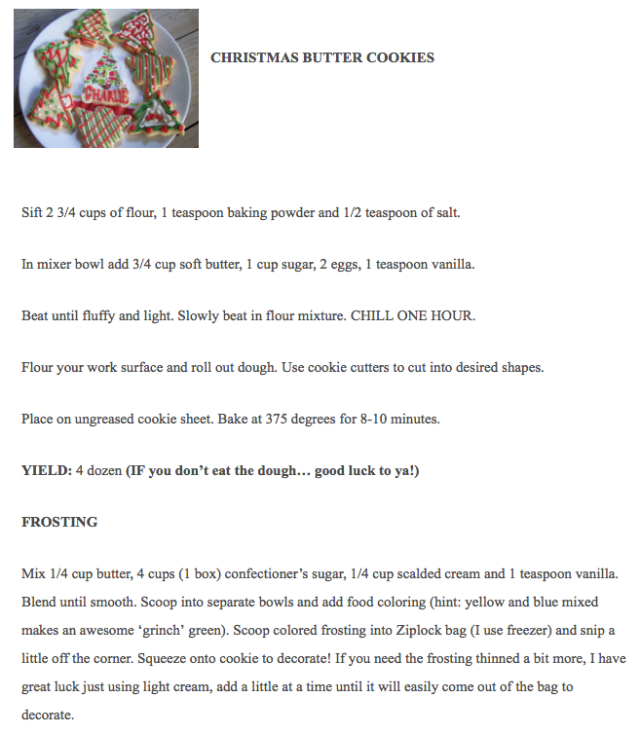
This is a Christmas Cookie recipe that our family has made since I was a little kid. It’s become a tradition. It’s fun because everyone can partake in the festivities. Especially if you bake the cookies ahead and then have a decorating party! We just put the frosting into zip-top baggies and cut a hole. Some years we have more colors than others. As you can see, this particular year, I was only loving my Christmas Tree cookie cutter, so that’s the only one I used. Recipe below as well as a link to print recipe only.
Enjoy!

Catch you back here tomorrow!

This soup is so wonderful during chilly weather. It is incredibly quick and easy to make, yet tastes like something you worked on all day! I ran across the original recipe on the 100 Days of Real Food website. I made a few changes, just because I had an extra large bunch of kale to use and because I wanted to add thinly sliced potato which really added quite nicely, reminiscent of a soup at Olive Garden restaurant.
Here is my version of the 100 Days of Real Food recipe for Kale, Sausage and White Bean Soup, (click HERE to print):
Kale, Sausage, White Bean Soup with Potato
Olive Oil
½-1 Onion, peeled and diced
2 cloves Garlic (I use microplane, but you can mince)
1 pound Chicken Italian Sausage links, cut into ¼” slices
6 cups Chicken Stock/Broth (48 oz)
1 bunch of Lacinato Kale, washed stalks removed, and chopped
2 cans Cannellini Beans, drained and rinsed (or other white bean)
1-2 Yukon Gold potatoes (large), quartered and sliced thin.
Pepper, taste before adding Salt.
Note: If you have a large bunch of kale, you can add more chicken broth, I added 4 cups (32 oz.), I also added one more can of cannellini beans (rinsed and drained).
Instructions
Heat oil in large soup pot over medium heat. Cook the onion for 2-3 minutes. Remove onion and put in small dish to add back later.
Add sausage (in batches so that it browns slightly) – cook for 5 minutes (if sliced rather thin, or 10 minutes if thicker).
When sausage is almost done add the garlic and stir while it cooks about 30 seconds or until fragrant (if pan is dry use a little olive oil before adding garlic).
Add onions back into the pot with sausage and garlic.
Add chicken broth, and stir to loosen browned bits on bottom of pan.
Add the sliced potato, and cook until you can pierce with a fork.
Now add the chopped kale, beans, Salt (if you need it) and Pepper. Cook 10-20 minutes, until beans are hot and kale is wilted.
Original soup recipe from 100daysofrealfood.com!
Catch you back here tomorrow!
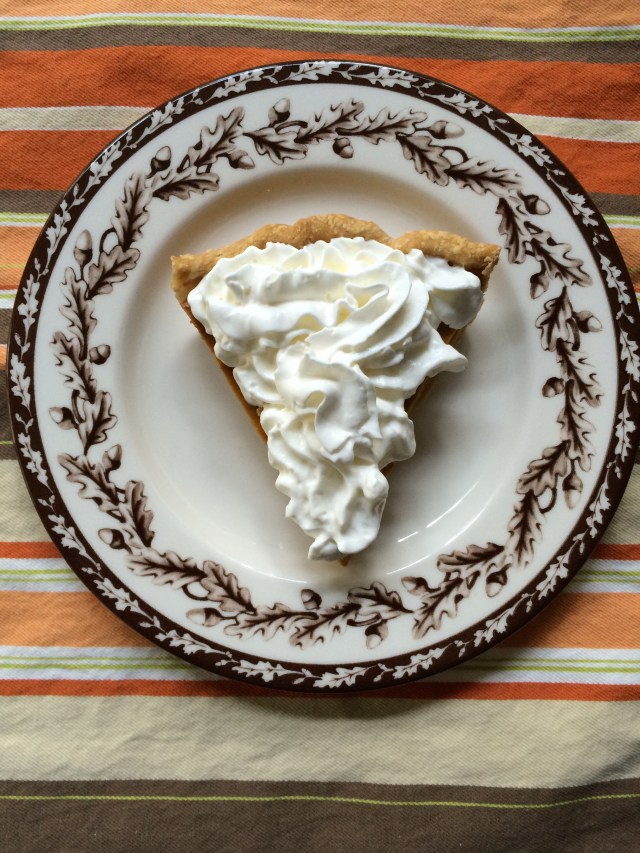
Pumpkin Pie. It simply cannot be easier! I saw this small can of “Farmers Market Organic Pumpkin Pie Mix” while shopping for Thanksgiving groceries at Whole Foods. By looking at the can, I figured I would need 2 cans for one pie. The recipe on the can says to add 3/4 cup evaporated milk, 2 eggs and the one can of pumpkin pie mix. I Googled when I got home and found that you truly only need one can. (Why is the other can in the grocery store so much bigger I wonder)?
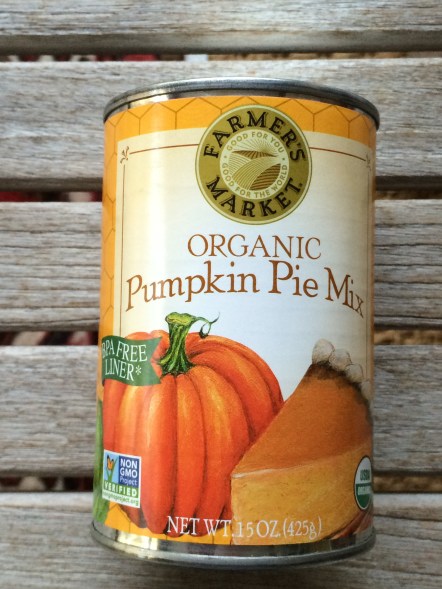
This is what the can looks like. In addition to organic it’s also non-GMO certified and in a can with a BPA-Free Liner. The Farmers Market Foods website also has great recipes!
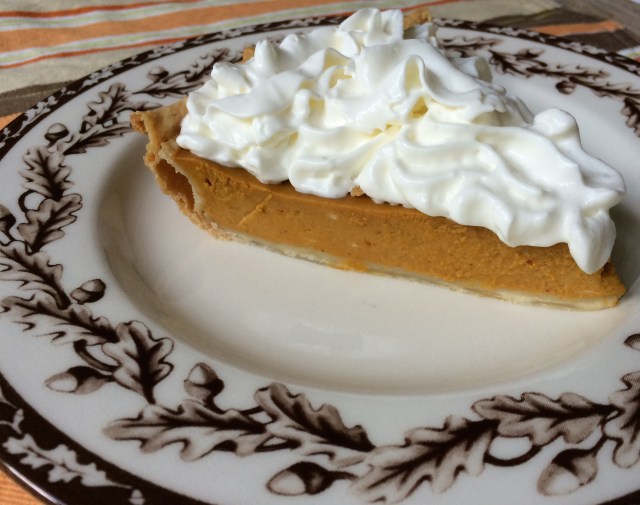
This pie came out very creamy. Absolutely wonderful. I will always buy this brand in the future! We had to make a “test pie” to be sure it would be ok for Thanksgiving Day! The verdict… and overwhelming Y.E.S.!!!
Catch you back here tomorrow!

Good grief it looks good, doesn’t it? It is! I originally featured this recipe four years ago, but it’s one that’s worth repeating. I use spinach pasta, artichokes, shrimp, garlic, red pepper, feta, olives, a splash of wine and olive oil. This will put a smile on your face!
I like this photo better, more light, so I am replacing the old photo… Hey! Did I mention that this recipe comes together quickly? I know, you just can’t beat it!
It’s wonderful served with Trader Joe’s Olive Baguette and olive oil for dipping!
Here’s a link to the original post: MED PASTA WITH SHRIMP AND FETA RECIPE
Catch you back here tomorrow!

Funny how small the world is. We were on vacation and I was reading a magazine, saw a recipe that looked wonderful, from a Bertolli pasta sauce ad. Looked quick and easy and oh so delicious. That recipe came home with me. My friend, Heather, had done the same thing. She told me she made spaghetti and meatballs, they sounded delicious! I told her I tore out a recipe from a Bertolli ad! She said THAT’s the recipe, with a minor change!!
The only thing that she does differently is to bake the meatballs instead of just placing into the sauce. I like that! She bakes hers at 350 degrees F for 35 minutes, turning once. I baked mine 20 minutes, turning once during that time. Not sure if my oven is a little speedy or what, but they smelled just about done. Then pour one jar of sauce (plenty for four people) into a pan (a taller pan would work better than a wide pan so that the meatballs are submerged in the sauce). Heather uses Olive Oil & Garlic sauce, and I used Tomato Basil, just because that’s our favorite.
I’m not kidding you. This recipe is STUNNING. It took about 5 minutes to make the meatballs. Good note from Heather is to not pack the meatballs to tightly. She knew what she was talking about!
Following her direction, I put the pasta (I used whole wheat) and sauce with meatballs into a large bowl and tossed.
Get out! It was breathtakingly beautiful and the aroma in the house was to die for! Fred said he savored every bite! ;) I served it with a small salad of arugula, carrots, cucumber, green onion, olive oil, balsamic vinegar, pepper and a little sprinkle of parmesan. Nice!
Next time I will eat 2 instead of 2 3/4 meatballs, ha ha… they were just so good. Click HERE to print the recipe with my notes, or click HERE to click the recipe directly from Bertolli!

Thank you Bertolli for the quick and easy recipe, and thank you Heather for making it and passing along the tips!
Catch you back here tomorrow!

This is one of our staple recipes. The ingredients can vary due to preference and what you have on hand, also what is fresh! It can be made with or without meat (chicken, steak, shrimp or just black beans!) – we’ve made it both with chicken and without and it was equally delicious!
Click HERE to print the recipe minus all my words…
BROWN RICE BOWL – Serves 2
1 package Trader Joe’s Brown Rice (freezer), it’s just rice, but you microwave it so it cooks quickly, but you can always use cooked brown rice!
1 Boneless/Skinless Chicken Breast (we usually split one for this meal)
1 carton or can Black Beans (use however much you like), drained and rinsed
Avocado, diced (or you can use fresh guacamole)
Fresh Salsa (or you can cut up tomatoes, onion, a little garlic, lime juice)
Pepper Jack Cheese, shredded
Blue Corn Chips (or any tortilla chips)
Lime wedges
Cook the protein (i.e. we grill the chicken with olive oil, or you could sauté shrimp, etc.)
Cook the brown rice according to package directions.
Put black beans in a small pan and heat on stove or in glass dish in microwave, just until hot.
Set up the diced avocado, shredded cheese, and salsa (we bought Heirloom Tomato Salsa from Whole Foods, it was out of this world!)…
DISH UP!
Spoon some rice into your bowl (it can look like not much and end up being a lot!)…
Add cheese, Black Beans, Avocado and Salsa. Squeeze lime over the top (owie, this is so good!)… top with a few tortilla chips.
Out. Of. This. World, right?
Catch you back here tomorrow!
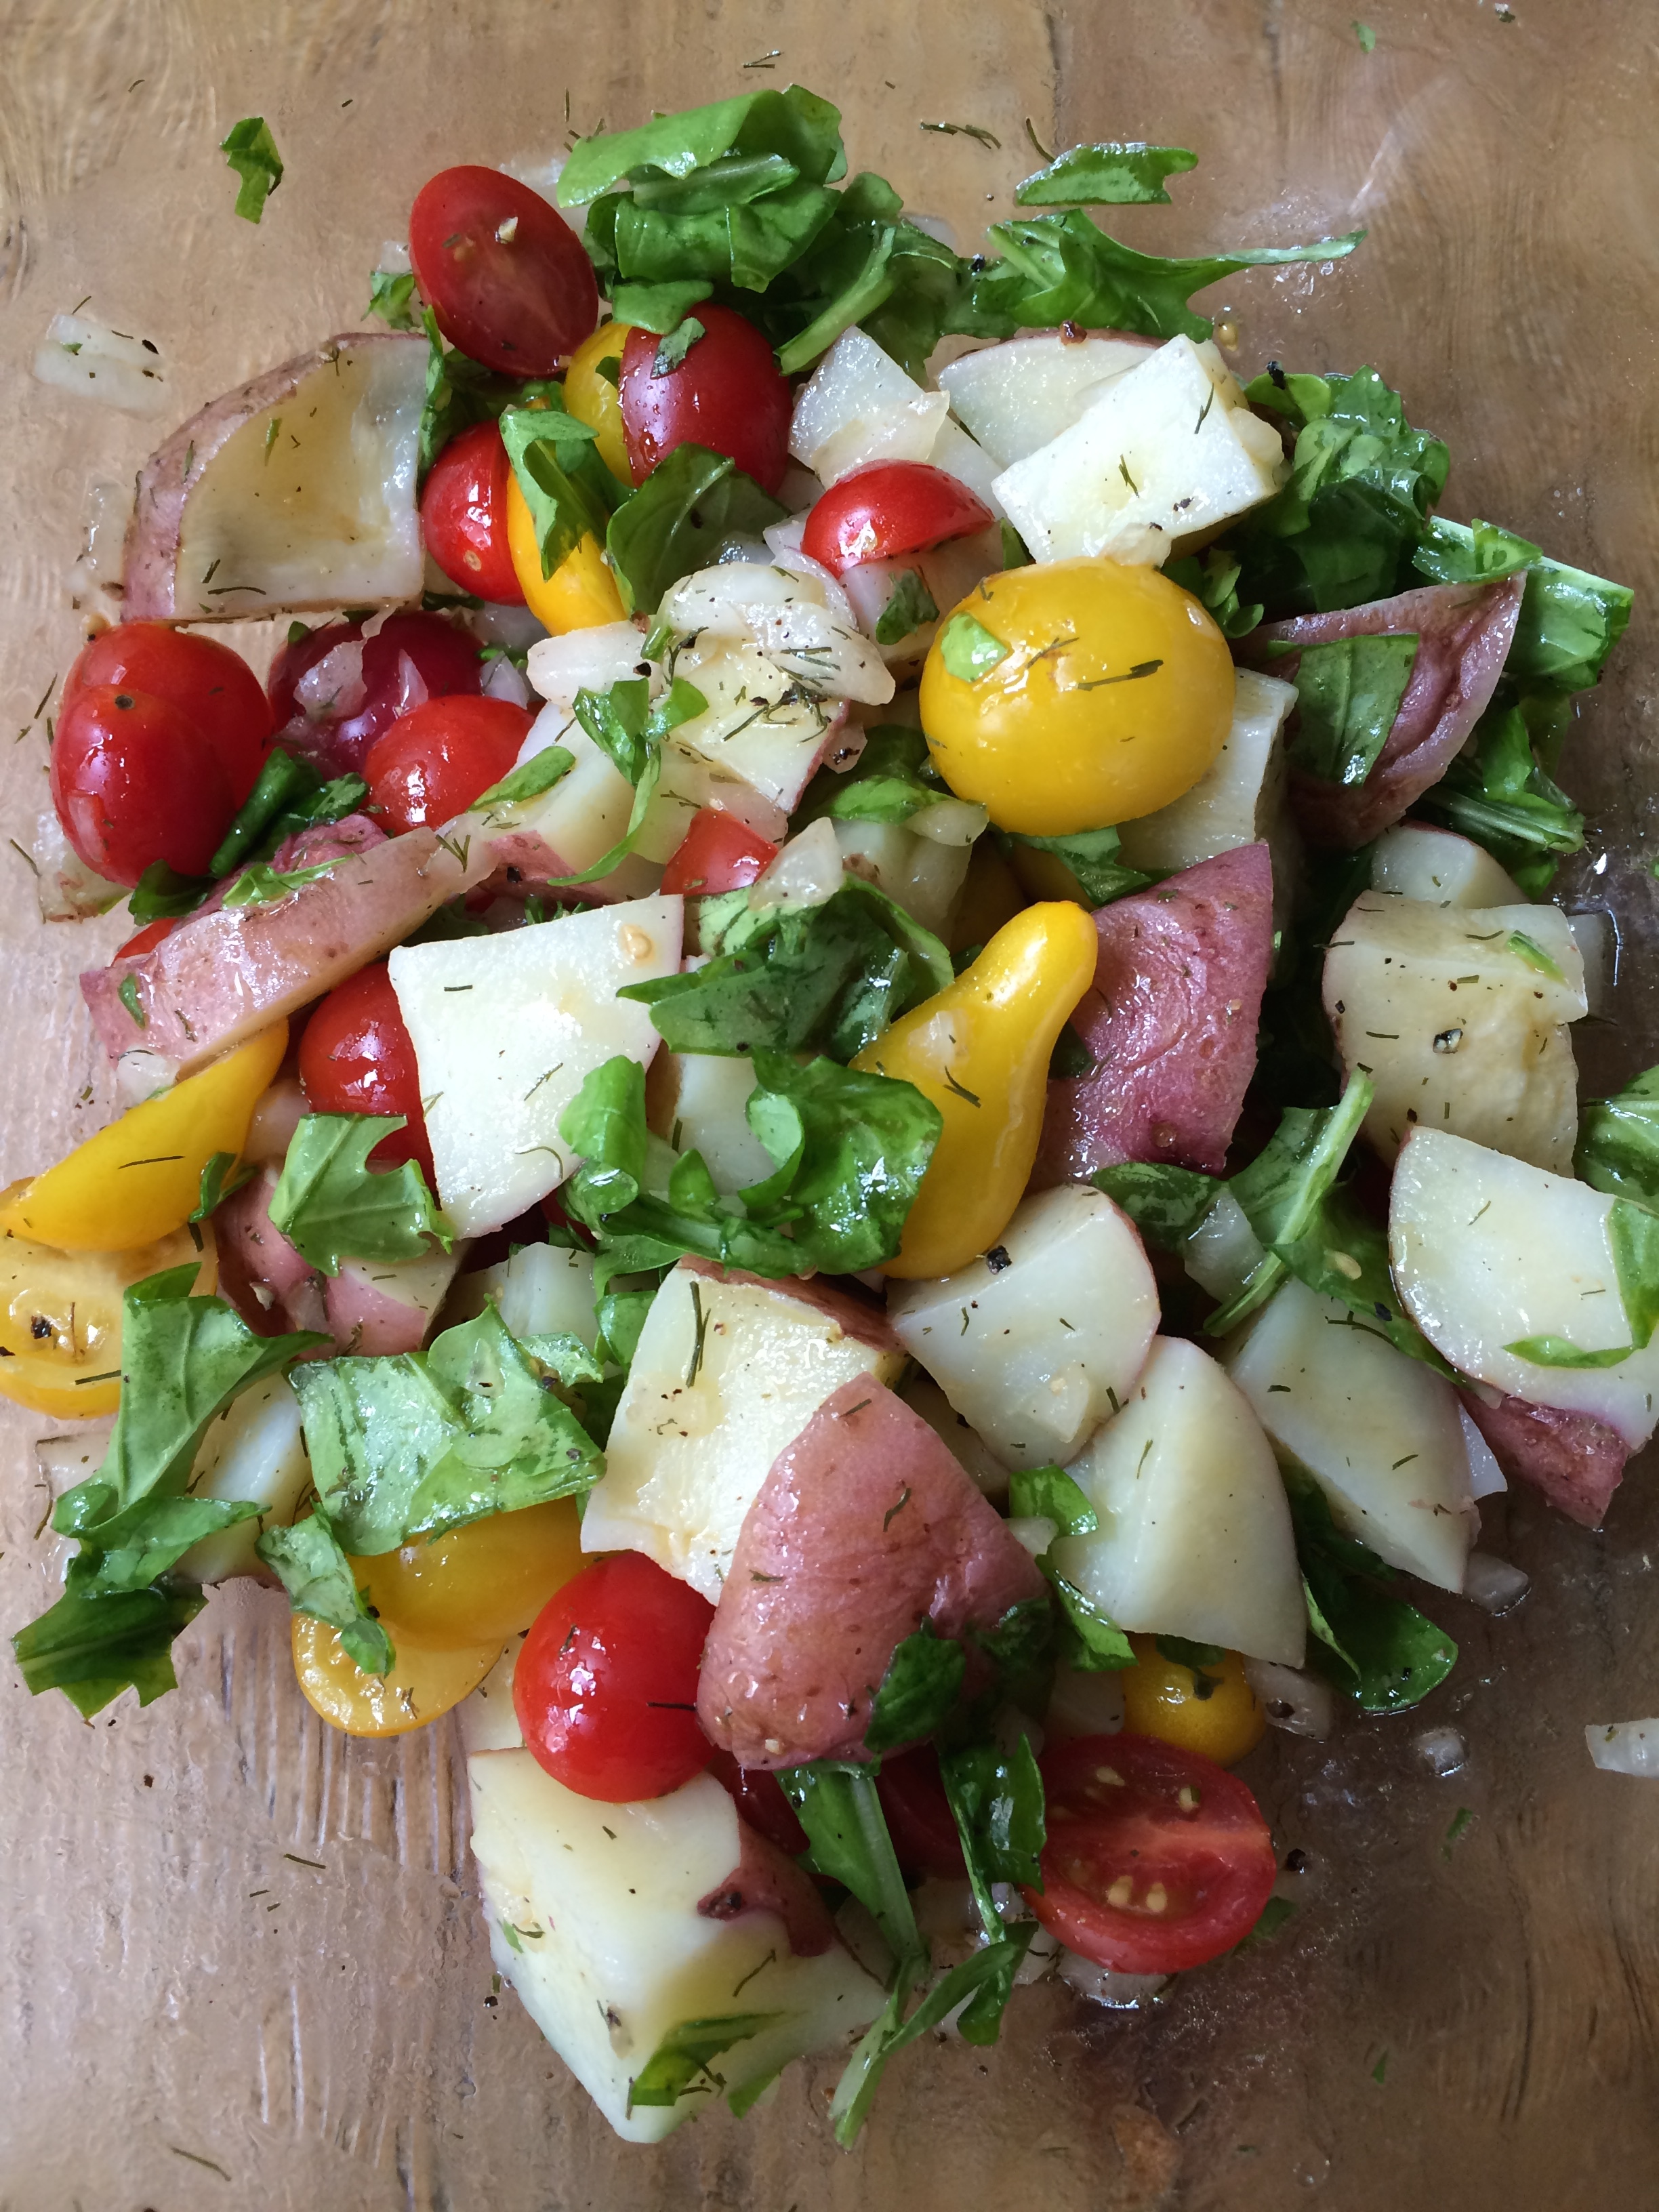
This is the freshest, tastiest, most wonderful potato salad in the entire world! Use fresh tomatoes when possible – these were a “tomato medley” from Whole Foods…
I call it “Monhegan” Potato Salad, because that’s where I was the first time I tasted potato salad minus mayo AND the freshest ingredients imaginable! This recipe is inspired by a true friend, [Thank you Jenn :)] She went to the Farmer’s Market that day, bought the best veggies and whipped this up (along with LOBSTER!)… what a treat!
This is how I remember it, and when I tasted it, whew! It was amazing! This is a true favorite! I will never make potato salad with mayo again! I was never even big on mayo in the first place, but this… it’s an entirely different beast!
Click HERE to print the recipe minus all the blah, blah, blah…
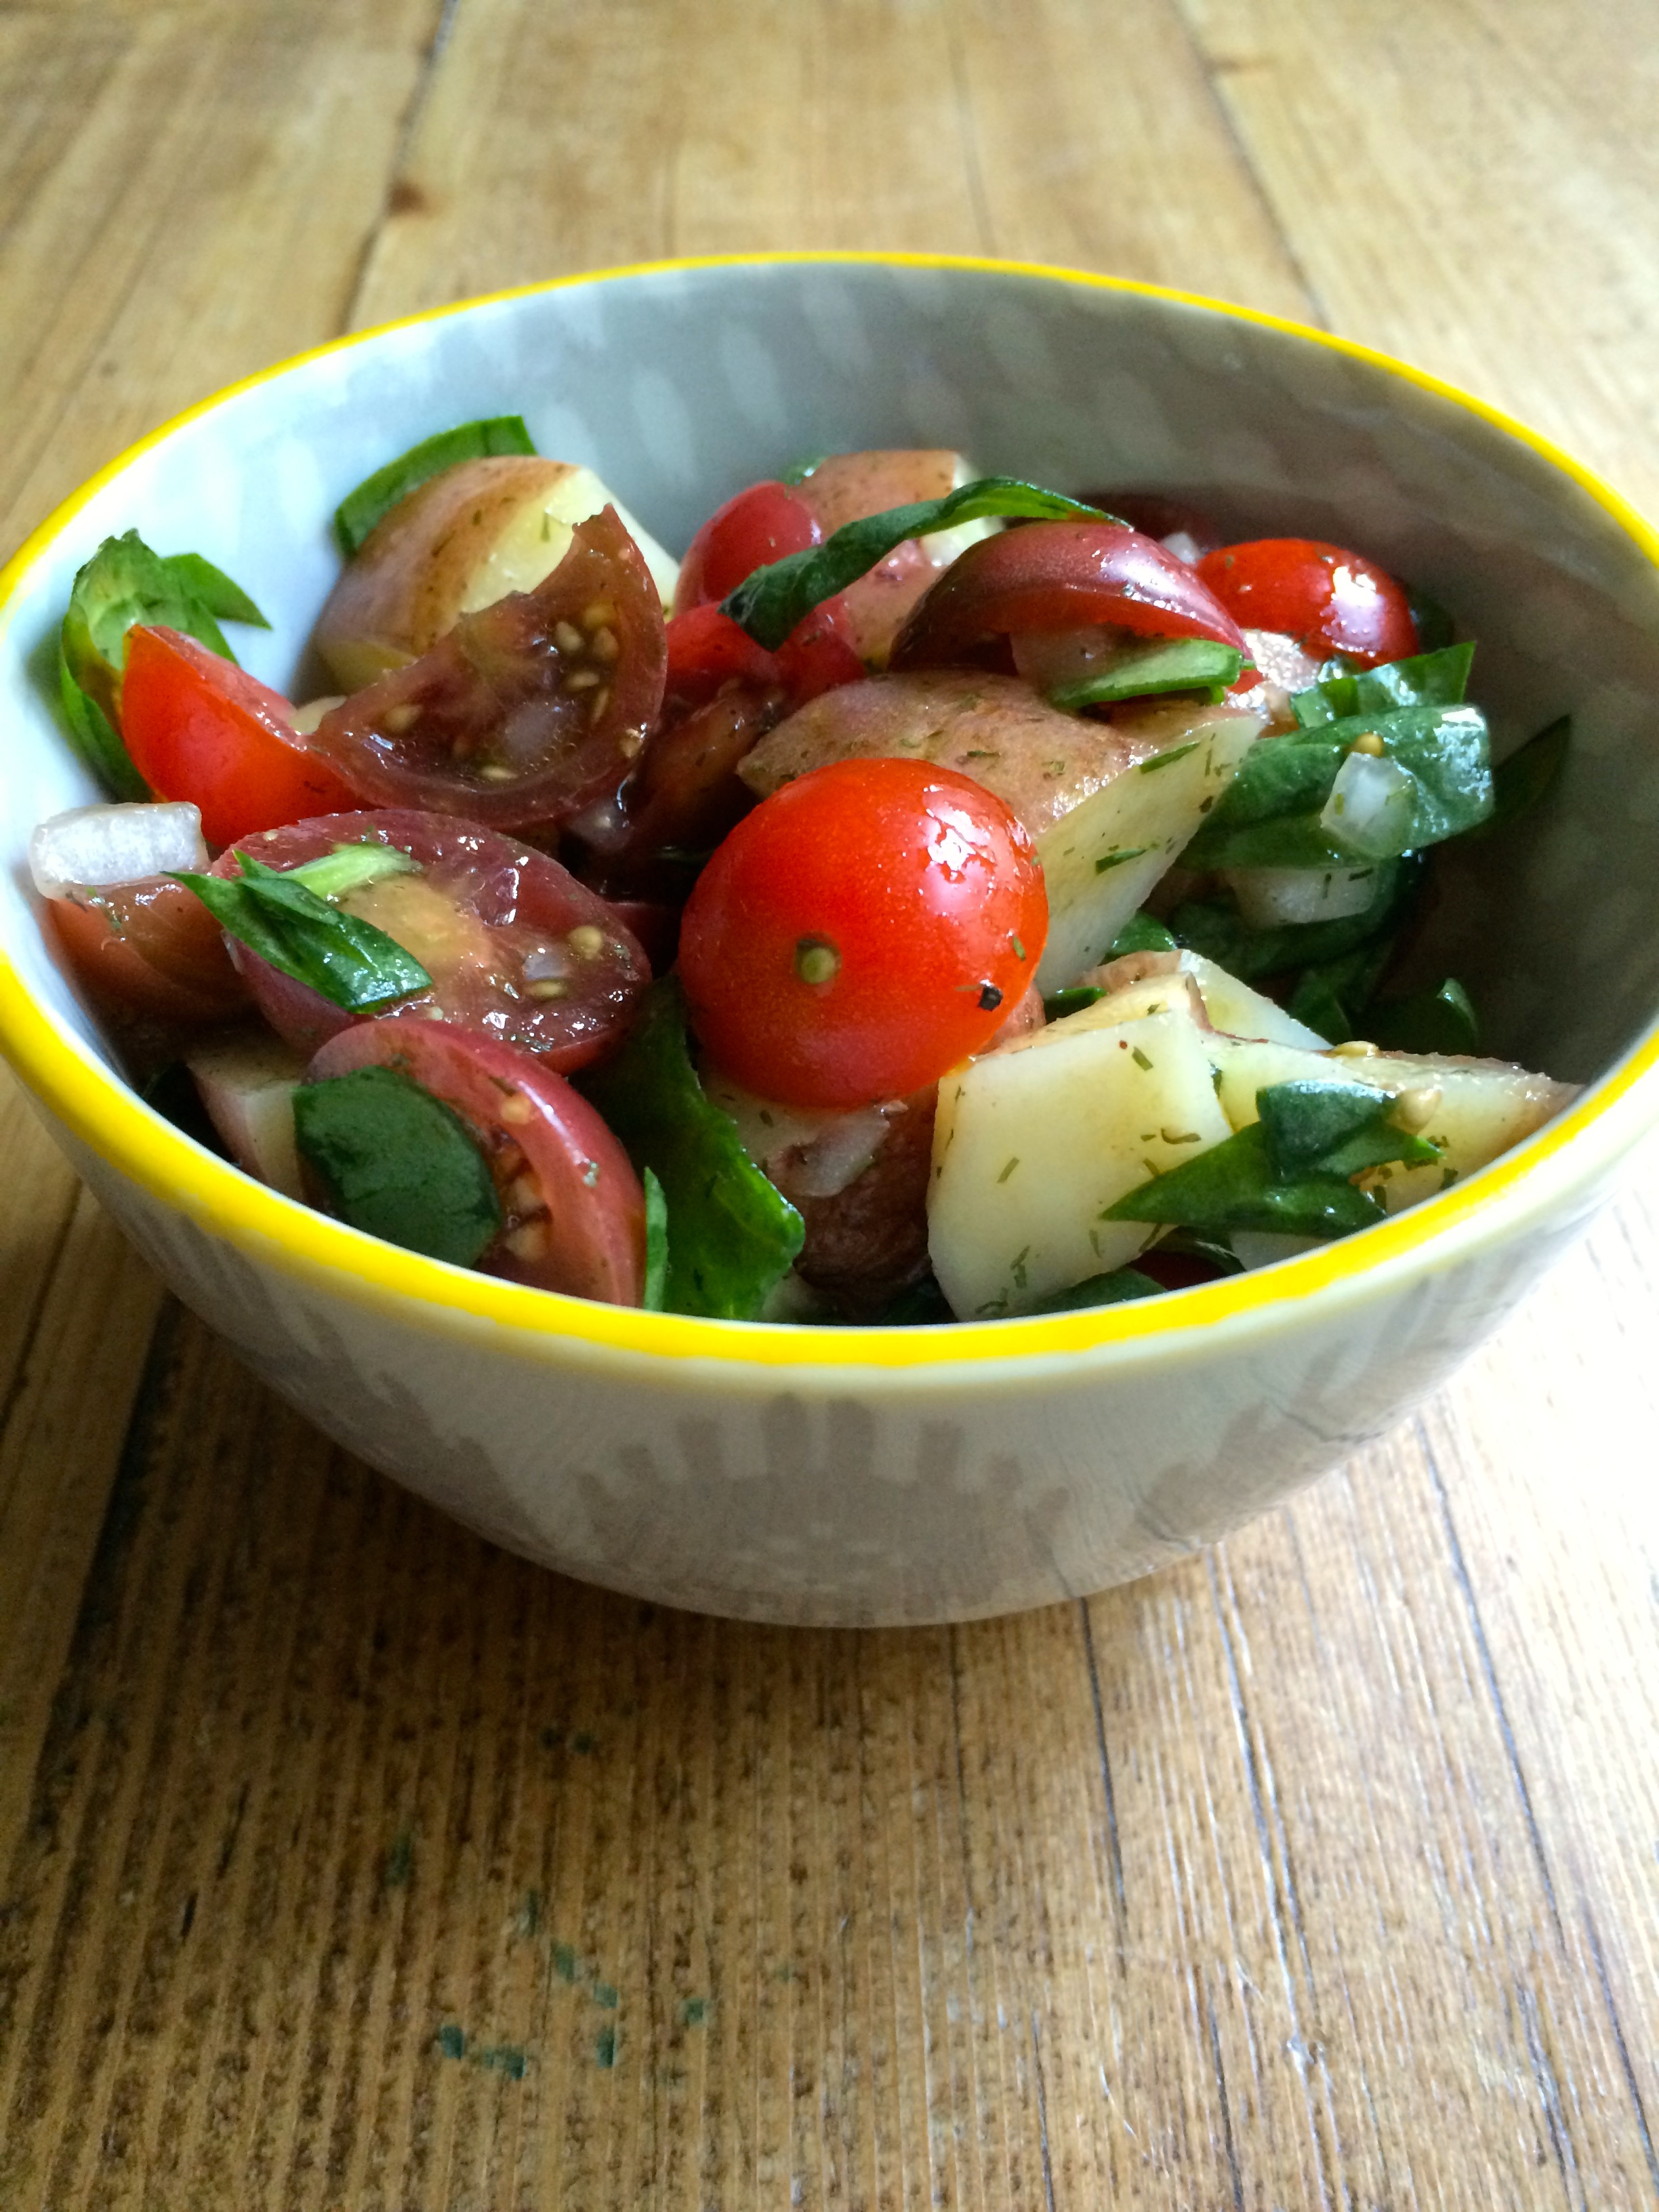
MONHEGAN POTATO SALAD – Serves 2
Ingredients
2 Red potatoes (more if they are small)
Onion (sweet or red, whatever you like), chopped or minced
Grape or cherry tomatoes – good sweet ones! I used 1/2 container… cut in half or thirds
Extra Virgin Olive Oil – I used about 8-9 quick swirls around the bowl, you can always add more.
Salt, Pepper, Dill (I use a lot of dill)
Arugula, Kale or Spinach chopped (fresh) – or whatever green(s) you like!
Directions
You can boil your potatoes until you they are barely tender when you pierce them with a fork, or you can do what I did (I’m always in a hurry). I took 2 red potatoes and washed them, then cut into bite size pieces. I spread on a plate and covered with another plate, and I (shhhhhh!) MICROWAVED THEM! (Truly, I am not a microwave cook, but needed to whip this up in the time it takes a hamburger to come off the grill, so boiling wasn’t an option, however, if you can plan ahead…).
In a large bowl, add the olive oil, tomatoes, onion, salt, pepper and dill. Mix it together and then add the potatoes (they can still be warm). Stir to coat.
Chop some arugula or spinach, however much you like, and add that to the bowl, tossing to coat.
Taste and season if necessary.
I’m making this again in a few minutes! Too good for words!
Catch you back here tomorrow!

What a stunning display of color, don’t you agree? Just look at these beets. I always thought beets tasted like dirt, I was so wrong. If you roast them, they have a sweetness to them that you will not believe! Give it a whirl!
You can roast them whole (scrub them good, cut off any leaves, but don’t peel). Then preheat oven to 375 F. Coat them with olive oil, then wrap in aluminum foil and place on a baking sheet. Roast 45-60 minutes (or until done). Remove from oven and let cool 10 minutes. Peel and slice into 1/4″-inch thick slices. Recipe: Bobbie Flay/Food Network
Ina Garten she peels, slices and roasts and then tops with orange juice, GOOGLE it! You won’t believe the wonderful combinations!
Catch you back here tomorrow!

